Advertisement
Advertisement
Table of Contents

Related Manuals for DeLonghi La Specialista Maestro EC9865


Summary of Contents for DeLonghi La Specialista Maestro EC9865
- Page 1 De’Longhi Appliances via Seitz, 47 31100 Treviso Italia www.delonghi.com...
-
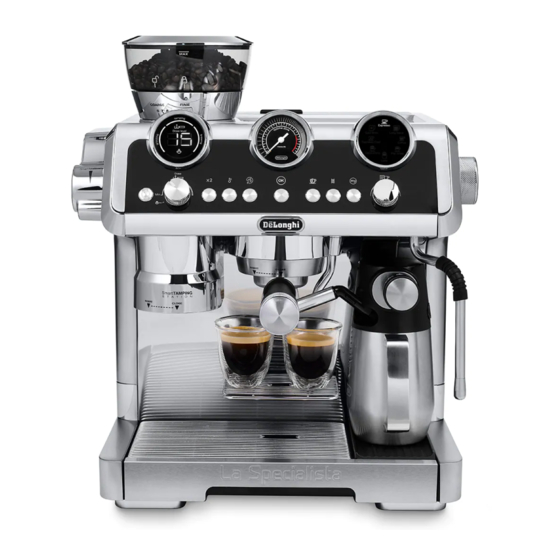
Page 2: Coffee Maker
EC9865 COFFEE MAKER Instructions for use Instructions videos available at: http://EC9865.delonghi.com... - Page 3 Decalci cante per macchine da ca è Descaler for co ee machines Détartrant pour machines à café Entkalker für Ka eemaschinen De’Longhi Appliances s.r.l. Via L. Seitz, 47 31100 Treviso - ITALY Tel. +39 0422 4131 5413218631/04.15 SoftBalls...
- Page 5 Espresso based drinks D8. Milk container • Espresso 1.5 Optional cleaning accessories • Long Black • Coffee Visit Delonghi.com for more information. Cold coffee drinks Cleaning tab • Cold Brew • Espresso Cool (see “5.3 Coffee filter cleaning and maintenance”)
-
Page 6: Explanation Of Lights
2. EXPLANATION OF LIGHTS LIGHTS EXPLANATION OF LIGHTS OPERATION All the lights flash briefly Turning the machine on Self-diagnosis The appliance is being turned on for the first Proceed as described in section “Setting la specialista time and the water circuit must be filled for first use”... - Page 7 LIGHTS EXPLANATION OF LIGHTS OPERATION After every use, the LatteCrema System When all the milk drinks are ready, proceed with au- must be cleaned tomatic cleaning turning the knob to Clean The appliance is on and ready for use The appliance is at the right temperature to deliver steam.
- Page 8 3. MENÙ SETTINGS Enter the setting menu Select the setting Press both buttons for 5 seconds Turn the knob to select the drink to enter setting menu light corresponding to the fun- ction to set Energy saving Beep Extra grinding Default values Auto off Water hardness...
- Page 9 4. CUSTOMISING THE QUANTITY OF COFFEE DRINKS WITH THE BUTTON (B9) 1. Prepare the appliance to 3. Press the button: 4. Press the OK button to 2. Turn the dial (B10) to deliver the drink you want start delivering the drink. select the drink to be the light corresponding to make.
-
Page 10: Cleaning And Maintenance
5. CLEANING AND MAINTENANCE Important! • Do not use solvents, abrasive detergents or alcohol to clean the coffee machine. • Do not use metal objects to remove encrustations or coffee deposits as they could scratch metal or plastic surfaces. • None of the components of the appliance can be washed in a dishwasher with the exception of the drip tray (A11), cup grilles (A8) and (A9), Lattecrema System (D) with the exception of the milk container (D8). -
Page 11: Cleaning The Drip Tray
5.1 Cleaning the drip tray Coffee filter cleaning and maintenance The drip tray is fitted with a level indicator (A12) (fig. 7) showing For best results, the filters must the amount of water it contains. Before the indicator protrudes from always be clean and free from the cup tray, the drip tray must be emptied and cleaned, otherwise all coffee residues. -
Page 12: Cleaning The Water Tank
To run the cleaning, you have to purchase dedicated cleaning tabs for coffee makers. For more 5.7 Cleaning the beans container info, please visit Delonghi.com. Without extracting it, clean the beans container regularly with a Proceed as follows: cloth. - Page 13 5.8 Cleaning the burrs 10. Turn the selector to select the desired grinding level (fig. 25); When cleaning the beans container, clean the container housing 11. Make sure the burr is inserted correctly by pulling it by the and upper burr with a damp cloth. The burr can be removed and handle.
- Page 14 5. Make sure there are no milk residues on the hollow and 5.11 Cleaning the LatteCrema System groove under the dial (fig. 32): if necessary, scrape the gro- Clean the milk container each time you prepare milk as de- ove with a toothpick; scribed below: 6.
-
Page 15: Other Cleaning Operations
5.13 Other cleaning operations 3. Remove the paper from the water and shake lightly. After about a minute, 1, 2, 3, or 4 red squares form, depending 1. Do not use solvents or abrasive detergents to clean the cof- on the hardness of the water. Each square corresponds to fee maker. - Page 16 8. DESCALING Minutes Decalcificante per macchine da caffè Descaler for coffee machines Détartrant pour machines à café Entkalker für Kaffeemaschinen De’Longhi Appliances s.r.l. Via L. Seitz, 47 31100 Treviso - ITALY Tel. +39 0422 4131 5413218631/04.15 Please note • Before use, read the instructions and the labelling on the descaler pack. •...
- Page 17 DESCALING 10. When rinsing is complete, delivery stops and the appliance prepares to be used again. 11. Empty the containers used to collect the rinse water. but- 9. Keep pressed the 7. Empty the containers used 8. Remove the water tank, ton until the correspond- to collect the descaler empty any residues of...
-
Page 18: Troubleshooting
9. TROUBLESHOOTING PROBLEM CAUSE SOLUTION There is water in the drip tray It is normal: due to the internal water Regularly empty and clean the drip tray circuits operations No espresso coffee is delivered No water in the tank (A15) Fill the tank light is on to indicate that the Press the button corresponding to the... - Page 19 PROBLEM CAUSE SOLUTION At the end of descaling, the appliance During the rinse cycle, the water tank Complete the rinse cycle from point (8) of sec- requests a further rinse has not been filled to the MAX level tion “8. Descaling” The appliance does not grind the coffee There is foreign matter that cannot be Clean the burrs as described in section “5.8 ground in the coffee grinder...
- Page 20 PROBLEM CAUSE SOLUTION After grinding, the coffee filter is empty The coffee grinder coffee funnel is Clean as described in section “5.10 Cleaning clogged the “Smart tamping station””. If the problem After tamping, there is too much coffee persists, access the guide by opening the hatch in the filter and free it using the brush) After grinding, the ground coffee in the...
Need help?
Do you have a question about the La Specialista Maestro EC9865 and is the answer not in the manual?
Questions and answers