Bittium Respiro Operating Instructions Manual
Hide thumbs
Also See for Respiro:
- Operating instructions manual (63 pages) ,
- Notes (6 pages) ,
- Quick manual (5 pages)
Table of Contents
Advertisement
Quick Links
Advertisement
Table of Contents

Related Manuals for Bittium Respiro


Summary of Contents for Bittium Respiro
- Page 1 Bittium Respiro™ Operating Instructions for healthcare professionals...
-
Page 2: Table Of Contents
Carry case packing ..................12 Configuration options ................. 12 Equipment needed in recording ..............14 Respiro indicator LEDs and power button functions ........14 2.5.1 LED indications in idle state ..............14 2.5.2 LED indicators during recording ............... 14 2.5.3 LED indicators while charging Respiro ............15 2.5.4 Power button functions ................ - Page 3 2.10.1 Uploading the recording data after HSAT recording ........ 26 2.10.2 Cleaning ....................30 2.10.3 Other actions.................... 31 Maintenance ....................32 Changing the Respiro Device Manager language ........32 Updating Respiro firmware ................. 32 IT network ....................33 Battery replacement ................... 34 User responsibility and warranty ..............
-
Page 4: General
Use of Respiro for any other purpose is prohibited. Respiro is used either in a hospital or at patient’s home. The device records patient’s biosignals. The device does not actively moni- tor the patient’s status, make diagnoses or treat the patient and it cannot be used... -
Page 5: Notes And Warnings
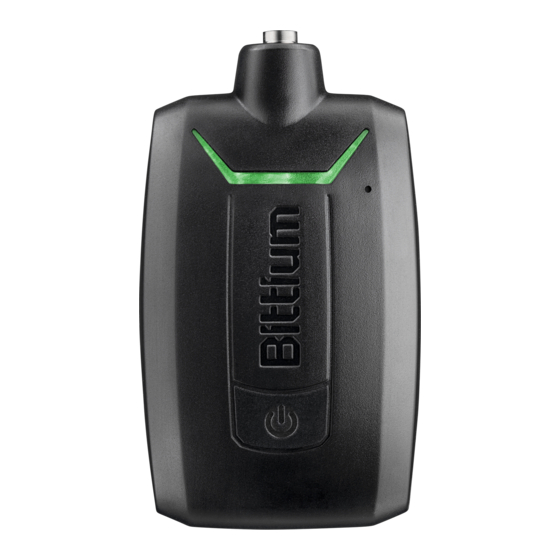
Image below gives an overview of the device and its interfaces. Figure 1 Respiro screening device interfaces Figure below presents the pulse oximeter and the sensor. Figure 2 Pulse oximeter and sensor 1.2 Notes and warnings • Do not use a broken device or electrodes/cannulas whose packing is opened. - Page 6 Examples of such devices include: mobile phone, laptop computer, activity band, smart ring. • Respiro is not suitable for use in MRI environment. • Respiro is not intended to be used at the same time with high frequency (HF) surgical equipment or with a defibrillator. Respiro...
-
Page 7: Adverse Events
• Respiro device should not be used adjacent to or stacked with other electri- cal equipment. If adjacent or stacked use is necessary, the device should be observed carefully to verify normal operation. • Body and hand creams as well as sunscreens can damage the device. -
Page 8: Contraindications
A doctor always assesses the requirement for a night polygraphy and whether the patient is suitable for home recording. Only an expert can interpret and analyze the results of night polygraphy recording and be responsible for the given state- ments and care. Respiro 8 (48) Operating Instructions © Bittium Biosignals 2022... -
Page 9: Using Respiro
Medical Power Supply 7W USB Pulse oximeter Nonin 3150 with batteries (type AAA), 2 pcs (inserted) RIP (Respiratory inductance plethysmogra- phy) belt(s) for attaching Respiro to body (applied part). Two sizes are available, M and L. • Size M: length 80 cm, chest circum- ference max. - Page 10 Respiro patch for 1 RIP belt (applied part), 2 pcs Respiro patch for 2 RIP belts (applied part), 2 pcs Respiro ECG Adapter (applied part, single use) Bittium OmegaSnap™ ECG electrode (applied part, single use) Bittium Respiro Quick Guide Bittium Respiro Notes and Warnings...
- Page 11 Do not open the packing of the patch, the ECG adapter or the ECG electrode before use. Make sure that the cannula length is optimal for each patient. Avoid using too long cannulas to ensure patient safety. Respiro 11 (48) Operating Instructions © Bittium Biosignals 2022...
-
Page 12: Carry Case Packing
Figure below show the Respiro carry case contents in HSAT™ recording. Figure 3 Carry case packing, HSAT 2.3 Configuration options Respiro polygraphy recording can be carried out as an HSAT™ recording with three configurations: • 1 RIP belt configuration (abdominal application):... - Page 13 Figure 4 1 RIP belt configuration • 2 RIP belts configuration (thoracic and abdominal application): Figure 5 2 RIP belts configuration • 2 RIP belts configuration with ECG (thoracic and abdominal application with ECG electrode): Respiro 13 (48) Operating Instructions © Bittium Biosignals 2022...
-
Page 14: Equipment Needed In Recording
Figure 7 Respiro indicator LEDs in idle state In this state there is no recording ongoing and the device is idle. This is the basic state. If no activity occurs in 5 minutes Respiro will shut down. In that state Respi- ro has no LED indications. -
Page 15: Led Indicators While Charging Respiro
Middle LED blue for 3 seconds: Patient marker indication when power but- ton is pressed once. 2.5.3 LED indicators while charging Respiro Respiro LED indicators blink as described in Table 2 when Respiro is charged in its charging dock. Table 3 LED indicators during charging... -
Page 16: Power Button Functions
Respiro device’s power button has the following functions: • A press of approx. 3 seconds: Respiro power on. • After power on a press of approx. 8 seconds after which Respiro vibrates once: Recording start. • A press of approx. 3 seconds during recording: Recording end. Respiro vi- brates 3 times. -
Page 17: Charging Respiro
Note: Connect the charging dock to the charger’s USB port only. Do not connect it anywhere else for charging. Respiro device’s battery is at least 95 % full when all 3 indicator LEDs are green. See chapter 2.5.3. 2.6.2 Attaching the pulse oximeter’s wristband Attach the pulse oximeter’s wristband as shown in the images below. - Page 18 Figure 9 Threading the short part Figure 10 Threading the long part Figure 11 Attached wristband, back view Figure 12 Attached wristband, front view Respiro 18 (48) Operating Instructions © Bittium Biosignals 2022...
-
Page 19: Checking The Device Pairs
2.6.3 Checking the device pairs Note! Make sure that Respiro is not in the charger dock or connected to a com- puter. The carry case equipment (Respiro, pulse oximeter) is already connected together by the manufacturer. It is possible to find out the device pairs following the in- structions below. -
Page 20: Connecting Respiro And The Pulse Oximeter
1. Connect the Respiro device’s charging dock to a computer with the USB ca- ble. 2. Set Respiro in the charging dock. Respiro indicator LEDs will be blue for a moment until the charging cycle begins and the LEDs blink green cycling from left to right. - Page 21 Respiro Manager folder to your PC and run the Respiro Device Manager application from there). You can open the File Explorer by clicking the yellow folder icon at the bottom of the desktop view. a) Double-click Respiro device icon.
- Page 22 5. Enter the pulse oximeter’s serial number in the Pulse oximeter device name field in the Respiro Device Manager main view and click Save. Note: If you want to add a name for the Respiro device you can enter it in the Recorder name field.
- Page 23 If it was not successful, try again and follow the on-screen instructions. See image below. Note that it is also possible that the pulse oximeter is already connected with another Respiro device and this is why the connecting process Respiro...
-
Page 24: Recording Types
The function is activated in the Respiro Device Manager main screen. See chapter 2.6.4, step 3 for information on how to start the Respiro Device Man- ager application. - Page 25 Note: It is recommended to synchronize the device time with the PC time. This can be done in the Respiro Device Manager main view on the lower left-hand side of the view. Remember to always detach Respiro safely from the computer using the Windows Safely remove hardware function or via Respiro Device Manager’s Eject...
-
Page 26: Recording Configuration
Starting a recording manually A recording can be started manually by pressing the power button: one short press (<3 seconds) and next press for approx. 8 seconds after which Respiro vi- brates once. Recording starts. 2.8 Recording configuration Before starting a recording, you must select the configuration that will be used from the drop-down list under Recording configuration. - Page 27 Follow these instructions to upload the recording data from the Respiro device: 1. Connect the charging dock to a computer with the USB cable. 2. Set the Respiro device in the charging dock. Ensure that the device rests properly in the charging dock.
- Page 28 7. Select a save location for the file(s) and click Save. Respiro 28 (48) Operating Instructions © Bittium Biosignals 2022...
- Page 29 Those files that were not removed will then remain visible in the Save recording files view. 8. Click Eject. You can remove Respiro from the charging dock when the appli- cation instructs you to do so. Note! If the device contains corrupt files they will appear with a yellow notification triangle.
-
Page 30: Cleaning
Quick Guide and laminated Notes and Warnings must all be cleaned and disinfected (eg. isopropanol, except for Respiro and pulse oximeter which must be cleaned with mild detergent) before first use and also af- ter every recording. -
Page 31: Other Actions
Remember to erase prior recording data from the Respiro device before preparing it for a new patient. Charge the Respiro and replace the pulse oximeter batteries as required. Pack the carry case for the next patient, see Chapter 2.2. Respiro... -
Page 32: Maintenance
3.2 Updating Respiro firmware 1. Connect the charging dock to a computer with the USB cable. 2. Set the Respiro device in the charging dock. Ensure that the device rests properly in the charging dock. 3. Start Respiro Device Manager application (see Chapter 2.6.4). Wait for the application to detect the Respiro device. -
Page 33: Network
8. Firmware update starts after you have selected the update package with the Open button. Respiro Device Manager returns to main view after the update is complete. Remember to always detach Respiro safely from the computer using the Windows Safely remove hardware function or via Respiro Device Manager’s Eject function. -
Page 34: Battery Replacement
IT-network. 3.4 Battery replacement Respiro device battery is an in-built part of the device and can be changed only by Bittium Biosignals Ltd. Battery lifetime depends on device usage modes and recharging cycles. It is recommended to replace the battery after max. 2 years. - Page 35 The use of accessories other than those approved by the manufacturer may break the device, decrease its performance or cause other issues. Shelf life of the accessories shipped with Respiro can be seen from the product packing markings. Warranty: 12 months for Respiro and pulse oximeter. Service interval is max. 2 years.
-
Page 36: Troubleshooting
Make sure that the device is charged. • Respiro has red light(s) on: o If some of the Respiro device’s indicator LEDs is red see Tables 4, 5 and 6 below. Table 4 Respiro common LED indications in error states... - Page 37 Note 3. If some of the LEDs are green, the sensor in question is ok. Table 6 Respiro 4 sensor configuration LED indications in error states 4 sensor configuration (2 RIP belts with ECG), 2 LEDs on for 1 second cycling from left to right Left LED yellow, center green: Pulse oximeter is connected but finger is not inserted in the sensor.
- Page 38 • Pulse oximeter does not start: Check the sensor connection. Then, if still not starting, check that batteries are correctly inserted or replace batteries. • Respiro Device Manager does not detect Respiro when Respiro is in the charging dock and the charging dock is connected to the computer: Check the charging dock connection to the computer and that Respiro is properly set in the charging dock.
-
Page 39: Device Disposal
Take care of the environ- ment and dispose of the device according to the disposal instructions. You can check the location of the nearest recycling point with your local waste disposal au- thority. Respiro 39 (48) Operating Instructions © Bittium Biosignals 2022... -
Page 40: Product Safety And Regulatory Information
Certificate of Conformity and Declaration of Conformity in accordance with the applicable directives and standards can be requested from bbs@bittium.com 6.2 EMC This product meets the requirements of the electromagnetic compatibility (EMC) standard EN 60601-1-2. Respiro 40 (48) Operating Instructions © Bittium Biosignals 2022... -
Page 41: Technical Information
7 TECHNICAL INFORMATION 7.1 Respiro dimensions and weight Height: approx. 81 mm. Width: approx. 46 mm. Depth: approx. 19 mm. Weight: approx. 48 g. 7.2 Device IP classifications Respiro: IP67 Charging dock: IP31 Pulse oximeter: IP33 7.3 Operating and storage conditions... -
Page 42: Respiro Specifications
7.4 Respiro specifications Table 8 Respiro specifications Respiro Nasal pressure Pressure range ± 7 kPa Sampling and storage rate 100 Hz ADC conversion 12 bits Blood oxygen saturation range 70 to 100 % (SpO ) and pulse rate Pulse rate range... -
Page 43: Electromagnetic Emissions
7.5 Electromagnetic emissions Table 9 Electromagnetic emissions Manufacturer’s declaration - Electromagnetic emissions Respiro is suitable for use in an electromagnetic environment as described below. The users should ensure that the device is used in such an environment. Emission test Compliance... - Page 44 1 kHz sine 704-787 LTE Band 13, Pulse modulation 217 Hz 800-960 Pulse modulation 800/900, 18 Hz TETRA 800, iDEN 820, CDMA 850, LTE Band 5 1720 1700-1990 GSM 1800; Pulse modulation Respiro 44 (48) Operating Instructions © Bittium Biosignals 2022...
- Page 45 LTE Band 1, 3,4, 25; UMTS 2450 2400-2570 Bluetooth, Pulse modulation WLAN, 217 Hz 802.11 b/g/n, RFID 2450, LTE Band 7 5240 5100-5800 WLAN 802.11 Pulse modulation 217 Hz 5500 5785 Respiro 45 (48) Operating Instructions © Bittium Biosignals 2022...
-
Page 46: Symbols And Labels
The data to be encoded can be text or numeric data. GS1 data matrix includes GTIN and production identifier (PI). • GTIN (01) Respiro 46 (48) Operating Instructions © Bittium Biosignals 2022... - Page 47 Device is protected against small objects (≥2,5 mm) and IP31 condensation. Device is dust-protected and protected against the effects of IP67 immersion in water between 15 cm and 1 m for 30 minutes. Respiro 47 (48) Operating Instructions © Bittium Biosignals 2022...
-
Page 48: Manufacturer
MANUFACTURER Bittium Biosignals Ltd Phone: +358 (0)17 581 www.bittium.com 7700 Pioneerinkatu 6 medical.support@bittium.com bbs@bittium.com 70800 Kuopio Finland 5800666A02, 08.07.2022 Respiro 48 (48) Operating Instructions © Bittium Biosignals 2022...
Need help?
Do you have a question about the Respiro and is the answer not in the manual?
Questions and answers