Advertisement
Quick Links
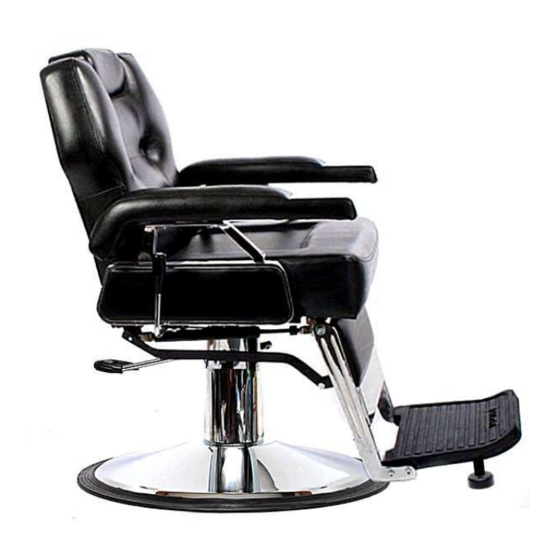
K2012 Traditional Barber Chair Assembly Directions
This is the K2012 Traditional Barber Chair from Keller International. This chair is
assembled by the purchaser which makes it simple to disassemble whenever parts
need to be replaced.
© Keller International, LLC.
NOTE:
THESE DIRECTIONS SUPERCEDE
ANY FACTORY DIRECTIONS FOUND
INSIDE THE K2012 BARBER CHAIR
SHIPPING CONTAINER. USE THESE
DIRECTIONS TO ASSEMBLE YOUR K2012
TRADITIONAL BARBER CHAIR.
1-800-578-8772
1
Advertisement

Related Manuals for Keller K2012


Summary of Contents for Keller K2012
- Page 1 SHIPPING CONTAINER. USE THESE DIRECTIONS TO ASSEMBLE YOUR K2012 TRADITIONAL BARBER CHAIR. This is the K2012 Traditional Barber Chair from Keller International. This chair is assembled by the purchaser which makes it simple to disassemble whenever parts need to be replaced.
- Page 2 Leg Rest Chromed Side bars (each) right or left Footrest Plate - Molded Rubber or Cast Iron (with part 22) Kick plate Leg Rest Pad Reclining Handle, Plastic Seat Cushion NG1-N Hydraulic Pump NG1-N Foot Bail 660mm diameter Circle Plate © Keller International, LLC. 1-800-578-8772...
- Page 3 Use the 4 – 8mm bolts & the 6mm allen wrench to attach the pump to the plate. Bolts should be tightened until there is no gap between the bolt heads & the plate bottom. © Keller International, LLC. 1-800-578-8772...
- Page 4 DOWN on the bail will lock the pump in that position). NOTE: If you notice the foot pumper bail is attached to the wrong side – detach – go 180º around to the other side of the pump and reattach properly. © Keller International, LLC. 1-800-578-8772...
- Page 5 FRONT operation. REAR Note: The chair pump bracket (or TOP CHAIR CHAIR PLATE) is pre-bolted onto the bottom of the chair and has a tapered hole & a 5-degree backwards tilt. © Keller International, LLC. 1-800-578-8772...
- Page 6 Front view of the padded legrest / footrest assembly. Tread Plate may be Molded Rubber or Cast Iron with a Rubber Cover M10 by 45mm © Keller International, LLC. 1-800-578-8772...
- Page 7 Pass the 10mm bolts through the chromed legs and screw them into the threaded holes on the chair frame tabs. The foot pegs are adjustable. foot pegs can be lengthened or shortened to just miss the floor. © Keller International, LLC. 1-800-578-8772...
- Page 8 NOTE: After assembly, pull the reclining lever and recline the chair enough to install the seat cushion (the seat clip should snap over the chair frame). Connect PLEASE SAVE THESE Here DIRECTIONS. © Keller International, LLC. 1-800-578-8772...
- Page 9 K2012 Seat Cushion Installation Foot Pumper BAIL NEVER pick the chair UP or MOVE it by the ARMS unless the foot bail is PULLED UP and LOCKED. Recline the chair a little to make it easier to install the seat cushion.
-
Page 10: Troubleshooting Guide
Q. Why does the seat cushion move around / keep coming loose? A. The seat clip under the cushion (on the back edge) is broken or bent. Call Keller International for parts. Q. Why does my chair back recline by itself or drift backwards? A. - Page 11 K2012 Economic Barber Chair 30 Minutes to Assemble Five (5) Major Components Instructions & Tools Included Factory Safe Weight Specification 400 to 450 pounds Total Weight Assembled 210 pounds © Keller International, LLC. 1-800-578-8772...
- Page 12 See more details on these bases at www.kellerinternational.com – on the parts page. © Keller International, LLC. 1-800-578-8772...
- Page 13 © Keller International, LLC. 1-800-578-8772...
- Page 14 The headrest can also be completely removed from the Barber Chair. The maximum recline (see the picture below) is around 50º to facilitate shaving. The footrest rises as the Barber Chair is reclined. © Keller International, LLC. 1-800-578-8772...
- Page 15 SHIPPING CONTAINER. USE THESE DIRECTIONS TO ASSEMBLE YOUR K2012 TRADITIONAL BARBER CHAIR. This is the K2012 Traditional Barber Chair from Keller International. This chair is assembled by the purchaser which makes it simple to disassemble whenever parts need to be replaced.
- Page 16 Leg Rest Chromed Side bars (each) right or left Footrest Plate - Molded Rubber or Cast Iron (with part 22) Kick plate Leg Rest Pad Reclining Handle, Plastic Seat Cushion NG1-N Hydraulic Pump NG1-N Foot Bail 660mm diameter Circle Plate © Keller International, LLC. 1-800-578-8772...
- Page 17 Use the 4 – 8mm bolts & the 6mm allen wrench to attach the pump to the plate. Bolts should be tightened until there is no gap between the bolt heads & the plate bottom. © Keller International, LLC. 1-800-578-8772...
- Page 18 DOWN on the bail will lock the pump in that position). NOTE: If you notice the foot pumper bail is attached to the wrong side – detach – go 180º around to the other side of the pump and reattach properly. © Keller International, LLC. 1-800-578-8772...
- Page 19 FRONT operation. REAR Note: The chair pump bracket (or TOP CHAIR CHAIR PLATE) is pre-bolted onto the bottom of the chair and has a tapered hole & a 5-degree backwards tilt. © Keller International, LLC. 1-800-578-8772...
- Page 20 Front view of the padded legrest / footrest assembly. Tread Plate may be Molded Rubber or Cast Iron with a Rubber Cover M10 by 45mm © Keller International, LLC. 1-800-578-8772...
- Page 21 Pass the 10mm bolts through the chromed legs and screw them into the threaded holes on the chair frame tabs. The foot pegs are adjustable. foot pegs can be lengthened or shortened to just miss the floor. © Keller International, LLC. 1-800-578-8772...
- Page 22 NOTE: After assembly, pull the reclining lever and recline the chair enough to install the seat cushion (the seat clip should snap over the chair frame). Connect PLEASE SAVE THESE Here DIRECTIONS. © Keller International, LLC. 1-800-578-8772...
- Page 23 K2012 Seat Cushion Installation Foot Pumper BAIL NEVER pick the chair UP or MOVE it by the ARMS unless the foot bail is PULLED UP and LOCKED. Recline the chair a little to make it easier to install the seat cushion.
- Page 24 Q. Why does the seat cushion move around / keep coming loose? A. The seat clip under the cushion (on the back edge) is broken or bent. Call Keller International for parts. Q. Why does my chair back recline by itself or drift backwards? A.
Need help?
Do you have a question about the K2012 and is the answer not in the manual?
Questions and answers