Advertisement
Quick Links
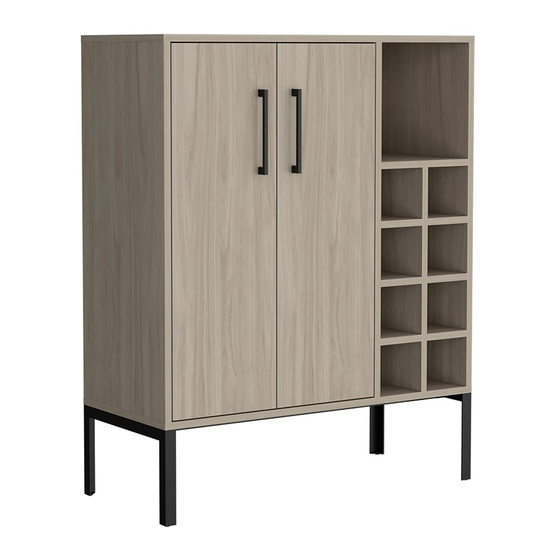
Height:
39,37
in
Width:
31,5
in
Ancho:
Depth: 1 ,
3 78
in
Fondo:
LOT N°
For assistance with assembly or customer service, call 1-877-924-2090 (English) Monday-Friday, 8 a.m. to 5 p.m. Mountain
Time, North America. Email: customerservice@rstbrands.com or visit our website at www.rstbrands.com /
Para recibir ayuda con el ensamblaje o para comunicarse con servicio al cliente llame al 1-877-924-2090 (inglés) de lunes a
viernes de 8:00 a.m. a 5:00 p.m. (hora de la montaña de Norte América), envíe un correo electrónico a
customerservice@www.rstbrands.com o visite nuestro sitio web en
Pour de l'assistance avec l'assemblage ou pour le service à la clientèle, appelez le 1-877-924-2090 (Anglais) Du lundi au
vendredi de 8h AM à 5h PM, heure des Rocheuses, Amérique du Nord. Courriel: customerservice@rstbrands.com ou visitez
Alto:
100
cm
Hauteur:
80
cm
Largeur:
35
cm
Profondeur:
TALMAGE BAR CABINET
/ MUEBLE-BAR TALMAGE
notre site Web au www.rstbrands.com /.
ASSEMBLY INSTRUCTIONS
INSTRUCCIONES DE ENSAMBLE
INSTRUCTIONS D'ASSEMBLAGE
100
cm
80
cm
35
cm
/ BAR SOHO
2 PEOPLE ASSEMBLY RECOMMENDED
REF./SKU. SL-BARCAB-10
www.rstbrands.com
/
Advertisement

Related Manuals for rst brands TALMAGE SL-BARCAB-10


Summary of Contents for rst brands TALMAGE SL-BARCAB-10
- Page 1 ASSEMBLY INSTRUCTIONS INSTRUCCIONES DE ENSAMBLE INSTRUCTIONS D’ASSEMBLAGE Height: 39,37 Alto: Hauteur: 2 PEOPLE ASSEMBLY RECOMMENDED Width: 31,5 Ancho: Largeur: Depth: 1 , 3 78 Fondo: Profondeur: LOT N° REF./SKU. SL-BARCAB-10 TALMAGE BAR CABINET / BAR SOHO / MUEBLE-BAR TALMAGE For assistance with assembly or customer service, call 1-877-924-2090 (English) Monday-Friday, 8 a.m. to 5 p.m. Mountain Time, North America.
- Page 2 IMPORTANT RECOMMENDATIONS / RECOMENDACIONES IMPORTANTES / RECOMMANDATIONS IMPORTANTES -The cabinet MUST be used exclusively indoors, do not expose to direct sun. / El mueble debe ser usado únicamente en interiores, no exponer al sol directo. / L'armoire DOIT être utilisée exclusivement à l'intérieur, ne pas l'exposer au soleil direct.
-
Page 3: Required Tools
INDEX / ÍNDICE / INDICE Assembly Hardware Herrajes para Armado/ Quincaillerie d'assemblage Assembly Parts Piezas de Armado/ Parties d'assemblage Suggested Loads Cargas Sugeridas/ Charges suggérées Assembly Recommendations Recomendaciones de Ensamble/ Recommandations d'assemblage 7-22 Assembly Steps Pasos de Armado/ Étapes d'assemblage Warranty Garantía/ Garantie... - Page 4 ASSEMBLY HARDWARE / HERRAJES PARA ARMADO / QUINCAILLERIE D'ASSEMBLAGE Please check that the hardware content is correct. If any item is missing, please call to our customer service line. Compruebe que el contenido de los herrajes sea el correcto. En caso de que falte alguna pieza, por favor llame a nuestra línea de atención al cliente.
-
Page 5: Assembly Parts
ASSEMBLY PARTS / PIEZAS DE ARMADO / PIÈCES DE MONTAGE A - x1 F - x1 K - x 2 B - x1 G - x1 L - x C - x1 H - x1 M - x1 D - x1 I - x1 N - x1 E - x2... -
Page 6: Assembly Recommendations
MAX SUGGESTED LOADS / CARGAS MÁXIMAS SUGERIDAS / CHARGES MAXIMALES SUGGÉRÉES 22 lbs 10 Kg 18 lbs 8 Kg 4 lbs 4 lbs 2 Kg 2 Kg 4 lbs 4 lbs 2 Kg 2 Kg 4 lbs 4 lbs 2 Kg 2 Kg 22 lbs 10 Kg... - Page 8 Turn all cams to tighten. Apriete todas las cajas minifix. Tournez les cames pour serrer.
- Page 9 Rotate Voltear Voltear Rotation...
- Page 10 Rotate Voltear Voltear Rotation P 10...
- Page 11 P 11...
- Page 12 P 12...
- Page 13 P 13...
- Page 14 P 14...
- Page 15 P 15...
- Page 16 Turn all cams to tighten. Apriete todas las cajas minifix. Tournez les cames pour serrer. P 16...
- Page 17 Drywall screw/ ornillo Ensamble Vis à cloison sèche Slide the back panels inside the cabinet Deslice los fondos dentro del mueble Faites glisser le tiroir à l'intérieur du meuble. P 17...
- Page 18 Screw/ Tornillo/ 3/16" x 1/2" Be careful turning over the cabinet. Be careful turning over the cabinet. Tenga cuidado al voltear el mueble. Tenga cuidado al voltear el mueble. Soyez prudent en retournant le coffret. Flat Head Screw Tornillo Lámina Vis à...
- Page 19 Turn all cams to tighten. Apriete todas las cajas minifix. Tournez les cames pour serrer. P 19...
- Page 20 Ensure glass rack is facing the correct way Asegurese que el rack de copas esté en el lado correcto. Assurez-vous que le support à verres est orienté dans le bon sens Bottom View Vista Inferior Vue du dessous Flat Head Screw Tornillo de cabeza plana Vis à...
- Page 21 Door Installation Instalación de las puertas Installation de la porte Handle Adjustment Ajuste de Manijas Ajustement de la poignée Hinge adjustment Ajuste de las bisagras Ajustement de la charnière Front screws adjustment Depht adjustment Side adjustment Height adjustment Ajuste tornillos frontales Ajuste de profundidad Ajuste lateral Ajuste de altura...
- Page 22 For the user safety, it is recommended to anchor the cabinet to the wall. Por la seguridad del usuario se recomienda anclar el mueble a la pared. Pour la sécurité de l'utilisateur, il est recommandé d'ancrer l'armoire au mur --WARNING! TIPPING HAZARD – Unanchored furniture can tip over -WARNING: CHECK FOR HIDDEN PIPES AND CABLES BEFORE DRILLING.
-
Page 23: Warranty Policy
/ Bienvenue dans la famille RST Here at RST Brands™ we are committed to your satisfaction by offering you a competitive warranty to ensure all our products are free from defects, in material and workmanship, to the original purchaser for a period of one year from the date of your purchase.
Need help?
Do you have a question about the TALMAGE SL-BARCAB-10 and is the answer not in the manual?
Questions and answers