Table of Contents
Advertisement
Quick Links
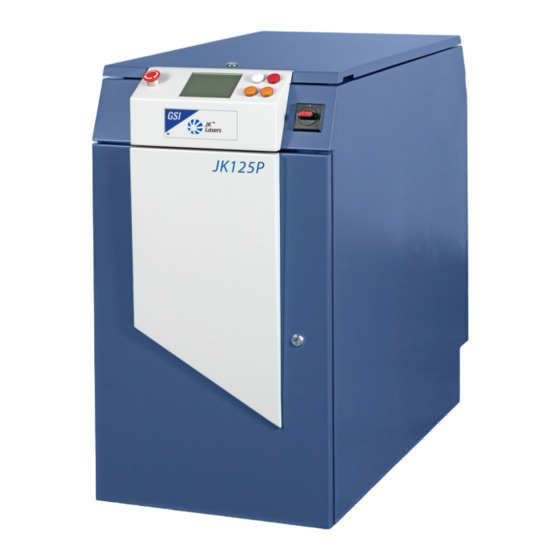
JK300HP/JK300P/JK125P
Nd: YAG Industrial Laser
Pre-installation and User Manual
GSI Group - Laser Division
Cosford Lane, Swift Valley
Rugby, Warwickshire, CV21 1QN
England
Telephone: 44 (0) 1788 570321
Fax: 44 (0) 1788 579824
www.gsig.com
Petitioners Canadian Solar Inc. and Canadian Solar (USA) Inc.
Ex. 1025, p. Cover
Advertisement
Table of Contents

Related Manuals for GSi JK300HP


Summary of Contents for GSi JK300HP
- Page 1 JK300HP/JK300P/JK125P Nd: YAG Industrial Laser Pre-installation and User Manual GSI Group - Laser Division Cosford Lane, Swift Valley Rugby, Warwickshire, CV21 1QN England Telephone: 44 (0) 1788 570321 Fax: 44 (0) 1788 579824 www.gsig.com Petitioners Canadian Solar Inc. and Canadian Solar (USA) Inc.
- Page 2 GSI Group - Laser Division JK300HP/JK300P/JK125P Pre-installation and User Manual Issue 2.0 Intentionally blank Part No: 1EA300E01 Page ii Petitioners Canadian Solar Inc. and Canadian Solar (USA) Inc. Ex. 1025, p. ii...
- Page 3 The Transport Company that delivers this shipment to your premises is responsible for its safe delivery. If the shipment has been made Free Carrier (FCA) GSI Group - Laser Divisions and is damaged externally, undertake the following actions: •...
- Page 4 GSI Group - Laser Division JK300HP/JK300P/JK125P Pre-installation and User Manual Issue 2.0 Intentionally blank Part No: 1EA300E01 Page iv Petitioners Canadian Solar Inc. and Canadian Solar (USA) Inc. Ex. 1025, p. iv...
- Page 5 Any software forming part of this equipment should be used only for the purpose for which it was supplied by GSI Group - Laser Division. No changes, modifications or copies (except for producing a necessary back-up copy) shall be undertaken by the User.
- Page 6 GSI Group - Laser Division JK300HP/JK300P/JK125P Pre-installation and User Manual Issue 2.0 Intentionally blank Part No: 1EA300E01 Page vi Petitioners Canadian Solar Inc. and Canadian Solar (USA) Inc. Ex. 1025, p. vi...
-
Page 7: Table Of Contents
1.3.1 Safety Paragraphs ................3 Table of Definitions ..................... 4 After Sales Support ..................... 7 CE Mark Information ................... 7 The JK300HP/JK300P/JK125P Series Laser ............. 8 1.7.1 Main Assemblies ................... 8 1.7.2 Control System and Local Controller ............ 9 1.7.3 Machine Interface.................. - Page 8 GSI Group - Laser Division JK300HP/JK300P/JK125P Pre-installation and User Manual Issue 2.0 2.7.2 Safety Compliance ................33 2.7.3 Safety Labelling................... 33 2.7.4 Safety Features................... 36 2.7.5 Remote Interlock Connector ............... 36 2.7.6 Workstation Interlock................37 Training ......................38 Personal Protective Equipment................. 38 2.9.1...
- Page 9 GSI Group - Laser Division JK300HP/JK300P/JK125P Issue 2.0 Pre-installation and User Manual Emergency Shutdown ..................63 Keys ........................64 6.5.1 General ....................64 6.5.2 Control Keys..................64 6.5.3 Navigation Keys .................. 64 6.5.4 Function Keys ..................64 6.5.5 Value Keys ..................64 6.5.6...
- Page 10 GSI Group - Laser Division JK300HP/JK300P/JK125P Pre-installation and User Manual Issue 2.0 7.3.3 Alarm 1n03 : No Laser Type Configured..........74 7.3.4 Alarm 1n04 : Laser Control Card Communication Fault...... 74 7.3.5 Alarm 1n05 : Pulse Generator Card Communication Fault ....74 7.3.6...
- Page 11 GSI Group - Laser Division JK300HP/JK300P/JK125P Issue 2.0 Pre-installation and User Manual 7.5.8 Alarm 3n08: High temperature fault ............ 87 7.5.9 Alarm 3n09: Very High temperature fault ..........87 7.5.10 Alarm 3n10: High Conductivity fault ............ 88 7.5.11 Alarm 3n11: Low Coolant Flow ............88 7.5.12...
- Page 12 GSI Group - Laser Division JK300HP/JK300P/JK125P Pre-installation and User Manual Issue 2.0 7.11.3 Warning 3n03 : Low Flow..............97 7.11.4 Warning 3n04 : High Flow ..............97 7.11.5 Warning 3n05 : High Conductivity ............97 7.12 Power Supply Warnings (Zone 4) ..............97 7.12.1...
- Page 13 GSI Group - Laser Division JK300HP/JK300P/JK125P Issue 2.0 Pre-installation and User Manual 9.11 Focus lens cell Replacement Procedure............142 9.11.1 Materials.................... 142 9.11.2 Replacement Procedure ..............142 9.11.3 Cleaning Procedure ................144 9.12 Focus Lens Replacement Procedure.............. 146 9.12.1 Materials.................... 146 9.12.2...
- Page 14 GSI Group - Laser Division JK300HP/JK300P/JK125P Pre-installation and User Manual Issue 2.0 Intentionally blank Part No: 1EA300E01 Page xiv Petitioners Canadian Solar Inc. and Canadian Solar (USA) Inc. Ex. 1025, p. xiv...
- Page 15 North America and Europe along with a network of support centres. GSI Group - Laser Division offers a complete range of lasers that cover applications in sectors including electronics, aerospace, automotive, advanced manufacturing, packaging and advanced research.
- Page 16 GSI Group - Laser Division JK300HP/JK300P/JK125P Pre-installation and User Manual Issue 2.0 Intentionally blank Part No: 1EA300E01 Page 2 of 172 Petitioners Canadian Solar Inc. and Canadian Solar (USA) Inc. Ex. 1025, p. 2...
-
Page 17: General Information
Pre-installation and User Manual General Information Class of Laser The JK300HP/JK300P/JK125P Series Laser is a Class 4 (IV) Laser system. Refer to Section 2 – Safety for information on Laser radiation hazards and safety precautions in a Class 4 (IV) environment. -
Page 18: Table Of Definitions
GSI Group - Laser Division JK300HP/JK300P/JK125P Pre-installation and User Manual Issue 2.0 Table of Definitions Name Definition An opening in the protective housing of a Laser enclosure or Laser unit Aperture through which Laser radiation is emitted. Gas that is fed to the beam focus at the workpiece to assist the cutting Assist Gas process. - Page 19 GSI Group - Laser Division JK300HP/JK300P/JK125P Issue 2.0 Pre-installation and User Manual Name Definition Laser Controlled A work area controlled and supervised to protect personnel from Laser Area hazards. Person knowledgeable in the evaluation and control of Laser hazards and Laser Safety Officer has responsibility for overseeing control of Laser hazards.
- Page 20 GSI Group - Laser Division JK300HP/JK300P/JK125P Pre-installation and User Manual Issue 2.0 Name Definition There are two possible interpretations of this phrase and care must be exercised. Spot size can represent: The actual diameter of the beam focus at the surface of the workpiece, based on knowledge of the Laser beam characteristics and the parameters of the optical focusing system.
-
Page 21: After Sales Support
• Any relevant information (e.g. fault codes and descriptions) that would assist in fault diagnosis. Product news and information resources can also be accessed via the GSI Group website at www.gsig.com/lasers. CE Mark Information The JK300HP/JK300P/JK125P Series Laser complies with all CE requirements and relevant European Union directives. -
Page 22: The Jk300Hp/Jk300P/Jk125P Series Laser
1.7.1.5 Fibre Optic Cable Assembly Fibre-optic beam delivery is achieved by focusing Laser light into a fibre-optic cable. The fibre optic cable on the JK300HP and JK300P is 300µm diameter and on the JK125P it is Part No: 1EA300E01 Page 8 of 172 Petitioners Canadian Solar Inc. -
Page 23: Control System And Local Controller
Recollimating and Focus lens focal lengths. The JK300HP/JK300P/JK125P Series Laser can be supplied with up to four output fibres to provide a Timeshare facility. The output beam can be switched between these fibres by demand from a controlling Workstation. -
Page 24: Technical Specification
This equipment is built to operate at 50Hz or 60Hz within the relevant supply voltage range. This frequency is not interchangeable because a different Cooler Pump motor is used in each case. Consult GSI Group - Laser Division if it is necessary to operate this equipment on a different supply frequency. - Page 25 GSI Group - Laser Division JK300HP/JK300P/JK125P Issue 2.0 Pre-installation and User Manual Cooling Water Supply A clean water supply is required to the following specification: Water pH 6.5 to 8.5 Inlet Temperature 15ºC (59ºF) Minimum Differential Pressure 2 bar (29 psi)
- Page 26 GSI Group - Laser Division JK300HP/JK300P/JK125P Pre-installation and User Manual Issue 2.0 Output Specification JK300P JK125P JK300HP Average Laser Power* 300 W 125 W 300 W Maximum Peak Power 5 kW 2.3 kW 9 kW Maximum pulse energy 40 J...
- Page 27 GSI Group - Laser Division JK300HP/JK300P/JK125P Issue 2.0 Pre-installation and User Manual Figure 1 - Temperature /Relative Humidity Graph Flow Pressure Drop Water Temperature - Deg C Figure 2 - External Water Parameters Part No: 1EA300E01 Page 13 of 172 Petitioners Canadian Solar Inc.
-
Page 28: Safety Interlocks
Remote interlock connection is via a 15-way D-type plug (male) (PL601), Refer to Section 3.7. 1.9.2 Shutter Interlocks (Beampath Interlocks) The JK300HP/JK300P/JK125P Series Laser has two independent circuits that control the Shutter: 1.9.2.1 Safety control Safety is provided by the Beam Delivery Interface card, using hard-wired circuits. -
Page 29: Laser Power Delivery
GSI Group - Laser Division JK300HP/JK300P/JK125P Issue 2.0 Pre-installation and User Manual 1.10 Laser Power Delivery Laser output power is delivered, via a fibre optic cable, to the Focus Head at the Workstation for processing. Up to four fibre optic cables can be fitted, permitting power to be directed to one of four workstations at any one time. - Page 30 GSI Group - Laser Division JK300HP/JK300P/JK125P Pre-installation and User Manual Issue 2.0 External Shutter Control Customer Command Control Demand Open Switch Status Acknowledge to Customer Figure 3 - Shutter Timing Name Description Typical Control Response Time 300µs 500µs Time from Customer Command to...
-
Page 31: Operating Parameters
• Rate (Frequency). The JK300HP/JK300P/JK125P Series Laser is capable of storing up to 10 active programmable Parameter Sets. The active Parameter Set can be selected via either the Local or Remote Controller. This allows the correct parameter values for specific processes to be established and programmed into the Laser. - Page 32 GSI Group - Laser Division JK300HP/JK300P/JK125P Pre-installation and User Manual Issue 2.0 The following is an example of setting a parameter value. To set a rate frequency of 260Hz, the following BCD ‘word’ would be required: This gives a decimal word of 52, the step resolution for frequency adjustment is 5, thus the set frequency is 52 x 5 = 260Hz.
-
Page 33: Parameter Set Selection
Pre-installation and User Manual 1.11.2 Parameter Set Selection The required parameter set can be selected locally. 1.12 Laser Outputs The JK300HP/JK300P/JK125P Series Laser has the facility to output the following information via either the Local or Remote Controller: Laser Status: •... -
Page 34: Fibre Optic Handling
GSI Group - Laser Division JK300HP/JK300P/JK125P Pre-installation and User Manual Issue 2.0 sensitive components, as the input power to the component is significantly less than a continuous weld. 1.15 Fibre Optic Handling These guidelines must be read before unpacking and handling the Fibre Optics. -
Page 35: Fibre Installation
GSI Group - Laser Division JK300HP/JK300P/JK125P Issue 2.0 Pre-installation and User Manual 1.15.3 Fibre Installation • Ensure that the bend radius limitations (refer to Section 1.15.4) are observed. • Avoid sharp or abrasive surfaces. • When fitting the fibre cable, ensure that the orientation key in the fibre termination and the keyway in the fibre receiver are aligned. -
Page 36: Fibre Optic Termination
GSI Group - Laser Division JK300HP/JK300P/JK125P Pre-installation and User Manual Issue 2.0 1.15.5 Fibre Optic Termination Fibre termination is the section of fibre from the beginning of the termination boot to the exposed end of the fibre. This includes all mechanical, electrical and optical parts. No single part of the fibre termination is replaceable/repairable outside the manufacturing base. -
Page 37: Safety
GSI Group - Laser Division JK300HP/JK300P/JK125P Issue 2.0 Pre-installation and User Manual Safety Laser Classification Laser classification indicates the potential hazard presented to the User. There are two standards used to define Laser Products: Throughout the World, with the exception of North America, regulation IEC 60825-1 (EN 60825-1 in Europe) is used. - Page 38 Pre-installation and User Manual Issue 2.0 The JK300HP/JK300P/JK125P Series Laser is a Class 4 Laser System. All operators using this Laser equipment must be officially trained and authorised. In North America, the Center for Devices and Radiological Health, a division of the FDA, regulates the classification of Laser Products and uses Federal Regulation 21 CFR Chapter J 1040.10.
-
Page 39: Laser Radiation Hazards
Pre-installation and User Manual Laser Radiation Hazards The JK300HP/JK300P/JK125P Series Laser is a Nd: YAG Laser. This Laser produces radiation with a 1064nm wavelength, powerful enough to melt and vaporise most materials. Even diffuse reflections can inflict serious injury if allowed to strike the body. - Page 40 This method of operation is preferred by Safety Authorities and is recommended by GSI Group - Laser Division for use with the JK300HP/JK300P/JK125P Series Laser. If a Class 1(I) enclosure is not employed and the Laser operates under Class 4(IV) conditions then additional precautions are required.
-
Page 41: Electrical Safety
Do not attempt to carry out work on electrical circuits when alone. Always have a colleague nearby. • Use only GSI Group - Laser Division approved spare parts, failure to do so will invalidate the warranty. • Always adhere to Local Plant Regulations relating to work on electrical equipment. -
Page 42: Environmental Hazards
GSI Group - Laser Division JK300HP/JK300P/JK125P Pre-installation and User Manual Issue 2.0 Environmental Hazards Materials used in Laser processing applications can become hazardous if safe working practices are not followed. Hazards can result from the following: • Fire. • Fume. -
Page 43: Fume
Guidance on welding fume and its removal can be obtained by contacting: The Welding Institute, Abington Hall, Abington, Cambridge CB1 6AL, England. General guidance can also be obtained from GSI Group - Laser Division. Part No: 1EA300E01 Page 29 of 172 Petitioners Canadian Solar Inc. and Canadian Solar (USA) Inc. -
Page 44: Compressed Gases
Solvents are used for the maintenance of equipment. Solvents are hazardous to health if adequate precautions for use and storage are not taken. GSI Group - Laser Division recommend that only PROPAN-2-OL (IPA) is used for cleaning optics. IPA is also identified as ISOPROPANOL or ISOPROPYL ALCOHOL. -
Page 45: Conditions Of Use
GSI Group - Laser Division JK300HP/JK300P/JK125P Issue 2.0 Pre-installation and User Manual Conditions of Use The JK300HP/JK300P/JK125P Series Laser must only be used under the following circumstances: • On approved materials. • Using an approved process. • Under approved conditions. -
Page 46: Due Authorisation
Do not attempt to process parts with personnel inside the safety enclosure. Safety equipment must be complete, intact and free from damage. Parts must only be processed in strict conformity with GSI Group - Laser Division Instruction Manuals, Local Safety Regulations and using established good working practices for Laser processing. -
Page 47: Safety Control System
Labels must not be defaced or removed. Damaged or missing labels must be replaced immediately by contacting GSI Group - Laser Division quoting the label identification reference given on each label. Customers must ensure any component fitted has the correct labelling (refer to GSI Group - Laser Division). Part No: 1EA300E01 Page 33 of 172 Petitioners Canadian Solar Inc. - Page 48 GSI Group - Laser Division JK300HP/JK300P/JK125P Pre-installation and User Manual Issue 2.0 Figure 5 - Safety and Compliance labels Part No: 1EA300E01 Page 34 of 172 Petitioners Canadian Solar Inc. and Canadian Solar (USA) Inc. Ex. 1025, p. 34...
- Page 49 GSI Group - Laser Division JK300HP/JK300P/JK125P Issue 2.0 Pre-installation and User Manual Figure 6 - Safety Label Locations Part No: 1EA300E01 Page 35 of 172 Petitioners Canadian Solar Inc. and Canadian Solar (USA) Inc. Ex. 1025, p. 35...
-
Page 50: Safety Features
GSI Group - Laser Division JK300HP/JK300P/JK125P Pre-installation and User Manual Issue 2.0 2.7.4 Safety Features Two safety features of the JK300HP/JK300P/JK125P Series Laser which protect personnel from exposure to Laser radiation are: • Remote Interlock Connector. • Workstation Interlock. 2.7.5 Remote Interlock Connector The Remote Interlock Connector enables an external Remote Safety Interlock to be fitted to the interlock circuit of the Laser. -
Page 51: Workstation Interlock
GSI Group - Laser Division JK300HP/JK300P/JK125P Issue 2.0 Pre-installation and User Manual 2.7.6 Workstation Interlock Where safety interlock switches are operated frequently, a RIC is not suitable. In these circumstances, workstation interlocks are used. If the terminals of the workstation interlock are open-circuit (not electrically joined) then the Laser Shutter closes, preventing the Laser beam from emitting from the Laser. -
Page 52: Training
GSI Group - Laser Division JK300HP/JK300P/JK125P Pre-installation and User Manual Issue 2.0 Training Operation of a Class 4 (IV) Laser system can represent a hazard not only to the User but also to personnel considerable distances from the system. Persons in control of a Class 4 (IV) Laser system are required to have successfully completed training in the following areas: •... -
Page 53: Pre-Installation
Pre-installation Location of Laser System GSI Group - Laser Division recommends that the JK300HP/JK300P/JK125P Series Laser is located within a room that contains no non-related equipment or personnel. This will enable the access controls and hazard precautions to be rigidly enforced. -
Page 54: General Arrangement
Pre-installation and User Manual Issue 2.0 General Arrangement 3.2.1 Dimensions and Weight Overall dimensions and footprint of the JK300HP/JK300P/JK125P Series Laser are shown in Figure 7. Refer to Section 1.8 for weight specifications. Figure 7 - Dimensions and Footprint Part No: 1EA300E01 Page 40 of 172 Petitioners Canadian Solar Inc. -
Page 55: Site Preparation
This equipment is designed to operate at 50Hz or 60Hz within the relevant supply range; the frequency is not interchangeable because a different Cooler Pump motor is used in each instance. Consult GSI Group - Laser Division if operation on a different supply frequency is required. - Page 56 ISO 3696 (EN ISO 3696) Grade 3 but with an improved conductivity. 10 litres (2.64 US gallons) are required for the installation of the JK300HP/JK300P/JK125P laser. This type of water is often referred to as de-mineralised water being produced by distillation, de-ionisation or by reverse osmosis. This water has the following basic requirements: pH value at 25 °C...
-
Page 57: Gas Supply
Return ½ inch 13mm internal diameter 3.3.3 Gas Supply Processing with the JK300HP/JK300P/JK125P Series Laser may require one or more of the following gas supplies: Shielding gas for welding applications The type and amount of gas required depends on the laser process. Shielding gas requirements are detailed in the User Manual. -
Page 58: Environmental Conditions
Class 1(I) enclosure be built around the laser workstation. Refer to Section 2 - Safety for laser hazards and safe operating information. Laser Cabinet Recommendation GSI Group - Laser Division also recommends that the laser cabinet is housed in the conditions of a Class 1 environment. Electromagnetic Compatibility The JK300HP/JK300P/JK125P Series Laser is certified to be in conformance with EMC Directive 89/336/EEC and amendments. -
Page 59: Electrical Connections
GSI Group - Laser Division JK300HP/JK300P/JK125P Issue 2.0 Pre-installation and User Manual Electrical Connections 3.7.1 Connection Panel Connections between the JK300HP/JK300P/JK125P Series Laser and customer devices are made from connectors located at the rear of the laser cabinet. Connector ID Description PL601 Customer Interlocks... -
Page 60: Sk603 - Basic Machine (M/C) Interface
GSI Group - Laser Division JK300HP/JK300P/JK125P Pre-installation and User Manual Issue 2.0 Table 3 - PL-602 Workstation Interlocks PIN # DESCRIPTION VOLTS USED Y/N CH 1 EXT SWITCH 1- 0 Vdc CH 1 EXT SWITCH + 24 Vdc CH 2 EXT SWITCH 1-... - Page 61 GSI Group - Laser Division JK300HP/JK300P/JK125P Issue 2.0 Pre-installation and User Manual Figure 8 – Location of M/C Interface Panel Part No: 1EA300E01 Page 47 of 172 Petitioners Canadian Solar Inc. and Canadian Solar (USA) Inc. Ex. 1025, p. 47...
- Page 62 GSI Group - Laser Division JK300HP/JK300P/JK125P Pre-installation and User Manual Issue 2.0 Table 4 - SK-603 Basic Machine (M/C) Interface PIN # FUNCTION PIN # FUNCTION PEXT External 24 Vdc PEXT External 24 Vdc GNDEXT External 0 Vdc GNDEXT External 0 Vdc...
- Page 63 GSI Group - Laser Division JK300HP/JK300P/JK125P Issue 2.0 Pre-installation and User Manual 3.7.4.3 Switches in SOURCE Position When the I/P switch is set to SOURCE, the external Controller output must “push” current through the laser input. Likewise, when the O/P switch is set to SOURCE, the external Controller input must “push”...
- Page 64 GSI Group - Laser Division JK300HP/JK300P/JK125P Pre-installation and User Manual Issue 2.0 3.7.4.5 Laser Inputs The laser can be controlled in remote by using inputs on the Machine Interface. Ensure Remote Ready Status is true before using the following inputs:...
- Page 65 GSI Group - Laser Division JK300HP/JK300P/JK125P Issue 2.0 Pre-installation and User Manual 3.7.4.8 Laser Status Outputs The laser provides the following Status outputs to the Machine Interface: Table 6 - Laser Status SK603 Pin Function Remarks False Off/Ready LASER ON STATUS...
-
Page 66: Sk604 - Full M/C Interface - I/O Card 1 (Optional)
GSI Group - Laser Division JK300HP/JK300P/JK125P Pre-installation and User Manual Issue 2.0 3.7.4.11 Laser Diagnostic Outputs Laser diagnostic outputs are grouped into the following: • Alarms that stop the laser. • Warnings that indicate a problem but allow continued laser operation. -
Page 67: Sk605 - Full M/C Interface - I/O Card 2 (Optional)
GSI Group - Laser Division JK300HP/JK300P/JK125P Issue 2.0 Pre-installation and User Manual 3.7.6 SK605 – Full M/C Interface - I/O card 2 (Optional) The Full (M/C) Interface connection is made via a 37 way D-Type Socket (female). Refer to pin out Table 8 To prevent operational problems caused by earth loops, the Machine Interface is opto- isolated. -
Page 68: Fibre Route Planning
The Fibre route must be planned in accordance with the safety precautions annotated in Section 1.15. Installation Consumables The consumables required for installation of the JK300HP/JK300P/JK125P Series Laser will be supplied by GSI Group - Laser Division. Part No: 1EA300E01 Page 54 of 172 Petitioners Canadian Solar Inc. -
Page 69: Pre-Installation Checks
Issue 2.0 Pre-installation and User Manual 3.10 Pre-installation Checks To facilitate the installation of the JK300HP/JK300P/JK125P Series Laser, efforts must be made to ensure that all required services, working environment and relevant personnel are available prior to installation. Refer to the following recommended checklist that can be used to determine that all site preparation requirements have been satisfied. - Page 70 SK605 Full M/C Interface - I/O card 2 Site Requirements All site requirements have been undertaken and meet Pre-installation conditions as specified by GSI Group - Laser Division. Customer is to complete check list by signing and dating below: Customer:………………………………….
-
Page 71: Installation
Equipment Warranty Installation of the JK300HP/JK300P/JK125P Series Laser must be carried out by an Authorised GSI Group - Laser Division Engineer (or a GSI Group - Laser Division certified engineer). Installation carried out by personnel other than the aforementioned, will render the equipment warranty void. -
Page 72: Installation Toolkit
Issue 2.0 Installation Toolkit If installation is to be carried out by GSI Group - Laser Division personnel, all installation tools and equipment will be provided by GSI Group - Laser Division. If installation is to be carried out by non-GSI Group - Laser Division personnel, all installation tools and equipment can be ordered from GSI Group - Laser Division on request. -
Page 73: Commissioning
GSI Group - Laser Division JK300HP/JK300P/JK125P Issue 2.0 Pre-installation and User Manual De-Commissioning This section provides procedures necessary de-commission JK300HP/JK300P/JK125P Series Laser. Disconnect Power Supply Disconnect Power Supply WARNING FOLLOW APPROVED SAFETY PROCEDURES WHEN WORKING WITH HIGH VOLTAGE POWER SUPPLIES AND EQUIPMENT. -
Page 74: Disconnect External Water Supply
GSI Group - Laser Division JK300HP/JK300P/JK125P Pre-installation and User Manual Issue 2.0 Disconnect External Water Supply Disconnect External Water Supply WARNING ENSURE WATER SUPPLY IS ISOLATED BEFORE DRAINING COOLING WATER SYSTEM. Turn OFF external water supply. Place drainage bowl underneath hose connectors. -
Page 75: Fibre Removal
GSI Group - Laser Division JK300HP/JK300P/JK125P Issue 2.0 Pre-installation and User Manual Fibre Removal Fibre Removal CAUTION Fibre ends are easily damaged. Fibre handling guidelines must be observed throughout this procedure. Refer to Fibre Handling Guidelines in Section 1.15. Remove fibre output end from focus head. - Page 76 GSI Group - Laser Division JK300HP/JK300P/JK125P Pre-installation and User Manual Issue 2.0 Intentionally Blank Part No: 1EA300E01 Page 62 of 172 Petitioners Canadian Solar Inc. and Canadian Solar (USA) Inc. Ex. 1025, p. 62...
-
Page 77: Laser Operation
GSI Group - Laser Division JK300HP/JK300P/JK125P Issue 2.0 Pre-installation and User Manual Laser Operation Overview Laser operation consists of the following: • Start up. • Shutdown. • Emergency Shutdown. • Monitoring and Control. The Laser is mechanically switched on and off by the mains disconnect switch located at the top right-hand corner of the Cabinet. -
Page 78: Keys
GSI Group - Laser Division JK300HP/JK300P/JK125P Pre-installation and User Manual Issue 2.0 Switch OFF the external Power Supply Isolator. Switch OFF the external water supply. Follow all Local Emergency Procedures. Keys 6.5.1 General Keys are active areas of the UFP touch-screen, the same key is usually displayed in the same place. -
Page 79: Status Bar
GSI Group - Laser Division JK300HP/JK300P/JK125P Issue 2.0 Pre-installation and User Manual Increment Increments the value. Decrement Decrements the value. Cursor Moves the cursor from left to right or from LSD to MSD (ie rotate right). Editing is entered and exited by pressing the value displayed. -
Page 80: Entry
GSI Group - Laser Division JK300HP/JK300P/JK125P Pre-installation and User Manual Issue 2.0 6.6.2 Entry From Welcome screen to Main screen when UFP is touched. 6.6.3 Exit Exits to Main screen when the screen is touched. 6.6.4 {Laser Descr) {Laser Type} {s/w} Configuration data. -
Page 81: Entry/Exit
GSI Group - Laser Division JK300HP/JK300P/JK125P Issue 2.0 Pre-installation and User Manual 6.8.2 Entry/Exit From/to Main screen. Text Range ‘Pulse Height’ Shows current value Enables numeric editing of value. 0.0 – 100.0 Value A new value has immediate effect. ‘Multishot’... -
Page 82: Status Bar
GSI Group - Laser Division JK300HP/JK300P/JK125P Pre-installation and User Manual Issue 2.0 Text Range Value shape Enables selection of state via edit Internal, ‘Pulse Trig’ Shows current state keys External Value ‘Trip’ Enable Shows current state Enables selection of state via edit... -
Page 83: Energy Monitor Screen
GSI Group - Laser Division JK300HP/JK300P/JK125P Issue 2.0 Pre-installation and User Manual Text Range Shows current value Enables numeric editing of value. 0 – 1000.0 Hz ‘Rep Rate’ Value ‘Ramp Up’ Shows current value Enables numeric editing of value. 0 - 9.9 sec ‘Ramp Down’... -
Page 84: System Screen
GSI Group - Laser Division JK300HP/JK300P/JK125P Pre-installation and User Manual Issue 2.0 6.12 SYSTEM screen 6.12.1 Function For setting System parameters. 6.12.2 Entry/Exit Entry to first screen from Main screen, by Access Code. Down-arrow moves between first and second screen. -
Page 85: Alarm/Warning
GSI Group - Laser Division JK300HP/JK300P/JK125P Issue 2.0 Pre-installation and User Manual There may be more than one active Warning; if there are more than three then the second screen is used; the Down-arrow key is not displayed unless a second screen is available. - Page 86 GSI Group - Laser Division JK300HP/JK300P/JK125P Pre-installation and User Manual Issue 2.0 Intentionally blank Part No: 1EA300E01 Page 72 of 172 Petitioners Canadian Solar Inc. and Canadian Solar (USA) Inc. Ex. 1025, p. 72...
-
Page 87: Alarm And Warning Handling
GSI Group - Laser Division JK300HP/JK300P/JK125P Issue 2.0 Pre-installation and User Manual Alarm and Warning Handling Alarm and Warning Display System faults will cause either an Alarm or a Warning to be displayed on the screen. Alarms will normally stop the Laser operating (some Shutter and Machine Interface alarms do not stop the Laser). -
Page 88: Alarm 1N02 : Serial Communications Fault
GSI Group - Laser Division JK300HP/JK300P/JK125P Pre-installation and User Manual Issue 2.0 7.3.2 Alarm 1n02 : Serial Communications Fault Meaning: The laser did not receive a message over the serial link for 5 seconds, while the laser was Possible causes: Serial communications cable disconnected or loose. -
Page 89: Alarm 1N07 : Software Error
GSI Group - Laser Division JK300HP/JK300P/JK125P Issue 2.0 Pre-installation and User Manual Faulty Interlock Module. 7.3.7 Alarm 1n07 : Software Error Meaning: The Interlock Module failed to initialise. Possible causes: Faulty Interlock Module. 7.3.8 Alarm 1n08 : Safety Relay Out Fault Meaning: The safety relay dropped out while the laser was on. -
Page 90: Alarm 1N12 : Laser Type Not Recognised By The Laser Control Network
GSI Group - Laser Division JK300HP/JK300P/JK125P Pre-installation and User Manual Issue 2.0 7.3.12 Alarm 1n12 : Laser Type Not Recognised By The Laser Control Network Meaning: The Interlock Module did not receive a correct laser type over the laser control network following a request. -
Page 91: Alarm 2N02 : Interlock Chain Input 2 Fault
GSI Group - Laser Division JK300HP/JK300P/JK125P Issue 2.0 Pre-installation and User Manual 7.4.2 Alarm 2n02 : Interlock Chain Input 2 Fault Meaning: There is no voltage supply to this interlock input. Possible causes: Interlock supply not turned on. Loose connection. -
Page 92: Alarm 2N06 : Interlock Chain Input 6 Fault
GSI Group - Laser Division JK300HP/JK300P/JK125P Pre-installation and User Manual Issue 2.0 7.4.6 Alarm 2n06 : Interlock Chain Input 6 Fault Meaning: For JK laser products this input is allocated to the Pump Overload. Circuit breaker supplying the cooler pump has tripped. -
Page 93: Alarm 2N10 : Interlock Chain Input 10 Fault
GSI Group - Laser Division JK300HP/JK300P/JK125P Issue 2.0 Pre-installation and User Manual 7.4.10 Alarm 2n10 : Interlock Chain Input 10 Fault Meaning: There is no voltage supply to this interlock input. Possible causes: Interlock supply not turned on. Loose connection. -
Page 94: Alarm 2N14 : Interlock Chain Input 14 Fault
GSI Group - Laser Division JK300HP/JK300P/JK125P Pre-installation and User Manual Issue 2.0 7.4.14 Alarm 2n14 : Interlock Chain Input 14 Fault Meaning: For JK laser products this input is allocated to the control rack dual shutter card slot 1 Emergency Stop circuit. Channel 1 of the dual shutter card. -
Page 95: Alarm 2N16 : Interlock Chain Input 16 Fault
GSI Group - Laser Division JK300HP/JK300P/JK125P Issue 2.0 Pre-installation and User Manual Possible causes: Interlock supply not turned on. Loose connection. Faulty interlock module. 7.4.16 Alarm 2n16 : Interlock Chain Input 16 Fault Meaning: For JK laser products this input is allocated to the control rack dual shutter card slot 3 Emergency Stop circuit. -
Page 96: Alarm 2N18 : Interlock Chain Input 18 Fault
GSI Group - Laser Division JK300HP/JK300P/JK125P Pre-installation and User Manual Issue 2.0 Faulty shutter connected to channel 2 of the dual shutter card fitted in slot 1 of the control rack. Faulty shutter card fitted in slot 1 of the control rack. -
Page 97: Alarm 2N20 : Interlock Chain Input 20 Fault
GSI Group - Laser Division JK300HP/JK300P/JK125P Issue 2.0 Pre-installation and User Manual Shutter fault on the shutter fitted to channel 2 of the dual shutter card in slot 3 of the control rack. Dual shutter card fitted in slot 3 of the control rack is not programmed. -
Page 98: Alarm 2N24 : Interlock Chain Input 24 Fault
GSI Group - Laser Division JK300HP/JK300P/JK125P Pre-installation and User Manual Issue 2.0 Possible causes: Interlock supply not turned on. Loose connection. Faulty interlock module. 7.4.24 Alarm 2n24 : Interlock Chain Input 24 Fault Meaning: There is no voltage supply to this interlock input. -
Page 99: Alarm 2N29 : Interlock Chain Input 29 Fault
GSI Group - Laser Division JK300HP/JK300P/JK125P Issue 2.0 Pre-installation and User Manual Loose connection. Faulty interlock module. 7.4.29 Alarm 2n29 : Interlock Chain Input 29 Fault Meaning: There is no voltage supply to this interlock input. Possible causes: Interlock supply not turned on. -
Page 100: Alarm 3N02 : No Pump On Response
GSI Group - Laser Division JK300HP/JK300P/JK125P Pre-installation and User Manual Issue 2.0 Re-programming Cooler Module. Faulty Cooler Module 7.5.2 Alarm 3n02 : No Pump On Response Meaning: The cooler module failed to report the pump contactor engaged during the laser sequence start up routine. -
Page 101: Alarm 3N06: Cooler Module Relay Overload Fault
GSI Group - Laser Division JK300HP/JK300P/JK125P Issue 2.0 Pre-installation and User Manual 7.5.6 Alarm 3n06: Cooler Module Relay Overload Fault Meaning: Circuit breaker supplying the pump has tripped. Possible causes: Faulty pump. Pump overheated. Loose connection. Faulty pump connections. 7.5.7 Alarm 3n07: Low temperature fault Meaning: The coolant temperature has fallen below a configurable threshold. -
Page 102: Alarm 3N10: High Conductivity Fault
GSI Group - Laser Division JK300HP/JK300P/JK125P Pre-installation and User Manual Issue 2.0 Configurable threshold set too low. Loose connections. Faulty temperature sensor. Faulty Cooler Module. 7.5.10 Alarm 3n10: High Conductivity fault Meaning: The coolant conductivity has raised above a configurable threshold. -
Page 103: Alarm 3N14: Conductivity Sensor Fault
GSI Group - Laser Division JK300HP/JK300P/JK125P Issue 2.0 Pre-installation and User Manual Possible causes: Faulty temperature sensor. Loose connections. Faulty Cooler Module. 7.5.14 Alarm 3n14: Conductivity Sensor Fault Meaning: The coolant conductivity sensor is faulty. Possible causes: Faulty conductivity sensor. -
Page 104: Alarm 4N05 : Power Supply Over Temperature
GSI Group - Laser Division JK300HP/JK300P/JK125P Pre-installation and User Manual Issue 2.0 7.6.5 Alarm 4n05 : Power Supply Over Temperature Meaning: The power supply temperature switch has been activated. Possible causes: Configurable high temperature alarm level set too high. Incorrect cooler valve setting. -
Page 105: Alarm 4N10 : Power Supply Failed To Simmer Timeout
GSI Group - Laser Division JK300HP/JK300P/JK125P Issue 2.0 Pre-installation and User Manual Loose laser control network connections. Faulty power supply. Faulty Interlock module. Faulty Laser Control Card. 7.6.10 Alarm 4n10 : Power Supply Failed To Simmer Timeout Meaning: The power supply failed to simmer within the timeout period during the laser start up sequence. -
Page 106: Alarm 4N15 : Power Supply Igbt Fault
GSI Group - Laser Division JK300HP/JK300P/JK125P Pre-installation and User Manual Issue 2.0 Possible causes: Wiring fault in the power supply demand. Faulty pulse generator card. Faulty power supply. 7.6.15 Alarm 4n15 : Power Supply IGBT Fault Meaning: The power supply IGBT is faulty. -
Page 107: Alarm 4N20 : Power Supply Contactor Out Timeout
GSI Group - Laser Division JK300HP/JK300P/JK125P Issue 2.0 Pre-installation and User Manual 7.6.20 Alarm 4n20 : Power Supply Contactor Out Timeout Meaning: The power supply contactor did not disengage within the timeout period during the laser shut down sequence. Possible causes: Faulty power supply. -
Page 108: Alarm 5N03 : Shutter Configuration Failure
GSI Group - Laser Division JK300HP/JK300P/JK125P Pre-installation and User Manual Issue 2.0 7.7.3 Alarm 5n03 : Shutter Configuration Failure Meaning: The Laser Control Card failed to set the shutter configuration. Possible causes: Loose Shutter card. Loose Laser Control Card. Faulty Shutter Card. -
Page 109: Warning Number Allocation
GSI Group - Laser Division JK300HP/JK300P/JK125P Issue 2.0 Pre-installation and User Manual Warning Number Allocation Lasers that allow warning values to be read using the Read_Warning_Value message, described in section 6, return values standardised across all lasers. The return values are four digit numbers formatted as follows:... -
Page 110: Warning 1N05 : Shutter Communications Timeout
GSI Group - Laser Division JK300HP/JK300P/JK125P Pre-installation and User Manual Issue 2.0 7.10.5 Warning 1n05 : Shutter Communications Timeout Meaning: A shutter open command was not received within 5 seconds of the previous command. The shutter has closed due to the timeout. -
Page 111: Warning 1N12 : Shutter Multi Shot Or Single Shot Not Allowed While Laser Is Off
GSI Group - Laser Division JK300HP/JK300P/JK125P Issue 2.0 Pre-installation and User Manual 7.10.12 Warning 1n12 : Shutter Multi shot or Single shot not allowed while laser is off Meaning: A shutter multi pulse (Pulsed lasers) or single shot (CW lasers) was attempted when the laser was not on. -
Page 112: Warning 4N02 : Dumping Current
GSI Group - Laser Division JK300HP/JK300P/JK125P Pre-installation and User Manual Issue 2.0 7.12.2 Warning 4n02 : Dumping Current Meaning: The Power Supply is dumping current following a shutdown. Reset when current level falls below the threshold. 7.12.3 Warning 4n03 : Dump Resistors Cooling... -
Page 113: Warning 5N07 : Shutter Switch Feedback Error
GSI Group - Laser Division JK300HP/JK300P/JK125P Issue 2.0 Pre-installation and User Manual 7.13.7 Warning 5n07 : Shutter Switch Feedback Error Meaning: The shutter switch feedback is not in a recognised state. Requires laser (alarm) reset to clear. 7.13.8 Warning 5n08 : Energy Share Configuration Fail Meaning: The Energy share position(s) failed configuration. - Page 114 GSI Group - Laser Division JK300HP/JK300P/JK125P Pre-installation and User Manual Issue 2.0 Intentionally blank Part No: 1EA300E01 Page 100 of 172 Petitioners Canadian Solar Inc. and Canadian Solar (USA) Inc. Ex. 1025, p. 100...
-
Page 115: Optimisation
GSI Group - Laser Division JK300HP/JK300P/JK125P Issue 2.0 Pre-installation and User Manual Optimisation Introduction The Optimisation procedure consists of tuning the Rear Mirror. When this has been done, the Laser will operate at maximum efficiency. The setting-up of External Power Control is described in Section 8.5. -
Page 116: Rear Mirror Tuning
GSI Group - Laser Division JK300HP/JK300P/JK125P Pre-installation and User Manual Issue 2.0 Rear Mirror Tuning Table 10 - Tuning Parameter Setup Tuning Parameter Setup INITIAL TUNING PARAMETERS - For all Models - Tuning The REAR MIRROR HEIGHT - 10% WIDTH - 5 ms... - Page 117 GSI Group - Laser Division JK300HP/JK300P/JK125P Issue 2.0 Pre-installation and User Manual Table 12 - Tuning the Rear Mirror Step Action Button On the UFP Press SETUP. In the Setup screen press the down button. Press DISPLAY ENERGY, this will display the Joules on the UFP.
-
Page 118: Focus Head Setup
GSI Group - Laser Division JK300HP/JK300P/JK125P Pre-installation and User Manual Issue 2.0 Focus Head Setup Step Action Button CAUTION If a Pointing Diode is fitted to the Laser System, it must be noted that the position of the focal plane of the Pointing Diode beam is different to that of the YAG beam. -
Page 119: External Power Control (Epc) Set-Up
GSI Group - Laser Division JK300HP/JK300P/JK125P Issue 2.0 Pre-installation and User Manual Figure 12 – Focus Burns External Power Control (EPC) Set-up Refer to the Section 3 for the Machine Interface (M/C) connections. 8.5.1 Set Up Procedure: The analogue signal should be connected to SK603 – M/C Interface, as shown below: SK603 –... - Page 120 GSI Group - Laser Division JK300HP/JK300P/JK125P Pre-installation and User Manual Issue 2.0 Width and Rate parameters remain the same and are not changed when using the EPC function. Switch ON and power-up the laser – Refer to Section 6.2. Note The EPC function can only be activated using the Laserview SE software.
-
Page 121: User Maintenance
GSI Group - Laser Division JK300HP/JK300P/JK125P Issue 2.0 Pre-installation and User Manual User Maintenance Introduction Routine Maintenance is restricted to the following items: • General inspection. • Coolant replenishment • Coolant Filter replacement. • De-ioniser cartridge replacement. • Pump replacement •... -
Page 122: User Maintenance Tasks
GSI Group - Laser Division JK300HP/JK300P/JK125P Pre-installation and User Manual Issue 2.0 User Maintenance Tasks Task Periodicity Reference Maint. Level General Inspection Weekly Section 9.3 Coolant replenishment Section 9.4 Coolant Filter Replacement 12 months or 2000 hours* Section 9.5 De-ioniser cartridge replacement 12 months or 2000 hours* Section 9.6... -
Page 123: General Inspection
TO THE LASER BEAM, THE CAUSE MUST BE ASCERTAINED AND CORRECTED IMMEDIATELY. Check all Safety Labels are in position, secure and legible If any labels are missing or illegible, replacements can be obtained from GSI Group - Laser Division quoting the part numbers.. Part No: 1EA300E01 Page 109 of 172 Petitioners Canadian Solar Inc. -
Page 124: Coolant Replenishment
GSI Group - Laser Division JK300HP/JK300P/JK125P Pre-installation and User Manual Issue 2.0 Coolant Replenishment Personnel authorised to Maintenance Level 1 can carry out this procedure. 9.4.1 Materials Parts Required Part Number 10 litres of Analar Grade 3 Water 1D0M00801 Tools/Equipment... - Page 125 GSI Group - Laser Division JK300HP/JK300P/JK125P Issue 2.0 Pre-installation and User Manual Refer to Figure 13 for item identification. Step Action WARNING ELECTRIC SHOCK HAZARDS EXIST. ELECTRIC SHOCK CAN CAUSE SERIOUS OR FATAL INJURY. Carry out Power OFF Sequence. Wait for 2 minutes. This ensures that the capacitors have discharged to a safe level.
-
Page 126: Filling Procedure
GSI Group - Laser Division JK300HP/JK300P/JK125P Pre-installation and User Manual Issue 2.0 9.4.3 Filling Procedure The Coolant level should be between the minimum line and the maximum line indicated on the reservoir. If it is close to the minimum line, Coolant should be added. - Page 127 GSI Group - Laser Division JK300HP/JK300P/JK125P Issue 2.0 Pre-installation and User Manual Refer to Figure 14 for item identification. Step Action WARNING ELECTRIC SHOCK HAZARDS EXIST. ELECTRIC SHOCK CAN CAUSE SERIOUS OR FATAL INJURY. Carry out Power OFF Sequence. Wait for 2 minutes. This ensures that the capacitors have discharged to a safe level.
-
Page 128: Filter Replacement Procedure
GSI Group - Laser Division JK300HP/JK300P/JK125P Pre-installation and User Manual Issue 2.0 Filter Replacement Procedure Personnel authorised to Maintenance Level 1 can carry out this procedure. Parts Required Part Number Paper Filter MP010995MS Tools/Equipment Spares/Consumables Standard Tool Kit O-Ring Kit... - Page 129 GSI Group - Laser Division JK300HP/JK300P/JK125P Issue 2.0 Pre-installation and User Manual Refer to Figure 15 for item identification. Step Action WARNING ELECTRIC SHOCK HAZARDS EXIST. ELECTRIC SHOCK CAN CAUSE SERIOUS OR FATAL INJURY. Carry out Power OFF Sequence. Wait for 2 minutes. This ensures that the capacitors have discharged to a safe level.
-
Page 130: Ioniser Replacement Procedure
GSI Group - Laser Division JK300HP/JK300P/JK125P Pre-installation and User Manual Issue 2.0 De-ioniser Replacement Procedure Personnel authorised to Maintenance Level 1 can carry out this procedure. Parts Required Part Number De-ioniser Resin Refill MP010483MS Tools/Equipment Spares/Consumables Standard Tool Kit O-Ring Kit... - Page 131 GSI Group - Laser Division JK300HP/JK300P/JK125P Issue 2.0 Pre-installation and User Manual Refer to Figure 16 for item identification. Step Action WARNING ELECTRIC SHOCK HAZARDS EXIST. ELECTRIC SHOCK CAN CAUSE SERIOUS OR FATAL INJURY. Carry out a Power OFF Sequence.
-
Page 132: Coolant Pump Replacement
GSI Group - Laser Division JK300HP/JK300P/JK125P Pre-installation and User Manual Issue 2.0 Coolant Pump Replacement Personnel authorised to Maintenance Level 1 can carry out this procedure. 9.7.1 Materials Part Required Part Number Coolant Pump Assembly 50Hz 480002601 Coolant Pump Assembly 60Hz... - Page 133 GSI Group - Laser Division JK300HP/JK300P/JK125P Issue 2.0 Pre-installation and User Manual Refer to Figure 17 for item identification. Step Action WARNING ELECTRIC SHOCK HAZARDS EXIST. ELECTRIC SHOCK CAN CAUSE SERIOUS OR FATAL INJURY. Carry out Power OFF Sequence. Wait for 2 minutes. This ensures that the capacitors have discharged to a safe level.
-
Page 134: Installation Procedure
GSI Group - Laser Division JK300HP/JK300P/JK125P Pre-installation and User Manual Issue 2.0 9.7.3 Installation Procedure Figure 18 – Coolant Pump Installation Part No: 1EA300E01 Page 120 of 172 Petitioners Canadian Solar Inc. and Canadian Solar (USA) Inc. Ex. 1025, p. 120... - Page 135 GSI Group - Laser Division JK300HP/JK300P/JK125P Issue 2.0 Pre-installation and User Manual Refer to Figure 18 for item identification. Step Action WARNING ELECTRIC SHOCK HAZARDS EXIST. ELECTRIC SHOCK CAN CAUSE SERIOUS OR FATAL INJURY. CAUTION The Coolant Pump is heavy. Care must be taken when lifting the Coolant Pump Assembly.
- Page 136 GSI Group - Laser Division JK300HP/JK300P/JK125P Pre-installation and User Manual Issue 2.0 Intentionally blank Part No: 1EA300E01 Page 122 of 172 Petitioners Canadian Solar Inc. and Canadian Solar (USA) Inc. Ex. 1025, p. 122...
-
Page 137: Arc-Lamp Replacement
Arc-lamps x 2 or complete set for JK300HP and P55B6770B JK300P 12280360A Arc-lamp x 1 for JK125P GSI Group - Laser Division recommends that Arc-lamps are changed as a complete set or in pairs. This will increase system running time. Tools/Equipment Spares/Consumables Standard Tool Kit... -
Page 138: Replacement Procedure
GSI Group - Laser Division JK300HP/JK300P/JK125P Pre-installation and User Manual Issue 2.0 9.8.2 Replacement Procedure Figure 19 – Arc-lamp Part No: 1EA300E01 Page 124 of 172 Petitioners Canadian Solar Inc. and Canadian Solar (USA) Inc. Ex. 1025, p. 124... - Page 139 GSI Group - Laser Division JK300HP/JK300P/JK125P Issue 2.0 Pre-installation and User Manual Refer to Figure 19 for item identification. Step Action WARNING ELECTRIC SHOCK HAZARDS EXIST. ELECTRIC SHOCK CAN CAUSE SERIOUS OR FATAL INJURY. Carry out Power OFF Sequence. Wait for 2 minutes. This ensures that the capacitors have discharged to a safe level.
-
Page 140: Installation Procedure
GSI Group - Laser Division JK300HP/JK300P/JK125P Pre-installation and User Manual Issue 2.0 9.8.3 Installation Procedure Figure 20 - Arc-lamp Part No: 1EA300E01 Page 126 of 172 Petitioners Canadian Solar Inc. and Canadian Solar (USA) Inc. Ex. 1025, p. 126... - Page 141 GSI Group - Laser Division JK300HP/JK300P/JK125P Issue 2.0 Pre-installation and User Manual Refer to Figure 20 for item identification. Step Action WARNING ELECTRIC SHOCK HAZARDS EXIST. ELECTRIC SHOCK CAN CAUSE SERIOUS OR FATAL INJURY. CAUTION WEAR PLASTIC GLOVES. Optical components are fragile and are easily damaged. Extreme care must be taken when handling optical components.
- Page 142 GSI Group - Laser Division JK300HP/JK300P/JK125P Pre-installation and User Manual Issue 2.0 Step Action WARNING ENSURE COOLER OPERATES FOR AT LEAST ONE MINUTE AND CHECK FOR LEAKS BEFORE RUNNING THE LASER IN LASER ON STATUS. Check the Pumping Chamber (item 5) for signs of leaks. If leaks are detected shut down the Laser immediately.
- Page 143 GSI Group - Laser Division JK300HP/JK300P/JK125P Issue 2.0 Pre-installation and User Manual Intentionally blank Part No: 1EA300E01 Page 129 of 172 Petitioners Canadian Solar Inc. and Canadian Solar (USA) Inc. Ex. 1025, p. 129...
-
Page 144: Pipa Fibre Optic Cable Replacement
GSI Group - Laser Division JK300HP/JK300P/JK125P Pre-installation and User Manual Issue 2.0 PIPA Fibre Optic Cable Replacement Personnel authorised to Maintenance Level 2 can carry out this procedure. 9.9.1 Materials Parts Required Part Number PIPA Fibre Cable Refer to Section 1.15... - Page 145 GSI Group - Laser Division JK300HP/JK300P/JK125P Issue 2.0 Pre-installation and User Manual Refer to Figure 21 for item identification. Item Action WARNING ELECTRIC SHOCK HAZARDS EXIST. ELECTRIC SHOCK CAN CAUSE SERIOUS OR FATAL INJURY. Ensure Power is switched OFF. Wait for 2 minutes. This ensures that the capacitors have discharged to a safe level.
-
Page 146: Installation Procedure
GSI Group - Laser Division JK300HP/JK300P/JK125P Pre-installation and User Manual Issue 2.0 9.9.3 Installation Procedure Figure 22 - PIPA Fibre Cable Installation Part No: 1EA300E01 Page 132 of 172 Petitioners Canadian Solar Inc. and Canadian Solar (USA) Inc. Ex. 1025, p. 132... - Page 147 GSI Group - Laser Division JK300HP/JK300P/JK125P Issue 2.0 Pre-installation and User Manual Refer to Figure 22 for item identification. Item Action WARNING ELECTRIC SHOCK HAZARDS EXIST. ELECTRIC SHOCK CAN CAUSE SERIOUS OR FATAL INJURY. Ensure Power is switched OFF. CAUTION Refer to Section 1.15 –...
-
Page 148: Fibre Output Termination Replacement Procedure
GSI Group - Laser Division JK300HP/JK300P/JK125P Pre-installation and User Manual Issue 2.0 9.9.4 Fibre Output Termination Replacement Procedure Figure 23 – Fibre Output Termination Part No: 1EA300E01 Page 134 of 172 Petitioners Canadian Solar Inc. and Canadian Solar (USA) Inc. - Page 149 GSI Group - Laser Division JK300HP/JK300P/JK125P Issue 2.0 Pre-installation and User Manual Refer to Figure 23 for item identification. Step Action WARNING ELECTRIC SHOCK HAZARDS EXIST. ELECTRIC SHOCK CAN CAUSE SERIOUS OR FATAL INJURY. Removal Procedure Ensure Power is switched OFF.
-
Page 150: Alignment Procedure
GSI Group - Laser Division JK300HP/JK300P/JK125P Pre-installation and User Manual Issue 2.0 9.9.5 Alignment Procedure Personnel authorised to Maintenance Level 2 can carry out this procedure. Figure 24 – Fibre Optic Cable Alignment Part No: 1EA300E01 Page 136 of 172 Petitioners Canadian Solar Inc. - Page 151 Increase the Height by 10% increments up to approximately 50%. This will give full power at source, ie 300W for JK300HP. Repeat step 9 at each Height setting. Note Refer to the test documentation supplied with your laser.
-
Page 152: Cover Slide Replacement Procedure
GSI Group - Laser Division JK300HP/JK300P/JK125P Pre-installation and User Manual Issue 2.0 9.10 Cover Slide Replacement Procedure 9.10.1 Materials Part Required Part Number Cover Slide 1234123YA Tools/Equipment Spares/Consumables Standard Tool Kit O-Ring Kit Rubber Bulb Puffer PROPAN-2-OL Small Vacuum Cleaner... - Page 153 GSI Group - Laser Division JK300HP/JK300P/JK125P Issue 2.0 Pre-installation and User Manual Refer to Figure 25 for item identification. Step Action WARNING ELECTRIC SHOCK HAZARDS EXIST. ELECTRIC SHOCK CAN CAUSE SERIOUS OR FATAL INJURY. Carry out Power OFF Sequence. Remove excess dust from the area around Cover Slide (item 8) using a small vacuum cleaner.
-
Page 154: Cleaning And Installation Procedure
GSI Group - Laser Division JK300HP/JK300P/JK125P Pre-installation and User Manual Issue 2.0 9.10.3 Cleaning and Installation Procedure Figure 26 – Cover Slide Installation Procedure Part No: 1EA300E01 Page 140 of 172 Petitioners Canadian Solar Inc. and Canadian Solar (USA) Inc. - Page 155 GSI Group - Laser Division JK300HP/JK300P/JK125P Issue 2.0 Pre-installation and User Manual Refer to Figure 26 for item identification. Step Action WARNING ELECTRIC SHOCK HAZARDS EXIST. ELECTRIC SHOCK CAN CAUSE SERIOUS OR FATAL INJURY. Clean the cover slide holder (item 4) and place in a clean environment.
-
Page 156: Focus Lens Cell Replacement Procedure
GSI Group - Laser Division JK300HP/JK300P/JK125P Pre-installation and User Manual Issue 2.0 9.11 Focus lens cell Replacement Procedure 9.11.1 Materials Part Required Part Number Focus lens cell Various Lens Ring Tool [60mm SQ Head] ML123431B Tools/Equipment Spares/Consumables Standard Tool Kit... - Page 157 GSI Group - Laser Division JK300HP/JK300P/JK125P Issue 2.0 Pre-installation and User Manual Refer to Figure 27 for item identification. Step Action WARNING ELECTRIC SHOCK HAZARDS EXIST. ELECTRIC SHOCK CAN CAUSE SERIOUS OR FATAL INJURY. Removal Procedure Carry out Power OFF Sequence.
-
Page 158: Cleaning Procedure
GSI Group - Laser Division JK300HP/JK300P/JK125P Pre-installation and User Manual Issue 2.0 9.11.3 Cleaning Procedure Figure 28 – Focus lens cell Part No: 1EA300E01 Page 144 of 172 Petitioners Canadian Solar Inc. and Canadian Solar (USA) Inc. Ex. 1025, p. 144... - Page 159 GSI Group - Laser Division JK300HP/JK300P/JK125P Issue 2.0 Pre-installation and User Manual Refer to Figure 28 for item identification. Step Action WARNING ELECTRIC SHOCK HAZARDS EXIST. ELECTRIC SHOCK CAN CAUSE SERIOUS OR FATAL INJURY. Clean the Focus lens cell holder (item 5) and place in a clean environment.
-
Page 160: Focus Lens Replacement Procedure
GSI Group - Laser Division JK300HP/JK300P/JK125P Pre-installation and User Manual Issue 2.0 9.12 Focus Lens Replacement Procedure 9.12.1 Materials Part Required Part Number Focus lens cell Various Lens Ring Tool [60mm SQ Head] ML123431B Tools/Equipment Spares/Consumables Standard Tool Kit O-Ring Kit... - Page 161 GSI Group - Laser Division JK300HP/JK300P/JK125P Issue 2.0 Pre-installation and User Manual Refer to Figure 29 for item identification. Step Action WARNING ELECTRIC SHOCK HAZARDS EXIST. ELECTRIC SHOCK CAN CAUSE SERIOUS OR FATAL INJURY. Carry out Power OFF Sequence. Note To remove the lens the correct tool must be used to prevent optical damage.
-
Page 162: Installation Procedure
GSI Group - Laser Division JK300HP/JK300P/JK125P Pre-installation and User Manual Issue 2.0 9.12.3 Installation Procedure Figure 30 – Focus Lens Part No: 1EA300E01 Page 148 of 172 Petitioners Canadian Solar Inc. and Canadian Solar (USA) Inc. Ex. 1025, p. 148... - Page 163 GSI Group - Laser Division JK300HP/JK300P/JK125P Issue 2.0 Pre-installation and User Manual Refer to Figure 30 for item identification. WARNING ELECTRIC SHOCK HAZARDS EXIST. ELECTRIC SHOCK CAN CAUSE SERIOUS OR FATAL INJURY. Inspect the optic for damage or debris. If necessary refer to section 9.11.3 to clean the optics.
-
Page 164: Surge Suppressor Replacement Procedure
GSI Group - Laser Division JK300HP/JK300P/JK125P Pre-installation and User Manual Issue 2.0 9.13 Surge Suppressor Replacement Procedure Personnel authorised to Maintenance Level 1 can carry out this procedure. 9.13.1 Materials Part Required Part Number Surge Suppressor 85D884501 Tools/Equipment Consumables Door key Figure 31 –... - Page 165 GSI Group - Laser Division JK300HP/JK300P/JK125P Issue 2.0 Pre-installation and User Manual Refer to Figure 31 for item identification. Step Action WARNING ELECTRIC SHOCK HAZARDS EXIST. ELECTRIC SHOCK CAN CAUSE SERIOUS OR FATAL INJURY. Carry out Power OFF Sequence. Wait for 2 minutes. This ensures that the capacitors have discharged to a safe level.
-
Page 166: Bulb Replacement Procedure
GSI Group - Laser Division JK300HP/JK300P/JK125P Pre-installation and User Manual Issue 2.0 9.14 Bulb Replacement Procedure Personnel authorised to Maintenance Level 1 can carry out this procedure. 9.14.1 Materials Part Required Part Number Bulb 24V 2.6W 640000821 Tools/Equipment Consumables Bulb Extraction Tool... -
Page 167: Bendlock Assembly
GSI Group - Laser Division JK300HP/JK300P/JK125P Issue 2.0 Pre-installation and User Manual 9.15 Bendlock Assembly The Bendlock Assembly is available for Output Fibre Termination on PIPA Fibres used in robot applications. 9.15.1 Assembly Instructions 1. Fit the two Bendlock 2. Remove Locator Screw adaptors using the 4 M3 screws 3. -
Page 168: Pointing Diode Replacement
GSI Group - Laser Division JK300HP/JK300P/JK125P Pre-installation and User Manual Issue 2.0 9.16 Pointing Diode Replacement Personnel authorised to Maintenance Level 2 can carry out this procedure. 9.16.1 Materials Part Required Part Number Pointing Diode Assembly PC120150X Tools/Equipment Consumables Standard Tool Kit Door key 9.16.2 Replacement Procedure... - Page 169 GSI Group - Laser Division JK300HP/JK300P/JK125P Issue 2.0 Pre-installation and User Manual Refer to Figure 32 for item identification. Step Action WARNING ELECTRIC SHOCK HAZARDS EXIST. ELECTRIC SHOCK CAN CAUSE SERIOUS OR FATAL INJURY. Removal Procedure Ensure the Power is switched OFF.
-
Page 170: Alignment Procedure
GSI Group - Laser Division JK300HP/JK300P/JK125P Pre-installation and User Manual Issue 2.0 9.16.3 Alignment Procedure 4 (3 off) 2 (3 off) 3 (4 off) Figure 33 – Pointing Diode Part No: 1EA300E01 Page 156 of 172 Petitioners Canadian Solar Inc. and Canadian Solar (USA) Inc. - Page 171 GSI Group - Laser Division JK300HP/JK300P/JK125P Issue 2.0 Pre-installation and User Manual Refer to Figure 33 for item identification. Step Action WARNING ELECTRIC SHOCK HAZARDS EXIST. ELECTRIC SHOCK CAN CAUSE SERIOUS OR FATAL INJURY. Turn the laser mains isolator ON.
- Page 172 GSI Group - Laser Division JK300HP/JK300P/JK125P Pre-installation and User Manual Issue 2.0 Intentionally blank Part No: 1EA300E01 Page 158 of 172 Petitioners Canadian Solar Inc. and Canadian Solar (USA) Inc. Ex. 1025, p. 158...
-
Page 173: Laser Processing
GSI Group - Laser Division JK300HP/JK300P/JK125P Issue 2.0 Pre-installation and User Manual 10. Laser Processing 10.1 Overview This is a generic overview of laser processing and is not specific to the JK300HP/JK300P/125P lasers. Note Setting up a Laser process is an involved process. This section is for guidance only and is not intended for use without reference to Technical Instruction. -
Page 174: Pulse Energy
GSI Group - Laser Division JK300HP/JK300P/JK125P Pre-installation and User Manual Issue 2.0 Figure 34 - Basic laser pulse and shaped pulse The basic laser pulse from the pulsed laser is a rectangular pulse. Often the single sector standard pulse is quite adequate when welding standard ferrous alloys without any coating or carrying out standard pulsed YAG cutting applications. -
Page 175: Welding In Continuous Wave Mode
GSI Group - Laser Division JK300HP/JK300P/JK125P Issue 2.0 Pre-installation and User Manual Figure 35 shows the relationship between the welding speed and the frequency for three different percent overlaps. Figure 35 – Welding speed vs repetition rate for different percent overlaps (spot size 0.60mm) -
Page 176: Jigs And Fixtures
GSI Group - Laser Division JK300HP/JK300P/JK125P Pre-installation and User Manual Issue 2.0 Variations in focus position are tolerated more efficiently using a Modulated Beam. When the weld surface varies in distance from the Focus Lens, the use of high Peak Power overcomes the loss of weld penetration due to the lower intensity in the focus spot. -
Page 177: Fume And Spatter Control
GSI Group - Laser Division JK300HP/JK300P/JK125P Issue 2.0 Pre-installation and User Manual Under normal conditions, adequate gas shielding can be provided via a pipe to the weld area around the beam/material interaction point. Gas flow should typically be 10 - 20 litres/minute Argon. -
Page 178: Material Welding
However, some materials require material addition to give high quality welds with acceptable properties. At the high power level of the JK300HP/JK300P/125P Series Laser, welding with material addition is readily achievable although welding speeds are generally lower than with autogenous welding. -
Page 179: Cutting In Modulation Mode
GSI Group - Laser Division JK300HP/JK300P/JK125P Issue 2.0 Pre-installation and User Manual Increased focused spot size increases the width of cut. Cutting performance is normally presented in the form of material thickness versus cutting speed graphs. 10.10 Cutting in Modulation Mode When cutting, the square wave pulsed output of the Laser is used to improve the piercing speed. -
Page 180: Cutting Different Materials
It is essential to ensure that the cutting nozzle and gas system are adequate to handle such high pressures safely. 10.14 Cutting Different Materials A wide range of metallic materials can be cut successfully using the JK300HP/JK300P/125P Series Laser. For processing guidelines, please refer to GSI Group - Laser Division. -
Page 181: Cover Slide Damage
GSI Group - Laser Division JK300HP/JK300P/JK125P Issue 2.0 Pre-installation and User Manual 10.15.4 Cover Slide Damage The use of a short focal length lens is not advisable when welding or cutting materials that generate high levels of fume and spatter. Fume and spatter can impinge on the Cover Slide below the Focusing Lens and cause a reduction in Laser beam transmission through it. - Page 182 GSI Group - Laser Division JK300HP/JK300P/JK125P Pre-installation and User Manual Issue 2.0 of 10-20 litres/minute when using a pipe or 30-50 litres/minute when using a Gas Shoe. • Ineffective shielding does not necessarily indicate insufficient gas flow rate. Excessive gas flow rate can cause turbulence in the weld area and result in entrapment of air that leads to oxidation.
-
Page 183: Cutting
GSI Group - Laser Division JK300HP/JK300P/JK125P Issue 2.0 Pre-installation and User Manual possible that, in a butt weld, no weld will be produced, as the focused Laser beam will pass through the joint gap without melting the material. Figure 37 – Undercut Overlap Weld... -
Page 184: Optimisation
GSI Group - Laser Division JK300HP/JK300P/JK125P Pre-installation and User Manual Issue 2.0 pressure is ~8 bar, although the use of significantly higher pressures may be needed if cuts free from dross are required. • Switch on assist gas prior to commencement of cutting to allow purging of the gas delivery system and establish steady state flow conditions. -
Page 185: Spares
GSI Group - Laser Division JK300HP/JK300P/JK125P Issue 2.0 Pre-installation and User Manual 11. Spares Refer to the Spares Navigator CD for all consumable spares information. Part No: 1EA300E01 Page 171 of 172 Petitioners Canadian Solar Inc. and Canadian Solar (USA) Inc. - Page 186 GSI Group - Laser Division JK300HP/JK300P/JK125P Pre-installation and User Manual Issue 2.0 Intentionally blank Part No: 1EA300E01 Page 172 of 172 Petitioners Canadian Solar Inc. and Canadian Solar (USA) Inc. Ex. 1025, p. 172...
Need help?
Do you have a question about the JK300HP and is the answer not in the manual?
Questions and answers
Error 9022 glovebox directory could not be connecte