Table of Contents
Advertisement
Advertisement
Table of Contents

Related Manuals for Maxcom MM918 STRONG DualSIM


Summary of Contents for Maxcom MM918 STRONG DualSIM
- Page 1 User Manual Mobile phone GSM/ WCDMA/LTE Maxcom MM918 STRONG DualSIM...
- Page 3 If technical assistance is required, we recommend contacting the helpline: (+48) 32 325 07 00 lub serwis@maxcom.pl Our website: http://www.maxcom.pl/ The Set Contents: GSM Telephone Charger USB cable Batteries Headset Screwdriver User Manual Warranty card It is advisable to keep the packaging, it may be useful for possible transport.
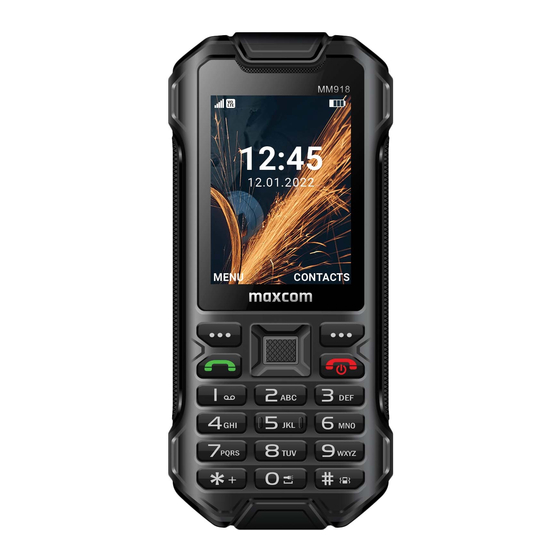
- Page 4 Key features: 2.4'' colour display IP 68 - resistant to water, dust and mud MicroSD memory card slot Speaker phone Phonebook - 500 entries Sending and receiving SMS and MMS messages function Internet Speed dial - 8 numbers Call time display 2MPix camera Loud ringtone FM radio...
-
Page 5: Table Of Contents
Contents: 1. Safety Guidelines ..............8 2. Installation of components .............9 SIM card and battery installation ........10 Charging the battery ............13 3. Phone description ..............15 4. Use the phone ..............19 Switching On the Phone ........... 19 Switching Off the Phone ........... 19 Standby Mode .............. - Page 6 13.3.2 Outbox ................33 13.3.3 Drafts ................33 13.3.4 Items sent..............33 13.4 Deleting messages ............34 13.5 Message settings ............. 34 13.5.1 SMS ................34 13.5.2 MMS................34 13.6 Voicemail ................35 14. Multimedia ................35 14.1 Picture browser ..............35 14.2 Camera ................
- Page 7 22.2.3 Call forwarding .............. 45 22.2.4 Waiting call ..............46 22.2.5 Call blocking ..............47 22.2.6 Hiding the number ............47 22.2.7 Other Settings ............... 47 22.3 Display settings ..............48 22.4 Font size settings ............. 48 22.5 Security settings ............... 48 22.5.1 PIN Code...............
-
Page 8: Safety Guidelines
1. Safety Guidelines Reading these guidelines presented below will minimize the risk of misusing the phone. • Do not use the phone in areas where it is prohibited, e.g. petrol stations or hospitals. Using the phone in such places can expose others to danger. -
Page 9: Installation Of Components
• Never repair or try to modify your phone by your own. Any faults should be repired by a qualified service. • Use only original batteries and chargers. Use of any unauthorized accessories could damage your phone or might cause an explosion. •... -
Page 10: Sim Card And Battery Installation
SIM card and battery installation Make sure the phone is switched off before inserting the SIM card. The charger should be disconnected. To insert the SIM card, first remove the battery (if inserted) as shown and described. • When your phone is switched off, turn the phone face down, then use a screwdriver to unscrew the 2 screws and gently pull off the battery cover by levering it upwards. - Page 11 • Remove the battery while lifting it up with your fingernail. • Insert the SIM Card into the „SIM1 SLOT” with the metal contact pins facing downwards. • Insert the SIM card into the socket with the metal contacts facing downwards and the notch as shown in the picture.
- Page 12 • As on option, install a MicroSD Memory Card. To do it, slide the pin to the LEFT, and next lift the pin. Insert MicroSD Card so its contact pins touch the telephone contacts, and slide the pin to the RIGHT. Be careful while using the memory card particularly while installing and uninstalling the card.
-
Page 13: Charging The Battery
• After inserting the battery, place the battery cover on the phone and tighten the 2 screws slightly. Charging the battery Note! Use only the original battery included in the set. Using unauthorized batteries could damage your phone and will void the Manufacturer’s warranty. - Page 14 3. When the battery is fully charged (battery indicator bars will stop blinking), unplug the charger from the power outlet and from the phone. Note: o Make sure the battery is correctly installed before starting the charging process. o Never remove the battery while charging - doing so could damage the phone.
-
Page 15: Phone Description
3. Phone description... - Page 17 Red receiver Speaker. Display # Key OK Key Navigation key Camera (up/down/left/right) Left function key Keyboard flash (LFK) Screw the Green receiver battery cover Numeric keypad Phone loop Ringtone Torch volume Sockets for Right function key charging, (RFK) headphones (under the seal)
- Page 18 Basic keys functions Function Short press: return to standby; end call. reciver Long press: switch off/on the phone Green Short press: call connection; in stand-by Receiver mode access to call log Shortcut to Audio Down Shortcut to DUAL SIM settings Left Shortcut to Write a message Right...
-
Page 19: Use The Phone
4. Use the phone Switching On the Phone Press and hold the red receiver key to switch on your phone. The battery cover must be properly closed and tightened. If a message asking for the PIN code appears, you must enter your PIN. You can find it in the SIM card starter set. - Page 20 1. Icons to show functions: No SIM Network signal card/SIM card error No services No signal/ VoLTE service LTE coverage active 3G/2G Aeroplane 3G/ G coverage mode New text Missed Phone message Call...
-
Page 21: Menu Operation
Vibration only (meeting Silent Mode on profile) Active profile Roaming "Outside active Alarm Clock Call forwarding Activated enabled SD card Bluetooth inserted enabled Headphones Battery close connected to empty Battery fully Battery charged discharged * The icon also Icons might vary depending appears in domestic on the software version roaming if the subscriber... -
Page 22: Keylock
6. Keylock To lock/unlock the keypad press MENU (LFK) and then It is not necessary to unlock the keys to answer the call. NOTE: The keypad can be manually locked when the display is in Standby mode. Automatic keylock To set the automatic keypad lock, select: MENU>Settings>Display>Auto keylock Set the time after which the keypad locks automatically. -
Page 23: Phonebook
abc - lower case letters without Polish characters ABC - capital letters without Polish characters 123 - digits 8. Phonebook Saving contacts You can save a new contact in one of several ways: In standby mode, select the desired number >... -
Page 24: Deleting Contacts
3. The phone will go to the names starting with this character. Use UP/DOWN keys to scroll up and down in the list of Contacts. Deleting contacts 8.3.1 Deleting a single contact If you want to delete a Contact from the phone or the SIM card, do as follows: 1. -
Page 25: Copying And Moving Contacts
Copying and moving contacts To copy/transfer contacts from the SIM card (SIM1 or SIM2) to the phone, or from the phone to SIM1 or SIM2, do as follows: 1. Select: MENU-> Phonebook-> Options-> Import/Export-> Copy, then select from where you want to copy the contacts (from phone, SIM1 or SIM2) and to where (to phone, to SIM1, to SIM2). -
Page 26: Memory Status
number to • Press OK • Enter a number or select a number from the contact list by pressing LFK>OK • Press OK again to save. Memory status This option allows you to check the memory status of SIM1, SIM2 and the phone. In MENU select >Phonebook>Options>Other>Memory status 9. -
Page 27: Dialling A Number From Call Log
If you want to quickly navigate to a contact starting with, for example, the letter U, press the 8 key twice, using the UP/DOWN keys, highlight the desired contact and press the green receiver. Dialling a number from Call Log When the phone is on standby mode, press the green receiver to access the list of recent calls. -
Page 28: Call Log
- Connect to headset: can be switched to talk via Bluetooth headset -Add new connection: allows another connection to be established - Hold: suspends the connection - Start recording: starts the recording of the call - Microphone off/on -Volume: allows you to increase or decrease the call volume. -
Page 29: Text (Sms) & Multi-Media (Mms) Messages
Note: To view the call log, simply press the green receiver while being on standby mode. Coloured symbols indicate the type of connection Dialled numbers (green) Received calls (blue) Missed calls (red) Rejected calls (grey) To display additional options, select LFK: - Details, displays call details - Call, calls the number - Write a message, allows you to send an SMS or... -
Page 30: Creating And Sending Sms
The telephone allows you to send and receive text and multimedia messages. When the icon is displayed on the screen, it means that there is at least one unread message. To enter the SMS MENU , select Menu>Messages>Inbox in standby mode. When the inbox is full, a message will appear that the message memory is full. -
Page 31: Reading And Responding
To save the message, press Options>Save as draft (the message will be saved in Draft. draft(the message will be saved in the Drafts folder). Press Options>Add to insert information about a contact stored in the Phonebook, - add an emoticon, insert a template, add a photo, subject, audio file, etc. -
Page 32: Message Boxes
13.3 Message boxes 13.3.1 Inbox It lists received messages, sorted by receipt date. Unread Unread message message (stored in (saved on phone SIM1 or SIM2) memory) Read Unread message message (stored in (saved on phone SIM1 or SIM2) memory) Unread MMS Read MMS message message (pink) -
Page 33: Outbox
- Lock (protects the message from deletion). To block, the message must be stored in the phone's memory - Move (to move to SIM card memory or to phone memory) - Select (e.g. to delete more messages) - Sort (sorts by date, contacts, MMS topics, MMS/SMS types) - Add sender to contact (allows you to save a number in your Phonebook) -
Page 34: Deleting Messages
Use the UP and DOWN keys to navigate around in the inbox. 13.4 Deleting messages To delete a selected message, enter options and select "Delete". 13.5 Message settings Go to MENU to: Messages> >Settings, then use the Left/Right keys to select settings. 13.5.1 SMS •... -
Page 35: Voicemail
- Sending options: allows you to set the validity period of delivery reports, anonymous sending. - Memory settings: allows you to choose where your messages are stored - Play a sound: enables/disables playing sounds -Restore default - restores MMS settings by default 13.6 Voicemail The voice mail is the operator’s service making it... -
Page 36: Camera
Press LFK to display additional options The phone supports the following file formats: png, jpg, gif 14.2 Camera The phone has the ability to take photos and record video. To activate the camera, select in MENU: Multimedia>Camera. When you turn you'll see an image on the screen. The camera is equipped with digital zoom (magnification). -
Page 37: Video Player
To pause recording, also use the OK key. To stop recording, press LFK. To select other options use navigation keys Left/Right/Up/Down In order to use video camera, installation of MicroSD Card is recommend (it is not included in the set); you also must select to save files on the memory card Options >Settings>... - Page 38 NOTE: The quality of reception depends on where you are. Radio station reception is affected by a number of external factors that can cause poor reception quality, but this is not grounds for a complaint about the goods. To switch on the radio, select MENU Multimedia> FM Radio.
-
Page 39: Voice Recorder
14.6 Voice Recorder Music or ambient sounds can be recorded. - Select in the MENU: Multimedia>Dictaphone - To start or pause recording, press the OK key. - To stop recording, select the right function key. - Select Options to make the appropriate settings for the voice recorder. -
Page 40: Calculator
17.1 Calculator To activate the calculator, in MENU select: Tools >Calculator. The following mathematical operations are possible: addition, subtraction, multiplication and division. Enter the first number using the 0-9 keys, then use UP/DOWN to select the action and enter the second number and press Ok again. -
Page 41: Bluetooth
17.3 Bluetooth Bluetooth connectivity gives you the opportunity to send and receive files. You can also connect other devices such as wireless headset. Select in the MENU: Tools> Bluetooth In the Bluetooth Menu you can turn Bluetooth on, change visibility, see paired devices, change the name of your device, preferred storage for file transfers 17.4 SIM services... -
Page 42: Internet
To move between days use the Up/Down/Right/Left keys. Press LFK (Options) to display additional options: - Add a task: you can enter a subject, change the date, time, set an alarm, and change the repeat mode (press the centre OK key to change). - View tasks: allows you to see the tasks set for the day. -
Page 43: Settings
your needs. Available profiles: Normal, Quiet, Meeting, Outside, You can edit the Normal profile by selecting: Options> Settings you can change: - Ringtone (separate for SIM1/SIM2) - Ringtone volume - Ringtone type (ringing only, vibration only, etc.) - Other sounds (key sounds, low battery alert, phone switch-off sound) In Standby mode, press and hold the # key to activate the meeting profile, hold the # key again to... -
Page 44: Language
the phone does not obtain data from the GSM network or auto update is disabled). 22.1.2 Language MENU>Settings>Telephone>Language Allows you to change the phone's menu language. If you accidentally set a foreign language to change to the correct one, in Standby mode press OK : - select the icon >OK - OK... -
Page 45: Choosing Web Browser
22.1.6 Choosing web browser You can set your default web browser 22.1.7 Restore factory setting With this option, you can restore the factory settings. Select in the MENU: Settings>Telephone>Restore settings. factory settings, and then enter the security password. Finally, confirm with the green reviver key. The default security password is: 1234 22.2 Call settings MENU>Settings>Calls... -
Page 46: Waiting Call
might direct incoming calls to be forwarded to voicemail or to any other number. 1. To set up the Call Forwarding service, go to MENU: Settings>Calls>Transferring a call 2. Then select when you want to transfer calls from the available list: Unconditional (Forward all incoming calls to the selected number), When busy (Forwarding incoming calls when you... -
Page 47: Call Blocking
will be signaled by the signal of the second call. You can hold the current call and answer another call 22.2.5 Call blocking It is a network service. If your operator offers such a service, configuration will be required. This feature allows you to restrict certain types of calls. -
Page 48: Display Settings
• Signalling the call time • Automatic redialling when busy. • Vibration when it reaches the number. • SMS response when a call is rejected • Answer with any key • Automatic call recording 22.3 Display settings MENU>Settings> Display You can set: •... -
Page 49: Change Pin2
22.5.2 Change PIN2 You can change the PIN2 code if you have one. Not all operators make it available. 22.5.3 Phone lock You can enable the phone lock. You will have to enter the lock code when switching on the phone. The default code is 1234. -
Page 50: Faq (Troubleshooting)
• GPRS service: allows you to select whether a GPRS connection is to be established • Data roaming: allows you to select whether data connections are to be made while roaming • Preferred SIM: you can choose which card to use for your data connection. - Page 51 “SIM Card in Ensure that the SIM card is correctly place, installed. emergency calls only (112)” “The phone The phone might be switched off; to switch does not work, on the phone, press the power on/off key the phone does (red receiver) for about 3 seconds.
-
Page 52: Conditions Of Use And Safety
Places such as buildings reduce signal strength, therefore you should get closer to a window or relocate to an area not surrounded by many buildings. „What is the It is the service provider’s center number Text Message where all text messages are stored. The Center?”... - Page 53 instructions by manufacturers of implanted medical devices. Users with a heart pacemaker should not carry a telephone in their front chest pockets and they should hold the telephone next to the ear opposite to the medical device in order to minimize the risk of interference; •...
-
Page 54: Terms Of Warranty
Long exposure to loud sounds might damage your hearing. Listen to music at a moderate level and do not hold the device next to your ear while using speakers. Prior to hooking the earpiece, always lower the volume. 25. Terms of Warranty The phone is covered under the warranty;... -
Page 55: Protect Your Environment
If the user observes significant loss of efficiency, it is necessary to buy a new battery. Use only and exclusively the batteries recommended by the manufacturer. Do not leave the charger connected for more than 2- 3 days. Do not store the phone in places where the temperature is too high. -
Page 56: Sar Information
\Note: Note phone is marked in compliance with the European Waste Electrical and Electronic Equipment Directive of 20012/19/EU and the Polish Act on Waste Electrical and Electronic Equipment, and with the symbol of waste electricals. Such a symbol tells us that the device, after use, must not be disposed of in the normal household waste stream. - Page 57 Specific Absorption Rate (SAR) – actual absorption. As recommended by ICNIRP, the border value of SAR for portable equipment is 2,0 watts per kilogram (W/kg). SAR value is determined at the maximum transmit power; the actual SAR value while the device is working is usually lower than the indicated level.
-
Page 58: Technical Data
0.029 0.200 DCS 1800 0.499 1.500 WCDMA Band I 0.559 1.076 WCDMA Band VIII 0.278 1.232 LTE Band 1 0.145 1.021 LTE Band 3 0.212 1.148 LTE Band 7 0.678 1.309 LTE Band 8 0.424 0.703 LTE Band 20 0.312 0.846 LTE Band 38 Limit... - Page 59 Karta SIM (Dual) Nano SIM+ Nano SIM 2.4” TFT,QVGA 240x320px Display Camera 2Mpix Bluetooth Batteries 2500 mAh Standby time: Up to approx. 360h* Call time: up to approx. 24 h* Weight 113 g size: 130.8x58.9x19.9mm *depending on conditions and signal strength of the mobile network signal...
-
Page 60: Frequency Ranges And Maximum Power Equipment
29.1 Frequency ranges and maximum power equipment Maximum emitted System Frequency range power EGSM 900 880MHz 915MHz 33.15dBm DCS 1800 1710MHz 1785MHz 29.15dBm WCDMA Band I 1920MHz 1980MHz 22.28dBm WCDMA Band VIII 880MHz 915MHz 22.45dBm LTE Band 1 1920MHz 1980MHz 22.65dBm LTE Band 3 1710MHz 1785MHz... -
Page 61: Technical Data
29.2 Technical data The external power supply for the phone complies with Commission Regulation (EU) 2019/1782 Power adapter Model identifier LM-UV050100SM Input voltage AC 100-240V AC input frequency 50/60Hz Output voltage DC 5.0V Output current 1.0 A Output Power Capacity: Average efficiency during 74.68%(230V) operation... -
Page 62: Simplified Eu Declaration Of Conformity
30. SIMPLIFIED EU DECLARATION OF CONFORMITY Maxcom SA is stating hereby that the radio device type: Mobile phone MAXCOM MM918 complies with: Directive 2014/53/EU RED of 16 April 2014 (Radio Equipment Directive) - radio equipment directive Directive 2011/65/EU of 8 June 2011 (Restriction of... - Page 64 SIM card. The right is reserved to make changes to the product and its functions without prior notice. Technical assistance, - number: 32 325 07 00 or email serwis@maxcom.pl MAXCOM S.A. 43-100 Tychy, ul Towarowa 23a POLAND tel.
Need help?
Do you have a question about the MM918 STRONG DualSIM and is the answer not in the manual?
Questions and answers