Table of Contents
Advertisement
Advertisement
Table of Contents

Related Manuals for Maxcom MM916


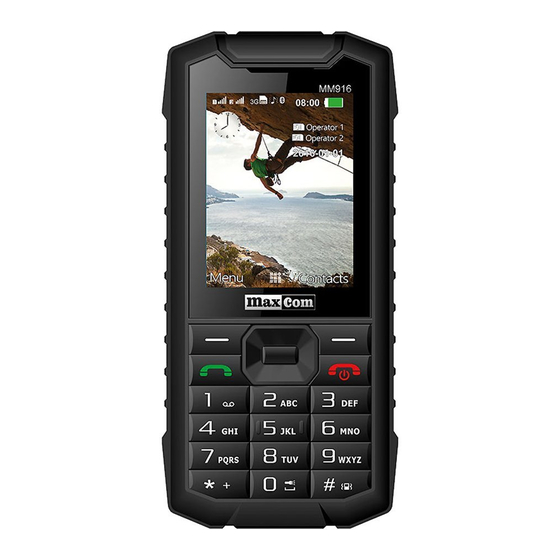
Summary of Contents for Maxcom MM916
- Page 1 User Manual GSM/3G Mobile Telephone Maxcom MM916 DualSIM...
- Page 3 If any technical assistance is required, call the hotline at (+48) 32 325 07 00 or e-mail us at: serwis@maxcom.pl Our website: http://www.maxcom.pl/ The set includes: GSM Telephone Charger USB Cable Battery Headset 2 screws, screwdriver User Manual Warranty Card Keeping the original package is recommended as it might be used for transport.
- Page 4 Mobile Telephone GSM: 850/900/1800/1900MHz WCDMA: 900/2100MHz Color LCD 2,4’ IP 67- water, dust, and mud-resistant MicroSD Memory Card Socket Speakerphone Option Phonebook – 500 entries Text and multimedia sending option Speed dialing- 8 numbers Call Duration Display Camera 2MPix Lound Ringtone Radio FM Calendar Calculator...
-
Page 5: Table Of Contents
Contents 1. Safety Guidelines .............. 8 2. Getting Started ..............9 SIM Card and Battery Installation .......10 Charging Battery ............14 3. Phone Description ............16 4. Using the Phone ...............19 Switching On the Phone ..........19 Switching Off the Phone ..........19 Idle Mode ..............19 5. - Page 6 10.1 How to Create and Send Message ......31 10.2 Reading & Replying to Messages ......32 10.3 Message Boxes ............33 10.3.1 Inbox ..............33 10.3.2 Sentbox ..............33 10.3.3 Drafts ..............33 10.3.4 Outbox ..............33 10.3.5 Archive ..............33 10.4 How to Delete Message ..........
- Page 7 16. Network Service ............46 17. Settings .................47 17.1 Switching SIM Cards ..........47 17.2 Dual SIM Card Settings ..........47 17.3 Telephone Settings ............47 17.3.1 Time and Date ............47 17.3.2 Auto Powering On/Off ..........48 17.3.3 Language ..............48 17.3.4 LCD .................48 17.3.5 Motifs ..............49 17.3.6 Welcome Note ............49 17.3.7 Shortcuts ..............49 17.3.8 Dedicated Keys ............50...
-
Page 8: Safety Guidelines
1. Safety Guidelines Reading the guidelines below will minimize the risk of misusing the phone. Never use the phone in any area where the use of mobile phones is prohibited such as refueling points or hospitals. Using mobile phones in such places might expose others to danger. -
Page 9: Getting Started
phone shall be switched off immediately if there is a suspicion of any interference. The phone and its accessories might contain small parts. Keep the phone and its accessories away from children. Never repair nor modify the phone by your own;... -
Page 10: Sim Card And Battery Installation
technologies (might be selected); SIM2 socket serves 2G technology only! 2.1 SIM Card and Battery Installation Prior to inserting the SIM Card, make sure the phone is switched off. The charger must be disconnected. To insert the SIM card, first remove the battery following the instructions and illustrations below: When the phone is switched off, place the... - Page 11 If there are no screws on the cover, they will be in the package, next to the screwdriver. Remove the battery, use your fingernail to unsnap, Insert the SIM Card to „SIM1 socket” (socket 3G) (first socket on the left ) so that metal contacts will face downwards and the notch is placed as shown in the illustration below.
- Page 12 As an option, you might install the MicroSD Memory Card. To do so, move the pin to the OPEN position and then move it upwards. Insert the MicroSD so that its contact pins will face the telephone contacts, and move the pin to the LOCK position.
- Page 13 Be careful while installing and uninstalling the card. Some memory cards must be formatted on a computer before the first use. Make backup copies of data stored on cards used in other devices, if you use SD cards! Misuse or other factors might cause damage or loss of data stored on the cards.
-
Page 14: Charging Battery
After inserting the battery, 2 screws should be placed or, if such a need arises, pushed into the battery cover openings; then, place the battery cover onto the phone, and screw 2 screws, slightly pressing. 2.2 Charging Battery Note! Use only the original battery included in the set. - Page 15 Note: o Prior to charging the phone, make sure the battery is properly installed. o Never remove the battery while charging – doing so might damage the phone. o If battery voltage is too low for the phone to properly function, there will be a message on the LCD that the phone will be automatically switched off, and then the phone will be automatically switched off.
-
Page 16: Phone Description
o If the battery is totally discharged (due to leaving the radio or the torch on) you should wait several minutes after plugging in the charger for the charging icon to appear. 3. Phone Description... - Page 17 Name Description Transfers sound to the ear Speakerphone while talking Confirmation/Selection Key OK/Select Lets you enter the menu Menu/Left and serves other options Functional Key (LFK) Confirms the number you Green Receiver wish to dial and works as an OK key...
- Page 18 Used to dial numbers and Keypad type messages Additional character „+” Key * A spot used to connect a USB port and headset (jack) and headset port charger (USB) Navigation key/ Used to navigate in joystick MENU „Phonebook”/ Lets you enter the Right Functional Phonebook and serves other options (RFK)
-
Page 19: Using The Phone
4. Using the Phone 4.1 Switching On the Phone Press and hold „red receiver”, to switch on the phone. The battery cover must be properly locked and screwed. If there is a prompt for PIN on the LCD, you must enter it. You will find the PIN in the SIM Card starter kit. -
Page 20: Other Options
SIM2 Range Time Battery Indicator Range Service provider Watch Data Transfer Technology Date Current Bluetooth Profile Description Desctription 1. Other options: Unread text or multimedia text notification Silent Mode Network Connection Technology... -
Page 21: Menu
Alarm Clock Enabled 5. MENU To enter MENU, in Idle mode (desktop visible) press the LFK (3). To navigate in MENU you should use the navigation key (joystick) (8). To confirm a selected option, press the LFK (3). To return (go back) to the previous MENU press the RFK (9). -
Page 22: How To View Contacts
3. You can add a new Contact directly to the Phonebook. In order to do so, use the LFK (3) to enter the Phonebook. Select „New Contact”, select the location where you want to save it, and enter the name and the number. Press „OK” (2). 6.2 How to View Contacts Method 1 1. -
Page 23: How To Delete Contacts
6.3 How to Delete Contacts If you want to delete the Contact from the phone or SIM Card, do as follows: 1. Select: MENU->Phonebook, 2. To delete a single Contact, mark it->press Options, and then select Delete. 3. To delete several Contacts, press Options, then Delete More. -
Page 24: Sending Vcard
6.5 Sending Vcard In order to do so, select: MENU->Phonebook- >Mark Selected Contact-> Options->Send VCard->Select Format to Send Vcard: SMS, MMS, E-mail & Bluetooth. Remember: to email a Vcard, the email must be property configured according to the User’s email service provider’s recommendations. -
Page 25: Preferred Memory
6.6.3 Preferred Memory This option lets you select which memory the phone should use to get and display Contacts in the Phonebook. For example, if you select the option „All”, the Phonebook will display Contacts stored on the SIM1, SIM2 Cards and in the phone’s memory. -
Page 26: Dialing Number From Phonebook
7.2 Dialing Number from Phonebook In Idle mode, press the RFK (9) or enter the Phonebook: MENU->Phonebook and use navigation key (8) to select the number. For example, If you want to go to the Contact that starts with U, press the key 8 twice. To connect with the selected number, press „green receiver”... -
Page 27: Speakerphone Mode
To mute the incoming phone ringtone, press Mute (RFK). 8.1 Speakerphone Mode While talking, press „OK”, the symbol enable the speakerphone. Follow the very same steps to switch the speaker off, now click 9. Call Log 9.1 Phone Call History To enter phone call history, select: Menu->Call Log->Phone Call History. -
Page 28: Phone Call Settings
9.2 Phone Call Settings Select: Menu->Call Log->Phone Call Settings. Then select either SIM1 or SIM2 Card to change settings for each Card or select advanced settings. 9.2.1 Number Withhold It is a network service. If your provider offers such service, configuration will be required. This feature lets you withhold your number while calling. -
Page 29: Call Barring
After entering this option, you can check availability status and decide whether you want to enable such a feature. If Call Waiting is enabled, and the User is talking on the phone, he/she will be notified about any other incoming phone call by a special beep of a second call. - Page 30 there are numbers added to the black list, every incoming phone call from a blacklisted number will be automatically rejected. Auto Re-Dial: if the outgoing phone call is missed or rejected, the number is automatically redialed. For this option to work, the person you are calling can’t have her/his voicemail enabled nor can’t use any other service returning phone calls to the service provider.
-
Page 31: Text Messages
when the headset is on or when there is an option to answer phone call by pressing any key. 10. Text Messages You can send and receive text messages and multimedia messages using your phone. When there is an icon on the LCD, you have at least one unread text message. -
Page 32: Reading & Replying To Messages
Changing the Text Input Method: To change the text input method (digits, capital or small characters) press the key„#”,if you want to enter a symbol, press the key„ ”. 3. Sending Messages: after typing your message (and enclosing attachments, if any) press: Options, and then Send, and then enter the number or select the number from the Phonebook. -
Page 33: Message Boxes
Connect: calls the sender, Delete: deletes the message, Forward: lets you forward the message to another recipient, Advanced, etc. 10.3 Message Boxes 10.3.1 Inbox Lists received messages in order they have been received. 10.3.2 Sentbox Lists sent messages. 10.3.3 Drafts Lists unfinished and unsent messages that have been not completed by the User. -
Page 34: How To Delete Message
All Messages from all boxes. 10.5 E-mail Select: Menu->Messages-> E-mail. In order to receive e-mail on the MM916 telephone, a configuration of email account is required according to guidelines by the User’s email service provider. These are options for advanced users. -
Page 35: Templates
weather, location, or road conditions in a particular area. You can learn more about available subjects and their numbers from the service provider. 10.7 Templates Select: Menu->Messages->Templates. In Templates, there are some ready-to-go messages to be sent when the User has no time to reply, or he/she rejects a phone call and an auto response message is sent instead. - Page 36 - Voicemail – lets you enter the service provider voicemail number – press and hold the key „1” for the phone to get automatically connected with voicemail. - Common Settings: Delivery Report: you can set the phone to receive feedback message whether your text message has been delivered to a recipient (network service).
-
Page 37: Voicemail
10.9 Voicemail Voicemail is a network service that allows callers to leave a voice message when you cannot answer the phone call. To learn more, contact your service provider. If you want to change your voicemail number, select: MENU->Messages- >Messages Settings-> SMS->Select SIM1or SIM2->Voicemail->... -
Page 38: Photo Viewer
„down” to switch to Camera. 3) When the video camera is enabled, the icon will appear at the bottom, in the center of the LCD. Press OK (2) to start recording a video or use the navigation key „up” to start recording. 4) Use the navigation key „right”... -
Page 39: Photo Editor
The phone supports video files 3gp, avi (filename extensions). This player is not complicated, therefore, if some additional codecs to compress files are necessary, the video might not be played. To navigate in the Player’s menu, use navigation key (8), LFK (3) and RFK (9). 11.4 Photo Editor The editor has two tools: 1) Photo Editor –... -
Page 40: Radio Fm
„down” – play/pause, „right” – play next file, „left” play previous file) 11.6 Radio FM The phone as a built-in radio FM. To use it, a headset is not necessary but tuning might be impossible as the headset doubles as an antenna. -
Page 41: File Manager
Navigation Key OK/Select (2):switch on/off recording the station to audio file. 12. File Manager Select: MENU->File Manager. Then use joystick (8) (navigation key) and the key OK/Select (2) to move in the phone memory or Card memory. File Manager lets you view and manage the folder and file structure on the phone and MicroSD Memory Card. -
Page 42: Tools
Highlight/Highlight More – select to mark one or more files/folders, 13. Tools 13.1 Alarm Clock This option lets you set five independent alarm clocks in the phone. To switch on alarm clock, go to MENU->Tools->Alarm. Select right alarm clock and press Edit or the key OK. -
Page 43: Notebook
13.6 Phone Synchronization This option is used to synchronize Contacts between MM916 telephones. Note! There is no possibility to synchronize the phone with other models. 13.7 Torch This option lets you switch on/off the torch that is located at the top of the phone. -
Page 44: Profiles
14. Profiles Select: Menu-> Profiles. The User has five profiles to choose from: General, Silent, Meeting, Outdoors, My Own. They vary by the alert type, ringtone type, and volume of each notification (connections, messages, warnings, etc). To select a profile, use the navigation key (8) and confirmation key (2). -
Page 45: Unit Converter
15.2 Unit Converter The converter is used to convert units of mass and length, for example: Km Mile or Kg Ounce. 15.3 Currency Converter After entering the exchange rate, you can convert local currency into foreign currency. 15.4 Stopwatch The phone is equipped in two kinds of a stopwatch: Standard–... -
Page 46: Answer Machine
15.6 Answer Machine The phone has an answer machine. Select: Menu->Others>Ans.Machine. To configure the tool, go to Settings and use the navigation key (8) and LFK and RFK to set parameters of your choice and the answer machine range. You can record conversations on the MicroSD Card („answer machine/message folder) as a*.wav file. -
Page 47: Settings
STK Service – service by the service provider; it is simple service providing information about weather, location, world news, etc. For network news, additional charge might apply. 17. Settings 17.1 Switching SIM Cards The service lets you set either automatic or manual selection of SIM cards. -
Page 48: Auto Powering On/Off
manually. This option lets you select a time zone, date & time format, and summer time. 17.3.2 Auto Powering On/Off Select: MENU->Settings->Phone Settings- >Plan Auto Power On/Off This option lets you set time for the phone to automatically switch on or off. 17.3.3 Language Lets you update telephone menu language. -
Page 49: Motifs
- Animation for switching on/off the telephone, - Show date/time, - Type of watch, - Backlit (its time and brightness). MENU-> Settings-> Phone Settings-> LCD 17.3.5 Motifs There are 3 telephone menu Motifs for the User to select from. Select: Motif 1, Motif 2 or Motif 3. MENU->... -
Page 50: Dedicated Keys
Shortcuts are assumed to be located on the key „down”; they might, however, be assigned to the joystick key (see 17.3.8). 17.3.8 Dedicated Keys This option lets you set the function of shortcut to the application. While In Idle mode (when the desktop is displayed, the home screen) press the dedicated key (joystick) - „Up”... -
Page 51: Network Settings
This option logs out both SIM cards which is useful while for example travelling by plane. 17.4 Network Settings To go to Options, select: MENU-> Settings> Network Settings. Then, select a SIM1 Card or SIM2 Card, and configure network settings. This option is for more advanced Users. -
Page 52: Blocking Sim1 Lock Or Sim2 Using Pin
17.5.1 Blocking SIM1 Lock or SIM2 Using PIN You can enable/disable/update the PIN for the SIM card. Please remember: not every service provider gives you the possibility to update PIN using the phone options. You are sometimes prompted to type a special code or you have to call customer service. -
Page 53: Bluetooth
17.6.1 Bluetooth Bluetooth technology is used to connect to other devices such as phones, headsets, etc., in order to transfer data packet. The icon on the desktop (at the top of LCD, status bar) notifies you about Bluetooth being enabled. To enable/disable BT select: MENU->... -
Page 54: Data Account
It is the option for advanced Users. 17.6.3 Internet Sharing This option lets you share the Internet available on the MM916 with other devices such as a computer. To share connection, you should: 1) Select: MENU-> Settings-> Connectivity-> Data Account-> Highlight APN you want to... -
Page 55: Restore Factory Settings
-> Options-> Set Default SIM Tethering. 2) Use a USB cable to connect the phone MM916 to a computer and select the option: Router USB on the phone. 3) A computer shall detect the device, and, if needed, install required controllers. -
Page 56: Computer Connection
2) Magic Sushi – delete/reduce number of sushi before the time is up. 19. Computer Connection The phone might be connected to a computer with a USB cable. There are 3 ways to connect the phone with a computer: 1) Mass Memory Device – the phone goes into the phone and the SD Card memory sharing status (if the SD Card is installed in the phone) and makes possible operations on data (transfer,... - Page 57 If you have a prepaid card, make sure there are sufficient funds available on the card to place a phone call. „No SIM card, Make sure the SIM card is installed emergency correctly. calls only(112)” “The phone The phone might be switched off; does not to switch it on, press &...
- Page 58 “Can I make If you are in the area with no an emergency reception of any network, no phone call if there is calls can be made. no reception or if there are If you have no funds available on no funds on the account, emergency call to 112 my account...
-
Page 59: Important Safety Precautions
When is the A fee for making a phone call is „ fee for making charged as soon as a phone call is a phone call made. To learn more about charge charging details, contact your ?” service provider. “How to make Enable Delivery Report option. - Page 60 the side of body with the medical device in order to minimize interference; if there is any suspicion of interference, the phone should be switched off immediately; Never use the phone in hospitals, airplanes, at refueling points and in proximity to flammable materials;...
-
Page 61: Battery Information
Protect your hearing Prolonged exposure to loud sounds might damage your hearing. Listen to music at a moderate level, and do not hold the phone too close to an ear, while using a speakerphone. Lower volume prior to using a headset. - Page 62 Do not keep the phone in excessively hot places. High temperatures might negatively impact both the battery and the phone. Do not use a battery that is clearly damaged. Doing so might cause a short circuit, and might damage the phone. Make sure to install the battery according to polarization.
-
Page 63: Protect Your Environment
23. Protect Your Environment Note: phone follows European Waste Electrical Electronic Equipment Directive 2002/96/EC (WEEE) and the Polish Waste Electrical Electronic Equipment. Such a logo tells us that the equipment, after use, must not be disposed of in the normal waste stream. Note: Never throw your phone &... -
Page 64: Sar Information
24. SAR Information This telephone meets all international standards pertaining to the impact of radio waves. The product both receives and emits radio waves. It is intended meet safety requirements pertaining impact radio waves recommended by international guidelines. These guidelines were developed by the International Commission Non-Ionizing Radiation... - Page 65 – 1 189 1 056 – 1 558 1 11...
Need help?
Do you have a question about the MM916 and is the answer not in the manual?
Questions and answers