Sony HT-RT5 Startup Manual
Hide thumbs
Also See for HT-RT5:
- Operating instructions manual (76 pages) ,
- Startup manual (2 pages) ,
- Operating instructions manual (231 pages)
Advertisement
4-570-119-11(1)
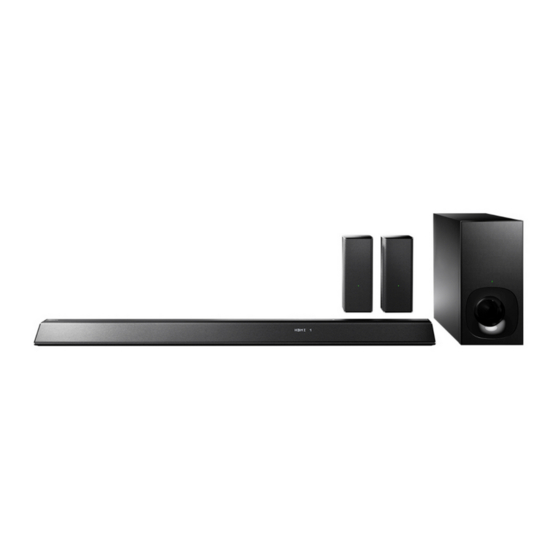
Home Theatre System
Startup Guide
Manuel de démarrage
HT-RT5
Bar Speaker
Barre de haut-parleurs
Subwoofer
Caisson infragrave
• There are the labels on the rear of the each speaker. Make sure to identify "SUR L" (left) and "SUR R" (right) and
place the speakers in the correct places.
• Des étiquettes sont apposées à l'arrière de chaque enceinte. Assurez-vous d'identifier les étiquettes « SUR L »
(gauche) et « SUR R » (droite) et de placer les enceintes aux endroits appropriés.
1
Connecting with a TV
Raccordement à un téléviseur
Is the HDMI input jack on your TV labeled "ARC" ?
La prise d'entrée HDMI de votre téléviseur porte-t-elle une étiquette « ARC »?
YES/OUI
High Speed HDMI cable (supplied)*
Câble HDMI haute vitesse (fourni)*
2
Connecting with other devices
Raccordement à d'autres appareils
High Speed HDMI cable (supplied)*
Câble HDMI haute vitesse (fourni)*
* One High Speed HDMI cable is supplied with this system.
* Un câble HDMI haute vitesse est fourni avec ce système.
Tip
• If another device is connected to the TV, disconnect its High Speed HDMI cable (supplied)* from the TV's HDMI IN jack and reconnect it to the HDMI IN jack of the Bar Speaker.
• To enjoy copy right-protected 4K content, connect the HDCP 2.2-compatible HDMI jack. For details, refer to "Viewing Copyright-protected 4K Content" in the supplied operating instructions.
Conseil
• Si un autre appareil est raccordé au téléviseur, déconnectez le câble HDMI haute vitesse (fourni)* de la prise HDMI IN du téléviseur, puis reconnectez-le à la prise HDMI IN de la barre de haut-parleurs.
• Pour apprécier un contenu 4K protégé par droit d'auteur, effectuez le raccordement à la prise HDMI compatible HDCP 2.2. Pour plus de détails, consultez la section « Visionnement d'un contenu 4K protégé par droit d'auteur » du manuel
d'instructions fourni.
3
Turning on the TV
Mise en marche du téléviseur
Power
Allumé
Supplied accessories
Accessoires fournis
US
Remote control (1)
R03 (size AAA) batteries (2)
FR
Télécommande (1)
Piles R03 (taille AAA) (2)
ES
Calibration mic (1)
IR blaster (1)
Micro d'étalonnage (1)
IR Blaster (1)
Setting up the remote control
Configuration de la télécommande
To mount the Bar Speaker and the surround speakers (SUR L/SUR R) on
a wall
Refer to the supplied operating instructions.
Pour fixer la barre de haut-parleurs et les enceintes ambiophoniques
(SUR L/SUR R) sur un mur
Consultez le manuel d'instructions fourni.
NO/NON
High Speed HDMI
Optical digital cable (not supplied)
cable (supplied)*
Câble numérique optique (non fourni)
Câble HDMI haute
vitesse (fourni)*
Blu-ray Disc™ player, cable
box or satellite box, etc.
Lecteur Blu-ray Disc™,
décodeur de
câblodistribution ou
récepteur satellite, etc.
4
Turning on the system
Mise en marche du système
High Speed HDMI cable (1)
Câble HDMI haute vitesse (1)
Wall mounting brackets (2)
and screws (2)
Supports de fixation murale (2)
et vis (2)
Connect the AC power cords (mains leads) of the Bar Speaker, the subwoofer
and the surround speakers (SUR L/SUR R).
Press / (on/standby) of the remote control.
The front panel display lights up.
Confirm that the on/standby indicator of the subwoofer and surround speakers
(SUR L/SUR R) are lit in green.
When the on/standby indicator of the subwoofer and surround speakers (SUR L/SUR R)
turns green, wireless connection of Bar Speaker, subwoofer and surround speakers (SUR
L/SUR R) is completed. If the wireless connection is not completed, the on/standby
indicator lights up in red. In this case, the wireless transmission is not activated. Refer to
"Wireless sound (Subwoofer/Surround speakers)" of "Troubleshooting" in the supplied
operating instructions.
5
Performing the Easy Setup
Exécution de Régl. facile
Connect the calibration mic to the A.CAL MIC (ECM-AC3) jack on the rear of the
Bar Speaker.
Follow the illustration and place the calibration mic where you would normally sit.
Press HOME on the remote control of this system.
The [Easy Setup] screen appears.
If the [Easy Setup] screen does not appear
Using the remote control of the TV, switch the input setting of the TV to that for the HDMI
input jack the system is connected to.
Press /// to select an item, and then press
Once [Easy Initial Settings are complete.] appears, select [Finish].
The home menu appears.
Tip
• On-screen instructions are displayed in the language you selected in this step.
• You can also select [Easy Setup] from [Setup] on the home menu.
Conseil
• Les instructions à l'écran sont affichées dans la langue que vous avez sélectionnée à cette étape.
• Vous pouvez également sélectionner [Régl. facile] à partir de [Config.] dans le menu d'accueil.
6
Listening to the sound
Écoute du son
INPUT
+/–
Press INPUT repeatedly until the device you want appears in the front panel
display. Then, press +/– repeatedly to adjust the volume.
Listening to the audio of the TV
Select the desired program using the remote control of the TV.
The screen switches to the television broadcast screen and the TV audio is output from
the system.
Adjust the volume pressing +/− on the remote control of the system.
Setup completed! Enjoy!
Configuration terminée!
Appréciez!
SongPal
A dedicated App for this model is available on both Google Play™ and
App Store.
Search for "SongPal" and download the free App to find out more about the convenient features.
Branchez les cordons d'alimentation CA de la barre de haut-parleurs, du caisson
infragrave et des enceintes ambiophoniques (SUR L/SUR R).
Appuyez sur la touche
L'affichage du panneau avant s'allume.
Vérifiez que le témoin de marche/veille du caisson infragrave et des enceintes
ambiophoniques (SUR L/SUR R) s'allume en vert.
Lorsque le témoin de marche/veille du caisson infragrave et des enceintes
ambiophoniques (SUR L/SUR R) s'allume en vert, la connexion sans fil de la barre de
haut-parleurs, du caisson infragrave et des enceintes ambiophoniques (SUR L/SUR R) est
terminée. Si la connexion sans fil n'est pas terminée, le témoin de marche/veille s'allume
en rouge. En pareil cas, la transmission sans fil n'est pas activée. Consultez « Son sans fil
(Caisson infragrave/Enceintes ambiophoniques) » dans la section « Dépannage » du
manuel d'instructions fourni.
, , , ,
HOME
Connectez le micro d'étalonnage à la prise A.CAL MIC (ECM-AC3) à l'arrière de la
barre de haut-parleurs.
Reportez-vous à l'illustration et placez le micro d'étalonnage à l'endroit où vous seriez
normalement assis.
Appuyez sur la touche HOME de la télécommande de ce système.
L'écran [Régl. facile] s'affiche.
Si l'écran [Régl. facile] ne s'affiche pas
En utilisant la télécommande du téléviseur, commutez le réglage d'entrée du téléviseur à
la prise d'entrée HDMI servant à raccorder le système.
to perform Easy Setup.
Appuyez sur /// pour sélectionner un élément, puis appuyez sur
exécuter Régl. facile.
Lorsque [Le Réglage initial facile est alors terminé.] s'affiche, sélectionnez
[Terminer].
Le menu d'accueil s'affiche.
Appuyez plusieurs fois sur INPUT jusqu'à ce que l'appareil souhaité apparaisse
dans l'affichage du panneau avant. Ensuite, appuyez plusieurs fois sur +/– pour
régler le volume.
Écoute de l'audio du téléviseur
Sélectionnez le programme souhaité en utilisant la télécommande du téléviseur.
L'écran passe à l'écran d'émission de télévision et l'audio du téléviseur est reproduit par le
système.
Réglez le volume en appuyant sur la touche +/− de la télécommande du système.
Please see the supplied Operating Instructions regarding details about
the network connection, NFC function, other functions.
Veuillez consulter le manuel d'instructions fourni pour en savoir plus sur
la connexion réseau, la fonction NFC et les autres fonctions.
Une application dédiée pour ce modèle est disponible dans Google
Play™ et l'App Store.
Recherchez « SongPal » et téléchargez l'application gratuite pour en savoir plus sur les fonctions
pratiques.
/
(marche/veille) de la télécommande.
pour
Operating Instructions
Manuel d'instructions
© 2015 Sony Corporation Printed in Malaysia
Advertisement
Table of Contents

Related Manuals for Sony HT-RT5


Summary of Contents for Sony HT-RT5
- Page 1 Search for “SongPal” and download the free App to find out more about the convenient features. Recherchez « SongPal » et téléchargez l’application gratuite pour en savoir plus sur les fonctions pratiques. Turning on the TV Mise en marche du téléviseur Power Allumé © 2015 Sony Corporation Printed in Malaysia...
- Page 2 • Para disfrutar de contenido 4K protegido con derechos de copyright, conecte la toma HDMI compatible con HDCP 2.2. Para obtener más detalles, consulte “Visualización de contenido 4K protegido por derechos de autor” en el Manual de instrucciones suministrado. Encendido del televisor Alimentación © 2015 Sony Corporation Printed in Malaysia...
Need help?
Do you have a question about the HT-RT5 and is the answer not in the manual?
Questions and answers