Linksys RV042 User Manual
10/100 4-port vpn router
Hide thumbs
Also See for RV042:
- Quick installation (2 pages) ,
- Product data (2 pages) ,
- Installation instructions manual (26 pages)

Related Manuals for Linksys RV042


Summary of Contents for Linksys RV042
-
Page 1: User Guide
® A Division of Cisco Systems, Inc. 10/100 4-Port VPN Router User Guide WIRED RV042 Model No. -
Page 2: Copyright And Trademarks
10/100 4-Port VPN Router Copyright and Trademarks Linksys is a registered trademark or trademark of Cisco Systems, Inc. and/or its affiliates in the U.S. and certain other countries. Copyright © 2004 Cisco Systems, Inc. All rights reserved. How to Use this Guide This User Guide has been designed to make understanding networking with the Router easier than ever. -
Page 3: Table Of Contents
Chapter 5: Configuring the PCs Overview Configuring Windows 98 and Millennium PCs Configuring Windows 2000 PCs Configuring Windows XP PCs Chapter 6: Set Up and Configure the Router Overview How to Access the Web-based Utility System Summary Tab Setup Tab - Network... - Page 4 Appendix C: Finding the MAC Address and IP Address for Your Ethernet Adapter Windows 98 or Me Instructions Windows 2000 or XP Instructions For the Router’s Web-based Utility Appendix D: Physical Setup of the Router Setting up the Router Appendix E: Windows Help Appendix F: Glossary...
- Page 5 10/100 4-Port VPN Router Appendix G: Specifications Appendix H: Warranty Information Appendix I: Regulatory Information Appendix J: Contact Information...
-
Page 6: List Of Figures
10/100 4-Port VPN Router List of Figures Figure 2-1: VPN Router-to-VPN Router VPN Figure 2-2: Computer-to-VPN Router VPN Figure 3-1: Front Panel Figure 3-2: Back Panel Figure 3-3: Right Side Panel Figure 3-4: Left Side Panel Figure 4-1: Example of a Typical Network... - Page 7 10/100 4-Port VPN Router Figure 6-12: DMZ Host Figure 6-13: Forwarding Figure 6-14: Service Management Figure 6-15: UPnP Figure 6-16: One-to-One NAT Figure 6-17: MAC Clone Figure 6-18: DDNS Figure 6-19: Advanced Routing Figure 6-20: DHCP Setup Figure 6-21: DHCP Status...
- Page 8 10/100 4-Port VPN Router Figure 6-42: Gateway to Gateway Figure 6-43: Client to Gateway Figure 6-44: Gateway to Gateway Figure 6-45: Client to Gateway Figure 6-46: Advanced Figure 6-47: VPN Pass Through Figure 6-48: System Log Figure 6-49: System Statistics...
- Page 9 10/100 4-Port VPN Router Figure B-1: Upgrade Firmware Figure C-1: IP Configuration Screen Figure C-2: MAC Address/Adapter Address Figure C-3: MAC Address/Physical Address Figure C-4: MAC Address Clone Figure D-1: Wall-Mounting the Router...
-
Page 10: Chapter 1: Introduction
Chapter 1: Introduction Welcome Thank you for choosing the 10/100 4-Port VPN Router. The Linksys 10/100 4-Port VPN Router is an advanced Internet-sharing network solution for your small business needs. Like any router, it lets multiple computers in your office share an Internet connection. But the unique dual Internet ports on the 10/100 4-Port VPN Router let you connect a second Internet line as a backup to insure that you're never disconnected. -
Page 11: What's In This Guide
10/100 4-Port VPN Router. • Appendix B: Upgrading Firmware This appendix instructs you on how to upgrade the firmware on your Router if you should need to do so. • Appendix C: Finding the MAC Address and IP Address for your Ethernet Adapter. - Page 12 • Appendix J: Regulatory Information This appendix supplies the regulatory information regarding the Router. • Appendix K: Contact Information This appendix provides contact information for a variety of Linksys resources, including Technical Support. Chapter 1: Introduction What’s in this Guide?
-
Page 13: Chapter 2: Networking Basics
A Router is a network device that connects two networks together. The Router connects your local area network (LAN), or the group of PCs in your home or office, to the Internet. The Router processes and regulates the data that travels between these two networks. -
Page 14: Why Do I Need A Vpn
It also will provide the Router with a dynamic IP address to establish a connection to the Internet. By default, a DHCP server (on the LAN side) is enabled on the Router. If you already have a DHCP server running on your network, you MUST disable one of the two DHCP servers. -
Page 15: What Is A Vpn
What is a VPN? A VPN, or Virtual Private Network, is a connection between two endpoints - a VPN Router, for instance - in different networks that allows private data to be sent securely over a shared or public network, such as the Internet. -
Page 16: Figure 2-1: Vpn Router-To-Vpn Router Vpn
As VPNs utilize the Internet, distance is not a factor. Using the VPN, the businesswoman now has a secure connection to the central office's network, as if she were physically connected. For additional information and instructions about creating your own VPN, please visit Linksys’s website at www.linksys.com. -
Page 17: Chapter 3: Getting To Know The Router
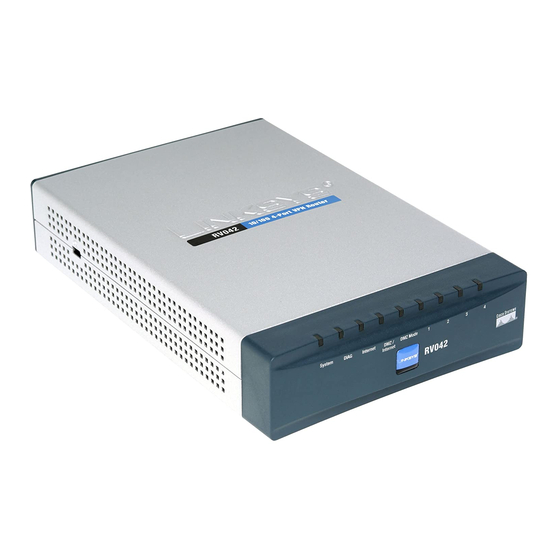
Figure 3-1: Front Panel LEDs System Green. The System LED lights up when the Router is powered on. If the LED is flashing, the Router is running a diagnostic test. Diag Orange. The Diag LED lights up when the system is not ready. The LED goes off when the system is ready. -
Page 18: The Back And Side Panels
10/100 4-Port VPN Router The Back and Side Panels The Router’s ports and Reset button are located on the back panel of the Router. Figure 3-2: Back Panel Reset Button Reset Button The Reset button can be used in one of two ways: If the Router is having problems connecting to the Internet, press the Reset button for just a second with a paper clip or a pencil tip. -
Page 19: Figure 3-3: Right Side Panel
The security slot is located on the left side panel. Figure 3-4: Left Side Panel Security Slot The security slot is where you can attach a lock so the Router will be protected from theft. Proceed to “Chapter 4: Connecting the Router.”... -
Page 20: Chapter 4: Connecting The Router
• Connect the Router to one of your PCs according to the instructions in this chapter. • If necessary, configure your PCs to obtain an IP address automatically from the Router, according to “Chapter 5: Configuring the PCs.” (By default, Windows 98, 2000, Millennium, and XP computers are set to obtain an IP address automatically, so unless you have changed the default setting, then you will not need to configure your PCs.) -
Page 21: Connection Instructions
DSL modem. 2. Connect one end of an Ethernet network cable to one of the numbered ports on the back of the Router (see Figure 4-2). Connect the other end to an Ethernet port on a network device, e.g., a PC, print server, hub, or switch. -
Page 22: Figure 4-5: Connect The Power
10/100 4-Port VPN Router 5. Connect the included AC power cable to the Router’s Power port on the side of the Router, as shown in Figure 4-5, and then plug the power adapter into an electrical outlet. The System LED on the front panel will light up as soon as the power adapter is connected properly. -
Page 23: Chapter 5: Configuring The Pcs
The instructions in this chapter will help you configure each of your computers so they will be able to communicate with the Router. Each PC must be set to obtain an IP address (or TCP/IP) address automatically (called DHCP). Computers use IP addresses to communicate with each other across a network or the Internet. -
Page 24: Configuring Windows 2000 Pcs
6. Windows may ask you to restart your PC. Click the Yes button. If Windows does not ask you to restart, restart your computer anyway. Go to “Chapter 6: Set Up and Configure the Router.” Configuring Windows 2000 PCs 1. Click the Start button. Click Settings and then Control Panel. From there, double-click the Network and Dial-up Connections icon. -
Page 25: Figure 5-5: Internet Protocol (Tcp/Ip) For Windows Xp
Click the OK button again (or the Close button if any settings were changed) to complete the PC configuration. 5. Restart your computer. Go to “Chapter 6: Set Up and Configure the Router.” Chapter 5: Configuring the PCs Configuring Windows XP PCs... -
Page 26: Chapter 6: Set Up And Configure The Router
Chapter 6: Set Up and Configure the Router Overview For your convenience, use the Router’s Web-based Utility to set it up and configure it. This chapter will explain all of the functions in this Utility. There are eleven main tabs in the Utility: System Summary, Setup, DHCP, System Management, Firewall, VPN, Log, Wizard, Support, and Logout. - Page 27 • Diagnostic. The Router has two built-in tools that will help with troubleshooting network problems. • Factory Default. The “Factory Default” button can be used to clear all of your configuration information and restore the Router to its factory default settings. Only use this feature if you wish to discard all other configuration preferences.
- Page 28 • Wizard. Use this tab to access two Setup Wizards, the Basic Setup Wizard and Access Rule Setup Wizard. Support Tab • Support. This tab supplies buttons to access the user guide and the Linksys website. Logout Tab • Logout. Clicking this tab exits you from the Utility.
-
Page 29: How To Access The Web-Based Utility
DRAM: The size of DRAM on the board. Flash: The size of Flash on the board. System Up Time: The length of time in Days, Hours, and Minutes that the Router is active and the current time are displayed. Configuration If you need help to re-configure the router, click the Setup Wizard button. -
Page 30: Port Statistics
PPPoE or PPTP, it shows Connect / Disconnect. WAN2/DMZ IP: It shows the current WAN2 IP Address of the Router, or DMZ IP when DMZ is selected, as seen by external users on the Internet and hyperlinks to WAN Connection type on the Network page of the Setup Tab. -
Page 31: Log Setting Status
If you have set up the mail server and the log cannot be sent to mail server successfully, it shows “E-mail cannot be sent out, probably use incorrect settings.” Chapter 6: Set Up and Configure the Router System Summary Tab... -
Page 32: Setup Tab - Network
Figure 6-5: Setup Tab In order to allow such services, the Router comes with a special DMZ port which is used for setting up public servers. The DMZ port sits between the local network ports and the Internet port. Servers on the DMZ are publicly accessible, but they are protected from attacks such as SYN Flooding and Ping of Death. -
Page 33: Wan Connection Type
Max Idle Time setting. 3. If you select Keep Alive option, the Router will keep the connection alive by sending out a few data packets at the Redial Period, so your Internet service thinks that the connection is still active. -
Page 34: Setup Tab - Password
The Router's default User Name and password is admin, and it is strongly recommended that you change the Router's password from the default. If you leave the password field blank, all users on your network will be able to access the Router simply by entering admin into the password field. See Figure 6-10. -
Page 35: Setup Tab - Dmz Host
Port forwarding can be used to set up public services on your network. When users from the Internet make certain requests on your network, the Router can forward those requests to computers equipped to handle the requests. If, for example, you set the port number 80 (HTTP) to be forwarded to IP Address 192.168.1.2, then all HTTP requests from outside users will be forwarded to 192.168.1.2. -
Page 36: Port Triggering
(outgoing) port and alternate incoming port in this table. The Router will forward the incoming packets to the LAN host. 1. Enter the application name, range of port numbers, and the incoming port range. -
Page 37: Setup Tab - Mac Clone
Public Range Begin: Enter the beginning IP address of the public address range being mapped in the Public Range Begin field. This address will be assigned by the ISP. The Router’s WAN IP (NAT Public) Address cannot be included in the range. -
Page 38: Setup Tab - Ddns
The Router's dynamic routing feature can be used to automatically adjust to physical changes in the network's layout. The Router uses the dynamic RIP protocol. It determines the route that the network packets take based on the fewest number of hops between the source and the destination. The RIP protocol regularly broadcasts routing information to other routers on the network. -
Page 39: Static Routing
In order to use static routing, the Router's DHCP settings must be disabled. To set up static routing, you should add routing entries in the Router's table that tell the device where to send all incoming packets. All of your network routers should direct the default route entry to the Linksys Router. -
Page 40: Dhcp Tab - Setup
DHCP Tab - Setup Setup The Router can be used as a DHCP (Dynamic Host Configuration Protocol) server on your network. A DHCP server assigns available IP addresses to each computer on your network automatically. If you choose to enable the DHCP server option, you must configure all of the PCs on your LAN to connect to a DHCP server. -
Page 41: System Management Tab - Dual-Wan
SNMP, or Simple Network Management Protocol, is a network protocol that provides network administrators with the ability to monitor the status of the Router and receive notification of any critical events as they occur on the network. The Router supports SNMP v1/v2c and all relevant Management Information Base II (MIBII) groups. The appliance replies to SNMP Get commands for MIBII via any interface and supports a custom MIB for generating trap messages. -
Page 42: System Management Tab - Diagnostic
Ping The Ping test bounces a packet off a machine on the Internet back to the sender. This test shows if the Router is able to contact the remote host. If users on the LAN are having problems accessing services on the Internet, try... -
Page 43: System Management Tab - Factory Default
The results include Packets transmitted / received / loss and Round Trip Time (Minimum, Maximum, and Average). Note: Ping requires an IP address. The Router’s DNS Name Lookup tool may be used to find the IP address of a host. -
Page 44: System Management Tab - Firmware Upgrade
Firmware Upgrade Right Now button. See Figure 6-30. Firmware Download Users can click the Firmware Download from Linksys Web Site button to link to the downloads on the Support Figure 6-30: Firmware Upgrade page of the Linksys website. Select the Router from the pull-down menu and choose the firmware from the options. -
Page 45: Firewall Tab - General
To use this feature, click the Export button, and your browser will bring up a dialog asking you where you would like to store your Preferences file. This file will be called “RV042.exp” by default, but you may rename it if you wish. -
Page 46: Firewall Tab - Access Rules
Besides the Default Rules, all configured Network Access Rules are listed in the table, and you can choose the Priority for each custom rule. * HTTP service from LAN side to RV042 is always allowed. * DHCP service from LAN side is always allowed. -
Page 47: Source Interface
Firewall Tab - Content Filter Forbidden Domains When the Block Forbidden Domains check box is selected, the Router will forbid web access to sites on the Forbidden Domains list. See Figure 6-41. Scheduling The Time of Day feature allows you to define specific times when Content Filtering is enforced. For example, you could configure the Router to filter employee Internet access during normal business hours, but allow unrestricted access at night and on weekends. -
Page 48: Vpn Tab - Summary
VPN Routers. Click the Add Now button to see the Gateway to Gateway screen, Figure 44. Client to Gateway: Figure 43 shows the Client to Gateway tunnel. A tunnel created between the VPN Router and the Client user which using VPN client software that supports IPSec. Click the Add Now button to see the Client to Gateway screen, Figure 45. -
Page 49: Groupvpn Status
Connected Tunnels: It shows the amount of connected tunnels. Phase2 Encrypt/Auth/Group: It shows the Encryption (DES/3DES), Authentication (MD5/SHA1) and Group (1/2/5) that you chose in IPSec Setup field. Figure 6-43: Client to Gateway Chapter 6: Set Up and Configure the Router VPN Tab - Summary... -
Page 50: Vpn Tab - Gateway To Gateway
IP Only: If you select IP Only, only the specific IP Address will be able to access the tunnel. The WAN IP of the Router will automatically appear in this field. Chapter 6: Set Up and Configure the Router VPN Tab - Gateway to Gateway... - Page 51 Dynamic IP + E-mail Addr.(USER FQDN) Authentication: If the Local Security Gateway has a dynamic IP, select this type. When the Remote Security Gateway requests to create a tunnel with the Router, the RV042 will work as a responder. If you select this type, just enter the E-mail address for Authentication.
- Page 52 IP, so you don’t need to enter the IP address. When the Remote Security Gateway requests to create a tunnel with the RV042, the RV042 will work as a responder. If you select this type, just enter the Domain Name for Authentication, and the Domain Name must be the same as the Local Gateway of the remote VPN device.
-
Page 53: Ipsec Setup
32-bit automatically by 0. If SHA1 is selected, the Authentication Key is 40-bit. If users do not fill up to 40-bit, this field will be filled up to 40-bit automatically by 0. IKE with Preshared Key (automatic) Chapter 6: Set Up and Configure the Router VPN Tab - Gateway to Gateway... - Page 54 Phase 2 Authentication: There are two methods of authentication, MD5 and SHA. The Authentication method determines a method to authenticate the ESP packets. Both sides must use the same Authentication method. Chapter 6: Set Up and Configure the Router VPN Tab - Gateway to Gateway...
- Page 55 Compress (Support IP Payload compression Protocol (IP Comp) The Router supports IP Payload Compression Protocol. IP Payload Compression is a protocol to reduce the size of IP datagrams. If Compress is enabled, the Router will propose compression when initiating a connection. If the responders reject this propose, the Router will not implement the compression.
-
Page 56: Vpn Tab - Client To Gateway
Enable: Check the box to enable VPN. Group VPN Group No.: The group no. will be generated automatically from 1~2. Two GroupVPNs are supported by RV042. Group ID Name: Enter the Group ID Name. Such as, American Sales Group. Interface: Select the Interface from the drop-down menu. When dual WAN is enable, there are two options. - Page 57 Dynamic IP + E-mail Addr.(USER FQDN) Authentication: If the Local Security Gateway has a dynamic IP, select this type. When the Remote Security Gateway requests to create a tunnel with the Router, the RV042 will work as a responder. If you select this type, just enter the E-mail address for Authentication.
-
Page 58: Remote Client Setup
IP, so you don’t need to enter the IP address. When the Remote Security Gateway requests to create a tunnel with the RV042, the RV042 will work as a responder. If you select this type, just enter the Domain Name for Authentication, and the Domain Name must be the same as the Local Gateway of the remote client. - Page 59 32-bit automatically by 0. If SHA1 is selected, the Authentication Key is 40-bit. If users do not fill up to 40-bit, this field will be filled up to 40-bit automatically by 0. Chapter 6: Set Up and Configure the Router VPN Tab - Client to Gateway...
- Page 60 Encryption method. If users enable the AH Hash Algorithm in Advanced, then it is recommended to select Null to disable encrypting/decrypting ESP packets in Phase 2, but both sides of the tunnel must use the same setting. Chapter 6: Set Up and Configure the Router VPN Tab - Client to Gateway...
- Page 61 Preshared keys regularly to maximize VPN security. Click the Save Settings button to save the settings or click the Cancel Changes button to undo the changes. Chapter 6: Set Up and Configure the Router VPN Tab - Client to Gateway...
-
Page 62: Figure 6-46: Advanced
Compress (Support IP Payload compression Protocol (IP Comp) The Router supports IP Payload Compression Protocol. IP Payload Compression is a protocol to reduce the size of IP datagrams. If Compress is enabled, the Router will propose compression when initiating a connection. If the responders reject this propose, the Router will not implement the compression. -
Page 63: Vpn Tab - Vpn Pass Through
Enable Syslog: If you check the box, Syslog will be enabled. Syslog Server: In addition to the standard event log, the Router can send a detailed log to an external Syslog server. Syslog is an industry-standard protocol used to capture information about network activity. The Router’s Syslog captures all log activity and includes every connection source and destination IP address, IP service, and number of bytes transferred. - Page 64 Log Queue Length (entries): The default is 50 entries. The Router will e-mail the log when Log entries is over 50. Log Time Threshold (minutes): The default is 10 minutes. The Router will e-mail the log every 10 minutes.
-
Page 65: Log Tab - System Statistics
Use this tab to access two Setup Wizards, the Basic Setup Wizard and the Access Rule Setup Wizard. They will help you to set up the Router to access the Internet and set up a Firewall security policy. The wizard will guide you through a series of menus to configure your Router. -
Page 66: Figure 6-51: Dual Wan Or Dmz
Select Obtain an IP automatically, Static IP, or PPPoE, depending on which type is used by your ISP. Click Next to continue. Click Previous if you want to return to the previous screen. Click Exit if you want to exit the wizard. Chapter 6: Set Up and Configure the Router Wizard Tab Figure 6-51: Dual WAN or DMZ... -
Page 67: Figure 6-54: Obtain An Ip Automatically
If you chose PPPoE, Figure 6-56 appears. Enter the User Name and Password provided by your ISP. Click Next to continue. Click Previous if you want to return to the previous screen. Click Exit if you want to exit the wizard. Chapter 6: Set Up and Configure the Router Wizard Tab Figure 6-54: Obtain an IP Automatically... -
Page 68: Figure 6-57: Wan Connection Type Wan2
(default) or Use the Following DNS Server Addresses, if you want to enter a specific IP. Click Next to continue. Click Previous if you want to return to the previous screen. Click Exit if you want to exit the wizard. Chapter 6: Set Up and Configure the Router Wizard Tab... -
Page 69: Figure 6-59: Static Ip Wan2
8. The final screen that appears is Figure 6-61. If you don’t need to make any changes click Save Settings. Click Previous if you want to return to the previous screen. Click Exit if you want to exit the wizard. Chapter 6: Set Up and Configure the Router Wizard Tab... -
Page 70: Access Rule Setup
Service menu. Click Next to continue. Click Previous if you want to return to the previous screen. Click Exit if you want to exit the wizard. Chapter 6: Set Up and Configure the Router Wizard Tab... -
Page 71: Figure 6-65: Select The Log
Click Next to continue. Click Previous if you want to return to the previous screen. Click Exit if you want to exit the wizard. Chapter 6: Set Up and Configure the Router Wizard Tab Figure 6-65: Select the Log... -
Page 72: Figure 6-68: When It Works
Click Previous if you want to return to the previous screen. Click Exit if you want to exit the wizard. The screen in Figure 6-70 will appear when the settings are correct. Chapter 6: Set Up and Configure the Router Wizard Tab... -
Page 73: Logout Tab
Support Tab Manual Click the On Line Manual button, and it will link to the Support page of the Linksys website. Click the Downloads button from the Technical Support menu, then select the RV042 from the drop-down menu, select your operating system, then click Downloads for this Product. -
Page 74: Appendix A: Troubleshooting
Appendix A: Troubleshooting This appendix provides solutions to problems that may occur during the installation and operation of the Router. Read the descriptions below to help solve your problems. If you can't find an answer here, check the Linksys website at www.linksys.com. -
Page 75: For Windows Xp
Properties button. Select Use the following IP address option. D. Enter a unique IP address that is not used by any other computer on the network connected to the Router. You can only use an IP address in the ranges 192.168.1.2 to 192.168.1.99 and 192.168.1.151 to 192.168.1.254. - Page 76 10/100 4-Port VPN Router 2. I want to test my Internet connection. A. Check your TCP/IP settings. For Windows 98 and Millennium: Refer to Windows Help and “Chapter 5: Configuring the PCs” for details. Make sure Obtain IP address automatically is selected in the settings.
- Page 77 D. In the command prompt, type ping followed by your Internet IP address and press the Enter key. The Internet IP Address can be found in the web interface of the Router. For example, if your Internet IP address is 1.2.3.4, you would enter ping 1.2.3.4 and press the Enter key.
- Page 78 AH has limitations due to occasional incompatibility with the NAT standard. Change the IP address for the Router to another subnet to avoid a conflict between the VPN IP address and your local IP address. For example, if your VPN server assigns an IP address 192.168.1.X (X is a number from 1 to 254) and your local LAN IP address is 192.168.1.X (X is the same number used in the VPN IP address), the...
- Page 79 DMZ hosting. There may be cases when you want to host an online game or Internet application. This would require you to set up the Router to deliver incoming packets or data to a specific computer. This also applies to the Internet applications you are using. The best way to get the information on what port services to use is to go to the website of the online game or application you want to use.
- Page 80 DMZ hosting. (In other words, data that enters the Router will be checked first by the forwarding settings. If the port number that the data enters from does not have port forwarding, then the Router will send the data to whichever PC or network device you set for DMZ hosting.) Follow these steps to set DMZ hosting: A.
- Page 81 12. I need to upgrade the firmware. In order to upgrade the firmware with the latest features, you need to go to the Linksys website and download the latest firmware at www.linksys.com. Follow these steps: Appendix A: Troubleshooting...
- Page 82 The upgrade could have failed for a number of reasons. Follow these steps to upgrade the firmware: A. Use the Linksys TFTD program to upgrade the firmware. Go to the Linksys website at http:// www.linksys.com and download the lthe TFTP program, which will be listed with the firmware.
- Page 83 For most DSL users, it is strongly recommended to use MTU 1492. If you are having some difficulties, perform the following steps: A. To connect to the Router, go to the web browser, and enter http://192.168.1.1 or the IP address of the Router.
-
Page 84: Frequently Asked Questions
Subnet Mask, Default Gateway, and DNS). Restart the computer that is having a problem. • If the PCs are configured correctly, but still not working, check the Router. Ensure that it is connected and powered on. Connect to it and check its settings. (If you cannot connect to it, check the LAN and power connections.) - Page 85 10/100 4-Port VPN Router Does the Router support any operating system other than Windows 98, Millennium, 2000, or XP? Yes, but Linksys does not, at this time, provide technical support for setup, configuration or troubleshooting of any non-Windows operating systems.
- Page 86 Reset the Router by holding down the Reset button for ten seconds. Reset your cable or DSL modem by powering the unit off and then on. Obtain and flash the latest firmware release that is readily available on the Linksys website, www.linksys.com.
- Page 87 10/100 4-Port VPN Router How many ports can be simultaneously forwarded? Theoretically, the Router can establish 4,000 sessions at the same time, but you can only forward 30 ranges of ports. Does the Router replace a modem? Is there a cable or DSL modem in the Router? No, this version of the Router must work in conjunction with a cable or DSL modem.
-
Page 88: Appendix B: Upgrading Firmware
10/100 4-Port VPN Router Appendix B: Upgrading Firmware You can use the Router’s Web-based Utility to upgrade the firmware; however, if you do so, you may lose the settings you have configured on the Router. To upgrade the Router’s firmware, follow these instructions: 1. -
Page 89: Figure C-2: Mac Address/Adapter Address
This section describes how to find the MAC address for your computer’s Ethernet adapter so you can use the MAC address cloning feature of the Router. You can also find the IP address of your computer’s Ethernet adapter. This IP address is used for the Router’s filtering, forwarding, and/or DMZ features. Follow the steps in this appendix to find the adapter’s MAC or IP address in Windows 98, Me, 2000, or XP. -
Page 90: For The Router's Web-Based Utility
The example in Figure C-3 shows the Ethernet adapter’s IP address as 192.168.1.100. Your computer may show something different. For the Router’s Web-based Utility For MAC address cloning, enter the MAC Address in the User Defined WAN1 or WAN2 MAC Address field or select MAC Address from this PC. -
Page 91: Setting Up The Router
Placement of the Router Set the Router on a desktop or other flat, secure surface. Do not place excessive weight on top of the Router that could damage the Router. If you want to wall-mount the Router, see Figure D-1. -
Page 92: Appendix E: Windows Help
10/100 4-Port VPN Router Appendix E: Windows Help All Linksys networking products require Microsoft Windows. Windows is the most used operating system in the world and comes with many features that help make networking easier. These features can be accessed through Windows Help and are described in this appendix. -
Page 93: Appendix F: Glossary
10/100 4-Port VPN Router Appendix F: Glossary 802.11a - A wireless networking standard that specifies a maximum data transfer rate of 54Mbps and an operating frequency of 5GHz. 802.11b - A wireless networking standard that specifies a maximum data transfer rate of 11Mbps and an operating frequency of 2.4GHz. - Page 94 IP addresses to network computers by "leasing" an IP address to a user for a limited amount of time, instead of assigning permanent IP addresses. DMZ (Demilitarized Zone) - Removes the Router's firewall protection from one PC, allowing it to be "seen" from the Internet.
- Page 95 10/100 4-Port VPN Router DTIM (Delivery Traffic Indication Message) - A message included in data packets that can increase wireless efficiency. Dynamic IP Address - A temporary IP address assigned by a DHCP server. EAP (Extensible Authentication Protocol) - A general authentication protocol used to control network access.
- Page 96 10/100 4-Port VPN Router Infrastructure - A wireless network that is bridged to a wired network via an access point. IP (Internet Protocol) - A protocol used to send data over a network. IP Address - The address used to identify a computer or device on a network.
- Page 97 Passphrase - Used much like a password, a passphrase simplifies the WEP encryption process by automatically generating the WEP encryption keys for Linksys products. Ping (Packet INternet Groper) - An Internet utility used to determine whether a particular IP address is online.
- Page 98 10/100 4-Port VPN Router SPI (Stateful Packet Inspection) Firewall - A technology that inspects incoming packets of information before allowing them to enter the network. Spread Spectrum - Wideband radio frequency technique used for more reliable and secure data transmission.
- Page 99 10/100 4-Port VPN Router URL (Uniform Resource Locator) - The address of a file located on the Internet. VPN (Virtual Private Network) - A security measure to protect data as it leaves one network and goes to another over the Internet.
-
Page 100: Appendix G: Specifications
10/100 4-Port VPN Router Appendix G: Specifications Standards IEEE 802.3, 802.3u Ports 4 10/100 RJ-45 Ports, 1 10/100 RJ-45 Internet Port, 1 10/100 RJ-45, DMZ/Internet Button Reset Cabling Type Ethernet Category 5 LEDs System, Internet, DMZ/Internet, DMZ Mode, Diag, 1-4... -
Page 101: Appendix H: Warranty Information
Your exclusive remedy and Linksys' entire liability under this warranty will be for Linksys at its option to repair or replace the Product or refund Your purchase price less any rebates. -
Page 102: Appendix I: Regulatory Information
10/100 4-Port VPN Router Appendix I: Regulatory Information FCC Statement This product has been tested and complies with the specifications for a Class B digital device, pursuant to Part 15 of the FCC Rules. These limits are designed to provide reasonable protection against harmful interference in a residential installation. -
Page 103: Appendix J: Contact Information
Can't find information about a product you want to buy on the web? Do you want to know more about networking with Linksys products? Give our advice line a call at: Or fax your request in to: If you experience problems with any Linksys product,...
Need help?
Do you have a question about the RV042 and is the answer not in the manual?
Questions and answers