Advertisement
Quick Links
Quick Star t Guide
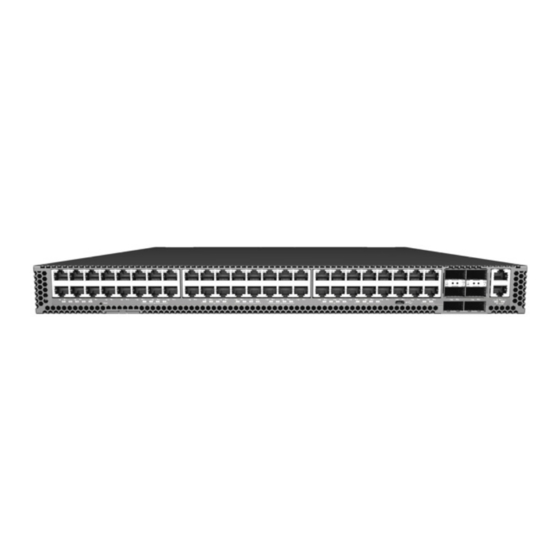
54-Port 10G Copper Ethernet Switch
F9372-T | F9372B-T
1. Unpack the Switch and Check Contents
2 front-post brackets
2 rear-post brackets with adjustable ears
20 bracket screws
2 rear bracket ear position-locking screws
Power Cords
Console Cable—RJ-45 to DB-9
Documentation—End-User License Agreement, Quick
Start Guide (this document) and Safety and Regulatory
Information
Caution:
The switch includes two plug-in AC PSUs and ve
fan tray modules that are installed into its chassis. All
installed modules must have a matching air ow direction.
That is, all modules must have a front-to-back (F2B) air ow
direction, or all modules must have a back-to-front (B2F)
air ow direction. The air ow direction of PSU and fan tray
modules is indicated by labels on the modules.
2. Attach the Brackets
1
Attach each of the two front-post brackets to the front of the
switch using four of the included bracket screws.
2
Attach each of the two rear-post brackets to the rear of the
switch using four of the included bracket screws.
3
For the rear-post brackets, use an additional two bracket
screws to secure the bracket at the mid-point on the side of
the switch.
www.pluribusnetworks.com
10G Copper Ethernet
Switch
F9372-T
F9372B-T
2
3
1
– 1 –
3. Mount the Switch
3
1
Caution:
Installing the switch in a rack requires two people.
One person should position the switch in the rack, while the
other secures it using the rack screws.
1
As per your rack plan, mark the holes in the rack where you
want to install the switch.
2
Lift the switch into the rack and align it with the marked
holes.
3
Secure the front-post brackets to the rack using four screws
and cage nuts supplied with the rack.
4. Adjust Rear-Post Bracket Ears
1
2
1
Adjust the rear-post bracket ears to t the depth of the rack.
2
Secure the rear post brackets to the rack rear posts using
four screws and cage nuts supplied with the rack.
3
Lock the position of the rear-post bracket ears using the
included position-locking screws.
2
3
E102016-AP-R01
150200001606A
Advertisement

Related Manuals for Pluribus Networks F9372-T


Summary of Contents for Pluribus Networks F9372-T
- Page 1 Quick Star t Guide 54-Port 10G Copper Ethernet Switch F9372-T | F9372B-T 1. Unpack the Switch and Check Contents 3. Mount the Switch 10G Copper Ethernet Switch F9372-T F9372B-T 2 front-post brackets 2 rear-post brackets with adjustable ears 20 bracket screws...
- Page 2 CE Mark BSMI EMI Standard CNS 13438:2006 7. Configuring the switch Immunity EN 55024:2010 IEC 61000-4-2:2008 To configure your switch please refer to the Pluribus Networks IEC 61000-4-3:2006/A1:2007/A2:2010 Quick Start Guide available at this location: IEC 61000-4-4:2012 http://www.pluribusnetworks.com/get-started/ IEC 61000-4-5:2014...
- Page 3 快速入門指南 54 埠 10G 乙太網路交換器 F9372-T | F9372B-T 1. 拆開交換器包裝並檢查內容物 3. 安裝交換器 10G 乙太網路交換器 F9372-T F9372B-T 2 個前柱托架 2 個後柱托架,附可調式固定片 20 個托架螺絲。 2 個後方托架固定片定位螺絲 注意: 需要兩個人,將交換器裝到機櫃上。一人負責固 電源線 定交換器在機櫃上之位置,另一人負責用機櫃螺絲固 定。 交換器包含兩個插入式 AC 電源供應器以及 5 注意: 依據您的機櫃配置,標出欲安裝交換器之機櫃孔位置。 個風扇托盤 模組。所有已安裝之模組氣流方向,必須一 致。意即,所有模組的氣流方向必須為由前至後 將交換器放到機櫃中,對齊標示孔。 (F2B) ,或者必須為由後至前 (B2F) 。...
- Page 4 透過檢查系統 LED,確認交換器的基本運轉情況。 如運 FCC Class A 轉正常,PSU1/PSU2、Diag 和風扇 LED 會亮起綠燈。 VCCI Class A CE Mark 7. 設定交換器 BSMI EMI Standard CNS 13438:2006 EN 55024:2010 要設定交換器,請參閱此網址提供的 Pluribus Networks 快速入 電磁耐受性 IEC 61000-4-2:2008 門指南,http://www.pluribusnetworks.com/onvl-get-started/ 。 IEC 61000-4-3:2006/A1:2007/A2:2010 IEC 61000-4-4:2012 8. 檢視產品標籤 IEC 61000-4-5:2014...
Need help?
Do you have a question about the F9372-T and is the answer not in the manual?
Questions and answers