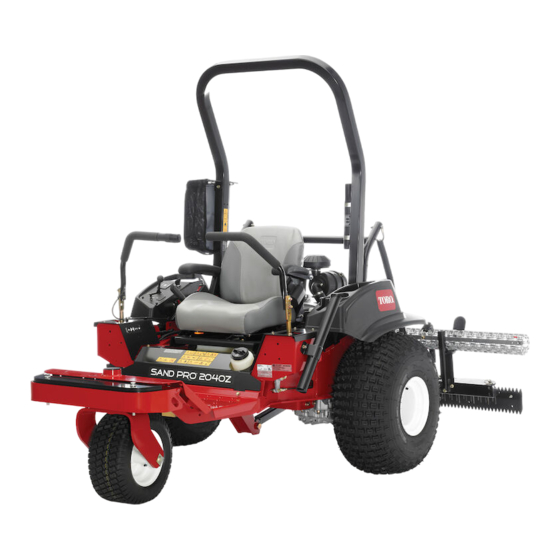
Toro Sand Pro 2040Z Operator's Manual
Nail drag traction unit
Hide thumbs
Also See for Sand Pro 2040Z:
- Service manual (130 pages) ,
- Operator's manual (60 pages) ,
- Operator's manual (16 pages)

Related Manuals for Toro Sand Pro 2040Z


Summary of Contents for Toro Sand Pro 2040Z
- Page 1 Form No. 3457-755 Rev A Nail Drag Sand Pro ® 2040Z Traction Unit Model No. 08717—Serial No. 314000001 and Up *3457-755* Register at www.Toro.com. Original Instructions (EN)
-
Page 2: Table Of Contents
Whenever you need service, genuine Toro parts, or Using the Back Blade ......... 9 additional information, contact an Authorized Service Adjusting the Depth .......... 10 Dealer or Toro Customer Service and have the model Operating Tips ..........10 and serial numbers of your product ready. Figure Maintenance ............11... -
Page 3: Setup
Setup Loose Parts Use the chart below to verify that all parts have been shipped. Description Qty. Drawbar Support brace Stop-chain assembly Bolt (3/8 x 4-1/2 inches) Bolt (3/8 x 3/4 inch) Locknut (3/8 inch) Long spacer Assemble the nail drag. Bolt (5/16 x 3/4 inch) Flange locknut (5/16 inch) U-bolt... -
Page 4: Assembling The Nail Drag
Assembling the Nail Drag Removing the Plates Remove the lynch pins from the 8 clevis pins securing the nail plate and the top plates to the bottom plate (Figure Note: Retain the lynch pins for installing the nail plate and the top plates. g023745 Figure 4 1. - Page 5 Attaching the Support Braces Mounting the Stop-chain Assembly Align the longer flat end of a support brace to the underside of the bottom plate so that the Align the center tab on the drawbar bracket to shorter flat end reaches the drawbar (Figure the hole toward the rear of the drawbar (Figure...
- Page 6 Mounting the Lift Chains Insert the nails down through the nail plate and the bottom plate (Figure Insert a bolt (3/8 x 3/4 inch) through a lift chain, and secure it to the bottom plate with a washer (3/8 inch) and a locknut (3/8 inch); refer to Figure Note: To ensure that the chain lengths do not...
-
Page 7: Product Overview
Product Overview Operation Installing and Removing the Weights Always ensure that your machine has the appropriate number of weights. Refer to the following table for how many weights are required on the front of the machine: Attachment Number of weights required Flex tooth rake Nail drag Nail drag with finish drag mat... -
Page 8: Attaching The Nail Drag To The Machine
Connecting the Drawbar to the Note: If the machine is equipped with the light kit, install the front light by inserting the bolt Frame Hitch through the weights and securing it with the nut; refer to the Light Kit Installation Instructions. Align the rod end of the drawbar to the frame hitch (Figure... -
Page 9: Removing The Nail Drag From The Machine
Do not drive the machine without a Toro-approved attachment installed. Disconnect the drawbar from the frame hitch. Disconnect the shackles from the attachment lift. Remove the frame bracket from the rear of the machine. -
Page 10: Adjusting The Depth
Adjusting the Depth allows the nail drag and the groomer to fill the void more completely when leveling the surface. Adjust the depth to suit your grooming conditions • To increase the usable life of the groomer, you can and preferences. You can also adjust the depth to remove it, flip it over, and install it again. -
Page 11: Maintenance
Maintenance Cleaning the Nail Drag Keep the nail drag clean. Excessive soil buildup Replacing the Nails increases the attachment weight and may affect the handling of the machine. Start the machine, and raise the attachment lift so that the nail drag is up off the ground. Remove the lynch pins from the 8 clevis pins securing the top plates to the nail plate and the bottom plate... -
Page 12: Troubleshooting
Troubleshooting Problem Possible Cause Corrective Action The appearance of the groomed surface 1. The nail depth is not correct. 1. Adjust the nail depth or remove some is unacceptable. nails if necessary. 2. The desired appearance is not possible 2. Install the optional drag mat kit (sold with the standard configuration. - Page 13 Notes:...
- Page 14 The method of transmission shall be electronic transmittal. This machinery shall not be put into service until incorporated into approved Toro models as indicated on the associated Declaration of Conformity and in accordance with all instructions, whereby it can be declared in conformity with all relevant Directives.
- Page 15 The method of transmission shall be electronic transmittal. This machinery shall not be put into service until incorporated into approved Toro models as indicated on the associated Declaration of Conformity and in accordance with all instructions, whereby it can be declared in conformity with all relevant Directives.
- Page 16 Countries Other than the United States or Canada Customers who have purchased Toro products exported from the United States or Canada should contact their Toro Distributor (Dealer) to obtain guarantee policies for your country, province, or state. If for any reason you are dissatisfied with your Distributor's service or have difficulty obtaining guarantee information, contact the Toro importer.
Need help?
Do you have a question about the Sand Pro 2040Z and is the answer not in the manual?
Questions and answers