
Related Manuals for HESA TCN-15MIR


Summary of Contents for HESA TCN-15MIR
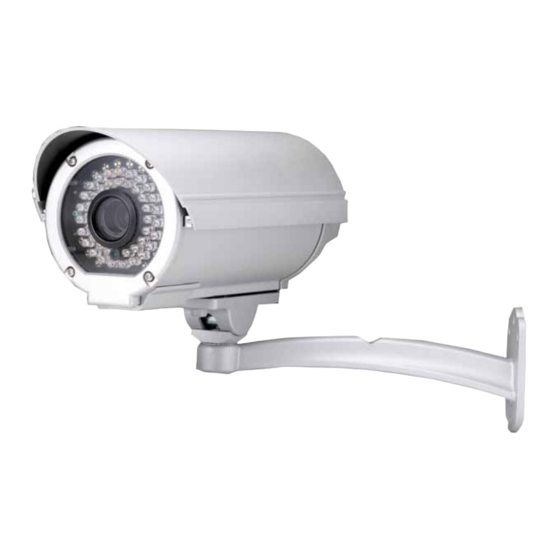
- Page 1 User Manual IR IP CAMERA TCN-15MIR (KUNTC15IR) TCN-16MIR (KUNTC16IR) TCN-17MIR (KUNTC17IR) DT01825HE0310R00 1/40...
- Page 2 WARINGS TO REDUCE THE RISK OF FIRE OR ELECTRIC SHOCK, DO NOT EXPOSE THIS PRODUCT TO RAIN OR MOISTURE. DO NOT INSERT ANY METALLIC & ELETRIC CONDUCTIVE OBJECT THROUGH VENTILATION GRILLS. CAUTION CAUTION RISK OF ELECTRIC SHOCK DO NOT OPEN CAUTION TO REDUCE THE RISK OF ELECTRIC SHOCK.
-
Page 3: Table Of Contents
Content PREFACE ................................4 PRODUCT SPECIFICATIONS ........................4 III. PRODUCT INSTALLATION........................6 ............................6 ONITOR ETTING ..........................7 ARDWARE NSTALLATION IP A ..............................10 SSIGNMENT : ........................13 NSTALL CTIVE CONTROL LIVE VIDEO ..............................15 IR IP CAMERA CONFIGURATION ......................17 ................................18 YSTEM ................................21 ETWORK A/V S ..............................27 ETTING ..............................33 VENT NETWORK CONFIGURATION......................36... -
Page 4: Preface
External Varifocal Lens adjustment Super hi-res 540TVL True Day/Night Function Mechanism IR Cut Filter available Fan/ Heater Built-in IR Distance 30M (TCN-15MIR), 40M (TCN-16MIR) e 50M (TCN-17MIR) MPEG-4/ MJPEG Compression Format Support Cell Phone/ PDA/ 3GPP Dual streaming SDK for software Integration... - Page 5 Mechanism IR Cut Filter IR Distance TCN-15MIR (5∅ x 42) IR Distance TCN-16MIR (5∅ x 56) IR Distance TCN-17MIR (5∅ x 21, E-power x7) Video Out 1 in/ 1 (relay out) Power Consumption AC 90V ~260V, 17W -10 ~ 45...
-
Page 6: Product Installation
Intel-C 2.0G, RAM 512MB, Graphic card 64MB Suggested Intel-C 1.6G, RAM 256MB, Graphic card 32MB Minimum III. Product Installation A. Monitor Setting Right-Click on the desktop. Select “ Properties”. Change color quality to highest (32bit). 6/40... -
Page 7: Hardware Installation
B. Hardware Installation Connect power adaptor Connect Ethernet cable to IP Camera iii. Connect IP Camera to a computer or Local network. -1 I/O Control Instruction I/O terminal connector – used in application, for e.g., motion detection, event triggering, alarm notifications. It provides the interface to: 1 Digital Input (GND+Alarm) –... - Page 8 B-2 Relay Connection: Digital Input connection Door/Window Contacts Relay Output Connection 8/40...
- Page 9 9/40...
-
Page 10: Ip Assignment
C. IP Assignment Use the software, “IP Installer” to assign the IP address of IP Camera. The software is in the attached software CD. There are two languages for the IP installer IPInstallerCht.exe Chinese version IPInstallerEng.exe English version iii. There are 3 kinds of IP configuration. Fixed IP (Public IP or Virtual IP) DHCP (Dynamic IP) Dial-up (PPPoE) - Page 11 vii. IP Installer will search all IP Cameras connected on Lan. The user can click “Search Device” to search again. viii. Click one of the IP Camera listed on the left side. The network configuration of this IP camera will show on the right side. You may change the “name”...
- Page 12 To Change PC IP address: Control Panel Network Connections Local Area Connection Properties Internet Protocol (TCP/IP) Properties Please make sure your IP Camera and PC have the same Subnet. If not, please change IP Camera subnet or PC IP subnet accordingly. A quick way to access remote monitoring is to left-click the mouse twice on a selected IP Camera listed on “Device list”...
-
Page 13: Install Active Xcontrol
Then, please key in the default “user name: admin” and “password: admin”. D. Install ActiveX control: For the first time to view the camera video via IE, it will ask you to install the ActiveX component. If the installation failed, please check the security setting for the IE browser. Tools Internet Options…... - Page 14 When popup the following dialogue box, click “Yes”. 14/40...
-
Page 15: Live Video
IV. Live Video Start an IE browser, type the IP address of the IP Camera in the address field. It will show the following dialogue box. Key-in the user name and password. The default user name and password are “admin” and “admin”. When connect to the IP Camera ,The following program interface shows. - Page 16 Get into the administration page Video Snapshot Show system time, video resolution, and video refreshing rate Select video streaming source (When streaming 2 setting in Video Setting is closed, this function will not display) Control the relay which is connected to this camera. Double-click the video, it will change to full screen mode.
-
Page 17: Ir Ip Camera Configuration
V. IR IP CAMERA Configuration Click to get into the administration page. Click to back to the live video page. 17/40... -
Page 18: System
A. System System Information Server Information Set up the camera name, select language, and set up the camera time. Server Name This is the Camera name. This name will show on the IP Installer. Select language There are English, Traditional Chinese, and Simple Chinese to select. - Page 19 IP Camera supports three different users, administrator, general user, and anonymous user. Anonymous User Login Yes Allow anonymous login No Need user name & password to access this IP camera Add user Type the user name and password, then click “Add/Set”. Click “edit”...
- Page 20 System update To update the firmware online, click “Browse…” to select the firmware. Then click “Upgrade” to the proceed. Reboot system re-start the IP camera Factory default delete all the settings and restore defaults system. Setting Management User may download the current setting to PC, or upgrade from previous saved setting.
-
Page 21: Network
B.Network IP Setting IR IP CAMERA supports DHCP and static IP. DHCP Using DHCP, IR IP CAMERA will get all the network parameters automatically. Static IP Please type in IP address, subnet mask, gateway, and DNS manually. Port Assignment: user may need to assign different port to avoid conflict when setting up IP assignment. - Page 22 This IP camera supports UPnP, If this service is enabled on your computer, the camera will automatically be detected and a new icon will be added to “My Network Places.” Note: UPnP must be enabled on your computer. Please follow the procedure to activate UPnP open the Control Panel from the Start Menu select Add/Remove Programs Select Add/Remove Windows Components and open...
- Page 23 DDNS IR IP camera supports DDNS (Dynamic DNS) and Manual Built-in DDNS services. DynDNS Please enable this service Key-in the DynDNS server name, user name, and password. Set up the IP Schedule update refreshing rate. Click “Apply” If setting up IP schedule update too frequently, the IP may be blocked.
- Page 24 Camddns service Please enable this service Key-in user name. IP Schedule update is default at 5 minutes Click “Apply”. DDNS Status Updating Information update Idle Stop service DDNS registration successful, can now log by http://<username>.ddns.camddns.com Register successfully. Update Failed, the name is already registered The user name has already been used.
- Page 25 Wireless Setting (Wireless Network Optional) Supports 802.11 b/g wireless connection. Notice Wireless network and Ethernet network use the same IP, the user has to unplug Ethernet cable, if Ethernet cable is not unplug, wireless setting can not be executed. Status of Wireless Networks scan all wireless services.
- Page 26 mode in order to avoid conflict. Security It supports “None”, “WEP”, “WPA-PSK” security encryption based on the setting of the Router. Authentication There are Open System and Shared Keys, it is based on different encryptions. This has to be the same as the Router’s setting.
-
Page 27: A/V Setting
C.A/V Setting Image Setting Adjust “Brightness”, “Contrast”, “Hue”, “Saturation” to get clear video. If needed, please select “Back Light Compensation” ON to compensate back light situation This IP camera belongs to external varifocal lens adjustment camera. Please adjust “ZOOM” first and “FOCUS” in the following to complete the adjustment. - Page 28 Video Setting User may select 2 streaming output simultaneously: Streaming 1 Setting: Basic mode and Advanced mode Streaming 2 Setting: Basic mode, Advanced mode, and 3GPP mode (Max Video Frame Rate for both streaming combined is 30 FPS) Streaming 1 Basic Mode Resolution There are 4 resolutions to choose.
- Page 29 Streaming 1 Advanced Mode Resolution There are 4 resolutions to choose. NTSC – 720 480 / 720 576 4CIF – 704 480 / 704 576 – 352 240 / 352 288 QCIF – 176 120 / 176 144 Bitrate Control Mode There are CBR Constant Bit Rate and VBR Variable Bit Rate to use.
- Page 30 There are 2 Video Format to choose MPEG4 or JPEG. RTSP Path: RTSP output connecting route Streaming 2 Basic Mode Resolution There are 4 resolutions to choose. NTSC – 720 480 / 720 576 4CIF – 704 480 / 704 576 –...
- Page 31 Streaming 2 Advanced Mode Resolution There are 4 resolutions to choose. NTSC – 720 480 / 720 576 4CIF – 704 480 / 704 576 – 352 240 / 352 288 QCIF – 176 120 / 176 144 Bitrate Control Mode There are CBR Constant Bit Rate and VBR Variable Bit Rate to use.
- Page 32 Streaming 2, 3GPP mode: 3GPP default value is QQVGA 128Kbp 5FPS GOP=1XFPS 3GPP mode suggested setting: QQVGA, lower than 128kbps, 5FPS, GOP= 1x FPS or 2x FPS, MPEG4 format 3GPP can achieve up to 10FPS, In 3GPP mode, Stream 1 & Stream 2 combined frame rate is 20FPS Fix Resolution QCIF...
-
Page 33: Event List
D. Event List IR IP CAMERA provides multiple event settings. Event Setting Motion Detection IP CAMERA allows 3 areas motion detection. When motion is triggered, it can send video to some specific mail addresses, transmit video to remote ftp server, trigger the relay, and save video to local SD card. - Page 34 When motion/alarm is triggered, there are 3 different types of record mode. AVI File (With Record File Setting ) Multi-JPEG (With Record File Setting), only with JPEG compression format. Single JPEG (Single File with Interval Setting) Record Time Setting Pre Alarm and Post Alarm setups for video start and end time when motion detected, I/O, or other devices got triggered.
- Page 35 Log List Sort by System Logs, Motion Detection Logs and I/O Logs. In addition, System Logs and I/O Logs won’t lose data due to power failure. 35/40...
-
Page 36: Network Configuration
VI. Network Configuration Configuration 1 Internet Access ADSL or Cable Modem IP address One real IP or one dynamic IP Only IR IP CAMERA connects to the internet For fixed real IP, set up the IP into IR IP CAMERA. For dynamic IP, start PPPoE. - Page 37 Internet Access ADSL or Cable Modem IP address one real IP or one dynamic IP IR IP CAMERA and PC connect to the internet Device needed IP sharing Use virtual IP, set up port forwarding in IP sharing. 37/40...
-
Page 38: Package Contents
VII. Package contents IR IP CAMERA Network Camera Adaptor Ethernet Cable CD title (User manual, IP installation Utility) 38/40... - Page 39 39/40...
- Page 40 DT01825HE0310R00 40/40...
Need help?
Do you have a question about the TCN-15MIR and is the answer not in the manual?
Questions and answers