
Related Manuals for HESA SD-PTZ2W


Summary of Contents for HESA SD-PTZ2W
- Page 1 Mini Speed Dome Camera SD-PTZ2W (cod. KUSDPTZ2W) INSTRUCTION MANUAL DT02239_HE0113R00...
- Page 2 Mini Speed Dome Camera Introduction Manual...
- Page 3 CAUTl0N RISK OF ELECTRIC SHOCK DO NOT OPEN CAUTION To reduce the risk of electrical shock, do not open covers. No user serviceable parts inside. Refer servicing to qualified service personal. This lightning flash with arrowhead symbol is intended to alert the user to the presence of un-insulated "dangerous voltage"...
-
Page 4: Important Safeguard
▌▌Important Safeguard Read Instructions Read all of the safety and operating instructions before using the product. Retain Instructions Save these instructions for future reference. Attachments/Accessories Do not use attachments or accessories unless recommended by the appliance manufacturer as they may cause hazards, damage product and void warranty. Water and Moisture Do not use this product near water or moisture. - Page 5 1. Introduction Features Product Accessories 2. Installation DIP Switch Setup Cabling 3. Operation Checking before Operation Preset and Pattern Function Pre-Check Start OSD Menu Reserved Preset Preset Swing Pattern Group Other Functions OSD Display of Main Screen 4. How to use OSD Menu General Rules of Menu Operation Main Menu Display Setup...
-
Page 6: Camera Specifications
▌▌Camera Specifications CCD Sensor: 1 / 4 " Interline Transfer CCD Zoom Magnification: x 12 Optical Zoom, x 16 Digital Zoom (Max x 192 Zoom) Day & Night Function Various Focus Mode : Auto-Focus / Manual Focus / Semi-Auto Focus. Independent Simultaneous Camera Characteristic Setup in Preset operation ▌▌Powerful Pan/Tilt Functions... -
Page 7: Osd (On-Screen Display) Menu
▌▌OSD (On Screen Display) Menu OSD menu is provided to display the status of camera and to configure the functions interactively. The information such as Camera ID, temperature, Pan/Tilt Angle, Alarm Input and Preset can be displayed on screen. ▌▌I/O Functions (for External Mini Model) To reject external electric noise and shock perfectly, alarm sensor Input is decoupled with photo coupler. -
Page 8: Product And Accessories
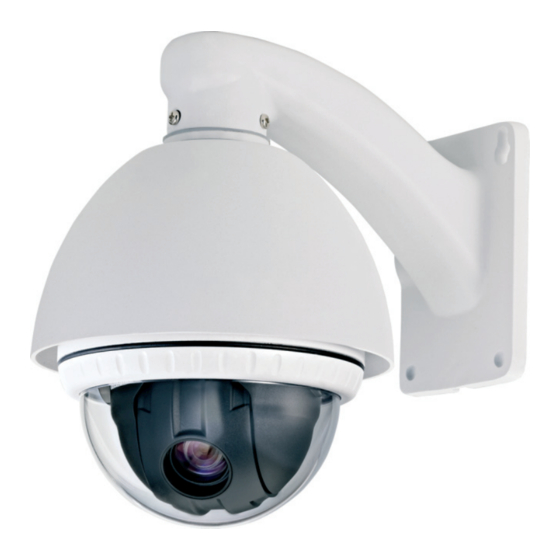
▌▌Product & Accessories Option ► Assembly Ceiling Bracket * Ceiling bracket is standard for mini PTZ Dome. (Do not support Internal PTZ Dome) Pendant Bracket L type Wall Mount Bracket ARM Type Wall Mount Bracket Mini Speed Dome Camera Introduction Manual... - Page 9 Option Ceiling Bracket Pendant Bracket L type * Internal PTZ Dome built in a ceiling plate for installation. Wall Mount Bracket ARM Type Wall Mount Bracket * ARM Type wall mount bracket is standard for External mini PTZ Dome. Mini Speed Dome Camera Introduction Manual...
-
Page 10: Dip Switch Setup
▌▌DIP Switch Setup Before you install the camera, you should set the DIP switches to configure the camera ID, communication baud rate. Camera ID Communication Baud Rate FUNC. Baud Rate Refer to the Manual ►Camera ID Setup ID number of camera is set using binary number. The example is shown bellow. - Page 11 ►Communication Baud Rate Setup Select the appropriate Baud Rate with DIP switch combination. Switch State Baud Rate default 2400 bps 2400 bps 4800 bps 9600 bps If you want to control using DVR or P/T controller, their protocol must be identical to camera.
-
Page 12: Power Connection
▌▌Cabling Cabling Terminal Block ►Power Connection Please, check the voltage and current capacity of rated power carefully. Rated power is indicated in the back of main unit. Rated Power Input Voltage Range Current Consumption DC 12V DC 11V~13 V 0.8A ►... -
Page 13: Video Connection
►Video Connection Connect with BNC coaxial cable. ► Alarm input Signal Description IN COM Common point for alarm IN1-,IN2-,IN3-, In4-, Alarm input signal Speed dome can detect the status of alarm input (NO or NC) automatically. Normal Open and Normal Close define as below No contact between alarm input and common point Normal Open Keeping contact between alarm input and common point... -
Page 14: Check Points Before Operation
▌▌Check points before operation Before power is applied, please check the cables carefully. The camera ID of the controller must be identical to that of the target camera. The camera ID can be checked by reading DIP switch of the camera. If your controller supports multi-protocols, the protocol must be changed to match to that of the camera. -
Page 15: Starting Osd Menu
▌▌Starting OSD Menu Function Using the OSD menu, Preset, Pattern, Swing, Group and Alarm Input function can be configured for each application. Enter Menu Press <Call> + Preset Number [95] +<Enter> ▌▌Reserved Preset Description Some Preset numbers are reserved to special functions. Function <Call>... - Page 16 ▌▌Preset Function Max 127 positions can be stored as Preset position. The Preset number can be assigned from 1 to 128, but 95 is reserved for starting OSD menu. Set Preset <Preset>[1~128 ] <Enter> (Except [95]) Run Preset <Call>[1~128 ] <Enter> (Except [95]) Delete Preset To delete Preset, use OSD menu.
- Page 17 ▌▌Pattern Function Pattern Function is that a camera memorizes the path (mostly curve path) by joystick of controller for assigned time and revives the path exactly as it memorized. 4 Patterns are available and Maximum 150~180S or 500 communication commands can be stored in a pattern.
- Page 18 ▌▌Group Function The group function allows running sequence of Presets Max 8 group can be stored. Each group can have max 16 preset can be set up in Group setup. Dwell time between actions can be set up also. Set Group Use OSD Menu to create a Group Run Group Ex) Run Group 1: <Call>[151]<Enter>...
-
Page 19: Other Functions
▌▌Other Functions Power Up Action This function enables to resume the last action executed before power down. Most of actions such as Preset, Pattern, Swing and Group are available for this function but jog actions are not available to resume. Auto Flip In case that tilt angle arrives at the top of tilt orbit (90º), zoom module camera keep moving to opposite tilt direction (180º) to keep tracing targets. -
Page 20: Osd Display Of Main Screen
▌▌OSD Display of Main Screen P/T/Z Information Current Pan/Tilt angle in degree and a compass direction. Camera ID Current Camera ID (Address). Action Title Following are possible Action-Titles and their meaning. "SET PRESET xxx" When Preset xxx is stored "GOTO PRESET xxx" When camera reach to Preset xxx "RUN PATTERN x"... -
Page 21: General Rules Of Key Operation For Menu
▌▌General Rules of Key Operation for Menu The menu items surrounded with ( ) always has its sub menu. For aIl menu level, to go into sub menu, press OPEN key or use joystick in the right. To go to up-one-level menu, press CLOSE key or use joystick in the left. To move from items to item in the menu, use joystick in the Up/Down. -
Page 22: Display Setup
▌▌Display Setup This menu defines Enable/Disable of OSD display on Main Screen. If an item is set to be AUTO, the item is displayed only when the value of it is changed. Camera ID [ON/OFF] PTZ Information [ON/OFF/AUTO] Action Title [ON/OFF/AUTO] Alarm Input [ON/OFF/AUTO]... -
Page 23: Privacy Zone Mask Setup
▌▌Privacy Zone Mask Setup <DISPLAY SETUP> <PRIVACY ZONE> Select area in image to mask. Mask No [1~8] Select Mask number. If the selected mask has already data, camera moves as it was set. Otherwise, “UNDEFINED” will be displayed under “Mask No”. Display [ON/OFF] Sets if camera makes mask shows or not on... -
Page 24: Camera Setup
►Camera Setup <DOME CAMERA SETUP> <CAMERA SETUP> Setup the general functions of zoom camera module Focus Mode [AUTO/MANUAL/SEMIAUTO] Sets camera focus mode. ■ SEMIAUTO Mode This mode exchanges focus mode automatically between Manual Focus mode and Auto Focus mode Manual Focus mode activates in preset operation and Auto Focus mode activates when jog operation Starts. - Page 25 ■ Auto Exposure Setup <Dome Camera Setup>→<Camera Setup> →<Auto Exposure Setup> Backlight [HIGH/NORMAL/OFF] Sets Backlight Compensation Brightness [0 100] Adjusts brightness of images. Iris, Shutter Speed and Gain are adjusted automatically in correspondence with this value Shutter [DEFAULT/MANUAL/A.FLK] If Shutter Speed is set to A. Flicker, to remove Flicker, Shutter Speed should be set to 1/100 secretary.
-
Page 26: Motion Setup
▌▌Motion Setup <DOME CAMERA SETUP> <MOTION SETUP> Setup the general functions of Pan/Tilt motions. Motion Lock [ON/OFF] Group. It is possible only to run those functions. To set up and delete those functions, enter into OSD menu. Power Up Action [NORTH/GROUP/PATTERN/SWING] Refer to "Other Functions"... - Page 27 ■ Parking Action Setup <DOME CAMERA SETUP>→<MOTION SETUP> →<PARKING ACTION SETUP> If Park Enable is set to ON, camera runs assigned function automatically if there is no PTZ command during assigned ''Wait Time''. Wait Time [003~240S] The time is displayed with "XXX S" format and you can change this joystick or keyboard..
-
Page 28: Swing Setup
▌▌Swing Setup <Dome Camera Setup>→<Swing Setup> Swing Number [1~8] Selects Swing number to edit. Start PositionSet up the 2 position for Swing function if a End Position selected preset is not defined, "UNDEFINED" will be displayed. When swing function runs, camera moves form the preset assigned as the start point to the preset assigned as the end point in CW (Clockwise) direction. -
Page 29: Pattern Setup
▌▌Pattern Setup <DOME CAMERA SETUP>→<PATTERN SETUP> Pattern Number [1~4] Selects Pattern number to edit. If a selected pattern number is not defined, "UNDEFINED" will be displayed under selected pattern number. Clear Pattern [CANCEL/OK] Deletes data in current pattern Label Display [ON/OFF] Edit Pattern [OK/CANCEL] OK: Edit the pattern function Cancel: Don't execute the pattern function. -
Page 30: Group Setup
▌▌Group Setup <Dome Camera Setup>→<Group Setup> Croup Number [1~8] Selects Group number to edit. If a selected Group number is not defined, "UNDEFINED" will be displayed under selected Group number. Clear Group [CANCEL/OK] Deletes data in current Group Edit Group Starts editing Group. -
Page 31: Alarm Input Setup
▌▌Alarm Input Setup (For External mini PTZ Dome only) <DOME CAMERA SETUP> <ALARM SETUP> Match the Alarm sensor input to one of Preset Positions /Home/Auto Scan/Group/Pattern/Swing. If an external sensor is activated, camera will corresponding command position when this item is predefined. Alarm Enable [ON/OFF] Establish the current passage reports to the... -
Page 32: System Initialize
▌▌System Initialize Clear All Data Deletes all configuration data such as display, camera, motion setup and so on. Clear Display Set Initializes Display Configuration Clear Camera Set Initializes Camera Configuration Clear Motion Set Initializes Motion Configuration Clear Edit Data Deletes Preset Date, Swing Data, Pattern Data and Group Data Reboot Camera Reboots Zoom Camera module... -
Page 33: Specifications
▌▌Specifications SD-PTZ2W Type Video Signal System NTSC / PAL 1/4" Interline Transfer CCD Max. Pixels NTSC: 811(H)×508(V)410K / PAL: 795(H)×596(V)470K Effective Pixels NTSC: 768(H)×494(V)380K / PAL: 752(H)×582(V)440K Horizontal Res. 600 TV Line(Color), 680 TV Line(B/W) Ration 52 dB (AGC Off) - Page 34 ▌▌Dimension ► Ceiling Bracket ► Pendant Bracket ►ARM Type Wall Mount Bracket ►L Type Wall Mount Bracket V.20111226 Mini Speed Dome Camera Introduction Manual...
Need help?
Do you have a question about the SD-PTZ2W and is the answer not in the manual?
Questions and answers