Advertisement
Quick Links
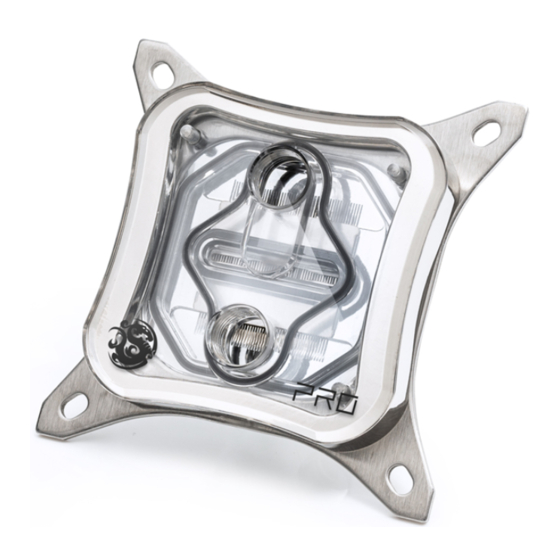
Bitspower CPU Block Summit M Pro
with OLED (12th Gen Intel CPU)
80
75
72
OUT
DRGB LED
1
Digital RGB PIN on
motherboard or
1
motherboard
IN
2
other equipment.
2
BPTA-DRGBMFC
DRGB Multi Function Controller
(Not included)
V1
INTEL LGA 775
INTEL LGA 115X
INTEL LGA 1366
INTEL LGA 2011
INTEL LGA 2011-V3
INTEL LGA 2066
INTEL LGA 2066
Press and hold the button for three seconds in
order to switch the device's status.
7 2
T
W
Water Temperature
80. 6
T
W
Temperature : 0~99° C(32~210.2° F)
[ 1 ]
instruction manual
1700
99
50
0
Line Graph
192
122
0
Input Voltage : DC 5V~12V
operate current : <20ma
TEM P
240 S
TEM P
240 S
Advertisement

Subscribe to Our Youtube Channel
Related Manuals for Bitspower Summit M Pro


Summary of Contents for Bitspower Summit M Pro
- Page 1 Bitspower CPU Block Summit M Pro with OLED (12th Gen Intel CPU) INTEL LGA 775 INTEL LGA 115X INTEL LGA 1366 INTEL LGA 2011 INTEL LGA 2011-V3 INTEL LGA 2066 1700 INTEL LGA 2066 Press and hold the button for three seconds in order to switch the device's status.
- Page 2 Installation 1 Follow the right sequence to install. Use an appropriate amount of thermal paste. SCM3FL20 Spring 1mm Spacer CPU Block SCM4M3 [ 2 ]...
- Page 3 Installation 2 Follow the right sequence to install. The thumb screw cannot be locked too tightly, the spring is slightly pressed and the gap is kept as shown below. The thumb screw cannot be rotated to the end. When the Thumb Screw spring screws too tight, the SCM3F6 screw will be driven Spring...
- Page 4 AMD SOCKET 939 / 754 / 940 AMD SOCKET AM4 AMD SOCKET AM3 / AM3+ AMD SOCKET AM2 / AM2+ AMD SOCKET FM1 / FM2+ AMD SOCKET AM4 AMD SOCKET AM3 / AM3+ AMD SOCKET AM2 / AM2+ AMD SOCKET FM1 / FM2+ Installation 1 Thumb Screw Follow the right sequence to install.
- Page 5 Installation 2 Follow the right sequence to install. Thumb Screw Spring 1mm Spacer CPU Block SC6-32M3 Screw Motherboard Original backplane [ 5 ]...
- Page 6 For 1200/1700 Motherboard BP-MKCPUM-1217 Accessories Backplate 1 PC Adjusting Nut 5 PCS 1.5MM Backplate Bolt 4 PCS 75MM 78MM Washer 4 PCS Screw 4 PCS Assembly steps step 1 [ 6 ]...
- Page 7 step 2 step 3 Thumb Screw Spring CPU Block 1200/1700 Intel Motherboards (Not included) [ 7 ]...
- Page 8 Forbidden to use the leak teser when there is water in the loop or the pump is runing. Bitspower requires to use of distilled or pure water or Bitspower Pellucid Coolant as the water-cooling liquid. Also, the consumer can add Bitspower Dye to Pellucid Coolant for the color requirement.
- Page 9 使用說明書 Bitspower CPU Block Summit M Pro with OLED (12th Gen Intel CPU) INTEL LGA 775 INTEL LGA 115X INTEL LGA 1366 INTEL LGA 2011 INTEL LGA 2011-V3 INTEL LGA 2066 1700 INTEL LGA 2066 出 進 輕觸此按鍵 ,輕觸此按鍵 3 秒, 進入模式切換狀態...
- Page 10 安裝方式 1 請按照正確的順序安裝 核心需塗導熱膏 手轉螺絲 彈簧 1 毫米墊片 冷頭 孔位固定螺絲 [ 10 ]...
- Page 11 安裝方式 2 請按照正確的順序安裝 手轉螺絲不能鎖太緊,彈簧略有壓迫且保有間隙如下圖。手轉 螺絲不能旋轉到底,當鎖太緊時,SCM3F6 螺絲會被帶動,並 會被帶離主板,反而導致冷頭與 CPU 貼合效果不好。 手轉螺絲 彈簧 1 毫米墊片 冷頭 SCM3F6 螺絲 1 毫米墊片 背板墊片 3M 背膠絕緣片 金屬背板 M3x32 毫米螺絲 [ 11 ]...
- Page 12 進 出 AMD SOCKET 939 / 754 / 940 AMD SOCKET AM4 AMD SOCKET AM3 / AM3+ AMD SOCKET AM2 / AM2+ AMD SOCKET FM1 / FM2+ AMD SOCKET AM4 AMD SOCKET AM3 / AM3+ AMD SOCKET AM2 / AM2+ AMD SOCKET FM1 / FM2+ 安裝方式...
- Page 13 安裝方式 2 請按照正確的順序安裝 手轉螺絲 彈簧 1 毫米墊片 冷頭 SC6-32M3 螺絲 主板 原廠背板 [ 13 ]...
- Page 14 適用於 1200/ 1700 主板 BP-MKCPUM-1217 配件 背板 1 片 固定螺帽 5 個 1.5MM 背板螺絲 4 支 75MM 78MM 墊片 4 個 墊高固定柱 4 個 組裝步驟 步驟 1 [ 14 ]...
- Page 15 步驟 2 步驟 3 手轉螺絲 彈簧 冷頭 1200/1700 Intel 主機板 ( 不包括 ) [ 15 ]...
- Page 16 注意 跑水前,請先確認所有零件已安裝在正確的位置上,在不開主機,單開水泵的 情况下,進行 24 小時的跑水測試, 確保無漏水情况後再開主機,避免發生漏 水而導致電腦零件的損壞。 本公司保留對產品的設計更改以及解釋的權力,如有更動恕不另行通知,產品 顏色與配件以實物為準。 當使用測氣產品測試水路時 , 為避免由于壓力過大導致產品損壞 , 輸入的壓力 請不要超過 0.5kg/cm (Bar), 如因壓力過大造成產品損壞 , 將由客戶自行承 擔 . 嚴禁客戶在水路有水及水泵開啟的情況下進行氣體飽壓測試。 Bitspower 要求消費者使用 蒸餾水或純水或 Bitspower 透明冷卻液作爲水冷液 使用。此外,也可以添加 Bitspower 染料到透明冷卻液中以滿足顏色要求。如 果消費者選擇不同的水冷液,可能會引起水路配件中的塗層剝落、積垢堵塞水 道、水泵磨損、水箱管破裂、O 型圈變形或失去密封性導致漏水等。任何因使 用不當水冷液導致相關的問題將由消費者自行負責。 [ 16 ]...
- Page 17 使用说明书 Bitspower CPU Block Summit M Pro with OLED (12th Gen Intel CPU) INTEL LGA 775 INTEL LGA 115X INTEL LGA 1366 INTEL LGA 2011 INTEL LGA 2011-V3 INTEL LGA 2066 1700 INTEL LGA 2066 出 进 轻触此按键 ,轻触此按键 3 秒, 进入模式切换状态...
- Page 18 安装方式 1 请按照正确的顺序安装 核心需涂导热膏 固定水冷头手转式螺絲 弹簧 1 毫米垫片 冷头 孔位固定螺丝 [ 18 ]...
- Page 19 安装方式 2 请按照正确的顺序安装 手转螺丝不能锁太紧,弹簧略有压迫且保有间隙如下图。手转 螺丝不能旋转到底,当锁太紧时,SCM3F6 螺丝会被带动,并 会被带离主板,反而导致冷头与 CPU 贴合效果不好。 手转螺丝 弹簧 1 毫米垫片 冷头 SCM3F6 螺丝 1 毫米垫片 背板垫片 3M 背胶绝缘片 金属背板 M3x32 毫米螺丝 [ 19 ]...
- Page 20 进 出 AMD SOCKET 939 / 754 / 940 AMD SOCKET AM4 AMD SOCKET AM3 / AM3+ AMD SOCKET AM2 / AM2+ AMD SOCKET FM1 / FM2+ AMD SOCKET AM4 AMD SOCKET AM3 / AM3+ AMD SOCKET AM2 / AM2+ AMD SOCKET FM1 / FM2+ 安装方式...
- Page 21 安装方式 2 请按照正确的顺序安装 手转螺丝 弹簧 1 毫米垫片 冷头 SC6-32M3 螺丝 主板 原厂背板 [ 21 ]...
- Page 22 适用于 1200/ 1700 主板 BP-MKCPUM-1217 配件 背板 1 片 固定螺帽 5 个 1.5MM 背板螺丝 4 支 75MM 78MM 垫片 4 个 垫高固定柱 4 个 组装步骤 步骤 1 [ 22 ]...
- Page 23 步骤 2 步骤 3 手转螺丝 弹簧 冷头 1200/1700 Intel 主机板 ( 不包括 ) [ 23 ]...
- Page 24 注意 跑水前,请先确认所有零件已安装在正确的位置上,在不开主机,单开水泵的 情况下,进行 24 小时的跑水测试, 确保无漏水情况后再开主机,避免发生漏 水而导致电脑零件的损坏。 本公司保留对产品的设计更改以及解释的权力,如有更动恕不另行通知,产品 颜色与配件以实物为准。 当使用测气产品测试水路时 , 为避免由于压力过大导致产品损坏 , 输入的压力 请不要超过 0.5kg/cm (Bar), 如因压力过大造成产品损坏 , 将由客户自行承 担 . 严禁客户在水路有水及水泵开启的情况下进行气体饱压测试。 Bitspower 要求消费者使用 蒸馏水或纯水或 Bitspower 透明冷却液作为水冷液 使用。此外,也可以添加 Bitspower 染料到透明冷却液中以满足颜色要求。如 果消费者选择不同的水冷液,可能会引起水路配件中的涂层剥落、积垢堵塞水 道、水泵磨损、水箱管破裂、O 型圈变形或失去密封性导致漏水等。任何因使 用不当水冷液导致相关的问题将由消费者自行负责。 [ 24 ]...
Need help?
Do you have a question about the Summit M Pro and is the answer not in the manual?
Questions and answers