Table of Contents
Advertisement
Quick Links
Advertisement
Table of Contents

Related Manuals for Bush Classic BRC-3


Summary of Contents for Bush Classic BRC-3
- Page 1 Instruction Manual BRC-3 SKU: 135873546...
- Page 2 We’re here to help you get the most from your DAB/FM Radio. Should you require any guidance, a simple solution can often be found online at: www.bush-support.com If you still require further assistance, call one of our experts on 0345 604 0105.
-
Page 3: Table Of Contents
USING THE UNIT WITH AUXILIARY EQUIPMENT Other information CARE AND MAINTENANCE TROUBLESHOOTING GUIDE TECHNICAL SPECIFICATION Product support Help and assistance Disposal Guarantee section of these instructions, or online at www.bush-support.com If you still require further assistance, call one of our experts on 0345 604 0105... - Page 5 Safety information...
-
Page 6: Safety Information
Safety information Important - Please read these instructions fully before installing or operating SAFETY PRECAUTIONS - Read all the instructions carefully before using the unit and keep them for future reference. Check that the voltage marked on the rating label matches your mains voltage. - The unit must be placed on a flat stable surface and should not be subjected to vibrations. - Page 7 Safety information Important - Please read these instructions fully before installing or operating Mains Adapter - Make sure the unit is not resting on top of the mains cable, as the weight of the unit may damage the cable and create a safety hazard. - If the mains cable is damaged it must be replaced by the manufacturer, its service agent, or similarly qualified persons in order to avoid a hazard.
-
Page 9: Getting To Know Your Dab/Fm Radio
Getting to know your DAB/FM Radio... -
Page 10: Ready? Let's Begin
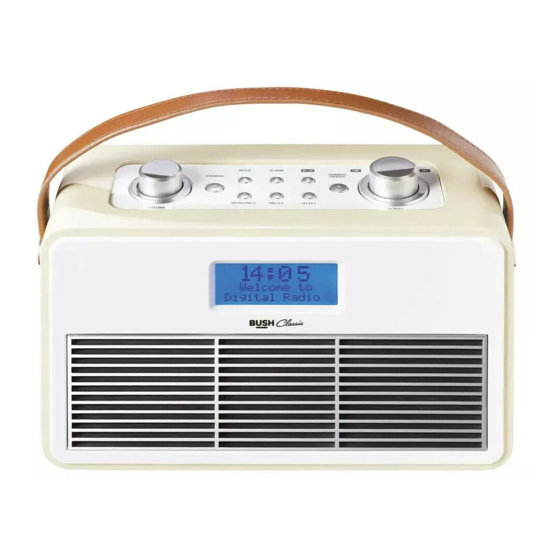
Getting to know your DAB/FM Radio You’ll be up and running in no time Ready? Let’s begin... Please read these instructions carefully. They contain important information which will help you get the best from your product and ensure safe and correct installation and operation. If you require any further assistance, our technical experts are happy to help. - Page 11 Getting to know your DAB/FM Radio You’ll be up and running in no time top view 3. Volume control knob 4. Standby / On( ) button 5. Mode button 6. Alarm button Play / Pause ( ) button 8. Dimmer/Snooze button 9.
-
Page 13: Using Your Dab/Fm Radio
Using your DAB/FM Radio... -
Page 14: Battery Installation And Use
Using your DAB/FM Radio Let’s get started BATTERY INSTALLATION AND USE To use the appliance with batteries ensure that the power cord is NOT connected to the mains and install the batteries into the battery compartment. Slide off the battery compartment cover from the reverse of the radio. -
Page 15: Setting The Clock
Using your DAB/FM Radio Let’s get started SETTING THE CLOCK The clock in this radio is equipped to receive a DAB and FM radio frequency time signal. Place the appliance on a flat and stable surface. 2. Connect the adaptor lead into the socket at the rear of the radio, plug in and switch on at the mains. -
Page 16: Using The Radio - Dab Mode
Using your DAB/FM Radio Let’s get started USING THE RADIO - DAB MODE DAB differs from analogue radio; the separate signals from a number of stations are grouped together and transmitted as a single frequency. These groups are referred to as multiplexes and ensembles. - Page 17 Using your DAB/FM Radio Let’s get started DAB MODE – SECONDARY SERVICES Some stations include secondary services and when these are available a ‘>’ symbol appears after the station name when searching the stations found list. These secondary services contain extra services that are related to the primary station, for example a sports station may want to add extra commentary.
- Page 18 Using your DAB/FM Radio Let’s get started DAB SET UP OPTIONS This function allows the DAB set up menus to be entered and a number of options to be changed. With the music of choice playing, press and hold the MENU / INFO button until ‘Full scan’ is displayed and then turn the SCROLL knob to move through the menu options available and press the SELECT button to enter each option.
-
Page 19: Using The Radio - Fm Mode
Using your DAB/FM Radio Let’s get started 3. The display will now show ‘Factory Reset? <No> Yes’ (fig. 8). Use the fig.8 SCROLL knob until <Yes> is shown and then press the SELECT button to confirm. The radio will display ‘Restarting….’ and will then go into standby mode. - Page 20 Using your DAB/FM Radio Let’s get started ∞ Time - the time will be automatically updated by the radio time signal. ∞ Date - the date will be automatically updated by the radio time signal. ∞ Radio text - the broadcaster may include a scrolling message about the current programme. ∞...
-
Page 21: Using The Radio - Programmed Station Function
Using your DAB/FM Radio Let’s get started USING THE RADIO - PROGRAMMED STATION FUNCTION This function allows up to 10 stations to be programmed into the memory and stored in DAB and FM modes. Follow the directions above to select a radio station. 2. - Page 22 Using your DAB/FM Radio Let’s get started 4. Turn the SCROLL knob to select the duration (90, 60, 45, 30, 15 minutes) of choice and press the SELECT button to confirm. The alarm source will be displayed. 5. Turn the SCROLL knob to select the alarm source (Buzzer, DAB or FM) of choice and press the SELECT button to confirm.
-
Page 23: Setting And Using The Sleep Function
Using your DAB/FM Radio Let’s get started To extend the snooze interval from the default 5 minutes, press the DIMMER / SNOOZE button repeatedly after the alarm has been activated to scroll through the options available (5, 10, 15 and 30 minutes). When the snooze interval of choice is displayed stop pressing the button and this interval will now be used as the default. -
Page 24: Using The Radio With A Bluetooth Device
Using your DAB/FM Radio Let’s get started USING THE RADIO WITH A BLUETOOTH DEVICE Turn the radio on and press the MODE button to select the BT mode. The display will show ‘Bluetooth’ and then a flashing ‘Disconnected’ . 2. Switch on your Bluetooth device and prepare it for Bluetooth set-up (often in Settings / Wireless and Networks) 3. -
Page 25: Using Headphones (Not Included)
Using your DAB/FM Radio Let’s get started USING HEADPHONES (not included) A stereo headphone jack has been provided so that the set can be used without disturbing others. Plug in the headphones at the point marked ‘ ’ on the back of the radio and adjust the listening volume to your chosen level. -
Page 27: Other Information
Other information... -
Page 28: Care And Maintenance
Other information Helpful technical information CARE AND MAINTENANCE ∞ Wipe external surfaces with a soft cloth. If the casing is very dirty, unplug from the mains supply and use a damp cloth soaked in a weak solution of washing up liquid and water. Allow it to dry thoroughly before reusing. -
Page 29: Technical Specification
Other information Helpful technical information Alarm does not work Has the alarm been activated – see section 10.2? Has the correct alarm been activated? TECHNICAL SPECIFICATION Model BRC-3 Rated voltage(adaptor) 100-240V~ 50/60Hz Adaptor output DC 6V 1.5A Rated voltage (radio) DC 6V (1.5V x 4 AA) Power consumption Power consumption (standby) -
Page 31: Product Support
Product support... -
Page 32: Help And Assistance
If you require any technical guidance or find that your DAB/FM Radio is not operating as intended, a simple solution can often be found in the Troubleshooting section of these instructions or online at www.bush-support.com If you still require further assistance, call one of our experts on 0345 604 0105*. To help... -
Page 33: Disposal
Product support Help is always at hand Disposal This symbol on the product or in the instructions means that your electrical and electronic equipment should be disposed at the end of its life separately from your household waste. There are separate collection systems for recycling in the EU. -
Page 34: Guarantee
Call us now and activate your 12 month guarantee Thank you for choosing Bush. Your new product is guaranteed against faults and breakdowns for 12 months. Don’t forget to register it with us today so we can provide you with our best possible after-sales service and useful updates. - Page 35 Contact: www.bush-support.com Helpline: 0345 604 0105...
Need help?
Do you have a question about the Classic BRC-3 and is the answer not in the manual?
Questions and answers