
Subscribe to Our Youtube Channel
Related Manuals for Starrett W2900-6ME


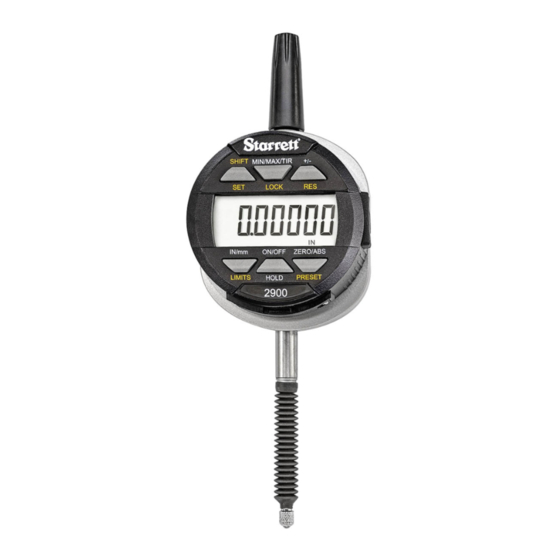
Summary of Contents for Starrett W2900-6ME
- Page 1 The L. S. Starrett Company 3/7/2022 Wireless Electronic Indicator User Guide The L.S. Starrett Company 121 Crescent Street Athol, MA 01331 https://www.starrett.com Wireless Indicator User Guide Ver 1.0...
- Page 2 The L. S. Starrett Company 3/7/2022 Table of Contents Page Section 1 General Information 1.0 Caution 1.1 Basic Operating Instructions 1.2 Button Descriptions and Functions Section 2 Functions 2.0 Setting PRESET 2.1 Setting the Limits (Go/No Go Function) 2.2 Setting the MIN/MAX/TIR Function 2.3 Resolution Selection...
-
Page 3: Section 1 General Information
The L. S. Starrett Company 3/7/2022 Section 1 General Information 1.0 Caution • Remember, only charge your Indicator when the battery symbol is shown on the display, (Fig.1A) see page 13. • Avoid extreme temperatures, direct sunlight or below freezing for extended periods. Allow the tool to return to the ambient temperature of the area you are working in, before using the tool. - Page 4 The L. S. Starrett Company 3/7/2022 LIMIT PRESET Fig.2B, This display is used in some of the indicators. The different icons are pointed out above. 8 / 9 / 10 5 / 6 Fig.2A The functions printed in yellow; LOCK, RES, LIMITS and PRESET, are used in conjunction with the SHIFT button.
-
Page 5: Section 2 Advanced Functions
The L. S. Starrett Company 3/7/2022 Section 2 Advanced Functions 2.0 Setting Preset Note: This function is available with some of the 6 button indicators. To set the value, follow the steps below: 1. The values can be set to: +/-9.99999 inches or +/- 9999.99 mm. - Page 6 The L. S. Starrett Company 3/7/2022 2.1 Setting the Limits (Go/No Go Function) Note: This function is available with the 6 button indicators. 1. Select the units to be displayed with the IN/mm button. 2. Press the SHIFT/SET button. The SET icon will appear in the bottom left corner Fig.6A.
- Page 7 The L. S. Starrett Company 3/7/2022 Press the LIMITS button. The MAX LIMIT icon will appear in the top middle of the display, see Fig.7A. “MAX LIM” will show on the alternative display Fig.7B. Press the SHIFT/SET button. The LIMIT/LIM icon will flash on/off.
- Page 8 The L. S. Starrett Company 3/7/2022 2.2 Setting the MIN/MAX/TIR Function The Min/Max/TIR (Total Indicator Reading or Run-out ) function measures the minimum and the maximum values of a surface (usually rotating) and then calculates the difference between them. (TIR), Note: This function is only available with the advanced indicators.
-
Page 9: Resolution Selection
The L. S. Starrett Company 3/7/2022 2.3 Resolution Selection Enter the Resolution mode by pressing the SET/SHIFT button followed by the RES button. The choices are displayed sequentially from high to low resolution with the associated units. The round off accommodates the range of values in the table below. -
Page 10: Lock Mode
The L. S. Starrett Company 3/7/2022 2.4 Lock Mode The Lock mode will prevent intended or unintended operator modifications to the settings. This function is not available with the basic type indicators. Lock Function Activation: Before the Lock function is activated, the functions must pre-set to the desired settings: Plus/Minus for spindle direction, ABS mode, PRESET Reading, Units, Limits setting, and MIN/MAX/TIR settings. -
Page 11: Section 3 Wireless Overview
The L. S. Starrett Company 3/7/2022 Section 3 Wireless Overview 3.0 Wireless Functions The new Wireless button (Fig.11A) on the 2900 Indicator is used for three functions; turn the wireless on/off, sending a reading, and to change/reset a function in profile mode. - Page 12 3.1 Communicating with your Wireless Tool Starrett Wireless Tools communicate with a DSA 4.0 Gateway using encryption. This prevents outsiders from ‘listening in’ to the data being sent. The first time a wireless tool talks to a Gateway they establish a set of security keys.
-
Page 13: Section 4 Rechargeable Battery
The L. S. Starrett Company 3/7/2022 Section 4 Rechargeable Battery 4.0 Rechargeable Battery Care and Maintenance The rechargeable battery in your tool will last longer when maintained properly. When the charge on the battery is getting low, a battery symbol will be visible on the display (Fig.13C). When you see this icon, charge the battery at the next opportunity. -
Page 14: Startup Sequence
The L. S. Starrett Company 3/7/2022 4.1 Startup Sequence 1. After the tool has completely shut down , you have to plug it in to charge the battery. The tool will flash a sequence of information on the display, see the examples below (Fig’s.14-17). This is normal for the indicator and a brief description of the screens is shown below.
Need help?
Do you have a question about the W2900-6ME and is the answer not in the manual?
Questions and answers