Advertisement
Table of Contents
- 1 Quick Start Guide
- 2 Table of Contents
- 3 Contact Phomemo Technical Support Team
- 4 Package List
- 5 Power on Your Printer
- 6 How to Feed Label
- 7 Connect to Computer
- 8 Installation for Windows
- 9 Installation for Mac
- 10 Installation for Chromeos
- 11 Label Editor: Labelife
- 12 Keep Your Label Printer in Latest Update
- 13 Setup: Printer Preference
- 14 Specifications
- Download this manual
Advertisement
Table of Contents

Related Manuals for Phomemo PM246S


Summary of Contents for Phomemo PM246S
-
Page 1: Quick Start Guide
QUICK START GUIDE For PM-241 Bluetooth version... -
Page 2: Table Of Contents
Catalog QUICK START GUIDE .......................1 1. Contact Phomemo Technical support team ................3 2. Package list ........................4 3. Power on your printer ......................5 4. How to feed label .......................6 5. Connect to computer ......................7 6. Installation for Windows ....................8 7. -
Page 3: Contact Phomemo Technical Support Team
Phone us: +1 855 957 5321 Our website: www.phomemo.com Email us: support@phomemo.com WhatsApp us: +86 139 2808 8284 YouTube Channel: https://www.youtube.com/channel/UC5t52R9QarUIICgo9FfxgtQ Scan QR code talk to us on WhatsApp. At last Thank you for choosing Phomemo. Best wishes for you. @Phomemo Technical Team 2021... -
Page 4: Package List
Label printer x 1 Fan-fold labels x 1 User manual x 1 Power adapter x 1 Power cable x 1 Usb cord x 1 Usb disk x 1 If any accessories missing, please contact us to get support. PM246S Quick start video: https://phomemo.com/pages/pm246s... -
Page 5: Power On Your Printer
3. Power on your printer Connect power adapter and power cable to printer. NOTE: Please switch power to O (I: ON O:OFF) before you connect power cable to printer. Turn on printer... -
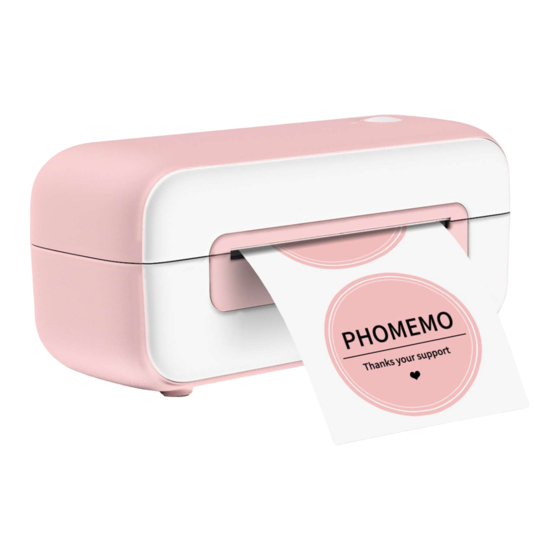
Page 6: How To Feed Label
4. How to feed label Open printer cover. And feed label into printer. NOTE: The printing side must be faced up or it will print blank label. Close printer cover. The printer catch label automatically. Press and hold FEED button(on the top of the cover) until blue light blink 2 times then release button. -
Page 7: Connect To Computer
5. Connect to computer Connect USB cable to printer. Connect USB cable to your computer. Turn on printer. -
Page 8: Installation For Windows
Get label printer driver from USB driver. Or get the latest driver from https://phomemo.com/pages/download-center-pm-246s-new Open driver installation. Just follow the prompts and proceed to the next step. Now, printer driver have been installed. Please enjoy our printer. -
Page 9: Installation For Mac
Get label printer driver from USB driver. Or get the latest driver from https://phomemo.com/pages/download-center-pm-246s-new Open driver installation. Just follow the prompts and proceed to the next step. Now, printer driver have been installed. Please enjoy our printer. -
Page 10: Installation For Chromeos
8. Installation for ChromeOS Open chrome web store. Search “labelife” extension. Add extension to your chrome. Connect printer to chrome. Select PM246S then pair with printer. Now, the printer has been setup with your Chromebook already. -
Page 11: Label Editor: Labelife
9. Label editor: Labelife Instruction: labelife is a free application for phomemo printer. You can customize label with editor tools or crop PDF files with labelife PDFs tools. Download and install Labelife Get installation on: https://labelife.itaricartridge.com Customize a new label... -
Page 12: Keep Your Label Printer In Latest Update
10. Keep your label printer in latest update Be aware, Keep your label printer in the latest update will make printer perform better. Open labelife application. 1. Help --> Firmware updates 2. It will check for updates. 3. Keep your printer in the latest version and print better. -
Page 13: Setup: Printer Preference
11. Setup: printer preference Setting paper size Windows 1. Open Setting --> Devices --> Printers & Scanners 2. Manage Phomemo PM-246S --> Printing preferences 3. Page Setup --> New your page --> Fill up dimension... - Page 14 1. Show detail while you ready to print 2. Paper Size --> Manage Custom Sizes 3. Set your paper size...
- Page 15 Setting printing darkness and speed Windows 1. In printing preference Option --> print speed / print density 1. Go printer features 2. Set printer speed and darkness...
-
Page 16: Specifications
12. Specifications Printing method Thermal Resolution 203 DPI Max printing speed 150mm/s Label width 1.57’’x4.7’’ Label thickness 0.08~0.2mm Connection Input voltage 100~240V Power adaptor 24V/2A Support Paper Direct thermal labels Thermal continuous labels Support operating system Windows (x86/x64/arm) macOS Linux(Ubuntu/CentOS) ChromeOS Printing life About 1,000,000 labels...
Need help?
Do you have a question about the PM246S and is the answer not in the manual?
Questions and answers
How to print a label out of an email