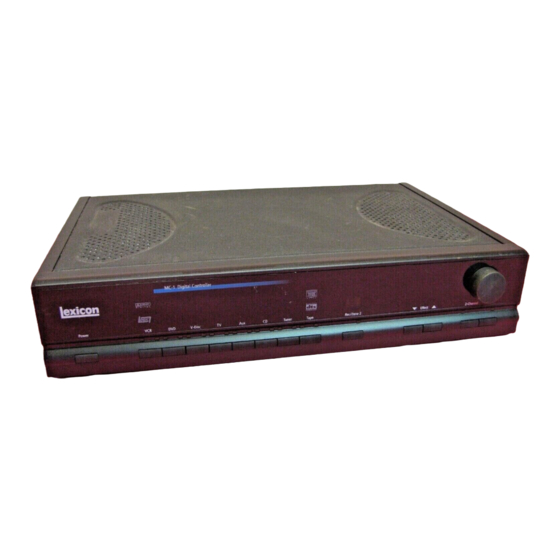
Lexicon MC-1 Owner's Manual
Digital controller
Hide thumbs
Also See for MC-1:
- Service manual (138 pages) ,
- Quick reference manual (2 pages) ,
- Protocol manual (44 pages)
Table of Contents
Advertisement
Quick Links
Advertisement
Table of Contents

Related Manuals for Lexicon MC-1


Summary of Contents for Lexicon MC-1
- Page 1 Owner's Manual MC-1 Digital Controller...
-
Page 2: Important Safety Instructions
"Logic 7" and "Auto-Azimuth" are trademarks of Lexicon, Inc. Copyright ©1999 Lexicon. Inc. All Rights Reserved. U.S. Patent numbers 4,862,502; 5,136,650 and 5,796,844; other patents pending on the MC-1. Lexicon, Inc.• 3 Oak Park • Bedford MA • 01730-1441 USA • Tel: 781-280-0300 • Fax: 781- 280-0490... - Page 3 Dansk Vigtig information om sikkerhed Gem denne vejledning til senere brug. Følg alle anvisninger og advarsler på apparatet. Apparatet skal altid tilsluttes den korrekte spænding. Der henvises til brugsanvisningen, der indeholder specifikationer for strømforsyning. Der gøres opmærksom på, at ved varierende driftsspændinger kan det blive nødvendigt at bruge andre lednings- og/eller stiktyper.
- Page 4 Deutsch Wichtige Sicherheitsanweisungen Heben Sie sich diese Sicherheitsanweisungen auch für später auf. Befolgen Sie alle auf der Vorrichtung stehenden Anweisungen und Warnungen. Immer richtigen Spannung Gebrauchsanweisungen des Herstellers informieren Sie über die elektrischen Anforderungen. Vergessen Sie nicht daß bei verschiedenen Betriebsspannungen ggf.
-
Page 5: Table Of Contents
Effect to the Factory Preset Version • Restoring the original parameter values of an Effect • Naming your custom Effect • Restoring the original Effect Name • Listening to only the MC-1 Effect Front/Back Fader 3 PCM Effects and Parameters Panorama ... -
Page 6: Introduction
Introduction The MC-1 can be thought of as four units in one. At its heart is a reference-quality 8-channel music and film digital audio computer capable of creating or recreating a limitless amount of listening environ- ments. This digital audio computer is mated to an 8-channel, 24-bit Digital-to-Analog converter that rivals the most exotic and costly stand- alone devices. -
Page 7: Using The Documentation
DTS Digital Surround input signals. Any DTS-capable software and/or source components should be labeled with a logo, similar to the one on the MC-1 front panel. Downmix describes the process of creating a two-channel output from a multichannel (>2) signal. - Page 8 Effect An effect is a configuration that determines how the MC-1 will process an input signal. The MC-1 contains 24 effects: Panorama, Nightclub, Concert Hall, Church, Cathedral, Party, 2-Channel, Music Surround, Music Logic, Logic 7, TV Matrix, Pro Logic, THX Cinema, Mono Logic, 5.1 2-Channel, 5.1 Music, 5.1 Logic 7, Dolby Digital, THX...
-
Page 9: Installation
Alternately puts the MC-1 Press and hold to activate into and out of standby. Turn- Record/Zone 2 control with ing the MC-1 off with this but- the On/Off, Input Selector, ton (or with the remote) deac- Volume and Mute buttons. -
Page 10: The Rear Panel
Installation The Rear Panel CAUTION: Never make or break any connections to the MC-1 with the rear-panel power ON. Make sure any associated amplifiers are turned off before turning this master power switch on or off. TAPE TUNER V-DISC INPUT... -
Page 11: The Remote Control
MC-1 Digital Controller The Remote Control 1 ON, FP and OSD ON turns the MC-1 on and selects the input last used with main and Zone 2 volume levels set to the levels cho- sen in the OUTPUT LEVELS menu. -
Page 12: Alternate Remote Control Functions Using The
Treble level adjust Bass level adjust CONCERT HALL NIGHTCLUB PANORAMA Accesses Digital Audio Expansion Ports You can access an additional set of controls with the MC-1 remote control by using the Shift key. Shift Record DONE SELECT Zone 2 Light... - Page 13 MC-1 Digital Controller Zone 2 outputs OFF Zone 2 L/R Balance adjust In LOCK SETTINGS menu, pressing with SETTINGS selected toggles double lock Select input for Record/Zone 2 outputs) Zone 2 volume to -20dB Zone 2 volume to -30dB Master volume...
-
Page 14: Connection
The MC-1 has a master power switch on the rear panel above the IEC standard AC power receptacle. This switch may be left ON continuously when the unit is in regular use. When the MC-1 will not be used for an extended period of time, or whenever you are connecting or disconnect- ing any cables to the unit, this switch should be turned OFF. -
Page 15: Wiring Considerations
There is debate over the audible effects of different types of intercon- nects. Good engineering practices have minimized the effect that cables might have on the inputs and outputs of the MC-1 — but feel free to evaluate different interconnects in your system. Be conscious,... -
Page 16: Mc-1 Connections
Connect your main stereo amplifier to the MC-1 FRONT outputs. Connect any additional amplifiers to the remaining outputs on the MC-1: side amplifiers to the SIDE outputs, rear amplifiers to the REAR outputs, center-channel amplifier to the CENTER output and the sub- woofer amp to the SUBWOOFER output. -
Page 17: Video Connections
S-Video outputs. Composite input signals will not be output as S-Video. You can assign any video source to any (or all) of the eight MC-1 inputs via the Input Configuration submenu of the Setup menu. This can be... -
Page 18: "Ac-3 Ready" Laser Disc And Ld/Dvd Players
"AC-3 ready" laser disc and LD/DVD players output Dolby Digital (AC-3) data from laser discs on a separate RCA jack in Radio Frequency (RF) form. To maintain the exceptional performance of the MC-1, an outboard demodulator is required to turn this RF signal back into a digital bitstream. -
Page 19: System Configuration
Turn the MC-1 OFF with the remote control. Turn the unit back ON and immediately press and hold the MUTE button on the remote. (Make sure you do not block the infrared receiver on the MC-1 front panel.) The... - Page 20 A Loudness Contour parameter which boosts bass information, pro- vides more balanced reproduction at low volume listening conditions. Once you have calibrated MC-1 output levels, set the LOUDNESS parameter ON to provide the ideal amount of boost for any given volume setting.
-
Page 21: Display Adjustment
EQUALIZATION DISPLAY ADJUST SETUP Depending on the location of the MC-1 in your room, you may need to adjust the brightness of the front panel display for optimum viewing. To adjust this display, press the to enter the Main Menu. Press Press SELECT to highlight the Display Adjust Menu. - Page 22 Adjusting the position allows you to move the MC-1 display items to a location where they will not interfere with any other video overlays or signals your system may generate.
-
Page 23: Input Configuration
IN, this control is automatically set to OFF. The MC-1 has eight inputs, each of which can be associated with any of the eight video and eight digital audio inputs. Selecting Input Configu- ration from the Setup menu displays a sub-menu which lists these inputs and allows you to select them individually for adjustment. -
Page 24: Input Level Meters
For example, if you primarily listen to CD’s with the CONCERT HALL effect, the MC-1 can be set to load this effect when the CD input is chosen. (You can listen to any similar type of effect using the... - Page 25 ANALOG TRIGGER ENABLE The MC-1 can also be set up to automatically switch to an appropriate effect whenever PCM, AC-3 or DTS encoded material is detected at the input. This allows one input to be used for different formats. For...
- Page 26 DTS MUSIC effect.* To go back to the effect selected as a default, simply press the input button. * As the MC-1 is in AUTOMATIC mode, there may be a brief burst of noise before normal playback begins. Lexicon...
- Page 27 If PCM ONLY is selected as the FX FORMAT for a given input, only PCM effects in the MC-1 can be used. When the MC-1 receives a signal which is not PCM encoded, it will mute and display "NO PCM AUDIO."...
-
Page 28: Audio In
This option in the INPUT CONFIG menu determines which audio input connector on the MC-1 rear panel will be used for the MAIN zone. Using the digital inputs will always yield better performance, and these should be used whenever a source component has a digital audio output. -
Page 29: Record/Zone 2
“zone” in multi-room installations. The Record and Zone 2 outputs on the MC-1 are wired in parallel so that the input selection will always be the same for both. For example, if the CD input is selected for Record, the CD input is also output to Zone 2. - Page 30 2 CH, Party, TV M, and Music (remote control only) These controls set the master volume level to the following levels. When Zone 2 mute is engaged, these controls set the Zone 2 volume level without disengaging mute. -30dB Party -20dB TV M -10dB Music +00dB Lexicon...
-
Page 31: Pgm Trigger Assignment
-3dB point. This menu item assigns the status for the programmable (PGM) trigger on the MC-1 rear panel. +12VDC is provided for controlling ancillary equipment or functions. Selections are ENABLE or DISABLE for the selected input. The factory default is ENABLE (high) for A/V inputs and DISABLE (low) for audio only inputs. - Page 32 120Hz are available as settings for the -3dB point). For any 5.1 channel inputs, selecting SMALL routes the low frequency information to the subwoofer output. Selecting NONE mutes the rear outputs and directs all surround information to the side outputs. Lexicon...
-
Page 33: Surround Ex Configuration
THX SURROUND EX setup with two side and two rear speakers, and with all filters set to 80Hz. These settings are not adjustable. When MC-1 input and output levels are set properly, the entire system will be calibrated to play films at the level intended by the director. -
Page 34: Note On External Noise Calibration • Subwoofer
In the absence of an SPL meter, it is possible to set the output level by ear. Use the internal noise generator in the MC-1 to adjust all volumes to be the same as they cycle around the various speakers. Depending on timbre variations between your speakers, this may be difficult to judge —... - Page 35 Effect Adjust menus — one setting does not affect the other. a Dolby Digital AC-3 signal is coming in, the MC-1 will load the DOLBY DIGITAL effect with the factory preset settings. If a DTS signal is coming in, the MC-1 will load the DTS FILM effect with the factory preset settings.
-
Page 36: Zone 2 Power On Volume
This control in the Output Levels menu allows you to select the volume at which the MC-1 will power on. You can choose from a range of -80 to +12dB, or elect to have the system power on at the last level used (LAST LVL). - Page 37 (This will vary, depending on your intial entry for NEAREST SPKR.) A/V Sync Delay compensates for the delay that occurs when a video processor, such as a scan rate converter, is used with the MC-1. Most of these processors alter the original audio/video timing relationship by adding delay to the video signal as it is processed.
- Page 38 (R001,R002,R003...R127). The numbers represent approximately 1/3", but are provided primarily as a general reference. Panorama is now calibrated. Press DONE repeatedly to step back to the main setup menu. Lexicon Adjust with OFF, LEFT ONLY, LEFT AND RIGHT, RIGHT ONLY 10 - 118 L127...CNTR...R127...
- Page 39 MC-1 Digital Controller L/R Balance Zone 2 Balance This control allows you to adjust the left/right balance of the front, side and rear main outputs. This control can also be accessed on the remote by pressing and holding the Shift button and using DONE to move to the left, and SELECT to move to the right.
-
Page 40: Customization
FX (with SETTINGS selected). Repeat to release lock. When the MC-1 is first turned on, it displays a copyright notice with the current software version. You can choose to have it display CUSTOM- IZED FOR DEMONSTRATION with the word DEMONSTRATION scrolled in from right to left, or you can replace the word DEMONSTRA- TION with a custom name of as many as 20 characters. -
Page 41: Using Mc-1 Effects
Press DONE to confirm the change and move on to the next menu item. Each MC-1 Effect and its parameter menu is described in the following sections. Although the list of available parameters will vary with different effects, the last item in each menu is always CUSTOM. -
Page 42: Front/Back Fader
Selecting EFFECT ONLY allows you to listen to only the effects added by the MC-1 to the currently loaded program. With this function selected, to turn this function on or off. This control allows you to adjust the front/rear balance for the current effect. -
Page 43: Pcm Effects And Parameters
The location of the front speakers and the listening position are crucial to Panorama’s effectiveness and for best results your system and the MC-1 together should be set up and calibrated according to the procedure in Chapter 2. The strength of the Panorama effect drops off as you move away from the prime listening position, especially to the sides. -
Page 44: Concert Hall
4.87 sec HALL SIZE 38 Meters PRE-DELAY 40ms ROLLOFF 2.6kHz SUBWOOFER LVL +00dB EFFECT LEVEL -01dB CUSTOM Lexicon Range 0-15 ON/OFF 20-30 Meters 453Hz-20.0kHz OFF, -30dB to +05dB -30 to +05dB Range 0-15 ON/OFF .89-13.42 sec 0.7, 1.0, 1.25xMID RT... -
Page 45: Party
MC-1 Digital Controller Party 2-Channel Music Surround PCM Effects and Parameters The Party effect allows unprocessed stereo signals to be played over all speakers for background music or for maximum acoustical output of the system. Parameter Initial Value CENTER LEVEL... -
Page 46: Music Logic
6dB lower than the rears to provide subjective rear imaging. Logic 7 contains the re-equalizer feature of the THX Cinema effect, as well as Lexicon's proprietary vocal enhancement feature. The combina- tion of stereo surround information during music and decorrelated effects, with discrete steering to the sides and rears, gives Logic 7 unrivaled performance on matrix encoded films. -
Page 47: Tv Matrix
CUSTOM This Effect provides Dolby Pro Logic Surround decoding designed for any Dolby Surround encoded movies, music, television programs or games. Lexicon's proprietary Auto Azimuth correction makes it one of the most accurate Pro Logic decoders available. Parameter Initial Value... -
Page 48: Mono Logic
BASS ENHANCE derives stereo bass to provide low frequencies that are noticeably less localizable and more spacious in the playback room. Note that results will vary depending on room acoustics and the low frequency capacity of the surround speakers. As side and/or rear Lexicon Range 0-16 ON/OFF 453Hz to 20.0kHz... - Page 49 PCM Effects and Parameters MC-1 Digital Controller speakers are used for bass enhancement, the effectiveness is improved with speakers capable of reproducing reproducing low frequencies (LARGE). Using speakers that are not capable of producing low frequencies (<80Hz) may cause damage to them.
- Page 50 PCM Effects and Parameters Lexicon LOW FREQ WIDTH allows you to apply low-frequency spatial correc- tion to the signal. Positive values of LOW FREQ Width indicate that the difference signal (L-R) has additional energy below 500Hz, while the sum (L+R) has correspondingly less. Negative settings of LOW FREQ WIDTH can compensate for recordings with too much of this property.
- Page 51 SOUNDSTAGE controls the level of the surround speakers relative to the front speakers in a dynamic way. The MC-1 attempts to detect whether or not the sound source was originally encoded from a surround source by looking for occasional bursts of rear-steered material, and by identifying the directional orientation of the background sound between strong sounds.
- Page 52 SURROUNDS selects the type of surround decoding used by the MC-1. STEREO provides extraction of five channels of surround infor- mation from a standard 4-2-4 matrix-encoded soundtrack (Dolby Sur- round, Ultra*Stereo, etc.) The drama of this effect is dependent on the source material and is most noticeable with strong stereo music soundtracks.
-
Page 53: Ac-3 Effects And Parameters
If the program material was mixed so that dialog is at -31dBFS, then REF OFFSET=0dB. If the dialog was mixed at a "hotter" level, for example, -27dBFS, then REF OFFSET = -4dB and the MC-1 would adjust the levels down 4dB to bring dialog back to -31dBFS. -
Page 54: 5.1 2-Channel
REAR DLY OFFSET SIDE LEVEL +00dB REAR LEVEL +00dB LFE MIX LEVEL +0.0dB SUBWOOFER LVL +00dB CUSTOM Lexicon Range AUTO, ON, OFF 0-30 -5 to +5dB -127 to +127 -5dB to +5dB -20.0dB to +0.0dB OFF, -30dB to +05dB Range... -
Page 55: Logic 7
In this effect, any rear speakers present are connected in parallel with the side speakers. This is the standard Dolby Digital decoder. It does not include the enhancements by Lexicon or Lucasfilm which are available with other AC-3 effects in the MC-1. -
Page 56: Thx 5.1 (Including Surround Ex)
This is quite useful when listening to Dolby Digital soundtracks at low output levels. When set to ON, full compression is applied, regardless of volume. Lexicon Range AUTO, ON, OFF ON, OFF ON, OFF -10.0dB to +0.0dB... - Page 57 AC-3 Effects and Parameters MC-1 Digital Controller LFE MIX LEVEL allows separate level attenuation of the LFE channel, which is ultimately mixed to the subwoofer output. As the bass from as many as five other channels is added to the LFE, it can significantly raise subwoofer output levels —...
- Page 58 AC-3 Effects and Parameters Lexicon VOCAL ENHANCE boosts dialog in the center channel. By targeting specific frequencies, it can boost only dialog, without raising the entire center channel level (which would alter the output balance achieved during calibration).
-
Page 59: Dts Effects And Parameters
DTS Effects are compatible with DTS Digital Surround input signals. Any DTS-capable software and/or source components should be labeled with a logo, similar to the one on the MC-1 front panel. This Effect mixes DTS Digital 5.1 information for two-channel playback. -
Page 60: Dts Logic 7
DTS Film DTS Logic 7 combines all the features of DTS Digital with enhance- ments by Lexicon and LucasFilm. This effect uses Logic 7 matrix technology to enhance the steering between the side speakers and the rear speakers, so sounds intended to come from behind the listener actually do come from behind. -
Page 61: Dts Thx (Including Surround Ex)
MC-1 Digital Controller DTS THX (Including Surround EX) DTS Effect Parameters DTS Effects and Parameters This Effect provides THX 5.1 AND Surround EX enhancements for film soundtracks recorded in the DTS format. This processing compensates for the acoustical differences between large mixing theaters and the typically smaller home environment. - Page 62 DTS Effects and Parameters Lexicon RE-EQUALIZER equalizes the left, center, and right channel outputs to match the overall frequency balance of the original recording. Without this re-equalization, many films and some television programs will sound too bright. REAR DELAY OFFSET is an additional delay added to the rear channels when listening to LOGIC 7 and MUSIC SURROUND.
-
Page 63: Troubleshooting
Possible Cause and Solution Check line cord to ensure good connection to the AC outlet and to the receptacle on the MC-1 rear panel. Check to make sure that the MC-1 rear panel power switch is ON. Check the Status menu (under DISPLAY ADJUST: ON-SCREEN or FRONT PANEL menu —... - Page 64 If the MC-1 LCD displays normally at the end of this test, no problems have been found with the MC-1 circuitry. If the internal tests fail, the LCD may display an error message, or no message at all.
-
Page 65: Routine Maintenance
When the message FACTORY DEFAULTS RESTORED is diplayed, press DONE to return to normal operation. All of the adjustable parame- ters in the MC-1 have now been reset to the values assigned when it cleared final Quality Control at the factory. -
Page 66: Specifications
MC-1 Digital Controller Inputs: Audio: 8 stereo (RCA) pairs Video: 8 composite (RCA), 8 S-video Digital: 8: 5 coaxial (RCA), 3 optical (TosLink), conforms to IEC-958, S/PDIF standards; 3 Expansion Ports for 96kHz, 24-bit PCM digital audio Outputs: Audio: 8 main (RCA): Left, Center, Right, L&R Sides, L&R Rears, Subwoofer... -
Page 67: Installation Worksheet
Installed by________________________________Phone____________________Date______________ Gain _______ Name ________________ Audio In _______ Video In _______ Trigger: enabled Gain _______ Name ________________ Audio In _______ Video In _______ Trigger: enabled V-DISC Gain _______ Name ________________ Audio In _______ Video In _______ Trigger: enabled Gain _______ Name ________________ Audio In _______ Video In _______...
Need help?
Do you have a question about the MC-1 and is the answer not in the manual?
Questions and answers