Table of Contents
Advertisement
Available languages
Available languages
Quick Links
Operating Instructions
DE
DE
DE
DE
DE
GB
deutsch, 13
English, 1
K3G52S/AT
COOKER AND OVEN
Contents
Installation, 2-5
Start-up and use, 7-9
Oven cooking advice table
Analogue timer, 10
GB
1
Advertisement
Chapters
Table of Contents

Related Manuals for Ariston K3G52S/AT


Summary of Contents for Ariston K3G52S/AT
-
Page 1: Table Of Contents
Description of the appliance, 6 Overall view Control panel Start-up and use, 7-9 Using the hob Using the oven Cooking modes K3G52S/AT Oven cooking advice table Analogue timer, 10 Setting the clock and timer Precautions and tips, 11 General safety Disposal... -
Page 2: Installation
Installation ! Before operating your new appliance please read Disposing of combustion fumes this instruction booklet carefully. It contains important information concerning the safe installation The disposal of combustion fumes should be and operation of the appliance. guaranteed using a hood connected to a safe and efficient natural suction chimney, or using an electric ! Please keep these operating instructions for future fan that begins to operate automatically every time... -
Page 3: Electrical Connection
• If the cooker is • The voltage is in the range between the values installed underneath a indicated on the data plate. HOOD wall cabinet, there must • The socket is compatible with the plug of the be a minimum distance appliance. -
Page 4: Adapting To Different Types Of Gas
Adapting to different types of gas • Is shorter than 1500 mm. • Fits firmly into place at both ends, where it will be fixed using clamps that comply with current It is possible to adapt the appliance to a type of gas regulations. -
Page 5: Table Of Burner And Nozzle Specifications
K3G52S/AT Burners located inside the flap or, after the oven compartment has been opened, on the left-hand wall inside the oven. -
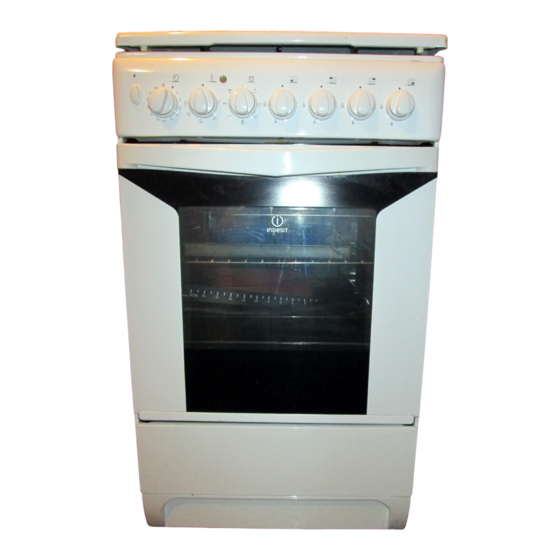
Page 6: Description Of The Appliance
Description of the appliance Overall view Glass cover Gas burner Containment surface for spills Hob grid GUIDE RAILS for the GUIDE RAILS GUIDE RAILS Control panel GUIDE RAILS GUIDE RAILS sliding racks position 5 GRILL rack position 4 position 3 DRIPPING PAN position 2 position 1... -
Page 7: Start-Up And Use
Start-up and use Using the oven Using the hob ! The first time you use your appliance, heat the Lighting the burners empty oven with its door closed at its maximum temperature for at least half an hour. Ensure that the For each BURNER knob there is a complete ring room is well ventilated before switching the oven off showing the strength of the flame for the relevant... -
Page 8: Cooking Modes
Cooking modes ! The TOP OVEN, GRILL and FAN-ASSISTED GRILL cooking modes must be performed with the oven OVEN DEFROST mode door shut. ! When using the TOP OVEN and GRILL cooking The fan at the bottom of the oven circulates room- modes, place the rack in position 5 and the dripping temperature air around the food. - Page 9 Oven cooking advice table S elector knob Food to be cooked W eight R ack P reheating Therm ostat C ooking position (in kg) position to tim e knob tim e be used (m inutes) position (m inutes) (counting up from bottom ) D efrosting A ll frozen foods...
-
Page 10: Analogue Timer
Analogue timer Timer feature The timer feature allows you to enter a specific amount of time and counts down from this time to zero. This feature does not switch the oven on or off; it merely sounds when the set time has elapsed. •... -
Page 11: Precautions And Tips
Precautions and tips ! This appliance has been designed and manufactured • If the appliance breaks down, under no in compliance with international safety standards. circumstances should you attempt to perform the The following warnings are provided for safety reasons repairs yourself. -
Page 12: Care And Maintenance
Care and maintenance Switching the appliance off ! Do not close the cover when the burners are alight or when they are still hot. Disconnect your appliance from the electricity supply before carrying out any work on it. Inspecting the oven seals Check the door seals around the oven regularly. - Page 13 Beschreibung des Gerätes, 18 Geräteansicht Bedienfeld Inbetriebsetzung und Gebrauch, 19-21 Gebrauch des Kochfeldes Gebrauch des Backofens GarprogrammeTabelle Garen im Backofen K3G52S/AT Analog-Kurzzeitwecker, 22 Einstellung von Uhr und Kurzzeitwecker Vorsichtsmaßregeln und Hinweise, 23 Allgemeine Sicherheit Entsorgung Energie sparen und Umwelt schonen Reinigung und Pflege, 24 Abschalten des Gerätes vom Stromnetz...
-
Page 14: Installation
Installation ! Bewahren Sie diese Bedienungsanleitung bitte Abluftsystem sorgfältig auf, damit Sie sie jederzeit zu Rate ziehen Das System zur Ableitung der Abgase ist über eine können. Sorgen Sie dafür, dass sie im Falle eines an einen gut funktionierenden Kamin mit natürlichem Verkaufs, einer Übergabe oder eines Umzugs das Zug angeschlossene Dunstabzugshaube oder über Gerät stets begleitet. -
Page 15: Elektroanschluss
• Bringen Sie keine die Netzsteckdose oder den Netzstecker aus; Vorhänge hinter dem verwenden Sie keine Verlängerungen und HOOD Herd oder in einem Mehrfachsteckdosen. Seitenabstand von Min. ! Netzkabel und Netzsteckdose müssen bei weniger als 200 mm an. installiertem Gerät leicht zugänglich sein. •... -
Page 16: Anpassung An Verschiedene Gasarten
! Sollten eine oder mehrere dieser Bedingungen Anpassung an verschiedene Gasarten nicht erfüllt werden können oder sollte der Herd gemäß den Vorschriften der Klasse 2 – Unterklasse Das Gerät kann auf eine andere Gasart als die, für 1 (Einbau zwischen zwei Unterschränken) installiert die es vorgesehen wurde, eingestellt werden werden, ist ein Flex-Schlauch aus Stahl zu (ersichtlich aus dem Eichungs-Etikett auf der... -
Page 17: Merkmal-Tabelle Brenner Und Düsen
Tiefe 44 cm Geschirrwagens: Umstellungsmöglichkeit auf sämtliche Gasarten, die auf dem Typenschild angegeben sind. Letzteres befindet sich Brenner: auf dem Türinnern bzw. auf K3G52S/AT der linken Innenwand des Geschirrwagens. siehe Typenschild Versorgungsspannung und -frequenz: Richtlinie 2002/40/EG über die Etikettierung von Elektrobacköfen. -
Page 18: Beschreibung Des Gerätes
Beschreibung des Gerätes Geräteansicht Glasabdeckung Gasbrenner Kochfeld-Überlaufschutz Kochmuldenrost GLEITFÜHRUNGEN Bedienfeld für die Einschübe Einschubhöhe 5 Einschub Einschubhöhe 4 BACKOFENROST Einschubhöhe 3 Einschub Einschubhöhe 2 FETTPFANNE Einschubhöhe 1 Höhenverstellbarer Höhenverstellbarer Stellfuß Stellfuß Bedienfeld Reglerknopf Reglerknopf Kontrollleuchte THERMOSTAT KOCHFELDBRENNER THERMOSTAT Reglerknopf ANALOG- KURZZEITWECKER Taste Reglerknopf... -
Page 19: Inbetriebsetzung Und Gebrauch
Inbetriebsetzung und Gebrauch Gebrauch des Backofens Gebrauch des Kochfeldes ! Bei erstmaliger Inbetriebnahme sollte der leere Zündung der Brenner Backofen für etwa eine Stunde bei Höchsttemperatur und geschlossener Backofentür in Neben jedem BRENNER-Reglerknopf ist durch ein Betrieb genommen werden. Schalten Sie das Gerät ausgefülltes Kreissymbol die zugehörige dann aus, öffnen Sie die Backofentür und lüften Sie Gasflamme gekennzeichnet. - Page 20 Garprogramme ! Setzen Sie bei den Garprogrammen OBERHITZE und GRILL zum Auffangen von abtropfendem Fett Programm AUFTAUEN oder Fleischsaft den Grillrost auf Einschubhöhe 5 und die Fettpfanne auf Einschubhöhe 1 ein. Für das Dank des an der Backofenrückwand installierten Programm UMLUFTGRILL wählen Sie zum Auffangen Gebläses zirkuliert Luft in Raumtemperatur um das von abtropfendem Fett oder Fleischsaft bitte die aufzutauende Gut.
- Page 21 Tabelle Garen im Backofen S elector knob Food to be cooked W eight Rack P reheating Therm ostat Cooking position (in kg) position to tim e knob tim e be used (m inutes) position (m inutes) (counting up from the bottom ) Defrosting A ll frozen foods...
-
Page 22: Analog-Kurzzeitwecker
Analog-Kurzzeitwecker Kurzzeitwecker-Funktion Bei dieser Funktion wird eine Zeit mit rückläufigem Ablauf eingestellt. Diese Funktion steuert weder das Ein- noch das Ausschalten des Backofens; nach abgelaufener Zeit ertönt lediglich ein akustisches Signal. • Drehen Sie den Reglerknopf gegen den Uhrzeigersinn und bringen Sie so den Zeiger auf die auf dem Display ersichtliche gewünschte Zeit Einstellung von Uhr und Kurzzeitwecker (Innenskala). -
Page 23: Vorsichtsmaßregeln Und Hinweise
Vorsichtsmaßregeln und Hinweise ! Das Gerät wurde entsprechend den internationalen • Stellen Sie bitte keine schweren Gegenstände auf Sicherheitsvorschriften entworfen und gebaut. der geöffneten Backofentür ab. Nachstehende Hinweise werden aus • Während des Betriebs wird das Gerät heiß. Achten Sicherheitsgründen geliefert und sollten aufmerksam Sie darauf, die Heizelemente im Inneren des gelesen werden. -
Page 24: Reinigung Und Pflege
Reinigung und Pflege 05/2006 - 195057165.00 Abschalten des Gerätes vom Stromnetz Die Abdeckung Bei Modellen mit Glas- Vor jeder Reinigung und Pflege ist das Gerät vom Abdeckung ist die Stromnetz zu trennen. Reinigung mit lauwarmen Wasser durchzuführen. Reinigung des Gerätes Vermeiden Sie Scheuermittel.
Need help?
Do you have a question about the K3G52S/AT and is the answer not in the manual?
Questions and answers