Table of Contents
Advertisement
Quick Links
Advertisement
Table of Contents

Related Manuals for PayFacto PAX A920 Pro


Summary of Contents for PayFacto PAX A920 Pro
- Page 1 September, 2022...
-
Page 2: Table Of Contents
Contents Introduction................................ 3 Terminal Overview ............................4 A920 Pro Terminal Overview ........................4 Terminal Hardware ............................4 Initial Terminal Configuration ........................... 6 Charging the Terminal........................... 6 Installing the Printer Paper..........................7 Configuring the Terminal Network Connections..................8 Installing the SIM Card..........................8 Configuring the Terminal Wi-Fi Connection .................... -
Page 3: Introduction
PAX A920 Pro Configuration and Installation The PAX A920 Pro mobile payment terminal is perfect for most applications, whether retail, bar/ restaurant, or delivery/transportation. This setup guide describes the following topics: • A920 Pro Terminal Overview • Terminal Hardware • Initial terminal configuration ◦... -
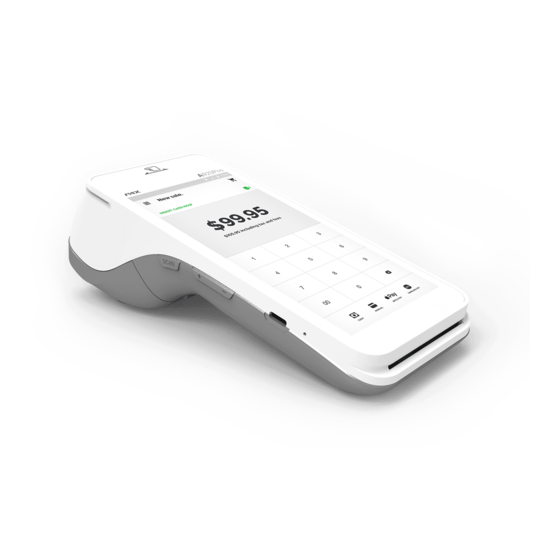
Page 4: Terminal Overview
This document will introduce you to your payment terminal as well as guide you through the process of preparing and configuring it in order to quickly begin processing payments. Your PAX A920 Pro payment processing terminal comes with the following: Payment terminal... - Page 5 PAX A920 Pro Configuration and Installation Copyright © 2021 PayFacto Inc. Page 5 of 20...
-
Page 6: Initial Terminal Configuration
PAX A920 Pro Configuration and Installation After you remove the terminal and accessories from the box, you need to charge the terminal before you can use it. The pre-installed battery has a protective cover on the contacts to prevent the possibility of a short circuit during transport. -
Page 7: Installing The Printer Paper
PAX A920 Pro Configuration and Installation If the supplied roll of printer paper was not already installed in the terminal when you received it, you will need to install it before you can print any transaction receipts. TIP: This procedure also applies to replacing a roll of printer paper. -
Page 8: Configuring The Terminal Network Connections
The terminal requires a network connection to communicate with the payment processor server to process transactions. The PAX A920 Pro is a mobile payment terminal that can connect to mobile (LTE) and wireless (Wi-Fi) networks. Mobile network access is required for delivery and transportation use, but it can also serve as a backup connection if your Wi-Fi network reception is unreliable in certain areas. ... -
Page 9: Configuring The Terminal Wi-Fi Connection
PAX A920 Pro Configuration and Installation The terminal has illustrations for the different cards it can accept. Insert your SIM card in the space identified as SIM1 so the diagonal corner is facing the top left side. IMPORTANT! The SIM card goes into the lower space and should not require great force to insert. ... - Page 10 PAX A920 Pro Configuration and Installation On the terminal’s main screen, touch the Settings icon. On the Settings screen, touch the Please Input Password field and use the keypad to type the password: either pax9876@@ or 9876. Touch the checkmark icon on the keypad when you are done and touch OK.
-
Page 11: Configuring The Terminal Display Language
PAX A920 Pro Configuration and Installation By default, the terminal displays all information in English. This procedure explains how to change the terminal’s display language if necessary. IMPORTANT! Selecting a different language changes all text that appears on the terminal. - Page 12 PAX A920 Pro Configuration and Installation If the selected language does not appear automatically, you can drag the language to the top of the list, as shown below: Copyright © 2021 PayFacto Inc. Page 12 of 20...
-
Page 13: Terminal Activation
PAX A920 Pro Configuration and Installation PayFacto uses a self-service terminal activation procedure designed to save time while also providing better security. The new activation procedure applies only to countertop and mobile PAX payment terminals using the Android operating system. The new procedure applies to: •... - Page 14 TID on the label on the back of your terminal. The TID will not appear on your terminal screen after you complete the activation process. IMPORTANT! If the TID does not match, call PayFacto immediately. Touch anywhere on the screen to begin the activation process.
- Page 15 PAX A920 Pro Configuration and Installation If you select Email, look for a message from noreply@payfacto.com. After you receive the 6-digit activation code, use the on-screen keypad to enter the code on the terminal screen. If you enter the code incorrectly, a red exclamation appears to indicate that the code is incorrect. Copyright © 2021 PayFacto Inc. Page 15 of 20...
-
Page 16: Set Passwords
PAX A920 Pro Configuration and Installation Re-enter the code, or touch Resend Code to obtain a new OTP. After you enter the OTP correctly, the payment application displays the Set Administrative Password screen to configure your terminal passwords. To prevent unauthorized individuals from changing the terminal’s configuration, you need to set the Administrator and Merchant passwords. These passwords restrict access to certain functions on the terminal. -
Page 17: Working With The Terminal
PAX A920 Pro Configuration and Installation To power the terminal on, press and hold the power key on the right side of the terminal for 2-3 seconds. To power off the terminal: Press and hold the power key on the right side of the terminal for 2-3 seconds. -
Page 18: Card Payment Options
PAX A920 Pro Configuration and Installation There are three (3) ways for a customer to use their payment card with the terminal: Insert the chip card and enter a PIN Swipe the card’s magnetic strip Copyright © 2021 PayFacto Inc. -
Page 19: Replacing The Printer Paper
PAX A920 Pro Configuration and Installation Tap the card for contactless payment The terminal uses 2 ¼” or 58mm thermal paper rolls to print transaction receipts. To install the printer paper: On the back of the terminal at the top, lift the lever to unlock and open the printer cover. - Page 20 PAX A920 Pro Configuration and Installation Place the roll of printer paper in the paper tray, leaving about 2 inches (5 cm) of paper beyond the printer's cutter. IMPORTANT! Make sure the paper unrolls from the back of the roll, otherwise the printer will be unable to print the transaction receipt.