Table of Contents
Advertisement
Quick Links
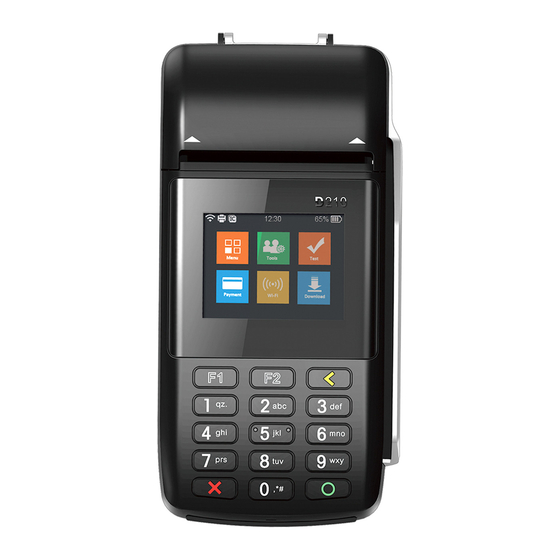
PAX D210 Set-up Guide
Wi-Fi Wireless Terminal
(device version with F1 and F2 keys)
Menu Layout
To access letters on the numeric keypad, press the letter key
quickly until the desired number appears.
Press 0 (zero) twice for space and Up button once for "*" and down
button twice for "."
Lit arrows on the terminal screen indicate more menu options.
Press up or down arrows to reach options
CONNECTING THE TERMINAL
Plug the connector of the power adapter cord into the PAX D210-W
"Power" jack on the front of the terminal. Plug into electrical outlet
or power bar and allow the terminal to charge for 2-3 hrs.
Confirm the Wi-Fi router is connected to the Internet and the
network signal is strong enough. Supported encryption methods
for Wi-Fi networks are WPA and WPA2. Make sure that your router
does not have any network traffic restrictions, filters or require a
special TCP/IP configuration on your network devices (the D210-W
will use the default settings only). The network signal strength is
indicated via a Wi-Fi signal icon located in the upper part of your
D210-W screen. To connect via a Wi-Fi router have your network
username and password available and:
Press F1 to access the Admin MENU
Press 3 for SET-UP
Press 3 for SYSTEM SET-UP
Enter Admin Password, press OK
Press OK until MAIN COMMUNICATION mode option. Press 3 for Wi-Fi
The terminal will scan for and display a list Wi-Fi networks available
Enter Wi-Fi NETWORK NAME
Enter Wi-Fi NETWORK PASSWORD
SETTING ADMIN PASSWORD
Press F1 to access the ADMIN MENU
Press 3 for SET-UP
Press 3 for SYSTEM SET-UP
Enter default Admin password 000000, press OK
Enter new ADMIN PASSWORD
Confirm new Admin password
COMMUNICATION TO HOST SET-UP
If you have not already, turn on terminal and change
the temporary password
Press F1 to access ADMIN MENU
Press 3 for SET-UP
Press 2 for HOST SET-UP
Enter new Admin password, press OK
Enter the 8 digit TERMINAL ID (TID), press OK Select F2 to set
FALLBACK TO DIAL to No
Confirm SELECT INPUT type:
Select F1 to confirm IP address
IP ADDRESS will be set automatically
Select F2 to confirm IP name
NAME will be set automatically
PORT NUMBER will be set automatically
PAYFACTO HOST DOWNLOADS
Press F1 to access ADMIN MENU
Press F2 to scroll menu to 6 for MAINTENANCE function, press OK
Press 1 for DLL PARAMETERS, press OK
Terminal will automatically connect to Host and update DLL
parameters
Follow same steps to update EMV keys:
Press 2 for EMV KEY DLL, press OK
Terminal will automatically connect to Host and update EMV pa-
rameters
Follow same steps to Associate terminal with Wi-Fi network:
Press 3 for ASSOCIATION
Choose network from list. Reset password if required
1
Advertisement
Table of Contents

Summary of Contents for PayFacto PAX D210
-
Page 1: Connecting The Terminal
Select F2 to confirm IP name CONNECTING THE TERMINAL NAME will be set automatically Plug the connector of the power adapter cord into the PAX D210-W PORT NUMBER will be set automatically “Power” jack on the front of the terminal. Plug into electrical outlet or power bar and allow the terminal to charge for 2-3 hrs. - Page 2 PAX D210 Set-up Guide Wi-Fi Wireless Terminal (device version with F1 and F2 keys) SYSTEM SET-UP Set ENTER LAST 4 DIGITS to activate fraud protection of swiped transactions. Set to ON/OFF using F1/F2 keys Press F1 - to access ADMIN MENU...
-
Page 3: Training Mode
PAX D210 Set-up Guide Wi-Fi Wireless Terminal (device version with F1 and F2 keys) PRINTER SET-UP Set PRINT COMPLETION to YES/NO (recommended to set to YES) Press Menu to access the ADMIN MENU Set PRINT FORCED RECEIPTS to YES/NO, press OK...


Need help?
Do you have a question about the PAX D210 and is the answer not in the manual?
Questions and answers