Riello RS 25/M BLU Installation, Use And Maintenance Instructions
Forced draught gas burners
Hide thumbs
Also See for RS 25/M BLU:
- Installation, use and maintenance instructions (88 pages) ,
- Quick start manual (8 pages) ,
- Installation, use and maintenance instructions (72 pages)
Table of Contents
Advertisement
Quick Links
Installation, use and maintenance instructions
Instrucciones de instalación, montaje y funcionamiento
Instruções de instalação, uso e manutenção
Forced draught gas burners
GB
Quemadores de gas de aire soplado
E
Queimadores a gás com ar insuflado
PT
Progressive two-stage or modulating operation
Funcionamiento a dos llamas progresivas o modulante
Funcionamento a duas chamas progressivas ou modulante
CODE - CÓDIGO
3910510
3910511
3910610
3910611
3910640
3910641
MODEL - MODELO
RS 25/M BLU
RS 25/M BLU
RS 35/M BLU
RS 35/M BLU
RS 35/M BLU
RS 35/M BLU
TYPE - TIPO
876 T
876 T
877 T
877 T
877 T
877 T
2916354 (15) - 05/2017
Advertisement
Table of Contents

Related Manuals for Riello RS 25/M BLU


Summary of Contents for Riello RS 25/M BLU
- Page 1 Progressive two-stage or modulating operation Funcionamiento a dos llamas progresivas o modulante Funcionamento a duas chamas progressivas ou modulante CODE - CÓDIGO MODEL - MODELO TYPE - TIPO 3910510 RS 25/M BLU 876 T 3910511 RS 25/M BLU 876 T 3910610 RS 35/M BLU...
-
Page 2: Table Of Contents
CONTENTS INFORMATION ABOUT THE INSTRUCTION MANUAL DECLARATION ........page 1 INTRODUCTION TECHNICAL DATA . -
Page 3: Declaration
The quality is guaranteed by a quality and management system certified in accordance with UNI EN ISO 9001. Manufacturer’s Declaration RIELLO S.p.A. declares that the following products comply with the NOx emission limits specified by German standard “1. BImSchV release 26.01.2010”. -
Page 4: Technical Data
TECHNICAL DATA MODEL RS 25/M BLU RS 35/M BLU RS 35/M BLU TYPE 876 T 877 T 877 T 125 - 370 202 - 480 202 - 480 OUTPUT MAX. 108 - 320 174 - 413 174 - 413 Mcal/h MIN. -
Page 5: Accessories
INVERTER, or in applications where the length of the thermostat connections exceeds 20 metres, a protection kit is available as an interface between the control box and the burner. BURNER RS 25/M BLU - RS 35/M BLU Code 3010386 • LONG HEAD KIT... -
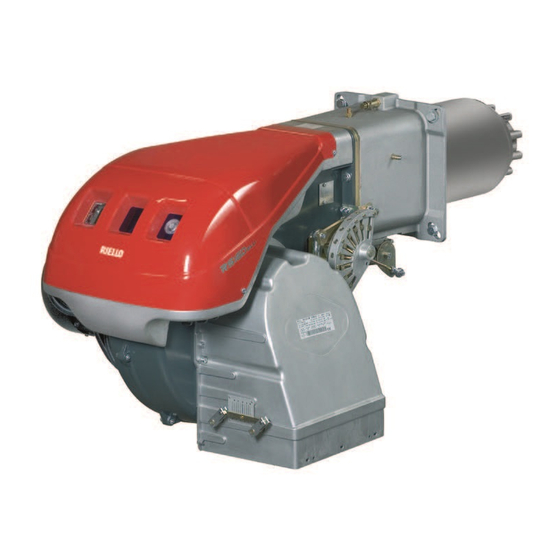
Page 6: Burner Description
- power reduction 19 Motor contact maker and thermal cut-out with reset button (RS 35/M BLU three-phase) 20 Motor capacitor (RS 25/M BLU single-phase) 21 Control box with lockout pilot light and lock- out reset button 22 Sockets for electrical connection... -
Page 7: Firing Rates
• a MAXIMUM OUTPUT, selected within area A, • and a MINIMUM OUTPUT, which must not be lower than the minimum limit in the diagram. RS 25/M BLU = 45 kW RS 35/M BLU = 72 kW Important The FIRING RATE values have been obtained considering an ambient temperature of 20°C, an... -
Page 8: Gas Pressure
GAS PRESSURE RS 25/M BLU RS 35/M BLU The adjacent tables show minimum pressure 1 p 2 p 1 p 2 p losses along the gas supply line depending on (mbar) (mbar) (mbar) (mbar) the maximum burner output operation. Column 1 Pressure loss at combustion head. -
Page 9: Installation
15. Any other position could compromise the correct working of the appliance. Installation 5 is forbidden, for safety reasons. RS 25/M BLU RS 35/M BLU BOILER PLATE (B) Pierce the closing plate of the combustion D455 chamber, as in (B). -
Page 10: Combustion Head Setting
COMBUSTION HEAD SETTING Installation operations are now at the stage where the blast tube and sleeve are secured to the boiler as shown in fig. (A). It is therefore par- ticularly easy to adjust the combustion head. Air adjustment (A - B) Rotate the screw 1)(A) until the notch on the lamina 2)(A) corresponds with the surface of the plate 3)(A). -
Page 11: Gas Feeding Line
GAS FEEDING LINE The fuel supply line must be installed by qualified personnel, in com- pliance with current standards and WARNING laws. Explosion danger due to fuel leaks in the presence of a flammable source. Precautions: avoid knocking, attri- tion, sparks and heat. Make sure that the fuel interception tap is closed before performing any operation on the burner. -
Page 12: Adjustment Prior To Ignition
ADJUSTMENTS PRIOR TO IGNITION MIN GAS PRESSURE SWITCH AIR PRESSURE SWITCH ATTENTION THE FIRST IGNITION MUST BE CARRIED OUT BY QUALIFIED PERSONNEL WITH THE RIGHT INSTRUMENTS. The adjustment of the combustion head, air, was described on page 8. In addition, the following adjustments must also be made: - open manual valves up-line from the gas train. -
Page 13: Burner Calibration
BURNER CALIBRATION The optimum calibration of the burner requires an analysis of the flue gases at the boiler outlet. Adjust successively: 1 - Output upon ignition (minimum) 2 - Max. burner output 3 - Intermediate outputs between Min. and Max. 4 - Air pressure switch 5 - Minimum gas pressure switch DETERMINATION OF OUTPUT UPON IGNI-... -
Page 14: Maximum Output
NOTE The servomotor follows the adjustment of cam III only when the angle of the cam is reduced. If it is necessary to increase the angle of the cam, you must first increase the angle of the servo- motor by means of the “output increase” key, then increase the angle of cam III, and finally bring the servomotor to the position of MIN out- put, with the “output reduction”... -
Page 15: Air Pressure Switch
4 - AIR PRESSURE SWITCH (A) AIR PRESSURE SWITCH 4)(A)p. 4 Adjust the air pressure switch after having per- formed all other burner adjustments with the air pressure switch set to the start of the scale (A). With the burner working at MIN output, insert a combustion analyser in the stack, slowly close the suction inlet of the fan (for example, with cardboard) until the CO value does not exceed... -
Page 16: Burner Operation
BURNER OPERATION STANDARD IGNITION (n° = seconds from the moment 0) BURNER START-UP (A) • 0s: Closure thermostat/pressure switch TL. • 2s: Start of electrical control box pro- gramme. Servomotor starts: rotate to the left by 90°, i.e. until the contact intervenes with cam I (D)p. -
Page 17: Final Checks
FINAL CHECKS (with the burner working): • disconnect a wire of the minimum gas pres- sure switch; • switch on the thermostat/pressure switch TL; • switch on the thermostat/pressure switch TS; the burner must stop. • disconnect the air adduction tube of the pres- sure switch;... -
Page 18: Switchboardmaintenance
TO OPEN THE BURNER (A): OPENING THE BURNER - Switch off the electrical power. - Remove the screw 1) and pull out the hood - Disengage the articulated coupling 3) from the graduated sector 4). - Remove the screw 5) only with the long head models;... - Page 19 BURNER START-UP CYCLE DIAGNOSTICS During start-up, the indications are explained in the following table: COLOUR CODE TABLE Sequences Colour code Pre-purging Ignition phase Operation, flame OK Operation with weak flame signal Electrical supply lower than ~ 170V Lockout Extraneous light Key to layout: Yellow Green...
-
Page 20: Problems - Causes - Solutions
Signal Problem Possible cause Recommended remedy Once the pre-purging phase - The operation solenoid lets little gas through ..Increase 2 blinks and safety time have passed, - One of the two solenoid valves does not open..Replace the burner goes into lockout without the appearance of the...
Need help?
Do you have a question about the RS 25/M BLU and is the answer not in the manual?
Questions and answers