Table of Contents
Advertisement
Quick Links
Advertisement
Table of Contents

Related Manuals for Coast-Air CEPH121C


Summary of Contents for Coast-Air CEPH121C
- Page 1 CEPH121C - 12,000...
-
Page 3: Table Of Contents
CONTENTS IMPORTANT SAFEGUARDS IMPORTANT - GROUNDING METHOD ELECTRICAL CONNECTIONS DESCRIPTION INSTALLATION INSTRUCTIONS DESCRIPTION OF THE DISPLAY SCREEN REMOTE CONTROL MANUAL WATER DRAINAGE METHOD CLEANING TROUBLESHOOTING... -
Page 4: Important Safeguards
IMPORTANT SAFEGUARDS ● This appliance is for household use only. ● Disconnect the appliance from its power source during service and when replacing parts and cleaning. ● Please note: Check the nameplate for the type of refrigerant gas used in your appliance. - Page 5 IMPORTANT SAFEGUARDS ● Do not clean the unit with water. Water can enter the unit and damage the insulation, creating a shock hazard. If water enters the unit, unplug it immediately and contact Customer Service. ● Utilize two or more people to lift and install the unit. ●...
-
Page 6: Important - Grounding Method
IMPORTANT - GROUNDING METHOD This product is factory equipped with a power supply cord that has a three-pronged grounded plug. It must be plugged into a mating grounding type receptacle in accordance with the National Electrical Code and applicable local codes and ordinances. If the circuit does not have a grounding type receptacle, it is the responsibility and obligation of the customer to exchange the existing receptacle in accordance with the National Electrical Code and applicable local codes and ordinances. - Page 7 ELECTRICAL CONNECTIONS PREFERRED GROUNDING METHOD TEMPORARY GROUNDING METHOD (Use of adapter plugs is not permitted in Canada) Ensure proper Ensure proper ground exists ground exists before use. before use. RECOMMENDED GROUND METHOD For your personal safety, this appliance must be grounded. This appliance is equipped with a 3 prong power supply cord with a grounded plug.
-
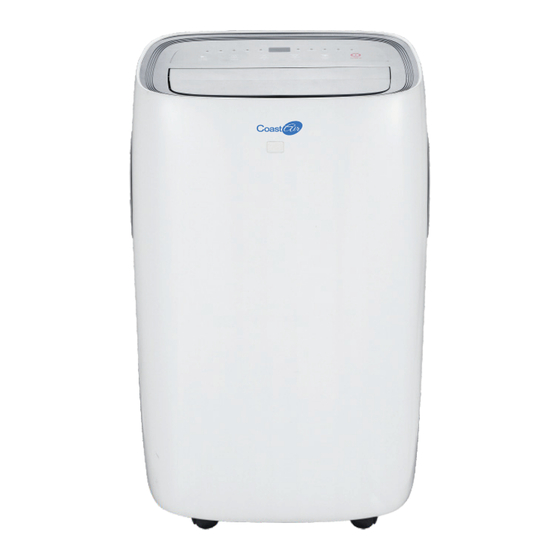
Page 8: Description
DESCRIPTION 1. Deflector 2. Control panel 3. Handle (both sides) 4. Castors 5. Power cable 6. Intake grille 7. Air outlet grille 8. Intake grille 9. Condenser drain 10.Continuous drain outlet ACCESSORIES PARTS PARTS NAME QUANTITY Exhaust hose Hose outlet 1 set Hose inlet 1 set... -
Page 9: Installation Instructions
INSTALLATION INSTRUCTIONS EXHAUSTING HOT AIR In the Cool Mode the appliance must be placed close to a window or opening so that the warm exhaust air can be ducted outside. First, position unit on a flat floor and make sure there's Extend the hose a minimum of 18"... - Page 10 INSTALLATION INSTRUCTIONS WINDOW SLIDER KIT INSTALLATION 1:Parts: A) Panel B) Panel with one hole C) Screw to lock window kit in place 2: Assembly: Slide Panel B into Panel A and size to window width. Window sizes vary. When sizing the window width be sure that the window kit ,...
- Page 11 INSTALLATION INSTRUCTIONS 1. Cut the foam seal(adhesive type) to the proper length and attach it to the window sash. 2. Attach the window slider kit to the window sash. Adjust the length of the window slider kit according to the width of window. If necessary, mark the kit and cut one end down to properly fit the window.
- Page 12 INSTALLATION INSTRUCTIONS LOCATION ● The unit should be placed on a firm foundation to minimize noise and vibration. For safe and secure positioning, place the unit on a smooth, level floor strong enough to support the unit. ● The unit has casters to aid placement, but it should only be rolled on smooth, flat surfaces.
-
Page 13: Description Of The Display Screen
DESCRIPTION OF THE DISPLAY SCREEN 》","「means only the heat pump model has this function. TURNING THE APPLIANCE ON Plug the air conditioner into an electrical outlet. Press the """""button to make the appliance turn on. The last function active when it was turned off will appear. - Page 14 DESCRIPTION OF THE DISPLAY SCREEN COOL mode Ideal for hot, muggy weather when you need to cool and dehumidify the room. To set this mode correctly: ● Press the """ button a number of times until the “Cool” symbol appears. ●...
- Page 15 DESCRIPTION OF THE DISPLAY SCREEN ● Water is removed from the air and collected in the tank. ● When the tank is full, the appliance shuts down and “ ”(full tank) appears on the display. The tank cap must be extracted and emptied water. Run off all water left into a basin. When all the water has been drained, put the cap back in place.
- Page 16 DESCRIPTION OF THE DISPLAY SCREEN DRY mode (dehumidifier only mode) Ideal to reduce room humidity (spring and autumn, damp rooms, rainy periods, etc). In dry mode, the appliance should be installed in the same way as the cool mode, with the air exhaust hose attached to enable moist/humid air to be vented outside.
- Page 17 DESCRIPTION OF THE DISPLAY SCREEN Programming shut down ● When the appliance is running, press the button, the screen will display hours. ● Press several times until desired time is displayed. After about 5 seconds, the timer will be active and the “Timer” symbol will be displayed on the screen. ●...
-
Page 18: Remote Control Manual
REMOTE CONTROL MANUAL On/Off button Fan speed button Increase button Mode button Decrease button Swing button Timer button Sleep button Unit Switch button √ Point the remote control at the sensor on the appliance. √ The remote control must be no more than 23ft (7 meters) away from the appliance (without obstacles between the remote control and the receiver). - Page 19 REMOTE CONTROL MANUAL INSERTING OR REPLACING THE BATTERIES ● Remove the cover on the rear of the remote control ● Insert two "AAA" 1.5V batteries in the correct position (see instructions inside the battery compartment) NOTE: √ If the remote control unit is replaced or disposed of, the batteries must be removed and discarded in accordance with current legislation as they are harmful to the environment.
- Page 20 REMOTE CONTROL MANUAL ● Water is removed from the air and collected in the tank. “ ” ● When the tank is full, the appliance shuts down and (full tank) appears on the display. The tank cap must be extracted and emptied water. Run off all water left into a basin.
- Page 21 REMOTE CONTROL MANUAL SMART mode The appliance chooses automatically whether to operate in cool, fan or heat mode (certain models have heat mode) . ● Press the button a number of times until the screen of the unit display below: It is SMART mode when the display will be running circulating.
- Page 22 REMOTE CONTROL MANUAL The SLEEP function maintains the room at optimum temperature without excessive fluctuations in either temperature or humidity with silent operation. Fan speed is always at Low, while room temperature and humidity vary gradually to ensure the room remains comfortable. When in COOL mode, the selected temperature will increase by 1℉*1℃) per hour in a 2 hour period.
- Page 23 REMOTE CONTROL MANUAL SETTING THE TIMER -This timer can be used to delay the appliance startup or shutdown. This avoids wasting electricity by optimizing operating periods. Programming start up ●Turn on the appliance and choose the mode you want. For example: Cool; 75℉; High fan speed.
-
Page 24: Water Drainage Method
WATER DRAINAGE METHOD When there is excess water condensation inside the unit, the appliance stops running and shows “ ”(FULL TANK as mentioned in SELF-DIAGNOSIS). This indicates that the water condensation needs to be drained using the following procedures: Manual Draining Fig.24) Water may need to be drained if running in dehumidify mode or if the unit is operating in Cool mode and running under very hot/humid conditions for a prolonged period of time. - Page 25 WATER DRAINAGE METHOD Middle drainage When running the unit in Dry mode, you can choose the way to drain: 1. Unplug the unit from the power source. 2. Remove the drain cap (Fig.A). While doing this operation some residual water may spill so please have a pan to collect the water.
-
Page 26: Cleaning
CLEANING Before cleaning or maintenance, turn the appliance off by pressing the button on the control panel or remote control, wait for a few minutes, then unplug the unit. CLEANING THE CABINET You should clean the appliance with a slightly damp cloth then dry with a dry cloth. Never wash the appliance with water. -
Page 27: Troubleshooting
TROUBLESHOOTING ROOM CONDITIONS Temperature of room 64℉-95℉ (18 35℃)(Cooling) ℃- Temperature of room 50℉-77℉ (10℃-25℃)(Heating) PROBLEM CAUSE SOLUTION The appliance ● There is no current ● Check the power supply does not come on ● It is not plugged in ●... - Page 28 TROUBLESHOOTING The appliance ● ● This delay is part of normal The internal compressor safety operation and the unit will be device prevents the appliance does not operate for able to operate after three from being restarted until three about three minutes minutes have passed minutes have elapsed since it after restarting it...
- Page 29 · 26 ·...
- Page 32 11/2021...
Need help?
Do you have a question about the CEPH121C and is the answer not in the manual?
Questions and answers