Advertisement
Table of Contents
- 1 Table of Contents
- 2 Parts List
- 3 Installation to Wood Stud Wall
- 4 Installation to Solid Concrete and Cinder Block
- 5 Mounting the Assembly Adapter Plate to Screen
- 6 Mounting the Attaching Adapter Plate to Screen
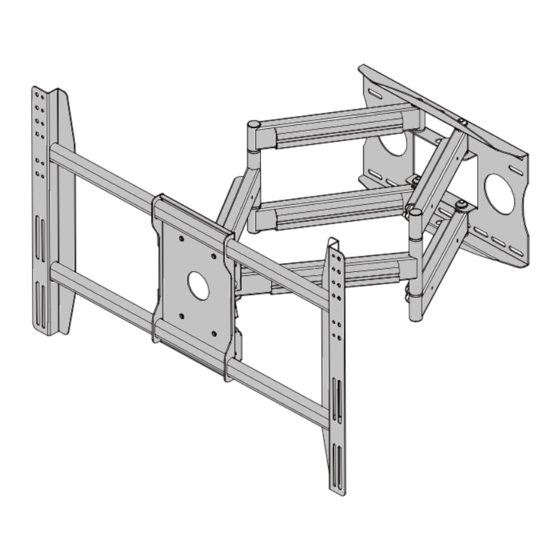
- 7 Attach Assembly Adapter Plate to Assembly Arm
- 8 Tilt Adjustment and Cord Covers
- Download this manual
Advertisement
Table of Contents

Subscribe to Our Youtube Channel
Related Manuals for Monoprice MHA-800


Summary of Contents for Monoprice MHA-800
- Page 1 INSTALLATION GUIDE Flat Panel Arm Mount MHA-800 Support 42" to 63" Screens Max Load Capacity: 200 lbs (91 kg) VESA 500x800 compatible...
- Page 2 WARNING • Be sure to read this entire manual thoroughly and you fully understand all the instructions and warning before attempting to begin your installation. • This product should only be installed by someone who has a basic knowledge of buiding construction,installations and fully understands these instructions.
- Page 3 Before you b egin, make sure all parts shown are included with your product. Parts may appear slightly different than illustrated. Parts List Description philips / washer M6x12 / 6x13x1.2 washer 8.2x1.5x16 washer 8.2x2.0x16 philips pan head screw M5x16 philips pan head screw M5x30 philips pan head screw M6x16...
- Page 4 Installation to Wood Stud Wall WARNING ‡ Make sure that the supporting surface will safely support the combined load of the equipment and all attached hardware and components. Wall arm assembly (AA) must be mounted onto two wooden studs,with center to center distances more than 12".
- Page 5 Installation to Solid Concrete and Cinder Block WARNING ‡ When installing double stud wall plate on cinder block, verify that you have a minimum of 1-3/8" of actual concrete thickness in the hole to be used for the concrete anchors. Do not drill into mortar joints! Be sure to mount in a solid part of the block, generally 1"...
- Page 6 Mounting the Assembly Adapter Plate to screen Modify the Adapter Plate Adaptor Modify the Assembled Adapter Plate Slide the adapter brackets into Assembled adapter plate slightly. Place the Assembled Adapter Plate on the back of the display with Back of Screen one Adapter Bracket aligned with a set of vertical mounting holes.Then,slide the other Adapter Bracket in or out until it aligns Adaptor and hooks...
- Page 7 For Flat Back Screen fig C.1 fig C.2 SCREEN SCREEN SPACER SCREW SCREW AA(mount) AA(mount) Select the small,medium,large or extra large screws from the baffled .Fastener pack then attach screen brackets(AA) to screen following figure C.1 or C.2 on page 7. Attach Assembly Adapter Plate to Assembly Arm top screw 1.
- Page 8 Tilt Adjustment and cord Coves Tilt Adjustment WARNING: Before removing your display,ensure 1.Loosen Tiltlevers(Only enough to the display has a allow controlled adjustment) negative Tilt and Tilt Lever is 2. Adjust Tilt LOCKED! 3. Lock Tilt Levers(Tighten) Tighten 4. Once Tilt Levers are locked,the position of the levers can be adjusted Loosen without loosening ortightening the unit by pulling the levers outwards and then...
Need help?
Do you have a question about the MHA-800 and is the answer not in the manual?
Questions and answers