Table of Contents
Advertisement
Quick Links
XX172-00-00
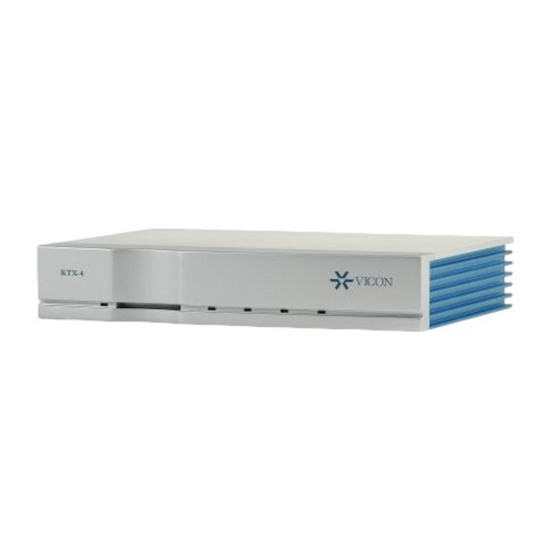
KTX-4V2 FOUR-CHANNEL
DIGITAL VIDEO SERVER
Vicon Industries Inc. does not warrant that the functions contained in this equipment will meet your
requirements or that the operation will be entirely error free or perform precisely as described in the
documentation. This system has not been designed to be used in life-critical situations and must not be
used for this purpose.
Copyright © 2006 Vicon Industries Inc. All rights reserved.
Product specifications subject to change without notice.
ViconNet and its logo are trademarks of Vicon Industries Inc.
Kollector Elite and Kollector Pro and their logos are trademarks of Vicon Industries Inc.
Vicon and its logo are registered trademarks of Vicon Industries Inc.
Windows is a trademark of Microsoft Corp.
VICON INDUSTRIES INC., 89 ARKAY DRIVE, HAUPPAUGE, NEW YORK 11788
TEL: 631-952-CCTV (2288) FAX: 631-951-CCTV (2288) TOLL FREE: 800-645-9116
24-Hour Technical Support: 800-34-VICON (800-348-4266)
UK: +44 (0) 1489 566300 WEB: www.vicon-cctv.com
Vicon Part No. 8009-8172-00-00 Section 1 Rev 206
Advertisement
Table of Contents

Subscribe to Our Youtube Channel
Related Manuals for Vicon KTX-4V2

Summary of Contents for Vicon KTX-4V2
- Page 1 KTX-4V2 FOUR-CHANNEL DIGITAL VIDEO SERVER Vicon Industries Inc. does not warrant that the functions contained in this equipment will meet your requirements or that the operation will be entirely error free or perform precisely as described in the documentation. This system has not been designed to be used in life-critical situations and must not be used for this purpose.
- Page 3 Warning: Power must be removed from this unit before removing circuit modules or ribbon cables. Caution: This unit contains circuit cards with integrated circuit devices that can be damaged by static discharge. Take all necessary precautions to prevent static discharge Important Notice • i XX172-00-00 Rev 206 KTX-4V2 Digital Video Server...
- Page 4 8. Accessories - Do not place the unit on an unstable surface 22. ESD Precaution - Take all normal electrostatic discharge to avoid falling. Use only UL Listed Vicon recommended mounting precautions to avoid component damage during installation and accessories.
- Page 5 Other company and brand products and service names are trademarks or registered trademarks of their respective holders. To ensure that the KTX-4V2 is protected during a power surge or failure and that no important data is lost, it should be connected to an uninterruptible power source (UPS) before use.
-
Page 6: About This Manual
This KTX-4V2 Installation and Operation Manual is comprised of the following chapters: Chapter 1, Introduction, introduces the KTX-4V2 Four-Channel Digital Video Server. Chapter 2, Quick Installation, is for experienced installers, and provides an illustration of how the KTX-4V2 should be connected to its various peripherals. -
Page 7: Table Of Contents
Step 2: Connecting the Power Supply......................10 CHAPTER 4 - OPERATION ....................11 About This Chapter ............................11 Powering-On the Server..........................11 Powering-Off the Server ..........................11 Configuring the Server..........................11 CHAPTER 5 - TROUBLESHOOTING ................20 Table of Contents • v XX172-00-00 Rev 206 KTX-4V2 Digital Video Server... - Page 8 Materials ................................22 Cable Types ..............................22 CHAPTER 9 – TWISTED-PAIR CABLE RECOMMENDATIONS ........23 Materials ................................23 Cable Types ..............................23 CHAPTER 10 – NETWORK CABLE RECOMMENDATIONS..........24 CHAPTER 11 – TECHNICAL INFORMATION ..............25 vi • Table of Contents XX172-00-00 Rev 206 KTX-4V2 Digital Video Server...
-
Page 9: Chapter 1 - Introduction
National Electrical Code ANSI/NFPA 70, state and local wiring codes. The KTX-4V2 is an intelligent and rugged Digital Video Server. It is a state-of-the-art embedded server in an attractive aluminum case. It is sold in a prepackaged configuration ready for analog camera connection. It will provide a video (frame per second) rate of up to 120 fps over 4 channels, 30 fps per channel (25 fps for PAL). -
Page 10: Unpacking And Inspection
Unpacking and Inspection All Vicon equipment is tested and inspected before leaving the factory. It is the carrier’s responsibility to provide suitable delivery. Inspect the cartons upon delivery and, if damage is present, make detailed notes on the carrier’s bill. Then, obtain the carrier agent’s signature and file a damage claim as soon as possible. -
Page 11: Chapter 2 - Quick Installation
3. Make all connections to camera, LAN, PTZ, alarm, audio and power. 4. Power on the server. Run the provided KTX-4V2 Setup CD to configure the correct IP address, using the provided MAC address. (See your System Administrator for assistance in IP addressing.) 5. -
Page 12: Chapter 3 - Installation
Unit Components defines all connections on the front panel and their use. Mounting defines all methods of securing the server for permanent use. Installing the KTX-4V2 describes how to install all necessary peripheral devices directly to the server. Unpacking the Server Carefully open the carton. -
Page 13: Unit Components
Unit Components This section describes the KTX-4V2 front and rear panels. Panel Connectors and Indicators The following picture shows the KTX-4V2 panel. Each panel component is described below. Figure 3-1: Rear Panel Layout The KTX-4V2’s rear panel contains the following components: PTZ Port: A 5-position terminal block used to connect simplex RS-422/485 communications. -
Page 14: Mounting
Desktop The KTX-4V2 can rest on a clean and dry flat surface, like a desk or tabletop. Four (4) rubber bumpers are provided for stable mounting. There must be an area of no less than 3 in. (76 mm) left around the exterior to provide suitable airflow for cooling. -
Page 15: Step 1: Connecting The Cabling
Note: 4 cameras/camera domes may be daisy-chained using the RS-485 configuration. If using a DL device for star configuration, connect the KTX-4V2 to the DL first, then to the dome or PTZ/receiver. 3. Using a twisted-pair cable as defined in the section Twisted-Pair Cable Recommendations, prepare a 2-conductor shielded twisted-pair type cable by stripping the ends back for use. - Page 16 Star Configuration Daisy Chain Configuration Figure 3-2: PTZ Camera Control 8 • Chapter 3 - Installation XX172-00-00 Rev 206 KTX-4V2 Digital Video Server...
- Page 17 To connect an alarm (sensor) to the KTX-4V2: 6. Locate the alarm cable(s) near the server. These wires (pairs) will be connected to the ALARMS and GND (Ground) terminal block connections (refer to Figure 3-3). There are four alarms available.
-
Page 18: Step 2: Connecting The Power Supply
Step 2: Connecting the Power Supply To ensure that the KTX-4V2 is protected during a power surge or failure and that no data is lost, it should be connected to an uninterruptible power source (UPS) before use. The power supply must be supplied by the customer. -
Page 19: Chapter 4 - Operation
1. Verify that the server is set up as detailed in Chapter 3, Installation. 2. Connect the 24 VAC power supply to the KTX-4V2 or connect PoE via network cable (RJ-45). The Status Indicator will illuminate blue (blinking) to indicate the server is ON and running properly. - Page 20 12 • Chapter 4 - Operation XX172-00-00 Rev 206 KTX-4V2 Digital Video Server...
- Page 21 Overview: • The KTX-4V2 server is shipped with the CD needed to setup your IP system. This CD contains the KT Setup and ViconNet software required for installation. • Be sure the ViconNet Workstation meets the minimum requirements, is running the ViconNet application (KTSetup.exe) and has the proper camera driver.
- Page 22 1) Before the KTX-4V2 is connected, the following screen displays: Figure 4-1: Instruction (Help) Screen 2) Connect the KTX-4V2 to your PC’s network card or to a switch connected to your PC using a CAT 5 cable. Press Refresh to retrieve data from the device.
- Page 23 3) Network – Click the Network tab to Review/Setup the Network properties of the KTX-4V2. Press Apply to update the device. Please note – this will cause the device to reset and the process takes approximately 1 min. Figure 4-3: Network Configuration Screen 4) Unit Configuration –...
- Page 24 5) Information – This tab shows device firmware information and unit status. Figure 4-5: Info Configuration Screen 6) DST – Daylight Saving Time setup tab. Review/Modify the KTX-4V2’s DST settings, then press Apply. Please note – this will cause the device to reset and the process takes approximately 1 min.
- Page 25 7) Setup – This tab allows the user to select a folder other than the default for the location of Update & Log files. Note: Log files are used for system diagnostics and troubleshooting. The normal setting for the KTX-4V2 is to NOT have Enable Logs checked.
- Page 26 9) Advanced – This tab has options for resetting the unit, restoring network default settings and restoring all factory default settings. Figure 4-10: Advanced Functions Configuration Screen 10) Exit – Press exit to end program. 18 • Chapter 4 - Operation XX172-00-00 Rev 206 KTX-4V2 Digital Video Server...
- Page 27 2. From the workstation desktop, run the ViconNet application. 3. After logging in, open the site setup selection window. 4. Select the KTX-4V2 unit to be configured and click Select. 5. Open the “Network Setup and Site Name” setup window. Network Settings window will display. See Figure below.
-
Page 28: Chapter 5 - Troubleshooting
IP address. • Verify that the server is correctly cabled to the workstation via hubs and switches. If the KTX-4V2 is present on the workstation but does not show any cameras and does not display video, check the following: •... -
Page 29: Chapter 7 - Shipping Instructions
Chapter 7 – Shipping Instructions Use the following procedure when returning a unit to the factory: 1. Call or write Vicon for a Return Authorization (R.A.) at one of the locations listed below. Record the name of the Vicon employee who issued the R.A. -
Page 30: Chapter 8 - Coaxial Cable Recommendations
Let the required picture quality and cable distances provide a guide in choosing the best cable type. For cables other than the approved Vicon types below, contact the manufacturers listed below. Note that “BC” refers to bare copper and “TC” refers to tinned copper. -
Page 31: Chapter 9 - Twisted-Pair Cable Recommendations
Chapter 9 – Twisted-Pair Cable Recommendations CAUTION: Careful selection of the proper cable is essential to obtain the best performance from this equipment. Vicon assumes no responsibility for poor performance when cables other than those recommended are installed. Materials Use a pure copper stranded conductor with or without tin plating to obtain a low DC resistance. Do not use cable with either steel or an aluminum stranded conductor because these do not transfer signals effectively for long distances. -
Page 32: Chapter 10 - Network Cable Recommendations
Chapter 10 – Network Cable Recommendations Caution: Careful selection of proper cable is essential to obtain the best performance. Vicon assumes no responsibility for poor performance when cables other than the recommended types, or equivalent, are used. Materials Use pure copper stranded conductors to obtain a low DC resistance. The preferred insulation and cable jacket is Polyvinyl chloride (PVC). -
Page 33: Chapter 11 - Technical Information
Table 11-1: Technical Information Input Voltage 24 VAC ±20%, 50/60 Hz nominal NOTE: Vicon recommends the use of uninterruptible power supply systems (UPS) to prevent voltage fluctuations that can affect operation and cause damage to the equipment. Current 300 mA @ 24 VAC... - Page 34 Software supplied either separately or in hardware is furnished on an “As Is” basis. Vicon does not warrant that such software shall be error (bug) free. Software support via telephone, if provided at no cost, may be discontinued at any time without notice at Vicon’s sole discretion.
- Page 35 Notes Chapter 11 – Technical Information • 27 XX172-00-00 Rev 206 KTX-4V2 Digital Video Server...
- Page 36 Vicon Industries Inc. Corporate Headquarters 89 Arkay Drive Hauppauge, New York 11788 631-952-CCTV (2288) 800-645-9116 Fax: 631-951-CCTV (2288) Vicon Europe Headquarters Brunel Way Fareham, PO15 5TX United Kingdom +44 (0) 1489 566300 Fax: +44 (0) 1489 566322 Brussels Office Planet II - Unit E...
Need help?
Do you have a question about the KTX-4V2 and is the answer not in the manual?
Questions and answers