Advertisement
Hellgate Bridge
®
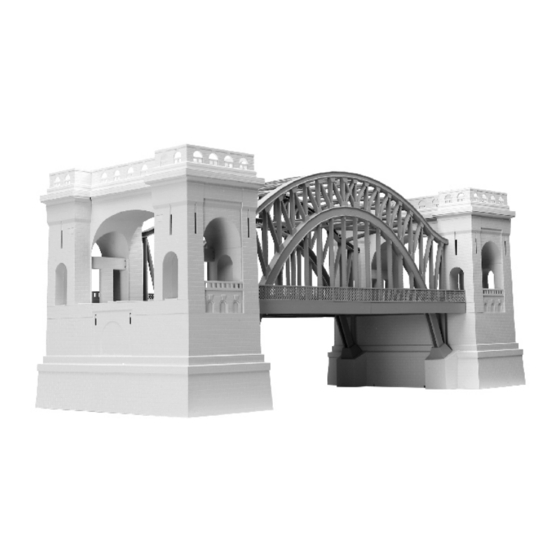
The RailKing Hell Gate Bridge is the standard by which all 0-27 and O-
Gauge structures will be measures. Constructed from sturdy ABS plastic,
the RailKing Hell Gate Bridge comes fully assembled and ready for dual-
track operation. it will support any two die-cast, plastic or brass O-Gauge
trains ever produced. The RailKing Hell Gate Bridge can also be
converted to 'low' configuration for layouts that make inclines impractical.
Please follow the simple instructions for setup and operation found inside.
PLEASE READ BEFORE USE AND SAVE
www.mthtrains.com
Advertisement
Table of Contents

Related Manuals for MTHTrains RAILKING Hellgate Bridge


Summary of Contents for MTHTrains RAILKING Hellgate Bridge
- Page 1 O-Gauge trains ever produced. The RailKing Hell Gate Bridge can also be converted to ‘low’ configuration for layouts that make inclines impractical. Please follow the simple instructions for setup and operation found inside. PLEASE READ BEFORE USE AND SAVE www.mthtrains.com...
- Page 2 Instructions Basic Setup: The RailKing Hell Gate Bridge comes fully assembled and ready for installment into your layout (see figure 1). Basic Setup: Each RailKing Hell Gate Bridge has a strobing light. Two wires exit from the inside edge of one of the tower bases. One wire is black. Connect the black wire to the negative (”-”, or “common”) power terminal or an outside rail terminal of a lock-on.
- Page 3 Track Installation: MTH RealTrax Mounting holes for RealTrax 10” and 30” straight sections are molded into the bridge roadbed (see figure 2). Other Track Systems For track systems other than MTH RealTrax, place the track on top of the bridge roadbed and mount the track using the track mounting screw holes provided in the frames.
- Page 4 Conversion between “Low” and “High” Configurations: To arrange your RailKing Hell Gate Bridge into the “Low” configuration, simply remove the screws attaching the Lower Base (2/model) and Lower Arches (4/model). Re-route the strobe light wires through one of the notches in the front of the tower. Figure 3 Route Wires Through Notch in Front of Tower...
- Page 5 Service & Warranty Information How to Get Service Under the Terms of the Limited One-Year Warranty When you suspect an item is defective, please check the operator's manual for standard operation and trouble- shooting techniques that may correct the problem. Additional information may be found on the M.T.H. Website. Should you still require service, follow the instructions below to obtain warranty service.
Need help?
Do you have a question about the RAILKING Hellgate Bridge and is the answer not in the manual?
Questions and answers