
Related Manuals for Medit Identica hybrid


Summary of Contents for Medit Identica hybrid
- Page 1 Optimized for impression & model scanning User Guide [02855] 23, Inchon-ro 22-gil, Seongbuk-gu, Seoul, Korea TEL : 02-2193-9600 E-mail : identica@meditcompany.com ENG / 3.2016 www.meditcompany.com...
- Page 2 User Guide Identica Hybrid...
-
Page 4: Table Of Contents
Product installation Step 1 : Software installation Step 2 : Hardware installation Precautions for use Précautions d ’ utilisations Using Identica Hybrid How to use Identica How to use Identica Scan Appendix - Scan case 8 Unit Bridge Waxup Single Impression... - Page 5 User Guide Identica Hybrid...
-
Page 6: Greetings
Greetings Introduction Thank you for buying Identica Hybrid. Medit specializes in scanners and CAD/CAM solutions for dentists and dental technicians. Medit ’ s Identica Hybrid scanner can be used to quickly and easily generate high-quality 3D data in open STL format, helping to increase your productivity and e ciency. - Page 7 User Guide Identica Hybrid...
-
Page 8: General Information
General information Indications Work ow Scanner and Scanning Software General information... - Page 9 - Orthodontics - Virtual articulation Work ow Identica Hybrid is designed to provide high-quality scan data for any type and any sized lab. Identica Hybrid ’ s intuitive and user-friendly software gives users the ability to nish scans quickly and easily.
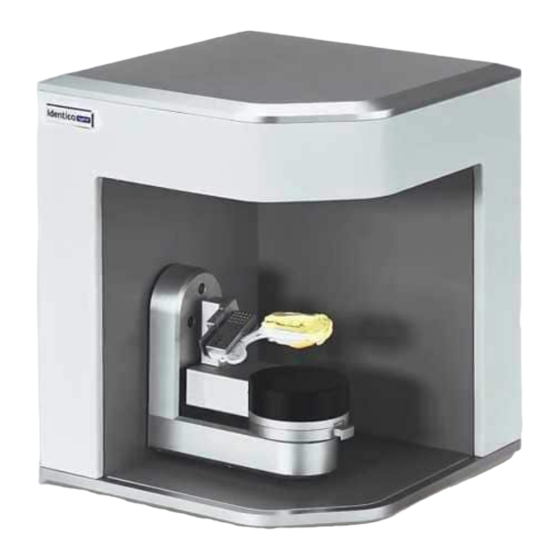
- Page 10 1) Scanner Identica Hybrid is designed to scan a wide range of dental models and impressions for fast and accurate data. With triple camera scanning technology, accuracy and precision is guaranteed, and with some of the fastest scanning speeds in the world, a full arch can be scanned in only 16 seconds.
- Page 11 User Guide Identica Hybrid...
-
Page 12: Before Use
Before use Unpacking and Installation Product Information Product Speci cations PC requirements Before use... - Page 13 When you receive your scanner, make sure all of the accessories are there, and if any are missing, please contact your Caution dealer. Product Information Basic composition Options (Separately Sold) 1. Identica Hybrid scanner 13. Artex jig 2. Screw jig (2EA) 14. KAVO jig 3. Gum base jig 15. SAM jig 4.
- Page 14 2. Screw jig (2EA) 3. Gum jig 4. Multi-die 5. Half Block jig (2EA) 6. Impression jig 7. Calibration panel 8. USB cable 10. 3-axis arm (impression)) 9. Power cord & external adapter 11. Flexible multi-die (Including 8 SIngle-dies) 12. Install CD & User guide Before use...
- Page 15 User Guide Identica Hybrid Options (Separately sold) 13. Artex jig 14. KAVO jig 15. SAM jig 17. Medit Articulator 16. Articulator plate...
- Page 16 AC 100 ~ 240V, 50~60 Hz PC requirements We suggest that you use Identica Hybrid with a PC that exceeds the minimum PC requirements. We cannot guarrantee proper operation with a PC that does not meet the minimum PC requirements.
- Page 17 User Guide Identica Hybrid...
-
Page 18: Product Installation
Product installation First, install Identica Software on your computer before connecting. Step 1 : Software installation Step 2 : Hardware installation Precautions for use Precautions for use in French Product installation... -
Page 19: Step 1 : Software Installation
User Guide Identica Hybrid Step 1 : Software installation Insert the installation CD into the PC and run setup.exe. Read and approve the license agreement and select “ I agree to the …” Specify the installation location. (default path recommended) - Page 20 Con rm the installation information and click Next. The Identica Software and other necessary software programs are automatically installed. Restart your computer after installation. To uninstall Identica Software v2.0, simply delete the folder where you installed it. Do not remove the program by using Caution Remove Programs in the Windows Control Panel.
-
Page 21: Step 2 : Hardware Installation
Identica Hybrid requires a USB 3.0 connection. Caution 1) Connect the power cable 2) Connect the USB cable to the blue USB 3.0 port on your computer. 3) Turn on Identica Hybrid. Turn on the power switch on the back. - Page 22 Con rm hardware installation. Con rm MEDIT USB Remote NDIS Network Device. Check the camera Check to see if 3 cameras are registered. Product installation...
-
Page 23: Precautions For Use
Remove the power cord from the machine if not in use for an extended time. All repairs should be done by the manufacturer or a Medit approved repair center. Users should not disassemble or reassemble their scanner. Doing so will void the warranty. - Page 24 Maintenance If the machine has not been used for a while, check for proper installation and calibration. Check to make sure that the scan data is correct. Periodically clean this machine with a dry cloth and make sure to not let water or moisture inside the machine. Do not clean this machine with corrosive detergent or antiseptic solution.
-
Page 25: Précautions D Utilisations
User Guide Identica Hybrid Précautions d ’ utilisations Cet appareil ne doit être utilisé que par un personnel compétent et expérimenté. Précautions à prendre lors de l ’ installation de l ’ appareil. ’ installation doit s ’ e ectuer dans un endroit sec. - Page 26 * Ne pas vaporiser vers l ’ intérieur du scanner. * Ne pas toucher le miroir situé à l ’ intérieur du scanner. Conditions d ’ entretien Essuyer légèrement la surface de l ’ appareil avec un torchon sec, avec précautions pour le pour le protéger du contact avec des substances étrangères tels que l ’...
- Page 27 User Guide Identica Hybrid...
-
Page 28: Using Identica Hybrid
Using Identica Hybrid How to use Identica How to use Identica Scan Using Identica Hybrid... - Page 29 User Guide Identica Hybrid How to use Identica Software GUI (Graphic User Interface) Con guration Standard screen con guration The Identica Interface will appear as in the screenshot below. Button explanation Menu New project : make a new job. Load : load an existing le.
- Page 30 : When making a SCRP crown. Select Tooth type Situ Scan Situ scan : Setup when you have a situ scan or study model to create a restoration. Select Tooth type Gingiva Scan Gingiva : Select when you scan a gingiva separately. Using Identica Hybrid...
- Page 31 User Guide Identica Hybrid Option Articulator type None : Choose when you do not select the antagonist in the arch. Medit or Etc : Select when scanning an antagonist, scanning a upper/lower jaw using another jig instead of an articulator plate.
- Page 32 O set Coping : Setup for a simple coping with a xed thickness over the preparation. Tooth type Inlay / Veneer O set Inlay : Setup for a simple inlay with a xed thickness over the inlay preparation. Using Identica Hybrid...
- Page 33 User Guide Identica Hybrid Tooth type Waxup Anatomic waxup : Scan the full anatomic waxup to create the framework for the prep teeth. Reduced waxup : Scan the full anatomic waxup, and cut it back to create the framework. Selective reduction (marking parts that stay unreduced) is also possible.
- Page 34 Open folder in new window Load : Load the selected le. Cancel : Cancel the current job and return to the previous job “ IMPORT ” IMPORT If you click the “ ” button, the screen below will appear. Using Identica Hybrid...
- Page 35 User Guide Identica Hybrid 1. Select the “ .dentalProject ” 2. Click Save after modifying the information.
- Page 36 3. After clicking “ ” the scan job will be activated. 4. If you want to return to the original screen, click “ Reset. ” Using Identica Hybrid...
- Page 37 User Guide Identica Hybrid 5. If you click “ Yes, ” you will be taken back to the original screen, if you click “ ” you will return back to your work ow. “ Option ” screen If you click the “...
- Page 38 Scan If you click the “ Scan ” button, you will see the screen below. Check the “ Scan strategy setting ” window for more information. Using Identica Hybrid...
- Page 39 Is the scanner connected properly? Make sure the projector has booted. Make sure the power is on and that the Medit logo appears from the projector. When booting has nished, the Medit logo will turn to a blue light. After installation, check the scanner connection.
- Page 40 If the scanner is not properly connected, a message will appear. Check the status of the equipment according to the message. The image below shows a successfully connected scanner. If your computer cannot nd the connected scanner, you will see the message below. Computer cannot detect connected device. Check the scanner power. Check USB cable connections. Using Identica Hybrid...
- Page 41 User Guide Identica Hybrid If the cameras are not recognized, you will see the message below. Camera not connected properly Check the USB cable connections. If the projector and computer cannot connect, the following message will appear. Projector is not properly Check the projector connection.
- Page 42 Check the serial number on the back of the calibration panel and match it with the PNL file. Press to start calibration. Set the calibration panel on top of two half jigs, as seen in the image above. Calibration will be completed in about two minutes. Using Identica Hybrid...
- Page 43 User Guide Identica Hybrid When the scanner is connected properly, it will automatically move to "Preparation-Strategy" page. Scan strategy will determine the progress of the scan.
- Page 44 Use a model ’ s base for a single coping/ Select ETC (use articulator plate) for articulators , and select OK to move to the next step. Single coping scan (#11) Order form setup Running Identica Software. Using Identica Hybrid...
- Page 45 User Guide Identica Hybrid Enter the settings for the model you want to scan. Cut-back coping - #11 Implant type – None | Situ scan – No | Gingiva scan – No Adjacent Tooth - upper jaw Antagonist - lower jaw...
- Page 46 Scan As in the image above, follow the instructions in the center and insert the model. Click “ Auto Scan ” proceed with the full model scan. As in the image above, the model scan is nished. Using Identica Hybrid...
- Page 47 User Guide Identica Hybrid Model handling Use the computer ’ s mouse to view the scan in di erent angles. 3D rotation to change the 3D viewing angle of the scan image Right click + drag Move the scan image horizontally...
- Page 48 - Make sure the model can be seen in the camera image on screen. Is the scan object shiny or black? Identica Hybrid is able to capture 3D data through reading the projected pattern. However, it can be hard to measure if the pattern is not clearly projected onto the tooth model.
- Page 49 User Guide Identica Hybrid Using a jig Attach the clean scan object to a jig. Spray the object before attaching it to the jig. Use tack to attach the scan object to the jig. Shake the jig to make sure it is stable.
- Page 50 (Prep). Experienced users can skip to their desired location. Prep. Place only No. 11 tooth model attached to a base onto the scanner as the instruction from left above. Then click “ Auto scan ” (or keyboard shortcut ) to proceed with the scan. Using Identica Hybrid...
- Page 51 User Guide Identica Hybrid Once the scanning of No. 1 1 preparation is nished, check the data by rotating the model image. If additional scans are Add scan needed, click “ ” or keyboard shortcut The area needs additional scans.
- Page 52 Auto scan Follow the instructions in the upper left corner, click “ ” or press to proceed with the scan. Using Identica Hybrid...
- Page 53 User Guide Identica Hybrid When the lower/base scan is complete, rotate the image to see if additional scans are needed. If needed, click “ scan ” or keyboard shortcut (Normally there is no need of additional scan for antagonist.) shortcut When the additional scans are complete, click keyboard .
- Page 54 As seen in the image below, place the articulator on the articulator plate. Then, scanning will proceed capturing 4 cuts. Articulator scan, 1st position. Articulator scan, last position. Using Identica Hybrid...
- Page 55 User Guide Identica Hybrid When the articulator scan is completed, click "Next" to proceed to the alignment step. In the rst step of alignment, alignment of the base and tooth No. 1 1 is automatically done. If you click Next again, you can move to the upper jaw alignment.
- Page 56 “ ” align or 3 point align. This case will use the 1 point alignment method. Click 1 points in the upper left image and then click 1 points in the right image whose locations are similar. Using Identica Hybrid...
- Page 57 User Guide Identica Hybrid The upper align is complete. Click next to proceed the lower jaw align. Experienced users can move to any step they wish. To align the upper and lower jaw, the one points must the same on each scan using 1 point alignment.
- Page 58 When the lower jaw alignment is nished click Next to move to the Edit stage. Scan data can be edited in the Edit stage Using Identica Hybrid...
- Page 59 User Guide Identica Hybrid Only the selected parts of the model can be seen. You can select di erent views by making the model or preparation teeth visible or invisible. Icon descriptions (at bottom of screen): Init shortcut : go back to initial data. (keyboard Undo : undo latest edit.
- Page 60 Scan le is completed. If more edits are needed, simply go back to the previous step. Next Click “ ” to store the scanned data le and exit the program. #11 single copings scan job is completed successfully. Using Identica Hybrid...
- Page 61 User Guide Identica Hybrid...
-
Page 62: Appendix - Scan Case
Appendix - Scan case 8 Unit Bridge Waxup Single Impression Double Impression Implant scan adapter Flexible multi-die Appendix - Scan case... -
Page 63: Unit Bridge
- Enter the scan settings for the model to scan. Refer to tooth settings(p28). Implant type – None | Situ scan – No | Gingiva – No Articulator - Medit / Etc. - Click the “ Save ” button. Scan - Click “... - Page 64 Preparation - Strategy 8 Unit Bridge – For upper prep teeth, scan in multi-die; for the lower base, scan in plaster models; for articulators, scan using Medit. Click “ ” to start scanning. See the “ Single coping scan(p.43) ”...
- Page 65 User Guide Identica Hybrid Click and drag the blue arrow to set the scan depth and click “ ” to move to the next step for scanning. Scanning …...
- Page 66 As in the image above, the scan of upper base model is nished. Check the data le to see if additional scans are needed. If needed, simply rotate the data image to the desired Add scan location and click “ ”...
- Page 67 User Guide Identica Hybrid Secure the preparation teeth on the multi-die as shown in the image in the top left corner, and then click the "Auto Scan ” . Press “ Next ” to proceed with the scan. When scanning the multi-die, 2 base jigs must be used.
- Page 68 Multi-die scanning in progress. Scanning can progress more easily if the buccal surface of the prep teeth are facing outward. Scanning of multi-die prep teeth has completed. Next Check the scan data and proceed with additional scans if needed. Click “...
- Page 69 User Guide Identica Hybrid Following the instructions on the screen, place the lower base model in the scanner and click “ Auto scan ” Adjust scan depth by dragging the blue arrow to the desired height. Click “ Next ”...
- Page 70 When scanning is complete (as seen in the image above) check the scan data to see if additional scans are needed. Add scan If needed, simply rotate the data image to the desired location and click “ ” Following the instructions on the screen, place the articular on the scan jig. Appendix - Scan case...
- Page 71 User Guide Identica Hybrid Use a screw jig when scanning two upper/lower base models. Be sure that the prep teeth are not needed to scan the bite relationship. Next Alignment When the articulator scan is nished, click the “ ”...
- Page 72 Align preparation teeth #14 to #24 using a multi-die. Click 1 point in the upper left image and then click the similar spot in the right image. In most cases, 1 point alignment is su cient. Appendix - Scan case...
- Page 73 User Guide Identica Hybrid Successful alignment for preparation tooth #14. Click “ Next ” to move to the next step. Pontic alignment of preparation tooth #13.
- Page 74 On the upper-left blue data image, click one point and then nd and click the similar spot in the upper-right data image. Pontic alignment of preparation tooth #13 completed. Click “ Next ” to move to the next step. Using the same steps as above, complete the alignment for the remaining preparation teeth. Appendix - Scan case...
- Page 75 User Guide Identica Hybrid For the upper base articulator alignment stage, select 1 or 3 point alignment and select similar points in the left and right data images for alignment. This case will show 1 point alignment. Upper base alignment complete. Articulator alignment complete.
- Page 76 To align the lower jaw, use 1 point alignment in the same manner as above. Lower base alignment complete. Articulator alignment complete. Appendix - Scan case...
- Page 77 User Guide Identica Hybrid Check the data when alignment is complete. Click “ Next ” to move to the next step. In the Edit stage, check or un-check the data images on the left to see them on the screen.
- Page 78 “ Rectangle ” to select a rectangular area. Click “ Delete ” to remove the selected data, or “ Invert ” > “ Delete ” to remove the data outside of the selection. When nished editing the data image, click “...
- Page 79 User Guide Identica Hybrid Scan le production is complete. Editing is still possible in this stage. “ Rectangle ” is selected on the screen.
- Page 80 Free ” When “ is selected users can trace any selection desired on the data image. After selecting the desired area, click “ Delete ” to delete the selected part. When nished with editing, click “ Next ” for data processing and STL le production.
- Page 81 User Guide Identica Hybrid 3 unit bridge for teeth #35-37 is complete. The data can be checked in the folder(\Documents\Medit\Identica v.2.0\ MeditProjectData\).
-
Page 82: Waxup
Waxup Teeth setup - Enter the settings for the scan model. Refer to teeth setup(p28). Proceed with cases 11 – 16. #6 Unit Wax-up Bridge Framework and #16 Wax-up crown. Implant type – None | Situ scan – No | Gingiva scan –... - Page 83 User Guide Identica Hybrid Preparation - Strategy Select #6 Unit Bridge and upper crown model and click “ ” to move to the next stage. Single scan coping(p.43) “ ” step for more information. Scan As in the image above, follow the directions in the upper left corner, insert the lower jaw model and click “...
- Page 84 Determine scan height. Drag the blue arrow to determine the height of the scanning area. Click "Con rm" to proceed to scan the entire model. The picture above shows the completion of the upper teeth base model scanning. If the scanning data does not meet the desired result, proceed with extra scanning. Rotate the data image to the location that requires additional scans and click “...
- Page 85 User Guide Identica Hybrid Click "Next" to scan the preparation teeth. Follow the instructions in the upper left corner and Put Pontic #12, 1 4 and prep teeth #16 into the upper base and click “ Auto Scan ” When the “...
- Page 86 According to the instructions in the upper left, place the prep teeth from the Upper jaw(#11, 13, 15, 26) into the scanner, click “ Auto Scan ” to proceed with the scan. Add Scan When the “ Prep 2 ” model scan is complete, check the data image and click “...
- Page 87 User Guide Identica Hybrid Waxup scan Put all single dies into the upper base and proceed with the scan. Add Scan When the waxup scan is complete, check the scan data to see if additional scans are needed. Click “...
- Page 88 Next Check the alignment between the model and dies. As in the image above, alignment is automatic. Click “ ” move to the next step. Edit “ ” stage Check the appropriate model numbers on the left to select the model to edit. Users will only see the checked models.
- Page 89 User Guide Identica Hybrid Use the editing features at the bottom of the screen to edit the data. Refer to “ Single coping scan(p.41) ” for more information. When editing is complete, click “ Next ” to process data and produce an STL le...
- Page 90 The scan le has been produced. Editing is still possible, as shown in the previous step. After editing is complete, click "Next" to end the scan job. A popup will notify the user of the program ending. Click "Yes" to save the scan data and exit the program. Appendix - Scan case...
- Page 91 User Guide Identica Hybrid Wax -up scanning operation has been completed successfully. The data can be checked in the folder(\Documents\Medit\Identica v.2.0\MeditProjectData\).
-
Page 92: Single Impression
Single Impression Teeth setup Enter the settings for the model you want to scan. Refer to the teeth setup(p.28). This crown case will use tooth #14. - Implant type Situ scan Gingiva scan – None | – No | – No - Antagonist - None Save... - Page 93 User Guide Identica Hybrid * Preparation - Strategy Select impression scanning. * Scan Insert the impression according to the instructions.
- Page 94 Open the 3-axis connection button Connect the 3-axis arm with the Put the impression on the impression manually scanner jig and mount onto the scanner. Click "Auto Scan" to proceed with scanning. Edit In the “ ” stage use the icons at the bottom of the screen to edit the data. Refer to “...
- Page 95 User Guide Identica Hybrid Free Select “ ” icon to draw your crop margins. Select “ Invert ” icon to invert the selected area.
- Page 96 Delete Click “ ” icon to delete the data of the selected portion. When editing is complete, click “ Next ” icon and data processing will begin and produce an STL le. Appendix - Scan case...
- Page 97 Scan le production is complete. Editing is still possible as in the previous step. Click “ Next ” to save the scanned data and exit the program. Single Impression scanning is completed. The data can be checked in the folder(\Documents\Medit\Identica v.2.0\MeditProjectData\).
-
Page 98: Double Impression
Refer to the tooth setup(p.28). This crown case will use tooth #14. Implant type Situ scan Gingiva scan - None | – No | – No Antagonist type - Medit Articulator, etc. Save - Click the “ ” button - Click the “ Scan ”... - Page 99 User Guide Identica Hybrid Preparation - Strategy Because of the bite tray, select double impression scan, and then select 3-axis. Impression scanning can be conducted easily by using the 3-axis scan. Con rm Click “ ” to move to the next step.
- Page 100 As in the image above, the upper and lower bite tray impression scan is complete. Next Click “ ” to move to the next step. Experienced users can move to any stage. Edit Use the icons at the bottom of the screen to edit the data. Refer to “...
- Page 101 User Guide Identica Hybrid Free Select “ ” icon and select the portions to be edited.
- Page 102 Invert Select “ ” icon to invert the selected area. Click “ Delete ” icon to delete the selected part. Appendix - Scan case...
- Page 103 User Guide Identica Hybrid Next Click “ ” icon to save the scanned data and exit the program. The scan job is completed. The data can be checked on the Settings folder.
-
Page 104: Implant Scan Adapter
Implant scan adapter Order form and teeth settings - Running Identica Software Set the settings for the model to scan. Bar Pillar – 16, 14, 12, 22, 24, 26 Implant type Situ scan Gingiva Scan – Retained Screw | – No | –... - Page 105 User Guide Identica Hybrid Preparation – Strategy On the left menu, check that “ Scanbody ” entry has been created and press the “ ” button to begin the program. After this step, proceed as with regular scanning from Scan...
- Page 106 Scan data acquisition Scan Align Edit After editing the data image, merging data can begin. When the merge is complete, “ Scanbody ” will appear on the left menu. After editing, press the “ Scanbody ” button or the “ Next ”...
- Page 107 User Guide Identica Hybrid Scanbody Align Click yes to move to the “ ” step. Scanbody Library Align *Scanbody In this step, setup the Scanbody Library and match the scan data. Bar Pillar – 16, 14, 12, 22, 24, 26...
- Page 108 Select the “ Scanbody type ” and check that it is displayed properly in the upper left corner. Afterwards, the Align step is the same as the sorting the scan data and library. One point alignment Appendix - Scan case...
- Page 109 User Guide Identica Hybrid Check the results of the alignment. If you are not sure of the alignment of the scan body, re-align using the "Paste" function. When all libraries are aligned, you can see the overall status on the screen.
- Page 110 When all libraries are aligned, you can see the overall status on the screen. Appendix - Scan case...
- Page 111 User Guide Identica Hybrid Next Click “ ” to save the scanned data and exit the program. Implant Position les and scanned data of #16, 14, 12, 22, 24, 26 has been created. Verify stored data in the storage folder.
-
Page 112: Flexible Multi-Die
Flexible multi-die Create order form and set a strategy. - Running Identica Software. Enter the order details (not required) Refer to the Identica S/W User Interface. (p.26) Using exible multi-die Select the “ exible multi-die scan ” and check the sub-options in the scan strategy settings, and click the “... - Page 113 User Guide Identica Hybrid Flexible multi-die “ ” will be activated on the left menu. Once selected, only exible multi-die scanning is available. The rest of the items except for occlusal are not possible to be selected and the scanning is available only for “...
- Page 114 Check that the model appears fully in the camera ’ s view and click “ Next ” to continue. Click “ Auto Scan ” to begin scanning. Check the data image and click “ Next ” to continue. Appendix - Scan case...
- Page 115 User Guide Identica Hybrid Click the Next button and select the appropriate button. Reset : reset the speci ed tooth elements. Con rm : Con rm the speci c elements. Cancel : Cancel all the job and return to the previous job.
- Page 116 Item button: Select the item to see on the screen. Designated screen: Scanned data will be displayed on the monitor. When you select the items with Item button then you can see the updated message on the upper center as .
- Page 117 User Guide Identica Hybrid Press after selecting all of the data. On the left menu, select each data image that should appear on the screen. Or, select the data to be deleted and click “ Delete ” Scan the rest of the model.
- Page 118 Place the lower jaw model and the upper jaw single dies on the exible multi-die, and then start scanning. On the left menu, each selected data will appear and be checked. Appendix - Scan case...
- Page 119 User Guide Identica Hybrid You can con rm the scan data from all of the items except for the occlusion. Continue with the articulator scan.
- Page 120 All scanning is complete. Proceed to the next step to align the data. The preparation teeth were aligned automatically as shown above. Appendix - Scan case...
- Page 121 User Guide Identica Hybrid The next step is the vestibular alignment step. Align the data using the "1 point alignment " function. Click one point in the top left data image and click the similar spot in the top right data image.
- Page 122 Upper vestibular alignment has been completed. The next step is the lower vestibular alignment step. Appendix - Scan case...
- Page 123 User Guide Identica Hybrid “ 1 point alignment ” Like the upper model, align the data using . Click one point in the upper left data image and click a similar spot in the top right data image. The lower occlusal relationships alignment has been completed.
- Page 124 All occlusal relationship alignments have been completed. Proceed to the next step after checking the data for errors. Editing stage Select the parts of the data to delete and click “ Delete ” . Click Next after editing to move to the next step. Appendix - Scan case...
- Page 125 User Guide Identica Hybrid Proceed to the next step to merge data. Merging data has been completed.
- Page 126 Use the "Rectangle" function to select only the necessary parts of the data image. Use the "Invert Selection" function to invert the selected data. Appendix - Scan case...
- Page 127 User Guide Identica Hybrid Delete the data by using the "Delete" function.
- Page 128 All scanning jobs are complete. Click "Next" to save data and end the program. Appendix - Scan case...
- Page 129 User Guide Identica Hybrid Scan data has been saved in the selected folder properly.
Need help?
Do you have a question about the Identica hybrid and is the answer not in the manual?
Questions and answers