Table of Contents
Advertisement
Advertisement
Table of Contents

Related Manuals for Medit T-series


Summary of Contents for Medit T-series
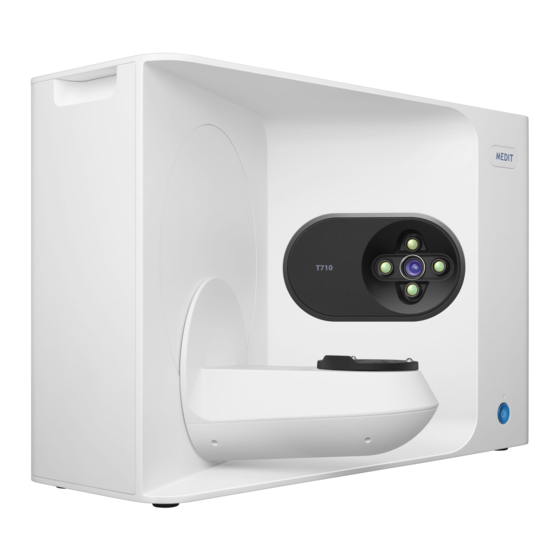
- Page 1 Function Manual Medit Scan for Labs – T710/T510/T310 Revision 4 (October 2020)
-
Page 2: Table Of Contents
1.7.1 Accessories Preparation............................11 1.8 Specifications ................................. 11 1.9 Symbols .................................... 13 Introduction and Overview ............................16 2.1 Medit Scan for Labs Introduction ........................16 2.2 Minimum Requirements............................16 2.3 Medit Link Installation ............................... 17 Medit Scan for Labs: Instruction ..........................20 3.1 Calibration: Table Top and Intraoral Scanners .................... - Page 3 4.3 Post and Core (Only available for T710) ......................71 4.4 Flexible Multi-die Process ............................76 Precautions for the User ............................78 5.1 General Precautions ..............................79 5.2 Environmental Conditions ............................82 5.3 Electro–magnetic Compatibility Information ....................84 Medit T-series User Guide...
- Page 4 Medit offers high quality table scanners for dental CAD/CAM, including dental plaster models, impressions and prosthesis. With Medit T-Series scanners, you can efficiently acquire high-quality 3D data in STL and OBJ formats. You can use our scanners with minimal training. Simply place the object in the scanner and follow the on-screen procedure to start scanning.
- Page 5 General Information Intended Use Workflow Scanner and Software Medit T-series User Guide...
-
Page 6: General Information
Inlay / Onlay / Inlay bridge ⚫ Veneer ⚫ Single wax-up / Wax-up bridge ⚫ Over-press crowns and bridge ⚫ Post and core ⚫ Telescopic crown ⚫ Custom abutments ⚫ Implant bars and bridges ⚫ Removable partial denture ⚫ Medit T-series User Guide... -
Page 7: Workflow
1) Model or impression scan Together with the scanner itself, Medit Scan for Labs will scan the model according to the information entered in the order form in Medit Link. This enables you to create a prosthesis directly by scanning the impressions as compared to the conventional methods of prosthesis manufacturing. -
Page 8: Scanner & Software
The scanner is designed to acquire scan data from a variety of dental models and impressions in a convenient way. A full arch scan takes only 8 seconds. 2) Software: Medit Scan for Las Medit Scan for Labs: The accompanying software is designed to be user friendly, making ⚫ it easy to acquire scanned data. -
Page 9: Components
※ Note: Please check all the components when you unbox the product. 1.6 Components 1. Medit 3D Table Top Scanner 2. USB cable 3. Power Cable & External Adapter 4. LED Protector Accessory Components 5. Calibration Panel 6. Articulator Plate 7. -
Page 10: Hardware Installation
(Not available for T510.) * Optional Components (purchased separately) 13. KAS Jig 14.AM Jig 1.7 Hardware Installation How to connect the scanner: You can begin installing the hardware after completing software installation and ➢ rebooting your PC. Medit T-series User Guide... -
Page 11: Accessories Preparation
1. Connect the power cable 2. Connect USB cable via USB 3.0 (indicated with Blue color) port. (*Important) 3. Turn on the switch located on the front of Medit 3D scanner device. 1.7.1 Accessories Preparation 1. Fill each of the Spray Supporters (2ea) with Blu Tack. - Page 12 Universal 100~240 Vac / 50~60 Hz input, without any slide switch Vac/ 50~60 input, without any slide switch Output +24v / 0~5A Case dimension 168.1 x 65.9 x 39 mm Protection OVP (Over Voltage Protection) SCP (Short Circuit Protection) OCP (Over Current Protection) Medit T-series User Guide...
-
Page 13: Symbols
Caution. Hand Hazard and Optical Hazard Instruction for User Manual The official mark of Europe Certificate Authorized representative in the European Community WEEE Mark MET mark Protective Earth Temperature Limitation Humidity Limitation Atmospheric Pressure Limitation Fragile Medit T-series User Guide... - Page 14 Keep Dry Position Three-layer stacking prohibited Medit T-series User Guide...
- Page 15 Introduction and Overview Medit Scan for Labs is installed with Medit Link. Please make sure you reboot the PC after Medit Link installation and before connecting the scanner to the PC. Medit T-series User Guide...
-
Page 16: Introduction And Overview
Medit Scan for Labs is a software program that allows to perform model and impression scans using the table top scanner series by Medit. Users can edit data, complement it with data from the intraoral scanner and prepare it for the CAD/CAM processes. Explicit explanations and guide messages are accompanying each stage on the left side of the window. -
Page 17: Medit Link Installation
Nvidia Geforce GTX 1060 6G and above Nvidia Geforce GTX 1060 6G and above Window 10 64-bit 2.3 Medit Link Installation Medit Scan for Labs is installed together with Medit Link. Follow the Medit Link instruction for more details. Run Medit_Link_X.X.X.X.exe file. ➢... - Page 18 USB 3.0 cable from your PC before installation. ➢ The program will be installed automatically, and it may take a few minutes. Do not turn off or unplug your PC until the installation is complete. Medit T-series User Guide...
- Page 19 ➢ Please restart your PC after the installation is complete. If you do not have the scanner, you can proceed without restarting the PC. Caution: If you do not restart your PC after the installation is complete, the scanner may not function properly. Medit T-series User Guide...
-
Page 20: Medit Scan For Labs: Instruction
–– Medit Scan for Labs: Instruction Installation Overview 3D Data Management User Interface Overview Scan Steps Scan Strategy Scan Steps: Scan, Align, Confirm Medit T-series User Guide... -
Page 21: Calibration: Table Top And Intraoral Scanners
Medit Scan for Labs: Instruction 3.1 Calibration: Table Top and Intraoral Scanners Calibration is recommended for proper scanning and performance of the device. Please calibrate the device if: ➢ The quality of scan data has decreased as compared to the previous scans. - Page 22 ➢ For Manual Calibration, select the corresponding PNL file from the file list after checking the serial number of calibration panel. Please check if you have a ‘PNL’ file on the PC or installation USB, in case it cannot be found on the list. Medit T-series User Guide...
- Page 23 ➢ If you have the file, click to search for it. ➢ If you do not have the file, click and enter the serial number of the scanner. ➢ Calibration process might take a few minutes. Please do not touch the scanner. Medit T-series User Guide...
-
Page 24: Intraoral Scanner Calibration
➢ Turn the device on and make sure that it is discoverable by the program. ➢ Click intraoral scanner icon on the bottom left to run the Calibration Wizard. ➢ Prepare the calibration tool. ➢ Set the dial of calibration tool to position Medit T-series User Guide... - Page 25 ➢ Click ‘Next’ to start the calibration. ➢ If you properly inserted the handpiece, data will be automatically obtained from position ➢ After the completion of data acquisition at position , move the dial to the next position according to on-screen instructions. Medit T-series User Guide...
- Page 26 ➢ Repeat the above process for positions ➢ After the completion of data acquisition at the position, calibration result will be displayed. Medit T-series User Guide...
-
Page 27: Data Management With Mouse
Places data in the center by double clicking on the background. Drag Moves the data in view screen. Wheel Scroll Zooms in/out the data in view screen. Click For data tree, allows to access data view options. Right Drag Rotates data in view screen. Medit T-series User Guide... - Page 28 Rotates the model. Up, Down, Left and Right Rotates the model. Keys Left Click and Drag Moves the model. Ctrl Up, Down, Left and Right Moves the model. Keys For keyboard shortcuts, go to Settings → Shortcuts. Medit T-series User Guide...
-
Page 29: User Interface Overview
The title bar includes menu and options such as minimize/maximize/restore, exit; shows case information. The menu includes basic program functions like settings, information, help Menu contents. Minimize Minimizes the program window. Maximize/Restore Maximizes/Restores the program window. Exit Exits the program. Medit T-series User Guide... -
Page 30: Menu
Anonymous Usage Select whether you want to send usage statistics anonymously. Statistics Shortcut Keys Check out the default shortcut keys and configure your own. Medit T-series User Guide... - Page 31 Different diagnostic information for software and hardware. ⚫ Usage statistics are collected to analyze software usage patterns and frequently used features for the improvement of the product and user experience. Medit does not collect users’ personal information (username, company name, MAC address). Medit T-series User Guide...
- Page 32 Cover Empty Spaces Turn this option on if you’d like to fill in the empty spaces in scan data with Using the Color of the color of the data located on its sides. Medit T-series User Guide...
-
Page 33: Shortcut Keys
All the configured settings are set to default. 3.3.4 Shortcut Keys You can use shortcut keys for most of the Medit Scan for Labs functions. These shortcut keys can be changed in Settings by selecting and then pressing the new key on the keyboard. -
Page 34: Scanner Status
The scanning is done based on the set strategy. Allows to manually align various scanned data. Align Data Align various scanned data (post and core, wax-up, occlusion etc..) with the model. Confirm Allows to check the data and edit it if necessary. Medit T-series User Guide... -
Page 35: Scan Strategy
Select the options that will define the scanning process, such as scan type, occlusion scan strategy, scanbody library alignment, wax-up scan etc. You can change the strategy at any stage, and in case you do so, you will be asked how to utilize already acquired data. ① Scan Type Selection Medit T-series User Guide... - Page 36 Alignment Assign a scanbody for each tooth based on the form information set in Medit Link, and their 3D image will be pulled out from the pre-set scanbody library. Select this option for post and core cases where you need to scan and merge the base and impression scans in order to get the complete and reliable scan data.
- Page 37 Select this option to use the solely the plate and any articulator Plate except the five ones below. Select this option to scan the occlusion between Maxilla and Mandible. Select this option when you want to scan the occlusion using the etc. jig only. Medit T-series User Guide...
- Page 38 In case there is no articulator jig, a part of mounting plate can be Virtual Mounting used for data alignment and moving the model to the virtual Plate articulator. ▷ [Example] Articulator Jig Usage Example ➢ The scan steps are as following: Medit T-series User Guide...
- Page 39 ➢ The scan is performed by using the jig to place mandible model as shown on the picture below. ▷ [Example] Virtual Mounting Plate ➢ The scan steps are as following: ➢ The scan is performed by flipping mandible model in the Mounting Plate step as shown on the picture below. Medit T-series User Guide...
- Page 40 If you choose to use flexible multi-die, only ‘All’ optio will be available. To get more reliable data for the cases where there are multiple scanbodies in the row, the program will automatically separate them into groups. Gingiva: Select to perform the scan with or without gingiva. Medit T-series User Guide...
- Page 41 Align Data step. Group This option can be selected when scanbodies are overlapped or when base data is needed for the missing part of scanbody. ▷ [Example] Scanning Process Group Medit T-series User Guide...
- Page 42 Select this option when the prepared tooth cannot be detached Solid from the solid model. There is no separate scan stage for prepared tooth, but the scanning can be done using many cuts. ▷ [Example] Scanning Process Flexible Multi- Medit T-series User Guide...
- Page 43 Select this option for the cases that require additional lingual measurements. Put the model on the buccal side to scan it in the upright position. Align the data after performing the scan. ▷ [Example] Interproximal Scanning ➢ The scan stages are shown below: Medit T-series User Guide...
- Page 44 Select this option to acquire impression using the scan data of two Metal Trays and a Triple Tray. Metal & Triple Tray Please note that in this case alignment accuracy is not guaranteed. ▷ [ Example] Impression Scanning Triple Tray Metal & Triple Tray Medit T-series User Guide...
-
Page 45: Scan Steps
The sequence can be changed for each arch. You can save the new sequence of steps and use for next scan. Medit Scan for Labs provides two options for performing a scan with already existing data: 1) Re- scan (‘Scan’... -
Page 46: Scan Sub-Stages
Multi-die. The number of each tooth appears under the icon. Occlusion Bite Allows to scan bite materials placed on the arch model. Gingiva Scan Gingiva Allows to scan mandibular gingiva materials. (Mandible) Gingiva (Maxilla) Allows to scan maxillary gingiva materials. Medit T-series User Guide... - Page 47 Allows to scan the outer surface of mandibular denture. Outer Surface) Denture (Maxilla; Inner Allows to scan the inner surface of maxillary denture. Surface) Denture (Maxilla; Outer Allows to scan the outer surface of maxillary denture. Surface) Occlusion Allows to scan the occlusion. Medit T-series User Guide...
-
Page 48: Data Control And Display Options
Allows to scan a mandibular wax-up after placing it on the model. (Mandible) Wax-up Allows to scan a maxillary wax-up after placing it on the model. (Maxilla) 3.6.2 Data Control and Display Options Move Moves scan data. Medit T-series User Guide... - Page 49 The part with higher reliability is shown as green color. Reliability Perform additional scanning to remove the less reliable areas. These data control tools are especially useful while working with touch screen. ▷ [ Example] Texture Texture On Medit T-series User Guide...
-
Page 50: Scanning
Before scanning, make sure that 1) the model is facing the cameras; 2) the articulator type settings are same across all linked programs (Medit Link, design program etc.). Try adjusting the Medit Scan for Labs shortcuts for all major functions in the Settings. By default, ‘Space’ key is set for ‘Scan’. - Page 51 ➢ The scan starts according to the specified scan path as shown by the image below. Do not touch the scanner while the scan is in progress. It will take a few seconds to complete. Medit T-series User Guide...
- Page 52 ➢ In case you need an additional scan, rotate the model to bring the missing spot to the front, and click ‘Additional Scanning’. Double-click on the missing spot to turn cameras to the empty spot and press ‘Scan’. Medit T-series User Guide...
- Page 53 ➢ The empty space has been filled after performing the additional scan. If you have an i500 scanner, the scan will proceed using it in Scan Using i500 Medit Scan for Labs. ➢ In case you need an additional scan, you can also proceed using the i500. Medit T-series User Guide...
- Page 54 Connect the i500 to the computer and make sure it is calibrated. Turn it on and click ‘Scan ➢ Using i500’. Scanning Toolbox Medit T-series User Guide...
- Page 55 When on, deselects the area using various tools. Mode Import Mesh Imports the 3D file. Data Clear Data Deletes all the data on the screen. Undo Undoes the previous action like scan, editing etc. Redo Redoes the action. ▷ [ Example] Trimming Tools Medit T-series User Guide...
- Page 56 Freeform Rectangle Flood To control the selected data, press RMB to see the following options: Select All Selects all the data on the screen. Deselect All Cancels the selection of data. Invert Swaps the data selection. Medit T-series User Guide...
- Page 57 ‘Scan’ button using these two scan bodies. ➢ Switch the position of the scanbodies and click the ‘Add Another Scanbody’ button. The program will perform the additional scan to complement the existing data. Medit T-series User Guide...
- Page 58 Medit T-series User Guide...
-
Page 59: Data Alignment Steps
Alignment Toolbox Align Automatically aligns all the data displayed on the screen. Automatically Detach Detaches all the aligned data. Remove Alignment Deletes the alignment points. Points Flip Occlusion This option is only available in occlusion alignment. Medit T-series User Guide... - Page 60 ➢ Once you move to this stage, alignment process will start automatically. ➢ If you want to perform alignment manually, first click ‘Detach’ to separate the aligned data and go back to the original position. ➢ On each data, set up to three corresponding points. Medit T-series User Guide...
- Page 61 For individual data alignment, clikc RMB to access the following control options: Detach Data Detaches the specific part of the data. Automatic Automatically aligns only the selected area. Alignment Try Realignment Realigns the data precisely in case there is a mistake in alignment. Medit T-series User Guide...
-
Page 62: Confirm
Free Selection Allows to freely select data. Rectangular Selects data using rectangular shape. Selection Island Selection Selects all connected data by clicking on it. Deselection Mode When on, deselects the area using various tools. Medit T-series User Guide... -
Page 63: Cases And Workflow Examples
–– Cases and Workflow Examples Wax-up Bottom Scanning Scanning and Aligning Scanbodies Post and Core Flexible Multi-die Process Medit T-series User Guide... -
Page 64: Scanning The Bottom Side Of The Wax-Up
➢ Here is an example of a maxillary wax-up case. Select Wax-up Bottom from the scan strategy and click ‘Next’. ➢ Select only the wax-ups for which you need the inner surface to be aligned, and click ‘Confirm’. Medit T-series User Guide... - Page 65 ➢ Proceed with scanning the maxillary base, and then move on to scanning only the prepared teeth. Medit T-series User Guide...
- Page 66 ➢ Move on to Maxillary Wax-up step, and perform the scanning. ➢ After finishing scanning the outer surface of the wax-up, move to the next stage. Flip the wax- up and place it on a single die before scanning. Medit T-series User Guide...
- Page 67 ➢ Proceed with scanning the base and occlusion, and move to Align Data stage. Prepared teeth and base will be aligned automatically. The outer surface of the wax-up and the base will also be aligned automatically. Medit T-series User Guide...
- Page 68 ➢ The inner and outer surfaces of the wax-up should be aligned manually. Set up to three corresponding alignment points as shown on the picture below to align the data. ➢ Occlusion data will also be aligned automatically. ➢ Proceed to the ‘Confirm’ step to edit the data if necessary. Medit T-series User Guide...
-
Page 69: Scanning And Aligning Scanbody
4.2 Scanning and Aligning Scanbody Medit Scan for Labs has an integrated Scanbody Library which makes it easier and faster to work with the scanbody cases. You can specify which scanbody is corresponding to each tooth, and the program will automatically insert the library data in to the model scan. - Page 70 ➢ Add a library to the favorites and manage it in the Favorites List.. ➢ After selecting the Scanbody library, click ‘Assign’ to assign the tooth with the selected scanbody. ➢ Once the assignment for all teeth is complete, click ‘Confirm’ to finish the process. Medit T-series User Guide...
-
Page 71: Post And Core (Only Available For T710)
4.3 Post and Core (Only available for T710) ➢ Selecting ‘Post and Core’ in the Set Scan Strategy dialogue window. ‘Post and Core’ option is possible for the cases where the form information contains Inlay/Onlay’, ‘Veneer’, ‘Telescopic crown’. Medit T-series User Guide... - Page 72 ➢ Perform the scan. ➢ Move to the Prep. Teeth stage and scan the trimmed die. ➢ If there is no trimmed die, scan the model again at this stage. Edit it to cut the unnecessary parts. Medit T-series User Guide...
- Page 73 ➢ Scan the corresponding impression. Medit T-series User Guide...
- Page 74 ➢ Once you move to the Post stage, you will be asked to assign the data for the corresponding tooth. ➢ Once you press ‘Confirm’, you will be able to align the die scan with the model. Medit T-series User Guide...
- Page 75 ➢ Next, align the model with the impression by setting up to three corresponding points on each data. ➢ The alignment will be performed as following: ➔ Medit T-series User Guide...
-
Page 76: Flexible Multi-Die Process
➢ Click on any of the following stages to select the corresponding data. A dialogue window will open. ➢ You can edit the data using the tools located at the bottom of the window before proceeding. Medit T-series User Guide... - Page 77 ➢ Select the scan data and scan stage for assignment. ➢ Click ‘Assign’ to assign the data. ➢ The remaining data is also assigned in the same way. Medit T-series User Guide...
-
Page 78: Precautions For The User
–– Precautions for the User General Precautions Scanner Electro–magnetic Compatibility Information Medit T-series User Guide... -
Page 79: General Precautions
• Do not access touch the moving parts during operation) and maintain a distance (1.5M) from the product. ▷ Before Using the Equipment Please make sure that all the components and cables are connected properly. The device should be recognized by Device Manager. Do not move the axis of scanner forcefully. Medit T-series User Guide... - Page 80 In case there is an error during the scanning process, it will be automatically stopped and the LED indicator light on the scanner will turn red. If the LED indicator light on the scanner turns red, press the ‘Initialize Axes’ button in Medit ➢...
- Page 81 Before disconnecting the power cord, make sure to turn off the power on the device using the power switch on the main unit. Only use the power adaptor supplied by Medit. Using other power adaptors may result in damage to the system.
-
Page 82: Environmental Conditions
Pollution degree 2 Indoor use Storage & Transportation Conditions Temperature: -5˚C ~ 45˚C Humidity: 20 ~ 80% (Non-condensing) Atmospheric pressure: 800hPa ~ 1,100hPa (No condensation) Do not sprinkle spray inside the scanner Do not touch the mirror Medit T-series User Guide... - Page 83 Do not operate the scanner with the cover on Do not store items on top of the scanner Medit T-series User Guide...
-
Page 84: Electro-Magnetic Compatibility Information
± 4 kV, ± 8 kV, ceramic tiles. If floors are covered with a IEC 61000-4-2 ± 15 kV air ± 15 kV air synthetic material, the relative humidity should be at least 30% is recommended. Medit T-series User Guide... - Page 85 The customer or the user of the MD-ID0400 can help prevent electromagnetic interference by maintaining a minimum distance between portable and mobile RF communications equipment (transmitters) and the MD-ID0400 as recommended below, according to Medit T-series User Guide...
- Page 86 Outside ISM including cables, should be used Bands no closer to any part of the MD- Vrms ID0400 than the recommended kHz – 80 MHz separation distance as calculated In ISM Bands using equation below, Medit T-series User Guide...
- Page 87 3 V/m. The ISM (Industrial, Scientific and Medical) bands between 150 kHz and 80 MHz are 6.765 MHz to6.795MHz; 13.553 MHz to 13.567 MHz; 26.957 MHz to 27.283 MHz; and 40.66 MHz to 40.70 MHz Medit T-series User Guide...
- Page 88 LTE Band 1,2,4,25 UMTS 2400 – Bluetooth Pulse 28 V/m 28 V/m 2570 MHz WLAN modulation 802.11b/g/n 217Hz RFID 2450 LTE Band 7 5100 – WLAN Pulse 9 V/m 9 V/m 5800 MHz 802.11a/n modulation 217Hz Medit T-series User Guide...
- Page 89 The carrier shall be modulated using a 50% duty cycle square wave signal. As an alternative to FM modulation, 50% pulse modulation at 18 Hz may be used because while it does not represent actual modulation, it would be worst case. Medit T-series User Guide...
- Page 90 Manufacturer Medit Corp 23, Goryeodae-ro 22-gil, Seongbuk-gu, Seoul, 02855 Rep. of Korea Tel : +82-2-2193-9600 Medit T-series User Guide...
Need help?
Do you have a question about the T-series and is the answer not in the manual?
Questions and answers