Table of Contents
Advertisement
Quick Links
AVVERTENZE
Avvertenze generali di sicurezza
Scopo dell'apparecchio
Questo manuale d'uso
Responsabilità del produttore
Targhetta di identificazione
Smaltimento
Indicazioni per gli Organismi di Controllo Europei 9
Dati tecnici di efficienza energetica
Per risparmiare energia
Sorgenti luminose
Come leggere il manuale d'uso
DESCRIZIONE
Descrizione generale
Pannello comandi
Altre parti
Accessori
Accessori opzionali (acquistabili separatamente)
12
Vantaggi della cottura a vapore
USO
Operazioni preliminari
Uso degli accessori
Programmatore digitale
We advise you to read this manual carefully, which contains all the instructions for maintaining the
appliance's aesthetic and functional qualities. For further information on the product: www.smeg.com
PRECAUTIONS
General safety instructions
Risk of personal injury
• ATTENTION: during use, the
appliance and its accessible
parts become very hot.
Children must be kept away
from the appliance.
• ATTENTION: during use, the
appliance and its accessible
parts become very hot. Never
touch the heating elements
during use.
• Protect your hands by wearing
oven gloves when moving food
91477A665/A
3
Primo utilizzo
Uso del forno
3
Uso della sonda di temperatura (solo su alcuni
8
modelli)
8
Consigli per la cottura
8
Mini guida agli accessori
8
Scopri le ricette
8
Indicazioni per gli Enti di Sorveglianza
Funzioni speciali
9
Funzioni secondarie
9
Impostazioni
9
PULIZIA E MANUTENZIONE
9
Pulizia dell'apparecchio
10
Pulizia della porta
10
Pulizia del vano cottura
10
Funzioni speciali di pulizia
11
Vapor Clean (solo su alcuni modelli)
11
Pirolisi (solo su alcuni modelli)
Decalcificazione
Pulizia del serbatoio e del circuito idraulico
13
Manutenzione straordinaria
13
INSTALLAZIONE
13
Collegamento elettrico
13
Posizionamento
14
inside the oven.
• Never try to put out a fire or
flames with water: turn off the
appliance and smother the
flames with a fire blanket or
other appropriate cover.
• This appliance may be used by
children aged at least 8 and by
people of reduced physical,
sensory or mental capacity, or
lacking in experience in the use
of electrical appliances,
provided that they are
supervised or instructed by
14
15
24
26
28
28
28
28
33
34
37
37
37
39
40
40
42
43
47
48
49
49
50
PRECAUTIONS - 55
Advertisement
Table of Contents

Related Manuals for Smeg SO610S3PS


Summary of Contents for Smeg SO610S3PS
- Page 1 Uso degli accessori Posizionamento Programmatore digitale We advise you to read this manual carefully, which contains all the instructions for maintaining the appliance’s aesthetic and functional qualities. For further information on the product: www.smeg.com PRECAUTIONS General safety instructions inside the oven.
-
Page 2: Flammable Materials
adults who are responsible for NEAR THE APPLIANCE. their safety. • DO NOT USE AEROSOLS IN • Children must not play with the THE VICINITY OF THIS appliance. APPLIANCE WHILST IT IS IN • Keep children under the age of USE. - Page 3 mechanical safety locks that bottom as a support for prevent them from being cooking. removed must face downwards • If you wish to use greaseproof and towards the back of the paper, place it so that it will not oven cavity. interfere with the hot air circulation inside the oven cavity.
- Page 4 maintenance, positioning or Installation and maintenance movement). • THIS APPLIANCE MUST NOT • Before performing any BE INSTALLED IN A BOAT OR operation on the appliance, CARAVAN. switch off the power supply. • The appliance must not be • Disconnect the appliance after installed on a pedestal.
- Page 5 appliance. • Make sure that the temperature • Take care that no objects are probe or its cable do not come stuck in the doors. into contact with heating • Do not install/use the elements inside the oven. appliance outdoors. •...
-
Page 6: Manufacturer's Liability
display may differ from those in the manual. Information for European Control Bodies Manufacturer’s liability The manufacturer declines all liability for Fan forced mode damage to persons or property caused by: the ECO function used to define the energy • use of the appliance other than that efficiency class complies with the specifications specified;... -
Page 7: Light Sources
Light sources as ovens. • This appliance contains light sources of • This appliance contains user-replaceable efficiency class "G". light sources. How to read the user manual This user manual uses the following reading conventions: Warning/Caution • The light sources contained in the appliance Information/Advice are declared suitable for operation at ambient temperature ≥300°C and intended... -
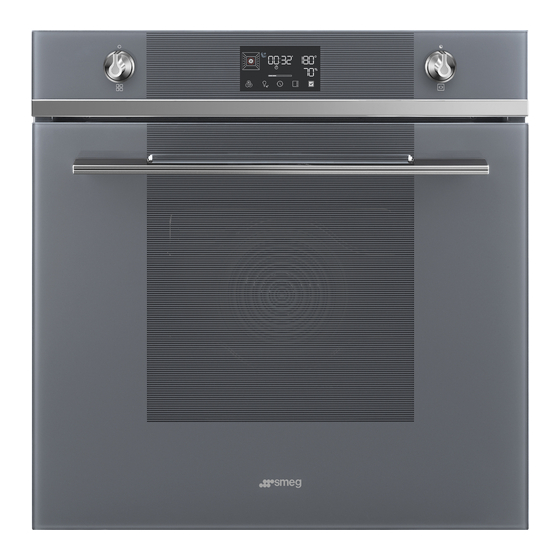
Page 8: Control Panel
Control panel 1 Function knob Cooling fan This knob can be used to: • turn the appliance on and off; • select a function. Turn the Function knob to the position 0 to immediately complete any cooking operation. 2 Digital programmer Displays the current time, the selected cooking temperature, power and function and any time The fan cools the appliance and comes into... - Page 9 comply with the provisions of current Deep tray legislation. • Original supplied and optional accessories can be requested to Authorised Assistance Centres. Use only original accessories supplied by the manufacturer. Funnel Useful for collecting fat from foods placed on the rack above and for cooking pies, pizzas, baked desserts, biscuits, etc.
-
Page 10: Advantages Of Steam Cooking
Optional accessories (can be Advantages of steam cooking purchased separately) The steam cooking system cooks any type of food much smoother and faster and finds its main applications for: • Braising and stewing • Cooking sauces • Cooking au gratin •... -
Page 11: Preliminary Operations
Preliminary operations Tray rack See General safety instructions. • Remove any protective film from the outside or inside of the appliance, including accessories. • Remove any labels (apart from the technical data plate) from the accessories and The tray rack has to be inserted into the tray. In shelves. -
Page 12: First Use
First use To cancel the operation, turn the function knob or hold down the button If the time is not set, the oven will not switch on. for a few seconds. On the first use, or after a long power failure, Modifying the time and the button flash on the... - Page 13 3. Insert the funnel provided in the loading compartment: drawer. • in this case dry with a cloth or sponge before a cooking. • It is recommended to drain the 200 ml reservoir through the reservoir drain function. 6. Close the door. the words and the button flash to indicate that the function can be started.
- Page 14 function indicator light and by a progressive increase in the temperature level reached Pre-heating cannot be bypassed when steam cooking is used. At the end of preheating: • the indicator light switches off; • the appliance beeps; • cooking starts automatically. 4.
- Page 15 • If you have a Smeg vacuum drawer, use the After a long period of inactivity it is maximum vacuum level (level 3). recommended to make a reservoir Once cooked, it is recommended to remove the filling and draining cycle to rinse the product from the bag and finish cooking it in a steam circuit.
- Page 16 100°C. To obtain perfect boiled eggs, covered with aluminium foil, will take around place them on the perforated tray and cook 10-12 minutes to reheat. Ready meals will for 4-6 minutes for soft boiled eggs and 8- require approximately double the time 10 minutes for hard-boiled eggs.
- Page 17 Setting combined steam cooking 6. Press the button to start the function. 1. Turn the temperature knob to set the cooking When the door is opened, the function temperature (from 100°C to 250°C) (for in progress is interrupted. example "190°C"). The function resumes automatically when the door is closed.
- Page 18 2 Turn the temperature knob to the right or to 5. Proceed with draining the reservoir as the left to select the wished temperature (for described above. example "200°C"). Drying after steam functions Cooking with steam generates a lot of moisture inside the appliance.
- Page 19 End of cooking 3. Press the button to confirm. 5. To end cooking, turn the function knob to Programmed cooking position 0 to exit the function. Programmed cooking is the function Timed cooking which allows a time-controlled cooking Timed cooking is the function which operation to be stopped at an allows a cooking operation to be established time depending on the time...
-
Page 20: Bottom Heat
The appliance waits for the set start time. At the end of the minute minder timer, an acoustic signal sounds and the indicator light The minutes required for preheating are flashes on the display. already included in the end-of-cooking time. 5. - Page 21 Cooking (and preheating) times are In order for the probe to measure the longer with the ECO function and may core temperature of the food precisely, depend on the amount of food in the its tip must not be in contact with bones oven.
- Page 22 5. Insert the plug of the temperature probe into The appliance will begin preheating. the socket at the side, using the probe to You can skip the preheating phase by open the protective cover. holding down the button for a few seconds.
-
Page 23: Cooking Advice
preheat the oven before grilling. 11. Press the button to start the function. • We recommend placing the food at the centre of the rack. • With the Grill function, we recommend that you set the temperature to the maximum value to optimise cooking. - Page 24 The ECO function used to establish the energy on cooking suggestions, we recommend visiting efficiency class is compliant with the the dedicated page on the www.smeg.com specifications of European standard EN website, which can be reached using the QR 60350-1.
-
Page 25: Special Functions
Conventional heating mode 6. Turn the temperature knob to set the defrosting time (from 1 minute to 13 hours) To use the STATIC mode, you have to skip the (e.g. "1:30"). preheating stage (see the section “Preheating stage” in the USE chapter. See the “To save energy ”... - Page 26 3. Turn the temperature knob to set required 5. Press the button to confirm. temperature (for example "90°C"). Turn the temperature knob to change 4. Press the button to start the function. the temperature value (from 25°C to 5. Turn the function knob to position 0 to exit 40°C) the function.
- Page 27 7. At the end of cooking, turn the function knob 4. Press the button to start the function. to position 0 to exit the function. As with normal cooking functions, you STONE can skip pre-heating and set a timed and programmed cooking. Useful for on stone cooking.
- Page 28 9. Close the door. 9. Close the door. 10. At the end of cooking, turn the function knob 10. Turn the function knob to position 0 to exit to position 0 to exit the function. the function. BBQ (Barbecue) AIRFRY Useful for barbecue cooking.
-
Page 29: Secondary Functions
Secondary functions 2. Turn the temperature knob to select the time format to display ( The buttons at the bottom of the display have some secondary functions: When the version is selected, MINUTE MINDER TIMER the display shows (morning) or The minute minder timer only warns the (afternoon). - Page 30 2. Turn the temperature knob to activate the 1. After entering the setting menu, press the control lock function. button until the show room function is selected. 3. Press the button to go to the next 2. Turn the temperature knob to activate the setting or press the button to confirm.
- Page 31 Water hardness descaling is required is as follows: This mode allows you to set the water Value °dH °dF Hours hardness value in order to optimise the 0 - 8 0 - 15 descaling process. 8 - 14 15 - 25 The appliance is factory set for water of 14 - 21 25 - 38...
-
Page 32: Other Settings
Display brightness 2. Turn the temperature knob to disable the sound associated with the touching of the This mode allows the display brightness symbols on the display. level to be selected. 1. After entering the setting menu, press the button until the display brightness function is selected. -
Page 33: Cleaning And Maintenance
CLEANING AND MAINTENANCE Cleaning the appliance 2. Grasp the door on both sides with both hands, lift it forming an angle of around 30° and remove it. See General safety instructions. Cleaning the surfaces To keep the surfaces in good condition, they should be cleaned regularly after use. -
Page 34: Cleaning The Oven Cavity
3. Release the front pins following the 7. Clean the external glass pane and the movement indicated by the arrows 2 panes removed previously. 4. Then remove the inner glass pane from the front profile. 8. Use absorbent kitchen roll. In case of stubborn dirt, wash with a damp sponge and neutral detergent. -
Page 35: Vapor Clean (On Some Models Only)
down. • When cleaning is complete, repeat the above procedures to put the rack/tray Avoid letting food residue dry inside the oven support frames back in. cavity, as this could damage the enamel. Take out all removable parts before cleaning. Special cleaning functions For easier cleaning, it is recommended to •... - Page 36 1. After entering the special functions menu, 6. Turn the function knob to position 0 to exit the function. press the button until the Programmed Vapor Clean cycle function is selected. It is possible to program the Vapor Clean function start time, like any cooking function. 7.
-
Page 37: Pyrolytic (On Some Models Only)
oven with a simultaneous catalytic cycle. 5. Press the button again to start the function. We recommend wearing rubber gloves for these operations. We recommend removing the door in order to make the manual cleaning of the parts that are difficult to reach easier. - Page 38 2. Press the button to confirm. During the Pyrolytic cycle the fans produce a more intense level of noise The display shows the Pyrolytic function duration due to a greater rotation speed. This is (factory set to 2:30 hours). an absolutely normal operation, intended to provide more effective heat dispersal.
- Page 39 function For easier manual cleaning of parts that are difficult to reach, we recommend removing the door. Descaling The presence of scale due to lack of descaling can compromise correct operation of the appliance in the long term. Descaling is a long process (more than 4.
- Page 40 Reservoir filling 5. At the end, remove the funnel and place the loading drawer back in its place. 1. Mix 100 g of citric acid with 650 ml of water in a jug. Do not use lactic acid or other descaling agents.
- Page 41 2. Place the deep pan on the third shelf from into the oven cavity (about 1.2 litres is the bottom. Push it against the rear wall of recommended). the oven cavity. The overflowing of water inside the 3. Press the button to start the function.
- Page 42 2. Place the deep pan on the third shelf from 5. Proceed with the descaling procedure as the bottom. Push it against the rear wall of described in the previous paragraphs. the oven cavity. Cleaning the reservoir and hydraulic 3. Pull the loading drawer out of its housing. circuit 4.
-
Page 43: Extraordinary Maintenance
3. Insert the funnel provided in the loading the request to drain the water. drawer. Reservoir draining 1. Open the door 2. Place the deep pan on the third shelf from the bottom. Push it against the rear wall of the oven cavity. -
Page 44: Installation
3. Use a tool (e.g. a spoon) to remove the bulb Do not touch the halogen light bulb cover. directly with your fingers, use an insulating material. 5. Replace the light bulb with one of the same type (40 W). 6. - Page 45 regulations. leaking in. For the Australian/New Zealand market: The circuit breaker incorporated in the fixed connection must comply with AS/NZS 3000. Connection with plug and socket Make sure that the plug and socket are of the same type. Avoid using adapters, gang sockets or shunts as these could cause overheating and a risk of burns.
- Page 46 Mounting into a column (mm) Make sure that the cabinet top/rear section has an opening approx. 35-40 mm deep. 100 - INSTALLATION 91477A665/A...
- Page 47 A min. 603 mm B 560 - 564 mm C 583 - 585 mm D 9 - 11 mm E min. 5 mm F 121 - 1105 mm G min. 560 mm H min. 594 mm co Cutout for power cord (min. 6 cm jb Electrical connection box 91477A665/A INSTALLATION - 101...
- Page 48 Mounting under worktops (mm) If the appliance is to be built-in under a worktop, a wooden bar has to be installed order to use the seal that is glued to the back of the front panel to prevent water or other liquids leaking in. Make sure that the piece of furniture top/rear part has an opening approx.
- Page 49 A min. 603 mm B 560 - 564 mm C 583 - 585 mm D 9 - 11 mm E min. 5 mm F 121 - 1105 mm G min. 560 mm H min. 594 mm co Cutout for power cord (min. 6 cm jb Electrical connection box wb Wooden bar (recommended) Mounting under worktops (mm) (pyrolytic...
Need help?
Do you have a question about the SO610S3PS and is the answer not in the manual?
Questions and answers