Table of Contents
Advertisement
Advertisement
Table of Contents

Related Manuals for Laresar L6 Pro


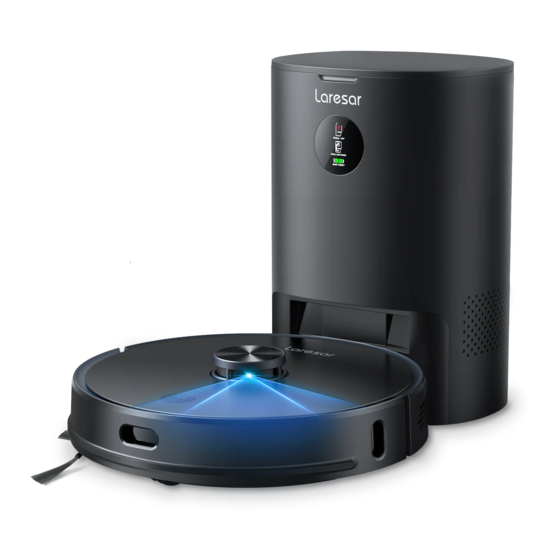
Summary of Contents for Laresar L6 Pro
-
Page 2: Table Of Contents
If you have any questions, please email to support09@laresar.us CONTENTS -------------------------------------------------- IMPORTANT SAFETY WARNING -------------------------------------------------------------------------- PACKING LIST ----------------------------------------------------------- PRODUCT INFORMATION -------------------------------------------------------------------------- MAINTENANCE ----------------------------------------------------------------------------------- 4.1 Product Assembling --------------------------------------------------------------------------------------- 4.2 Wall-Mount Plate ----------------- 4.3 Clean the Infrared Lens/Charging and Dust Collection Sensor Head ---------------------------------------------------------------- 4.4 Clean the Filter Screen of the Fan... -
Page 3: Important Safety Warning
ATTENTION: Before using this machine, please read all instructions in the manual and cautionary markings on the machine carefully. This user's manual includes information for Regulatory Models: Laresar L6 Pro Robot Vacuum Cleaner and Laresar LS-03 Dust Collection Charging Base. - Page 4 If you have any questions, please email to support09@laresar.us Notes on Charging This device is only to be used with the power supply unit (LS-03) provided. The battery must be removed from this device before this device is disposed of.
-
Page 5: Packing List
If you have any questions, please email to support09@laresar.us Reorient or relocate the receiving antenna. Increase the distance between the equipment and receiver. Connect the equipment into an outlet on a circuit different from that to which the receiver is connected. -
Page 6: Product Information
If you have any questions, please email to support09@laresar.us Main Brush On the robot vacuum 1pcs on the robot vacuum, 1pcs Side Brush is a gift in the package On the dust collection charging Cleaning Knife base After-Sales Service In the package... - Page 7 If you have any questions, please email to support09@laresar.us Indicator Reminder Status of recharge indicator Machine status Status of power indicator Stand by/pause Blue light long bright Light off Charging Blue light breath Light off Pause Blue light slowly flash...
-
Page 8: Maintenance
If you have any questions, please email to support09@laresar.us Reset button Press and hold for 1 second to restart Charging electrode tip Dust bin release button Wall-following TOF sensitive detector Dust Collection Charging Base Upper cover Screen Dust bag is full: The light will be... -
Page 9: Wall-Mount Plate
If you have any questions, please email to support09@laresar.us “ ” The COLLECTING sign will be high brightness while the collector is working. Open the upper cover Throw away the used Pull up the lifting handle dust of the dust bag and take... -
Page 10: Clean The Infrared Lens/Charging And Dust Collection Sensor Head
If you have any questions, please email to support09@laresar.us Transparent cover of the dust passage Dust Passage 4.3 Clean the Infrared Lens/Charging and Dust Collection Sensor Head Wipe them gently with a clean, soft, dry cloth. It is recommended to clean them once a month. -
Page 11: Clean The Main Brush
If you have any questions, please email to support09@laresar.us 4.5 Clean the Main Brush The main brush is consumable and should be cleaned at least once a week. It is recommended to replace the main brush every 6-12 months to ensure the cleaning effect. -
Page 12: Battery Maintenance
If you have any questions, please email to support09@laresar.us Senor of the Robot Vacuum Senor of the Charging Base Cliff sensor ×4 Infrared len ×2 Infrared sensor ×3 Charging and dust collection sensor head ×2 Charging electrode tip ×2 Wall-following TOF sensitive detector x1... - Page 13 If you have any questions, please email to support09@laresar.us ③ Remove the filter screen clip. ④ Take out the filter screen. ⑤ Remove the debris on the filter ⑥ Turn on the tap to clean screen and screen clip with a the dust bin.
-
Page 14: Specification
If you have any questions, please email to support09@laresar.us ⑧ Please remove the water tank fittings from the machine according to the illustration and reverse it, remove the mop or replace it. ! Tips: If the mop is too dirty, it will affect the effect of mopping, please clean it in time. -
Page 15: Troubleshooting
If you have any questions, please email to support09@laresar.us 6. TROUBLESHOOTING When the machine runs abnormally, the power indicator will blink in orange, and the machine will give a voice prompt when some faults occur. Please refer to the table below for a solution. - Page 16 If you have any questions, please email to support09@laresar.us The radar is pressed or The radar cover is pressed The radar cover is stuck stuck. Please move it to another position to start The battery temperature is too high or too low. Please...
- Page 17 If you have any questions, please email to support09@laresar.us Foreign matter wound on the Please turn off the machine There are abnormal sounds main brush/side brush or the for cleanup during cleaning main wheel Regular cleaning can only be started when the remaining...
-
Page 18: Warranty
This warranty will only be valid if the machine is used in the country in which it was sold. WHAT IS NOT COVERED? Laresar shall not be liable for costs, damages or repairs incurred as a result of: Machines purchased from an unauthorized dealer. -
Page 19: Disposal
Please keep your proof of purchase. To make a claim under our Limited Warranty, you need to provide your original purchase receipt with the purchase date and order number on it. All work will be carried out by Laresar or its authorized agency. Any replaced defective parts will become the property of Laresar. - Page 20 Contact us- We will get back to you within 1 business day. Contact Information laresar support09@laresar.us 208-210015...
Need help?
Do you have a question about the L6 Pro and is the answer not in the manual?
Questions and answers
How do I stop the L6 from stopping after 10 seconds saying "an error"?
To fix the error causing the Laresar L6 Pro to stop after 10 seconds, follow these steps:
1. Check if the radar is blocked or stuck: Remove any obstacles around the radar or move the machine to an open space and restart it.
2. Inspect the anti-collision rail: Clean any foreign matter around the bump sensor or move the machine away from obstacles.
3. Wipe the cliff sensor: Clean the cliff sensor and move the machine to a flat and open area before restarting.
4. Check the main brush: If the main brush is stuck, clean it or move the machine away.
5. Check the side brush: If the side brush is stuck, clean it or move the machine away.
6. Check the main wheel: If the main wheel is stuck, clean it or move the machine away.
7. Verify the two-in-one water tank: Make sure the water tank and filter screen are properly installed.
Following these steps should resolve the issue.
This answer is automatically generated