Table of Contents
Advertisement
Quick Links
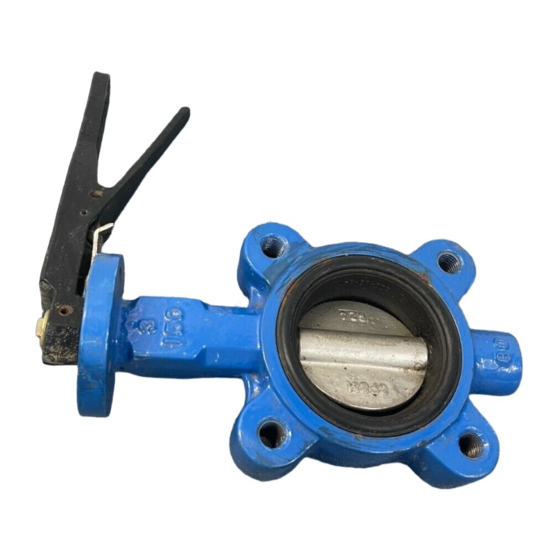
INSTALLATION INSTRUCTIONS
FNW7XX
RESILIENT-SEATED CARTRIDGE STYLE
BUTTERFLY VALVE
FNW resilient-seated Butterfly Valves have been designed and manufactured for fluid control handling in suitable
mechanical systems. This instruction manual includes installation, operation and maintenance information for the
FNW resilient-seated butterfly valve. It is important to read and understand the following instructions to assure safe
and trouble-free operation. Failure to follow these instructions may result in reduced valve performance and void
manufacturer's warranty. This manual addresses manually operated valves, including lever and gear operated only.
For complete actuation, options and accessories information, consult the specific device's manual.
TABLE OF CONTENTS
General Safety .......................................................... 2
General Information ................................................. 2
Transportation ........................................................... 2
Packing and Unpacking .......................................... 2
Storage ........................................................................ 3
Pre-Installation ..................................................... 3-5
Installation Considerations in Piping ................... 6
Installation ............................................................. 7-9
Operation ..................................................................10
Maintenance ....................................................... 10-11
the Valve from the Line ..........................................12
Removal of Valve from Piping ..............................12
Troubleshooting ................................................ 13-14
Part Information ................................................ 15-16
U-Section Part Information ................................... 17
Butterfly Valve Assembly ......................................18
Butterfly Valve Disassembly.................................19
Warranty ...................................................................20
FNW.COM
SCOPE:
The purpose of this manual is to ensure that the valves
supplied are properly installed, handled, operated and
maintained to give trouble-free performance.
This manual covers FNW resilient-seated butterfly valves.
NOTES:
• Read the manual carefully before removal, installation,
maintenance or operation of the valve.
• Refer to general arrangement drawings to identify the
design, as valves may vary in features and parts.
• Pay attention to warnings and illustrations carefully.
We reserve the right to modify or improve the designs or
1
specifications of our products at any time without notice.
Advertisement
Table of Contents

Related Manuals for FNW FNW7XX


Summary of Contents for FNW FNW7XX
-
Page 1: Table Of Contents
This instruction manual includes installation, operation and maintenance information for the FNW resilient-seated butterfly valve. It is important to read and understand the following instructions to assure safe and trouble-free operation. Failure to follow these instructions may result in reduced valve performance and void manufacturer's warranty. -
Page 2: General Safety
The selection of the valve design and materials of construction as related to the specific service application is the sole responsibility of the end user. All FNW BFV have an identification mark (casting or information tag) casted or attached on valve body. Important information, including valve size, class, materials of construction and pressure ratings, are shown. -
Page 3: Storage
INSTALLATION INSTRUCTIONS FNW7XX RESILIENT-SEATED CARTRIDGE STYLE BUTTERFLY VALVE 5. STORAGE • Storage condition is very important to prevent degradation in performance, contamination and discoloration and material deterioration. • The valves must be stored in a dry environment with no dust or water droplets, while avoiding direct sunlight, low and high temperatures and humidity. - Page 4 INSTALLATION INSTRUCTIONS FNW7XX RESILIENT-SEATED CARTRIDGE STYLE BUTTERFLY VALVE • Before installing the valve, inspect the piping and remove all dirt, welding slag, rust and scale from the piping and flange faces that could cause leakage. It is advisable to install a strainer upstream of the valve to prevent contamination from entering the valve. It is very important for long trouble-free service to keep the valve free of all contamination that may damage the sealing surface.
- Page 5 INSTALLATION INSTRUCTIONS FNW7XX RESILIENT-SEATED CARTRIDGE STYLE BUTTERFLY VALVE Installing a valve at a pump outlet Installing at an elbow or a reducer Incorrect Installation Correct Installation Incorrect Installation Correct Installation Combination of a control valve and stop valve Incorrect Installation...
-
Page 6: Installation Considerations In Piping
Valve Orientation FNW recommends valve be installed with the stem in vertical position and the actuator mounted vertically directly above the valve. When space restrictions do not allow, valve can be installed in upside down position. There are special applications where stem should be horizontal. -
Page 7: Installation
INSTALLATION INSTRUCTIONS FNW7XX RESILIENT-SEATED CARTRIDGE STYLE BUTTERFLY VALVE 8. INSTALLATION Before installation, read “Pre-Installation” in section 6 thoroughly and then perform installation in accordance with the following procedure. HAZARD/CAUTION: When installing a non-return valve, pump, or flexible joint made of rubber with this product, insert a short pipe between the part and this product. - Page 8 INSTALLATION INSTRUCTIONS FNW7XX RESILIENT-SEATED CARTRIDGE STYLE BUTTERFLY VALVE Flanges correctly parted DO NOT INSTALL OPEN FLANGES TOO CLOSE Correctly installed Test open to ensure FOR INSTALLATION no interference • For accurate alignment between the flanges and valve, tighten the flanges at both sides.
- Page 9 INSTALLATION INSTRUCTIONS FNW7XX RESILIENT-SEATED CARTRIDGE STYLE BUTTERFLY VALVE Piping Bolt Tightening Procedure • Clean the bolts and nuts and apply lubricant to them. • Do not use rusty or damaged bolts and nuts. • Tighten the bolts and nuts by hands. Tighten the bolts and nuts in any desired order with approx. 20% of specified tightening torque.
-
Page 10: Operation
INSTALLATION INSTRUCTIONS FNW7XX RESILIENT-SEATED CARTRIDGE STYLE BUTTERFLY VALVE 9. OPERATION Lever Operated • Valves are typically supplied with a locking lever plate. Squeeze the handle and locking lever together to disengage the locking lever plate. Open and close the valve by turning the handle one-quarter turn (90˚). - Page 11 INSTALLATION INSTRUCTIONS FNW7XX RESILIENT-SEATED CARTRIDGE STYLE BUTTERFLY VALVE Inspection Descriptions Inspection Points Inspection Procedure Countermeasure Re-tightening the piping bolt and nuts. Align the Pipe joints Visual check valve center with the pipe center and retighten the piping bolts. Fluid External leakage Disassembly and maintenance.
-
Page 12: Precautions Before Disassembling The Valve From The Line
INSTALLATION INSTRUCTIONS FNW7XX RESILIENT-SEATED CARTRIDGE STYLE BUTTERFLY VALVE BOTTOM PLUG SIZE & RECOMMENDED TIGHTENING TORQUE Recommended Size of Valve Plug Size Length of Plug Torque (ft/lb) 2"–3" 7/8" 9UNC 15mm 4" 1" 8UNC 15mm 5"–6" 1-1/8" 7UNC 15mm 8" 1-1/4" 7UNC 15mm 10"–14"... -
Page 13: Troubleshooting
INSTALLATION INSTRUCTIONS FNW7XX RESILIENT-SEATED CARTRIDGE STYLE BUTTERFLY VALVE 1 3. TROUBLESHOOTING Trouble Probable Cause Countermeasure/Remedy The piping bolts are loose or they were not After reducing the pressure, loosen the piping bolts, and then re-tighten tightened evenly. them by diagonal sequence. (Refer to “Piping bolt tightening procedures”) - Page 14 INSTALLATION INSTRUCTIONS FNW7XX RESILIENT-SEATED CARTRIDGE STYLE BUTTERFLY VALVE Problem Main Cause Countermeasure/Remedy Insert a short pipe or spacer between the valve and flange to avoid The disc interferes with the piping or other devices. interference. (Section 8) In this case, remove and check the disc sealing part because there is a high possibility that it is damaged.
-
Page 15: Part Information
INSTALLATION INSTRUCTIONS FNW7XX RESILIENT-SEATED CARTRIDGE STYLE BUTTERFLY VALVE 1 4. PART INFORMATION STC-SR & STL-SR PARTS LIST Ref. no. Description Material Remarks Retaining Plate ASTM A283D-A36 Steel Galvanized Galvanized, Size 2"–14" Retaining Plate Screw ASTM A283D-A36 Steel Galvanized, Size 16"–24"... - Page 16 INSTALLATION INSTRUCTIONS FNW7XX RESILIENT-SEATED CARTRIDGE STYLE BUTTERFLY VALVE PART DRAWING FNW.COM We reserve the right to modify or improve the designs or specifications of our products at any time without notice.
-
Page 17: U-Section Part Information
INSTALLATION INSTRUCTIONS FNW7XX RESILIENT-SEATED CARTRIDGE STYLE BUTTERFLY VALVE 1 5. U-SECTION PART INFORMATION U-SECTION PART LIST Material Ref No. Description Ductile Iron Disc Stainless Steel CF8M Disc Gear Unit ASTM A536 65-45-12 Bottom Plate ASTM A536 65-45-12 Bottom Plate Screw... -
Page 18: Butterfly Valve Assembly
INSTALLATION INSTRUCTIONS FNW7XX RESILIENT-SEATED CARTRIDGE STYLE BUTTERFLY VALVE 16. BUTTERFLY VALVE ASSEMBLY 1. Insert the seat into the body, making sure the 2. Insert bushing(s) into the lower stem hole. 3. With lubricant, insert the lower stem into the holes in the seat align with the stem holes in Check the valves bill of materials for correct body. -
Page 19: Butterfly Valve Disassembly
INSTALLATION INSTRUCTIONS FNW7XX RESILIENT-SEATED CARTRIDGE STYLE BUTTERFLY VALVE 13. Screw the lower stem plug in place using 14. If facilities are available, test the valve for 15. The valve is now complete and ready for a hex wrench. Do not overtighten the plug on torque and shutoff. -
Page 20: Warranty
INSTALLATION INSTRUCTIONS FNW7XX RESILIENT-SEATED CARTRIDGE STYLE BUTTERFLY VALVE 18. WARRANTY LIMITED WARRANTY: Subject to the limitations expressed herein, Seller warrants that products manufactured by Seller shall be free from defects in design, material and workmanship under normal use for a period of one (1) year from installation but in no case shall the warranty period extend longer than eighteen months from the date of sale.
Need help?
Do you have a question about the FNW7XX and is the answer not in the manual?
Questions and answers