Table of Contents
Advertisement
Quick Links
Coffee Machine
Service
RI9600/01
RI9601/01
RI9603/01
RI9604/01
All parts of this document are the property of Philips.
All rights reserved. This document and all the information herein is provided without liability deriving from any errors or omissions. Furthermore, no part may be reproduced, used or
collected, except where express authorisation has been provided in writing or through a contractual agreement.
Published by Philips
SUP 049EU
Service Manual
TYPE
SUP
SUP049
SUP049E
SUP049EP
SUP049EU
Subject to modification
SUP 049EP
12NC
886960001010 GAG.CADORNA STY CMF BK 230V WE
886960101010 GAG CADORNA PLUS CMF BK 230V
886960301010 GAG CADORNA MILK BK 230V
886960401010 GAG.CADORNA PRES OTC AN 230 WE
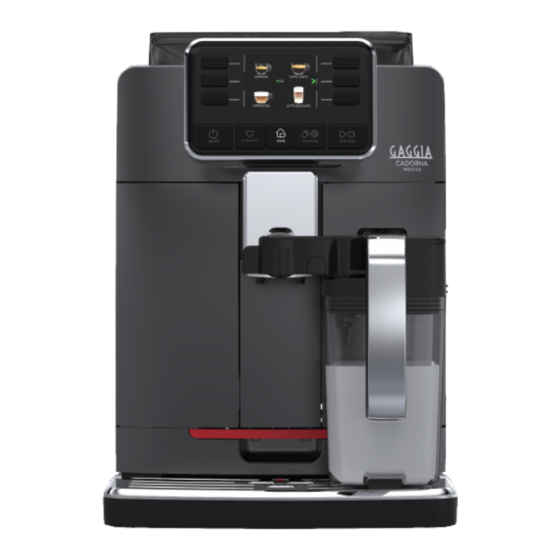
Gaggia Cadorna
SUP 049E
Rev. 00 JULY 2019
DESCRIPTION
SUP 049
EN 4219 400 00051
2019-May-06
Advertisement
Table of Contents

Subscribe to Our Youtube Channel
Related Manuals for Gaggia SUP 049EU


Summary of Contents for Gaggia SUP 049EU
- Page 1 Coffee Machine Gaggia Cadorna Service SUP 049EU SUP 049EP SUP 049E SUP 049 Service Manual Rev. 00 JULY 2019 TYPE 12NC DESCRIPTION RI9600/01 SUP049 886960001010 GAG.CADORNA STY CMF BK 230V WE RI9601/01 SUP049E 886960101010 GAG CADORNA PLUS CMF BK 230V...
- Page 2 GAGGIA CADORNA Technical specification Power supply and output: 230V ~ 50Hz 1900W Power consumption: During heating phase- approx. 5.6 A Boiler: Stainless steel 230V ~ 1900W for coffee, hot water and steam dispensing Safety system: 2 thermostats at 190°C one shot...
-
Page 3: Table Of Contents
GAGGIA CADORNA Table of contents Page Table of contents Page Introduction Espresso Philips Service Center 1.1. Specific tools and equipment 5.1. Espresso Philips Service Center 1.2. Maintenance Products 1.3. Safety warnings Machine Repair Flow 1.4. Water circuit diagram 6.1. Repair Flow Electrical diagram 1.6. - Page 4 GAGGIA CADORNA CHAPTER 1 INTRODUCTION...
-
Page 5: Introduction
GAGGIA CADORNA 01 INTRODUCTION 1.1. Specific tools and equipment As well as the standard equipment, the following is required: 12NC Description Notes Flathead screwdriver # 0, # 2 Torx screwdriver (T10,T20) Cutter Cable tie tightening tool Pliers for Oetiker clamps Digital Thermometer Type K (accuracy for temperature of 0,05 % or ±... -
Page 6: Water Circuit Diagram
GAGGIA CADORNA 01 INTRODUCTION 1.4. Water circuit diagram From this point circuit From this point circuit High temperaure in pressure... -
Page 7: Electrical Diagram
GAGGIA CADORNA 01 INTRODUCTION 1.5. Electrical diagram... -
Page 8: Service Policy Grid As Used For Coffee Machine
GAGGIA CADORNA 01 INTRODUCTION 1.6. Service POLICY grid as used for coffee machine During the repair is always recommended to use, if possible, single parts rather than the correspondent assembly. 1.7. External machine parts Bean coffee container lid Bean coffee containe... -
Page 9: Error Codes
GAGGIA CADORNA 01 INTRODUCTION 1.8. Error codes ERROR DESCRIPTION CODES The coffee grinder is blocked The grinder is disconnected (Only coffee grinder without electronic sensor) The brewing unit is blocked in work position The brewing unit is blocked in home position... -
Page 10: Position Of The Brew Unit
GAGGIA CADORNA 01 INTRODUCTION 1.10. Position of the Brew Unit Brew Unit Home Position Work Position 1.11. Internal machine parts Coffee grinder motor Coffee grinder insert Coffee grinder Boiler PW/CPU P.C.B. Pump Boiler pin Flowmeter Valve Solenoid valve Flow selector... -
Page 11: Technical Specifications
GAGGIA CADORNA CHAPTER 2 TECHNICAL SPECIFICATIONS... -
Page 12: Specification For The Measurement Of The Coffee Products
GAGGIA CADORNA 02 TECHNICAL SPECIFICATIONS 2.1. Specification for the measurement of the coffee products temperature. The below procedure is also contained in the Symptom Cure 97832. The temperature is influenced by the flow from the dispenser and stratification of temperatures in the glass. -
Page 13: Specification For The Measurement Of The Milk Products
GAGGIA CADORNA 02 TECHNICAL SPECIFICATIONS 2.2. Specification for the measurement of the Milk products temperature. Milk evaluation To carry out the test, a partially skimmed UHT milk with a percentage of grease between 1.5-1.8% at a refrige- rator temperature Trefr. (between 4 to 10°C) must be used. - Page 14 GAGGIA CADORNA 02 TECHNICAL SPECIFICATIONS How to measure the milk cream. The temperature (Trefr or Tamb) of the milk doesn’t affect as much the test result on measuring the milk cream; by convection is assumed to always use milk at refrigerator temperature Trefr..
-
Page 15: Machine Parameters And Performance
GAGGIA CADORNA 02 TECHNICAL SPECIFICATIONS 2.3. Machine parameters and performance Default quantity Default quantity Default quantity PRODUCT SUP049-SUP049E SUP049EP SUP049EU coffee (ml) milk (ml) water (ml) 30 +/- 10% Ristretto 40 +/- 10% Espresso Espresso lungo 80 +/- 10% 120 +/- 15% Caffè... -
Page 16: Operating Logic
GAGGIA CADORNA CHAPTER 3 OPERATING LOGIC... -
Page 17: Single Microswitch Gear Motor
GAGGIA CADORNA 03 OPERATING LOGIC 3.1. Single microswitch gear motor Switching on When the machine is switched on, the gear motor repositions itself as follows: - It acts on microswitch 1 - The gear motor changes its rotation direction and moves upwards again by approx. 1-2 mm. -
Page 18: Coffee Grinder
GAGGIA CADORNA 03 OPERATING LOGIC 3.3. Coffee grinder The coffee grinder is driven by a direct current motor (1) using a worm screw helicoidal wheel transmission (2). The worm screw (2) drives a plastic gear wheel (3), which turns the lower grinder (4) and the increment pin 3.4. -
Page 19: Coffee Lack Detection And Coffee Grinder Blocked
GAGGIA CADORNA 03 OPERATING LOGIC 1) When the system get the stability (i.e. the system got the current target) the coffee doses should be: A2/3 A4/5 ±1,5 grams with medium grinding (500±60μm) and using coffee of test. 2) the 3 grinding times are always: <T... -
Page 20: Coffee Cycle
GAGGIA CADORNA 03 OPERATING LOGIC 3.6. Coffee cycle Main switch ON START STOP Time Coffee grinder Time (Dosage) Heating approx. 45 sec. Pump Pump operation (flow meter pulses) in accordance with the amount of product selected. Brewing unit gear motor... -
Page 21: Milk Carafe
GAGGIA CADORNA 03 OPERATING LOGIC 3.7 Milk Carafe 1) Steam input 2)Bring the cappuccino maker into dispensing position 3) Milk tank The milk is heated by the steam and taken towards Emulsion chamber the emulsion chamber where it is mixed with air and... -
Page 22: Descaling Request
GAGGIA CADORNA 03 OPERATING LOGIC 3.9. Descaling request Flow meter pulses “Descaling” – message with water filter inserted (appliances with display only) The water hardness is set on the basis of the regional water hardness analysis (1, 2, 3, 4). -
Page 23: Test Mode And Steam Out
GAGGIA CADORNA CHAPTER 4 TEST MODE AND STEAM OUT... - Page 24 CADORNA TEST MODE Cadorna - Test mode user guide v0.0_ENG.doc GAGGIA CADORNA 04 TEST MODE & STEAM OUT 1 Test Mode 4.1. Test Mode & Steam Out 1.1 How to enter How to enter When the display turns ON, press the keyboard buttons in the order described below:...
- Page 25 2.pdf 1 05/07/2019 14:04:41 2.pdf 1 05/07/2019 14:04:41 GAGGIA CADORNA 04 TEST MODE & STEAM OUT nomeFile CADORNA TEST MODE Cadorna - Test mode user guide v0.0_ENG.doc Navigation in Test Mode nomeFile CADORNA TEST MODE 2 Navigation in Test Mode...
- Page 26 GAGGIA CADORNA 04 TEST MODE & STEAM OUT 2.3 Brew Unit Page 3: Brew Unit This page allow to test the functionality of Brew Unit and the microswitchs: This page allow to test the functionality of Brew Unit and the microswitchs:...
- Page 27 GAGGIA CADORNA 04 TEST MODE & STEAM OUT Info: • p/s: indicate the current number of water flow expressed in pulses/sec. When is activated the pump and one electrovalve the value measured must be equal to or greater than 10 p/s.
- Page 28 CADORNA TEST MODE Cadorna - Test mode user guide v0.0_ENG.doc GAGGIA CADORNA 04 TEST MODE & STEAM OUT 2.6 Steam Out Page 6: Steam Out This page allow to execute the steam out process: This page allow to execute the steam out process:...
-
Page 29: Espresso Philips Service Center
GAGGIA CADORNA CHAPTER 5 ESPRESSO PHILIPS SERVICE CENTER... - Page 30 GAGGIA CADORNA 05 ESPRESSO PHILIPS SERVICE CENTER 5.1. Espresso Philips Service Center (EPSC) The EPSC is a Service tool developed to upload the SW on the machine and run the diagnostic mode. It can be downloaded from the following link: https://www.epsc.philips.com/ServiceCenterPortal/...
-
Page 31: Machine Repair Flow
GAGGIA CADORNA CHAPTER 6 MACHINE REPAIR FLOW... -
Page 32: Repair Flow
0° to prevent any damaged due to frozen water. No need for those families: Gaggia Velasca (Only 230V) and Babila (120-230V) Please also check for GDA_113455 New devices have the possibility to reset the error code, once captured it need to be reset to see if it... -
Page 33: Disassembly
GAGGIA CADORNA CHAPTER 7 DISASSEMBLY... -
Page 34: Outer Shell
GAGGIA CADORNA 07 DISASSEMBLY 7.1. Outer Shell SUP 049EU SUP 049EP SUP 049E SUP 049 Remove the water tank, lid, drip tray, dump box, dreg drawer, brewing unit, caraffe/pannarello/capincup or cappuccinatore. Upper cover Covers unscrew the screw shown and remove the bean coffee container and the upper casing cover. - Page 35 GAGGIA CADORNA 07 DISASSEMBLY 7.2. Display 1. Unscrew the screw shown; 2. Slip off the frontal pannel cap (all except SUP049 EU) and the front pannel; 3. Unscrew the screw shown; 4. Slip off the frame; 5. Unscrew the screw shown and slip off the upper and the lower kayboard;...
-
Page 36: Coffee Dispenser
GAGGIA CADORNA 07 DISASSEMBLY 7.3. Coffee dispenser 1. Unscrew the screw shown and slip off the coffee dispenser external body; 2. Slip off the coffee dispenser mobil part; 3. Slip off the fork and then the the coffee dispenser mobil part. -
Page 37: Boiler
GAGGIA CADORNA 07 DISASSEMBLY 7.6. Boiler 1. Slip off the boiler insulating cover 2. Unscrew the screw shown; 2. Unscrew the screw shown and slip off the electrical and hidraulic connection 7.7. Coffee grinder 1. Slip off the coffee grinder and the electrical connection;... -
Page 38: Flowmeter
GAGGIA CADORNA 07 DISASSEMBLY 7.10. Flowmeter Slip off the electrical and hidraulic connection and than the flowmeter. 7.11. Casing bottom insert 1. Unscrew the screw shown; 2. Unscrew the screw shown; 3. Slip off the electrical connection and than the casing bottom insert. -
Page 39: Gear Motor
GAGGIA CADORNA 07 DISASSEMBLY 7.13. Gear motor Unscrew the screw shown and slip off the gear motor cover. The following are located inside the compartment protected by the casing: - Electric motor (A) with gears (B) and (C) for transmission and timing of the dispenser. -
Page 40: Grinder Blades
GAGGIA CADORNA 07 DISASSEMBLY 7.14. Grinder blades To extract the top support of the appliance, press on the grinding adjustment spindle (A) and turn the support anticlockwise until it unhooks. Turn the grinder blades anticlockwise out of the support. Turn the grinder blades clockwise out of the support. The bayonet connections can be accessed from the rear. -
Page 41: Cpu Board
GAGGIA CADORNA 07 DISASSEMBLY 7.15. CPU board Unscrew the screw shown and slip off the CPU board cover and then disconnect the electrical connection 7.16. Programming access Loosen the screw for remove the cover. 7.17. Fitting and removing Oetiker clamps 1) Boiler connection. -
Page 42: Casing Bottom
Rev.: OGGETTO Coppie di serraggio Besana Pag 4 The purpose of this paragraph is to define the correct tightening torque of each screw present on the Gaggia Montaggio viti eseguita in fase di pre-montaggio: Cadorna machine models. ST-0508 SPECIFICA TECNICA – TECHNICAL SPECIFICATION... - Page 43 GAGGIA CADORNA 07 DISASSEMBLY Vite Cod. 421940213291 VITE TCBR 3X8 PLAST.ZN‐B ST-0508 SPECIFICA TECNICA – TECHNICAL SPECIFICATION tightening torque Screw Quantity Image SPECIFICA DELLE COPPIE N° 1 vite ST-0508 SPECIFICA TECNICA – TECHNICAL SPECIFICATION DI SERRAGGIO SU CADORNA Vite Cod. 421940220061 Pag 7 SPECIFICA DELLE COPPIE VITE TCBR 3,5X12 DI SERRAGGIO SU CADORNA Assemblaggio: ...
- Page 44 ST-0508 SPECIFICA TECNICA – TECHNICAL SPECIFICATION SPECIFICA DELLE COPPIE GAGGIA CADORNA 07 DISASSEMBLY DI SERRAGGIO SU CADORNA Pag 12 tightening torque Screw Quantity Image Vite Cod. 421940220061 VITE TCBR 3,5X12 Coffee dispenser 0,6 Nm ± 0,1 N° 2 viti ST-0508 ST-0508 SPECIFICA TECNICA – TECHNICAL SPECIFICATION SPECIFICA TECNICA – TECHNICAL SPECIFICATION...
- Page 45 Assemblaggio: 0,7 Nxm ± 0,1 Rottura: ≥1,4 Nxm per modello Style GAGGIA CADORNA 07 DISASSEMBLY tightening torque Screw Quantity Image Vite Cod. 421940220061 ST-0508 SPECIFICA TECNICA – TECHNICAL SPECIFICATION SPECIFICA DELLE COPPIE VITE TCBR 3,5X12 DI SERRAGGIO SU CADORNA Pag 18 N° 1 vite Assemblaggio: Left side casing Vite Cod. 421944016761 0,7 Nxm ± 0,1 0,7 Nm ± 0,1 VITE TCBR 3,5X12 ...
Need help?
Do you have a question about the SUP 049EU and is the answer not in the manual?
Questions and answers