Advertisement
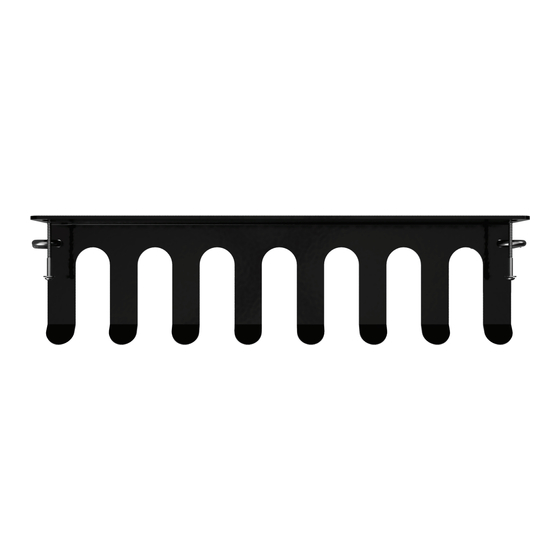
1 - Wall Rack
2 - Wall Screws
2 - Machine Washers
A
1. Use a stud finder to locate the nearest studs on the wall you wish to install the rack on. Mark each stud location
with a pencil. Ensure your stud locations are roughly 16" apart.
2. Hold the rack up to the wall at the desired mounting height. Align the mounting holes with the stud locations
marked in the previous step. Use a level to ensure the rack is evenly balanced horizontally. Once balanced, mark
both mounting hole locations with a pencil.
5 lbs. max per slot
20 lbs. max per unit
B
D
C
Drill/driver
Drill bits
Phillips-head screwdriver
Level
Tape measure
Pencil
Stud finder
A) Wall Rack
B) Wall Screws
C) Machine Washers
D) Carabiners
Advertisement
Table of Contents

Related Manuals for StoreYourBoard E Series


Summary of Contents for StoreYourBoard E Series
- Page 1 1 - Wall Rack 5 lbs. max per slot 2 - Wall Screws 20 lbs. max per unit 2 - Machine Washers Drill/driver Drill bits Phillips-head screwdriver Level Tape measure Pencil Stud finder A) Wall Rack B) Wall Screws C) Machine Washers D) Carabiners 1.
- Page 2 3. Use a 5/64” drill bit to drill pilot holes into the wall studs at the marked locations in the previous step. The depth of the hole should be similar to that of the screw provided. 4. Slide a machine washer on both wall screws. Align the rack with the pilot holes created in the previous step. Fasten the rack to the wall by screwing the wall screws into each of the pilot holes.
Need help?
Do you have a question about the E Series and is the answer not in the manual?
Questions and answers