Table of Contents
Advertisement
Quick Links
Download this manual
See also:
Operator's Manual
Installation Manual
Installation and Maintenance Instructions
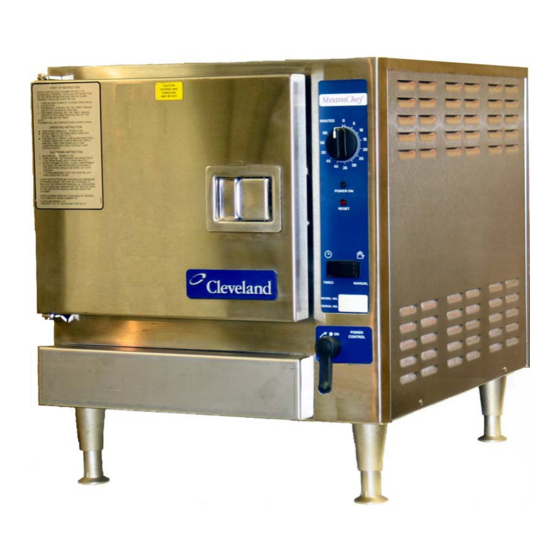
Steam Cooker and Rethermalization Unit
Series: SteamChef™ Gas Models 22CGT3 and 22CGT6
th
1333 East 179
Street
Cleveland, Ohio 44110
Phone: (216) 481-4900
1-800-338-2204
Fax: (216) 481-3782
www.clevelandrange.com
Part No. 22CGT-INM REV.A 2/07
Advertisement
Table of Contents

Related Manuals for Cleveland SteamChef 22CGT3


Summary of Contents for Cleveland SteamChef 22CGT3
- Page 1 Installation Manual Installation and Maintenance Instructions Steam Cooker and Rethermalization Unit Series: SteamChef™ Gas Models 22CGT3 and 22CGT6 1333 East 179 Street Cleveland, Ohio 44110 Phone: (216) 481-4900 1-800-338-2204 Fax: (216) 481-3782 www.clevelandrange.com Part No. 22CGT-INM REV.A 2/07...
- Page 2 DO NOT OPERATE OR ATTEMPT TO OPERATE THIS APPLIANCE OR ANY ACCESSORIES WITHOUT READING COMPLETELY AND FULLY UNDERSTANDING THIS MANUAL Cleveland Range SteamChef appliances are intended for other than household use. Improper installation, adjustment, alteration, service or maintenance can cause property damage, injury or death.
- Page 3 CLEVELAND RANGE agrees to repair or replace, at its option, f.o.b. factory, any part which proves to be defective due to defects in material or workmanship during the warranty period, providing the equipment has been unaltered, and has been PROPERLY INSTALLED, MAINTAINED, AND OPERATED IN ACCORDANCE WITH THE CLEVELAND RANGE OWNER’S MANUAL.
-
Page 5: Table Of Contents
SteamChef MODELS 22CGT3 AND 22CGT6 Chapter PRODUCT INFORMATION ABOUT 22CGT3 and 22CGT6 SteamChefs…………….. A. Product Information………………………………………………………………………... B. Product Information Plate…………………………………………………………………. C. Lifting Points – Do NOT Lift from Sides…………………………………………………. Figure 1-1, Do NOT Lift from Sides…………………………………………………………. GENERAL INFORMATION and INSTALLATION INSTRUCTIONS…..……...………... A. - Page 6 SteamChef MODELS 22CGT3 AND 22CGT6 STARTUP PROCEDURE………………………………………………………………….…. A. In the Event of a Power Failure………..…………………………………………………. B. Burner Ignition Test (Lighting and Shutdown Instructions)…………………………….. C. Burner Ignition Test………………………………………………………………………... 1. Lighting Instructions and Test of Direct Spark Ignition System……………………... 2. Shutdown Instructions…………………………………………………………………... OPERATING TESTS……………………………………………….……….………………...
-
Page 7: Product Information About 22Cgt3 And 22Cgt6 Steamchefs
CHAPTER 1 PRODUCT INFORMATION for 22CGT3 and 22CGT6 SteamChefs A. Product Information This manual covers the installation of SteamChef Steam Cookers (steamers), Cleveland Range models 22CGT6 and 22CGT3 and covers the standard features and options available on SteamChefs. • Other than the selection of options and size (3 or 6 pan), there are presently no significant design, parts, or operating differences among SteamChefs with these model numbers. -
Page 8: General Information And Installation Instructions
5. Installation must comply with all local fire and health codes. Improper installation, adjustment, alteration, service, or maintenance of this appliance, or installation of a damaged appliance, and installation and service by other than qualified Cleveland Range authorized personnel can result in DEATH, INJURY, EQUIPMENT DAMAGE, and void the Warranty. -
Page 9: Dimensions And Clearances
Dimensions and Clearances 22CGT3&6 Figure 2-1 32 3 16 50 1 4 2 3 16 18 1 16 TOP VIEW 21 5 8 24 7 8 18 3 4 FRONT VIEW OPERATING CLEARANCE SERVICE CLEARANCE 21 5 8 25 11 1 11 28 1 16 RIGHT SIDE VIEW... -
Page 10: Installation Of The Steamchef
• Maintain a 3-inch operating clearance on both sides of the appliance. • Cleveland Range recommends a 12-inch secondary clearance on the control side for service. • Maintain at least a 3-inch operating clearance at the rear of the appliance. -
Page 11: Install The Legs
1. Move the SteamChef into position. 2. Place a level along the bottom edge of the SteamChef. 3. Use the adjustable legs of the SteamChef or the adjustable legs of the Cleveland Range stand to level the SteamChef front-to-back and side-to-side. -
Page 12: Gas Supply For The Steamchef
E. Gas Supply for the SteamChef LEAKING GAS CAN CAUSE FIRE OR EXPLOSION. GAS LEAKS ARE FIRE AND EXPLOSION HAZARDS. INJURY, DEATH, AND PROPERTY DAMAGE WILL RESULT. If the installer smells gas, or suspects there is a gas leak, immediately refer to the posted gas leak instructions. -
Page 13: Testing Gas Supply Lines
Warranty without appropriate adjustment in the maintenance schedule voids warranty coverage. a. Contact your Cleveland Range sales representative for details on how to provide water per Minimum Water Quality Requirements in the Warranty, or how to increase the frequency of maintenance, cleaning, and descaling. -
Page 14: Connection Of The Water Supply Lines
Check local codes to determine exactly what type of anti-backflow / anti-siphon device is necessary to meet local requirements. Cleveland Range recommends the plumbing layout in either Figure 3-5 for installations using a single water supply or Figure 3-6 if a separate conditioned water supply is used for the steam generator reservoir feed. -
Page 15: Test Water Supply Lines
Water Reservoir Figure 3-6 Cleveland Range Separate Water Supply Arrangement “Conditioned” indicates water that has been filtered or treated by a Cleveland Range approved method to meet or exceed the water quality standards in the Warranty. 3. Test Water Supply Lines a. -
Page 16: Figure 3-7, Main External Power Switch
• The fuse or breaker and disconnect switch combination is called the “Main External Power Switch.” See Figure 3-7. • This appliance is not suitable for connection to a power cord. Do NOT use a power cord. • This appliance is not suitable for connection to a GFCI (GFI). Do NOT use a GFCI (GFI). 4. -
Page 17: Figure 3-8, Typical Drain Layout
Do NOT connect the SteamChef drain directly to drains or to the plumbing of any other equipment. Do NOT install a trap or shutoff in the drain line. The total length of pipe and number of bend fittings required to reach the open drain determines the pipe size used to extend the drain line to an open drain. -
Page 18: Install The Kleanshield
J. Install the KleanShield™ Note: See Figure 3-9. Never operate a SteamChef without a properly installed KleanShield™. 1. Place the KleanShield™ into the SteamChef so the drain trough slips into the KleanShield™ drain at the rear of the cooking compartment. 2. -
Page 19: Installation Check List
L. Installation Check List TASK Preparation • Check Operating Location Clearances • Test Supply Water Quality • Verify Electric Power Requirements. • Verify Gas Supply Requirements • Verify Exhaust Hood Requirements Installation • Verify SteamChef is Level • Check Exhaust Hood Function •... -
Page 20: Startup Procedure
If service is required, contact Cleveland Range. The Warranty is voided and Cleveland Range is in no way responsible for the operation or safety of this equipment if the controller, valve, igniter probe or any other gas system component is serviced by anyone other than a qualified Cleveland Range authorized service representative. -
Page 21: Burner Ignition Test (Lighting And Shutdown Instructions)
B. Lighting and Shutdown Instructions • Refer to the Operator’s Manual for complete operating and safety instructions. • This procedure should be performed only by a service technician or installer • Complete the Burner Ignition Test and Startup Procedure before starting the Operating Tests. •... -
Page 22: Shutdown Instructions
7) If the burner does NOT light or the SteamChef does not heat properly after the fourth attempt: • Follow the Shutdown Instructions (below). • Call a qualified Cleveland Range authorized service representative to adjust the burner controls. 2. Shutdown Instructions 1) Turn OFF the electrical power to the SteamChef at the ON/OFF lever. -
Page 23: Operating Tests
CHAPTER 4 OPERATING TESTS This procedure evaluates the function of the major operating controls of a SteamChef. • The SteamChef may be equipped with a Keypad Control Panel, Dial Timer Control Panel, or an ON/OFF Control Panel. • The ON/OFF control model works like the manual operation of the Timer models EXCEPT that a selector switch is used to turn the cooking function from standby heat (OFF) to the Cooking Mode (ON). -
Page 24: Operating Tests
If the water level continues to rise above the tip of the higher probe, see the Operator’s Troubleshooting Guide in the Operator’s Manual. • If the problem persists, have a qualified Cleveland Range authorized service representative check the probe circuit. 5. Close the compartment door to close the door interlock circuit. - Page 25 Note: After 60 minutes of uninterrupted operation of both the Timer model SteamChefs in Manual Mode, and ON/OFF model SteamChefs turned ON, the SteamChef automatically starts the Energy/Water Saver feature • The cooking compartment returns to standby temperature and condenser water flow stops. This saves energy, water, and maximizes equipment life.
-
Page 26: Shutdown Of The Steamchef After Testing And Front Burner Cover Installation
Go to Step 6. • If there are any problems: STOP. Shut down the SteamChef and call Cleveland Range at 216-481-4900 or 1-800-338-2204. 6. After completing the Operating Test Procedures and installing the Front Burner Cover, the SteamChef is ready for use. - Page 27 Figure 4-1 Front Burner Cover Installation Note: The Front Burner Cover is shipped loose. To Install the Front Burner Cover: 1. Remove the Front Burner Cover Retention Screws and flat washers from the bottom of the SteamChef. See Figure 4-1. 2.