Table of Contents
Advertisement
Operator's Manual
Use and Care Instructions
CONVOTHERM BY CLEVELAND
CombiNATION OVEN-STEAMERS
th
1333 East 179
Street
Cleveland, Ohio 44110
Phone: (216) 481-4900
Fax: (216) 481 3782
www.clevelandrange.com
Part No. COMBI-OPM REV. A, 8/05
Advertisement
Table of Contents

Related Manuals for Cleveland OVEN STEAMER


Summary of Contents for Cleveland OVEN STEAMER
- Page 1 Operator’s Manual Use and Care Instructions CONVOTHERM BY CLEVELAND COMBINATION OVEN-STEAMERS 1333 East 179 Street Cleveland, Ohio 44110 Phone: (216) 481-4900 Fax: (216) 481 3782 www.clevelandrange.com Part No. COMBI-OPM REV. A, 8/05...
- Page 2 Do not connect Combi steamer-oven drain connection to any drain material This Operation Manual is a part of your new Cleveland Range combination oven steamer. You must keep and maintain it for the entire life span of your Combi and...
- Page 3 CLEVELAND RANGE agrees to repair or replace, at its option, f.o.b. factory, any part which proves to be defective due to defects in material or workmanship during the warranty period, providing the equipment has been unaltered, and has been PROPERLY INSTALLED, MAINTAINED, AND OPERATED IN ACCORDANCE WITH THE CLEVELAND RANGE OWNER’S...
- Page 5 Use and Care Video: After your Equipment Demonstration, your sales representative will present and explain your free copy of the Cleveland Range Use and Care Video. (Combi video release expected in September 2005.) Consult your Customer Service Directory or call Cleveland Range at 216-481- 4900 to begin your free Start-Up Program.
-
Page 6: Table Of Contents
TABLE OF CONTENTS Safety instructions Convotherm by Cleveland Combi Oven-Steamers Operating Elements and their Functions Tables & Tips for Cooking with the Combi Steaming, Combi Hot Air and Steam, Hot Air, Retherm Measuring Core Temperature, Convotherm by Cleveland Cookbook Cooking charts:... - Page 7 HOT. Use caution, and wear DRY heatproof oven mitts when loading, unloading, or reaching into the oven compartment. Do not place containers with liquid contents or contents that become liquid on oven racks higher than you can see into the containers. WARNING CAUTION...
- Page 8 Safety The Preheat Bridge and Oven Compartment can be HOT. • Use caution when placing the Preheat Bridge in the Oven Compartment • Use caution when removing the Preheat Bridge from the Oven Compartment. • Handle with DRY heatproof gloves or mitts.
- Page 9 5. Before each use of the Combi, Inspect the door glass, door gasket assembly, shelves, racks, and accessories for proper installation and cleanliness. 6. Allow only qualified Cleveland Range authorized service representatives to service the Combi. 7. Use only Cleveland Range, LLC factory authorized repair parts.
- Page 10 Combi hand shower. 16. ELECTRIC SHOCK – Use the hand shower only on the inside of the oven. Use of the hand shower, hoses, power cleaners, or pressure washers on the outside of the Combi can cause electric shock and / or damage electrical and electronic components.
- Page 11 Safety 4. Combis must never be used to cook foodstuffs in sealed containers not designed for this purpose. (Combis are excellent for “purpose built” containers such as sous vide packages.) 5. Combis must never be used to heat flammable items such as oils, fats, cloths, or similar items.
- Page 12 Safety LEAKING GAS CAN CAUSE FIRE OR EXPLOSION. INJURY, DEATH, OR PROPERTY DAMAGE WILL RESULT. If the operator smells gas, or suspects there is a gas leak, immediately refer to the posted gas leak instructions. The posted instructions are provided by the local gas supplier, and supersede any other instructions.
- Page 13 F. All Combis 1. To help your CONVOTHERM by Cleveland Combi Oven-Steamer remain in good working order, it must be serviced regularly by a qualified Cleveland Range authorized service representative. 2. Keep the disappearing door guide rails clean.
- Page 14 8. If the Combi has been delivered when the outside temperature is below 23° F then the steam generator high limit safety thermostat will be tripped. a. The boiler high limit safety thermostat must be reset by a qualified Cleveland Range authorized service technician.
- Page 15 Safety 1. After initial installation, check: a. Suction Plate (Hinged Fan Guard) for both swing and latch action. b. Hinged Removable Pan Racks for remove, replace, and latch action. c. Universal Rack for correct installation. d. Loading Trolley for proper roll in and out action (floor models only). e.
- Page 16 140°F. N. Risk of Scalds! 1. Do not place containers with liquid contents or contents that become liquid on oven racks higher than you can see into the containers. 2. Cover containers (individual or on trolleys) containing hot or hot liquid items to help prevent spills during transport.
- Page 17 5. Set the Foot Brake when loading or unloading dishes onto or from the Trolley. 6. Use the Trolley Handle to push the Transport Trolley into the oven chamber. 7. Push the Shelf Rack Trolley or Transport Trolley to the Stop Position in the oven chamber and set the Foot Brake.
- Page 18 2. Read, understand, heed and obey and obey and obey, and follow all directions on the descaler label, MSDS, and related documents 3. Never operate the Combi Oven-Steamer when a descaler has been applied or while descaling. 4. Descale only when the Combi is cold.
-
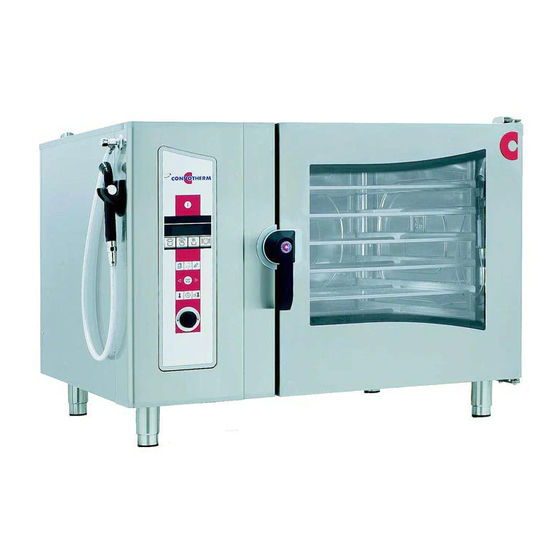
Page 19: Convotherm By Cleveland Combi Oven-Steamers
Convotherm by Cleveland Combi Oven-Steamers PRODUCT VIEWS 1. Control Panel 2. Disappearing Door with Double Glass Panel 3. Door Handle • Vertical: closed. • Horizontal: open. • To open the Combi door turn the handle to the horizontal (airing) position. - Page 20 Convotherm by Cleveland Combi Oven-Steamers Control Panel ON/OFF (1). • When unit is turned ON: – Self-diagnosis is performed. – Oven light turns on. – Steam generator fills and heats (OEB and OGB models). “Steam” cooking mode (2). • Oven temperature is continuously variable between 86°F and...
- Page 21 • LED below key lights up when corresponding recipe is started. Notes: • Magnetic door switch If the oven door is opened during a program, the magnetic door switch automatically interrupts the cooking program. The timer stops. After closing the oven door, the Combi automatically continues the cooking program.
-
Page 22: Tables & Tips For Cooking With The Combi
When opening Combi doors: always stand to the hinge side and back from the Combi doors. Open Combi doors to the “airing” position, and wait for the steam and heat to dissipate before carefully opening the door. DO NOT lean into the Oven Compartment. DO NOT breathe steam, hot air, or superheated steam CAUTION NOTICE during subsequent cooking. - Page 23 Tables & Tips for Cooking with the Combi The Oven Compartment and Contents (food, pans, racks, etc.) are HOT. Use caution, and wear DRY heatproof oven mitts when loading, unloading, or reaching into the oven compartment. Always lock the transport trolley correctly.
- Page 24 Tables & Tips for Cooking with the Combi Steaming With the “Steam” mode, you can boil, steam, blanch, and poach. Steaming at 212°F Some of the benefits of Steaming at 212° F are: • Dishes have rich natural color, bite, and intense flavor. •...
- Page 25 Optimum culinary results are achieved for sensitive foodstuffs such as terrines, flans, force, crème caramel and vegetarian dishes. • Perfect for sous-vide cooking. • Fan operates for 2 seconds every minute to reduce drying when the oven temperature is set below 212°F. • Fish poached at 185°F retains its protein. •...
- Page 26 HIGHER temperature than the cooking temperature. • Always pre-heat floor models with the trolley or pre-heat bridge in place. • The higher the oven temperature, the more darkly food browns, but the loss of weight also increases. • Browning begins around 248°F. •...
- Page 27 Tables & Tips for Cooking with the Combi • Greasing Always grease quick roast items well. This will ensure better conduction of heat. Use fats and oils with a high smoking point. • Pre-heating - Always pre-heat well for quick roast items. •...
- Page 28 • Up to 95% less fat required when compared with standard cooking methods. • The interior of the oven can be de-moisturized (Crisp & Tasty function) to make juicy, crispy, evenly browned dishes. • When baking, the Crisp & Tasty function will create a fine crust.
- Page 29 SET the oven temperature only a few degrees higher than the final core temperature. • The higher the oven temperature, the higher the shrinkage of meat. Recommendations: Keep prepared dishes warm for up to two hours at an oven temperature of 176°F, with the fan operating, without drying out the surface.
- Page 30 You will find pre-heat temperatures as well as rethermalization times and temperatures in the table on the following page. • After rethermalizing for the third time in a fully-loaded oven, always pre-heat again to the original pre-heat temperature. • When the pre-heat temperature is reached, start rethermalizing again.
- Page 31 Tables & Tips for Cooking with the Combi • Make sauces slightly thicker so that they can absorb remaining moisture from fish and vegetables. • Store optimized culinary ideas for standard dishes as Recipes. This increases efficiency for banquets or à la carte cooking. See page 56. •...
- Page 32 The PC-HACCP (Hazard Analysis Critical Control Point) software stores the core temperature measurements from the multi-point sensor between 23°F and 302°F for automatic compiling and archiving of HACCP-related data. • Contact your Cleveland Range sales representative and make PC-HACCP part of your food safety program. NOTE: •...
- Page 33 Tables & Tips for Cooking with the Combi Guide values for pre-heat temperatures and rethermalization times and temperatures when the Combi is fully loaded (Rethermalization times and temperatures are dependent on the number of plates and types of food to be rethermalized) CONVOTHERM Retherm Plate...
- Page 34 Tables & Tips for Cooking with the Combi Recommendations for core temperature settings: Food Degree of cooking Steak Medium Roast Beef Braised Beef Medium Roulades Well Rump steak Veal Shoulder Medium Well Veal Loin Medium Salmon slices Medium Pork fillet Medium Cured smoked pork Medium...
- Page 35 Potatoes (quartered) Dumplings Eggs Cabbage/kale/pulses Baked potatoes Poaching Royale Deep-frozen scrambled eggs Baking Vegetable casserole Cooking Mode Oven Cooking temperature time 212°F 10 – 14 212°F 20 – 25 212°F 8 – 15 min 212°F 10 - 15 212°F 15 – 20 212°F...
- Page 36 Tables & Tips for Cooking with the Combi Tabletop models 6.10 6.20 Six 12” x 20” Seven 18” x 26” Ten 12” x 20” x 2 ½” pans x 2 ½” pans x 2 ½” pans Fourteen: 12” x 20” x 2 ½” pans 26 lbs 61 lbs 26 lbs...
- Page 37 Trout Shrimp Salmon fillets Fish terrine Fish dumplings Stuffing in Savoy cabbage Trout in vacuum pouch (sous vide) Cooking mode Oven Cooking temperature time 428 – 464°F 12 – 15 410 – 446°F 6 – 12 410 – 446°F 12 – 16 356 –...
- Page 38 Tables & Tips for Cooking with the Combi Tabletop models 6.10 6.20 10.10 Six: 12” x 20” Seven: 18” x Ten: 12” x 20” x 2 ½” pans 26” x 2 ½” x 2 ½” pans pans Fourteen: 12” x 20” x 2 ½” pans 12 –...
- Page 39 Baked ham Braising Kale roulades Paprika pods, stuffed Roulade Braised beef Poaching Boiled ham Cooking mode Oven Cooking temperature time 275 – 320°F 80 – 90 275 – 320°F 60 – 70 284 – 320°F 70 – 80 275 – 293°F 80 –...
- Page 40 Tables & Tips for Cooking with the Combi Tabletop models 6.10 6.20 Six: 12” x 20” x Seven: 18” x 26” Ten: 12” x 20” x 2 ½” pans x 2 ½” pans Fourteen: 12” x 20” x 2 ½” pans 49 –...
- Page 41 Turkey escalope, 7 oz. Sausages Steaming/ Boiled sausage poaching Veal sausage Wiener sausage Cooking mode Oven Cooking temperature time 410 – 446°F 6 – 15 min 446 – 482°F 6 – 12 min 410 – 446°F 8 – 10 min 410 –...
- Page 42 Tables & Tips for Cooking with the Combi Tabletop models 6.10 6.20 Six: 12” x 20” x Seven: 18” x Ten: 12” x 20” 2 ½” pans 26” x 2 ½” pans Fourteen: 12” x 20” x 2 ½” pans 90 items 210 items 48 items...
- Page 43 Turkey approx. 7 – 9 lbs Turkey breast Rabbit Roasting/ Rabbit leg braising Grilling Chicken Chicken Leg Cooking mode Oven Cooking temperature time 338 – 356°F 50 – 65 248°F approx. 3 – 3.5 hrs. 266 – 284°F 110 – 120 275 –...
- Page 44 Tables & Tips for Cooking with the Combi Tabletop models 6.10 6.20 Six: 12” x 20” Seven: 18” x Ten: 12” x 20” x 2 ½” pans 26” x 2 ½” pans x 2 ½” pans Fourteen: 12” x 20” x 2 ½” pans 49 –...
- Page 45 Flaky pastry Croissants Plaited yeast pastry Buns / rolls, deep-frozen Baguettes, deep-frozen Poaching Crème caramel Crème Royal Cooking mode Oven Cooking time temperature 1. 221°F 1. 10 min 2. 302°F 2. 15 min 1.221°F 1. 20 min 2.320°F 2. 35 min 3.176°F...
- Page 46 Tables & Tips for Cooking with the Combi Tabletop models 6.10 6.20 Six: Seven: 12” x 20” x 2½” 18” x 26”x 2 ½” 12” x 20” x 2½” pans pans Fourteen: 12” x 20” x 2 ½” pans 6 sheets 14 sheets 3 baking tins 7 baking tins...
- Page 47 Dim Sum Sushi rice Frying with Chicken fingers the Crisp & Chicken wings Tasty function BBQ ribs Cooking mode Oven Cooking temperature time 410°F 8 – 12 min 410°F 10 – 12 410°F 8 – 10 min 410°F 8 – 10 min 410°F...
- Page 48 Tables & Tips for Cooking with the Combi Tabletop models 6.10 6.20 Six: 12” x 20” Seven: 18” x Ten: 12” x 20” x 2 ½” pans 26” x 2 ½” pans Fourteen: 12” x 20” x 2 ½” pans 26 lbs 61 lbs 10 lbs...
-
Page 49: Cooking With Convotherm By Cleveland
Combi doors. Open Combi doors to the “airing” position, and wait for the steam, condensate, and heat to dissipate before carefully opening the door. DANGER DO NOT LEAN INTO THE OVEN COMPARTMENT DANGER DO NOT BREATHE STEAM, HOT AIR OR CONDENSATE... - Page 50 • Moving the transport trolley. The Oven Compartment and Contents (food, pans, racks, etc.) are HOT. Use caution, and wear DRY heatproof oven mitts when loading, unloading, or reaching into the oven compartment. The Preheat Bridge and Oven Compartment can be HOT.
- Page 51 4. Press the Start/Stop key • The cooking mode will start. • The display will show the nominal oven temperature, and the cooking time remaining, or the actual core temperature. 5. To change the set values while operating, press the Temperature Temperature key and enter the desired value.
- Page 52 The “Combi Hot Air and Superheated Steam” mode will start. • The display will show the nominal oven temperature, and the cooking time remaining or the actual core temperature. 7. To change the set values while operating, press the Temperature and enter the desired values.
- Page 53 7. To change the set values while operating, press the Temperature keys and enter the desired values. 8. To read the actual oven temperature, nominal cooking time, and nominal core temperature: press the relevant key either once or twice needed.
- Page 54 Temperature key and enter the desired values. 9. To read the actual oven temperature and the nominal rethermalizing time: press the relevant key either once or twice as needed 10. When the set time has elapsed, or the nominal core temperature has been reached, the Signal Tone sounds and “Retherm”...
- Page 55 • Handle it with care. • Keep Sensor in its holder when not in use. • Do not allow Sensor or cable to hang out of the oven. • Remove it from food before taking items out of the oven.
- Page 56 6. To change the values set while operating, press the Temperature and enter the desired values. 7. You can read the actual oven temperature and the nominal core temperature by pressing the relevant key either once or twice as needed.
- Page 57 Note: The higher the Delta-T temperature, the greater the loss in weight and the darker the browning. When using Delta-T cooking: use of the core temperature sensor is required, because the oven temperature increases with the core temperature. The oven temperature will always be the Delta – T temperature plus the core temperature (see illustration below).
-
Page 58: Cook & Hold
When using the “Hot Air” or “Combi Hot Air and Superheated Steam” mode in the cook phase, a temperature range of 248° F to 300° F is recommended. The time at which the oven switches to the hold phase will depend on the type of food, volume being cooked, and portion or piece size. - Page 59 Cooking with Convotherm by Cleveland The principle of Cook & Hold Cook phase Oven Start chamber Preheated Hold phase Ready to serve Switchover from Cook to hold Holding Required final core temperature = Holding temperature Max. Time for keeping hot...
- Page 60 Cooking with Convotherm by Cleveland Extra Functions With Extra Functions, your Convotherm by Cleveland enables you to maximize productivity in the food preparation processes and cooking processes. Pre-Set Start Time A pre-set start time will automatically start the required program, cooking plan or recipe. 1.
- Page 61 • Use Crisp & Tasty to reduce moisture content. • Excess moisture is drawn out the food and then out of the oven. • Crisp & Tasty can be used in the “Hot Air” and “Combi” modes. 1. Press the Smart Key 2.
- Page 62 Tray Timer function. Select Mode: Steam , Combi Set the standard oven timer to continuous time ( - - : - - ) before using the Tray Timer. Set the Temperature START the selected cooking mode with the Start / Stop key...
- Page 63 Pre-heat floor models with the pre-heat bridge or the trolley in place. Reduced Fan Speed Reduced fan speed helps reduce the speed of moving air inside the oven. Use the reduced fan speed for products sensitive to air currents such as soufflés, meringues, sponges, cream puffs and puff pastry.
- Page 64 Cooking with Convotherm by Cleveland Reduced Power (Electric Models ONLY) • Reduced Power lowers energy consumption and eliminates power peaks in the kitchen. • Note that reduced power output can mean longer cooking times for food. 1. Press the Smart Key 2.
- Page 65 To add moisture, you can activate the steam supply. This will generate a jet of steam. Manually adding steam is not programmable, and can not be incorporated into a recipe. NOTE: The Combi oven must be ON Moisture Manually 1. Press the Key.
- Page 66 Cooking with Convotherm by Cleveland 8. Press the Start/Stop key. 9. The Combi will start with Program Protection activated. 10. The energy optimization unit cannot interfere with the operation of the Combi. Recommendations: • Use the energy optimization lock if cooking time is crucial to the quality of a dish, including sensitive foodstuffs with short cooking times, and the regeneration of plates.
-
Page 67: Convotherm By Cleveland Cookbook
Extra steps can NOT be added to a Recipe when checking steps by pressing the Paging / Scrolling keys • The oven temperature, cooking time and/or core temperature may be changed for each step. Copy Recipe Delete Recipe Change Recipe 6019002_00 keys. - Page 68 All mode, temperature and time changes for up to twenty (20) steps, or until deactivated are recorded. NOTE: Steps must be at least one (1) minute long. NOTE: The Start/Stop key may be pressed while the oven is operating without loosing or overwriting saved steps. 1. To start the recorder, press the Write / Edit key 2.
-
Page 69: Working With The Cookbook
Convotherm by Cleveland Cookbook Recommendations: • Use Recipes for gentle cooking in the first steps and perfect browning in the last step. • Use Recipes for roasts, poultry, casseroles, Delta-T cooking, Cook & Hold, Low Temperature cooking and pastry. • Save Recipes in the Cookbook. - Page 70 Smart Key key. The steps will appear in the display. • The oven temperature and the cooking time or core temperature of a Recipe can be changed at any time while the Combi is operating. • Save changes to a Recipe while the oven is operating. See “Transferring a Recipe into the Cookbook”.
- Page 71 Convotherm by Cleveland Cookbook Writing Recipes in the Cookbook You can change, copy, or delete Recipes saved in the Cookbook, or Write individual steps at any time. You can quit a Recipe without saving changes and return to the Cookbook at any time by pressing the Cookbook key Copying a Recipe Press the Cookbook...
- Page 72 Convotherm by Cleveland Cookbook Inserting a Step into a Recipe 1. Press the Cookbook key . The saved Recipes appear in the display. 2. Select the desired Recipe. 3. Confirm with the Write / Edit key 4. Select “Change Recipe” 5.
- Page 73 Convotherm by Cleveland Cookbook Deleting a Step from a Recipe 1. Press the Cookbook key . The saved Recipes appear in the display. 2. Select the required Recipe and confirm with the Write / Edit key 3. Select “Change Recipe” 4.
- Page 74 Convotherm by Cleveland Cookbook To Overwrite a Press & Go Key 1. Select the desired Recipe or cleaning process 2. Select, press, and hold down the Press & Go key for three seconds. 3. The audible signal sounds indicating the Recipe or cleaning process is assigned to the selected Press &...
-
Page 75: Maintenance And Cleaning
Maintenance and Cleaning When starting work: Automatic Emptying and Rinsing of the Steam Generator Daily rinsing of the steam generator in your Combi helps increase the service life of the steam generator and helps prevent malfunctions. Daily use of the automatic steam generator rinse immediately after switching on is recommended. 1. - Page 76 Pre-clean manually to save water and cleaning agent by selecting a lower cleaning setting. • Depending on the level of soiling of the oven chamber, the engaging frames and grills may be left in the oven during the automatic cleaning process. Note: •...
- Page 77 Release the quick-action locks on the oven racks and suction plate. b. Pivot the oven racks and suction plate out into the oven chamber. c. After cleaning, push the oven racks and suction plate closed and fix it in place with the quick-action locks.
- Page 78 9. Clean the door drip tray, appliance drip trays and accessory drip trays. 10. If a white deposit forms inside the oven chamber, the water treatment system is not correctly set, or the addition of a water treatment system is required.
- Page 79 Release the quick-action locks on the oven racks and suction plate (fan guard). b. Pivot the oven racks and suction plate (fan guard) out into the oven chamber. c. After cleaning, push the oven racks and suction plate (fan guard) closed and fix it in place with the quick-action locks.
- Page 80 If the oven chamber is very heavily soiled, additional manual cleaning may be necessary. • Hot-Air Sterilization and Shine+ can be set in the service level. Ask your qualified Cleveland Range authorized service technician about Hot-Air Sterilization and Shine+. •...
- Page 81 Spent material is considered non-hazardous, and spent material may be disposed of in a sewer system with water flush. The liquid solution in Cleveland Range Descaler Solution Part No. 106174 can be harmful if not handled properly.
- Page 82 Maintenance and Cleaning COMBI ATMOSPHERIC STEAM GENERATOR DESCALING PROCEDURE (For DISSOLVE ® Descaler Solution Part No. 106174) This procedure is slightly different depending on the model being descaled. This entire procedure should be read and fully understand as it applies to the model being descaled, before beginning the actual descaling operation.
- Page 83 Maintenance and Cleaning 7. Add cold tap water through the descale port until descaling solution enters the cooking compartment through the steam port or until the descaling port overflows (water required varies depending on the Model). • Wipe up any spills and overflows. 8.
- Page 84 Maintenance and Cleaning Press the Start / Stop key m. Signal Tone sounds and steaming stops after 30 minutes. n. Silence the alarm by pressing the Start / Stop key door. 19. Run a manual steam generator rinse cycle (Step 4). 20.
-
Page 85: Setup
Setup Setup Symbols Signal tone Date Volume Order of Cookbook Time Default or memory settings To use the Setup Menu: 1. Press the Smart Key 2. Various options appear in the display. 3. Use the Selector Dial to select “Setup” 6019002_00 4. - Page 86 Setup Time Set the time from the “Setup” menu 1. With the Selector Dial , select “Time” 6019002_00 2. Confirm by pressing the Smart Key 3. The display will show the time format options available. 4. Select the required format with the Selector Dial 5.
- Page 87 There is no need to select time and temperature settings and the cooking mode can be started immediately. Cooking Mode Oven Temperature Temperature Display You can select °C or °F for temperature display in the “Setup” menu 1. Use the Selector Dial to select “Temperature in °C”...
- Page 88 Setup Network Address The network address is required for the use of PC Control, PC-HACCP and the Convotherm by Cleveland Service System. Set the network address from the “Setup” menu 1. Use the Selector Dial to select “Network Address” 2. Confirm by pressing the Smart Key 3.
-
Page 89: What To Do If
If an error occurs, the system will display error codes and a description of the error. To continue operating, emergency operation is available (see below). The following tables will help troubleshoot if errors or malfunctions occur while a Combi Oven- Steamer is operating. The tables show possible causes and their remedies. - Page 90 Remove and clean filter Solenoid valve fault Call customer service Connection area ventilation fault Allow Combi to cool, or continue cooking at a lower oven Air supply blocked temperature, and call customer service Motor temperature monitor triggered, Call customer service...
- Page 91 Incorrect cleaning agent Degree of soiling incorrectly set Caution: If an error cannot be rectified with the aid of this list, please contact your qualified Cleveland Range authorized service representative. Possible cause Lock suction plate correctly Select lower temperature and increase...
-
Page 92: Emergency Operation
CHAPTER 5 Emergency Operation To continue to use your Convotherm by Cleveland Combi Oven-Steamer in the case of an error which cannot be solved immediately, an “Emergency Operation” function is available. This allows you to use at least some of the appliance functions despite a malfunction. - Page 93 What to do if ... The oven will operate if these errors occur Cooking time will be much longer, dishes in upper levels will be ready first X: Operation Injection of water into condenser constantly activated (higher water consumption) possible Errors E23 and E26 simultaneously, steam generator is not pre-heated –: Operation not...
- Page 94 What to do if ... failure Steam generator safety temp. limiter sensor failure E23& Steam generator safety temp. limiter and steam generator sensor failure Excess temperature Steam generator heater E 29 Error in ground connection Steam generator heater error Steam generator pump error ID error...
Need help?
Do you have a question about the OVEN STEAMER and is the answer not in the manual?
Questions and answers