
Subscribe to Our Youtube Channel
Related Manuals for Samsung HW-J7591R


Summary of Contents for Samsung HW-J7591R
- Page 1 HW-J7591R User Manual For further information, refer to the Web Manual. Web manual : www.Samsung.com Support → → Product name search → HW-J7591R...
-
Page 2: Safety Information
SAFETY INFORMATION SAFETY WARNINGS TO REDUCE THE RISK OF ELECTRIC SHOCK, DO NOT REMOVE THE COVER (OR BACK). NO USER-SERVICEABLE PARTS ARE INSIDE. REFER SERVICING TO QUALIFIED SERVICE PERSONNEL. This symbol indicates that high voltage is present inside. It is dangerous to make any CAUTION kind of contact with any internal part of this product. - Page 3 PRECAUTIONS 1. Ensure that the AC power supply in your house complies with the power requirements listed on the identification sticker located on the rear of your product. Install your product horizontally, on a suitable base (furniture), with enough space around it for ventilation (7~10 cm). Make sure the ventilation slots are not covered.
-
Page 4: Checking The Components
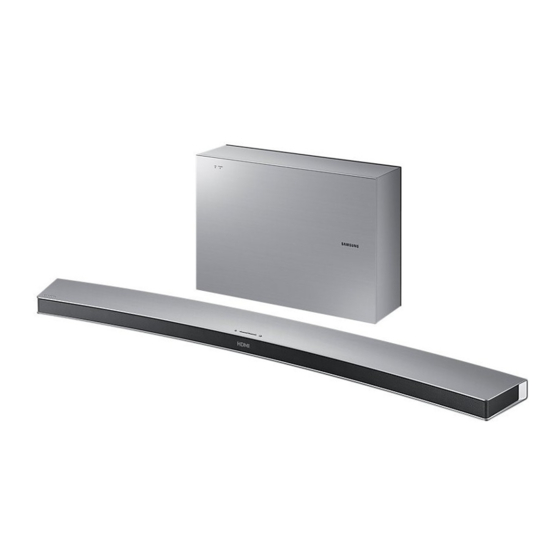
CHECKING THE COMPONENTS Soundbar Main Unit 2 AC/DC Adapter 3 Power Cord Remote Control / Subwoofer Battery HDMI Cable 1 Power Cord c Use Cat 7 (*STP Type) cable for the connection. * Shielded Twist Pair CONNECTING ELECTRICAL POWER Use the power components (1, 2, 3) to connect the power supplies in the following order: Subwoofer ... - Page 5 CONNECTING THE SUBWOOFER TO THE SOUNDBAR MAIN UNIT You can enjoy rich bass tones and better sound quality by linking the subwoofer to the Soundbar main unit. Soundbar Main Unit Unit Unit Subwoofer The Soundbar main unit and subwoofer should link (connect wirelessly) automatically when the Soundbar main unit and subwoofer are turned on.
-
Page 6: Connecting To Your Tv
CONNECTING TO YOUR TV You can enjoy TV sound after connecting the Soundbar to your TV with or without a cable. c Important: Before you begin, put the battery into the remote. See page 17 for instructions. Method 1. Connecting with a Cable Check the HDMI OUT (TV-ARC) port of the Soundbar main unit. - Page 7 If your Soundbar is connected to your TV through TV SoundConnect, you can conveniently control the volume with the Soundbar's remote or the TV's remote. c The TV SoundConnect (Soundshare) function is only available in some Samsung TV products released since 2012.
- Page 8 Samsung Multiroom Internet Wireless Router Smart Device 3. Install the Samsung Multiroom app on your smart device (smart phone, tablet, etc.). 4. Launch the Samsung Multiroom app. Samsung Multiroom Android Samsung Multiroom app 5. Complete the initial settings by following the instructions on the app screen.
- Page 9 Adding the Soundbar to an Existing Multiroom Audio System If the Samsung Multiroom app is already installed for use with another multiroom audio device, follow these steps to add the Soundbar. Wi-Fi SETUP SPK ADD DC 24V 1. Press and hold the SPK ADD button on the rear of the Soundbar for more than 1 second.
- Page 10 You can connect your TV to the Soundbar through a wireless network and enjoy the TV sound. c Important: Make sure that the TV and Soundbar are connected to the same network. (How to check your Samsung TV network : Home menu Network Network Status) Configuring Settings from your Samsung Smart TV c To play sound via the Soundbar, make sure that your TV model supports the Multiroom feature (Samsung Smart TVs released after 2014).
- Page 11 Connecting Samsung Multiroom Audio System to the Surround You can enjoy three-dimensional sound in surround mode after connecting two Multiroom Audios and a Soundbar. c Surround connection between a Multiroom Audio and a Soundbar is unavailable. 1. Touch to go to the list of all speakers.
-
Page 12: Connection Via Bluetooth
4. Play music on the connected device. [If failed to connect to the Bluetooth device / If device searching is needed again] • Delete the previous "[Samsung] HW-Jxxxx" found by the Bluetooth device and have it search for the Soundbar again. -
Page 13: Connecting To An External Device
CONNECTING TO AN EXTERNAL DEVICE You can enjoy sound from separate external devices such as a BD player/game console/set-top box, etc. by connecting them to your Soundbar. HDMI Cable HDMI IN Soundbar HDMI Cable HDMI OUT External Bottom of Soundbar Device 1. -
Page 14: Software Update
USB port on your Soundbar. For more information about how to download update files, go to the Samsung Electronics website at (samsung.com/sec) search for the model name download the firmware from the customer support menu option. - Page 15 3. Fix Holder-Screw 1 (4 EA) and Holder-Screw 2 For Soundbar Main Unit (Wallmount (for Soundbar main unit fixing) (4 EA) into the holes Components) of the Soundbar tightly as shown in the illustration. Holder-Screw 2 Holder-Screw 1 (4 EA) (for Soundbar main unit fixing) (4 EA) Holder-Fix Mount...
- Page 16 5. Mount the Soundbar on the Wall-Mount Bracket in order of the following illustration (1 2). 6. Fix the Holder-Fix Mount (for wall-mount fixing) to join the Wall-Mount Bracket with the Soundbar. c Wall-Mount Screws are not provided. c Since different types of wall-mount screws are required depending on your wall, you should check your wall before installation and purchase the appropriate wall-mount screws to use.
- Page 17 REMOTE CONTROL BUTTONS & FEATURES Inserting Battery before using the Remote Control 1. Use a suitable coin to turn the remote control's battery cover counterclockwise to remove it as shown in the figure below. 2. Insert a 3V lithium battery. Keep the positive (+) pole facing up when inserting the battery.
- Page 18 Selects the previous file. Skip Back The Repeat function is available only when playing back music from Songs on phone or DMS of Samsung Multiroom app. Repeat • OFF-REPEAT : Cancels Repeat Playback. • TRACK-REPEAT : Plays a track repeatedly.
-
Page 19: Troubleshooting
Channel is a trademark of DTS, Inc. © DTS, Inc. È TV SoundConnect is supported by some All Rights Reserved. Samsung TVs released from 2012 on. Check your TV to see if it supports TV SoundConnect. Is your TV firmware the latest version? The terms HDMI and HDMI High-Definition È... -
Page 20: Open Source Licence Notice
• Nominal specification – Design, specifications and App screen are subject to change without prior notice. – Samsung Electronics Co., Ltd reserves the right to change the specifications without notice. – Weight and dimensions are approximate. – For more information about the power supply and power consumption, refer to the label attached to the product. - Page 21 ﺍﻁﻼﻋﺎﺕ ﺍﻳﻣﻧﯽ ﻫﺷﺩﺍﺭﻫﺎی ﺍﻳﻣﻧﯽ .ﺟﻬﺕ ﮐﺎﻫﺵ ﺧﻁﺭ ﺑﺭﻕ ﮔﺭﻓﺗﮕﯽ، ﺍﺯ ﺑﺭﺩﺍﺷﺗﻥ ﺩﺭﭘﻭﺵ )ﻳﺎ ﭘﺷﺕ( ﺩﺳﺗﮕﺎﻩ ﺧﻭﺩﺩﺍﺭی ﮐﻧﻳﺩ .ﻫﻳﭻ ﻗﻁﻌﻪ ﺍی ﺩﺭ ﺩﺍﺧﻝ ﺩﺳﺗﮕﺎﻩ ﻭﺟﻭﺩ ﻧﺩﺍﺭﺩ ﮐﻪ ﻣﺻﺭﻑ ﮐﻧﻧﺩﮔﺎﻥ ﺑﺗﻭﺍﻧﻧﺩ ﺁﻧﻬﺎ ﺭﺍ ﺗﻌﻣﻳﺭ ﮐﻧﻧﺩ. ﺟﻬﺕ ﺗﻌﻣﻳﺭﺍﺕ ﺑﻪ ﭘﺭﺳﻧﻝ ﺧﺩﻣﺎﺗﯽ ﻭﺍﺟﺩ ﺷﺭﺍﻳﻁ ﻣﺭﺍﺟﻌﻪ ﻧﻣﺎﻳﻳﺩ ﺍﻳﻥ...
- Page 22 ﻧ ﺎﺕ ﺍﺣﺘ ﺎﻃ ﻣﻁﻣﺋﻥ ﺷﻭﻳﺩ ﮐﻪ ﻣﻧﺑﻊ ﺑﺭﻕ ﻣﺗﻧﺎﻭﺏ ﺧﺎﻧﻪ ﺷﻣﺎ ﺑﺎ ﺍﻟﺯﺍﻣﺎﺕ ﺗﻭﺍﻥ ﺫﮐﺭ ﺷﺩﻩ ﺩﺭ ﺑﺭﭼﺳﺏ ﻣﺷﺧﺻﺎﺕ ﭘﺷﺕ ﺩﺳﺗﮕﺎﻩ ﻣﻁﺎﺑﻘﺕ ﺩﺍﺷﺗﻪ ﺑﺎﺷﺩ. ﺩﺳﺗﮕﺎﻩ ﺧﻭﺩ ﺭﺍ ﺑﻪ ﺻﻭﺭﺕ ﺍﻓﻘﯽ ﻭ ﺑﺭ ﺭﻭی ﻳﮏ ﭘﺎﻳﻪ )ﻣﻳﺯ( ﻣﻧﺎﺳﺏ ﻭ ﺑﺎ ﻓﺿﺎی ﮐﺎﻓﯽ ﺩﺭ ﺍﻁﺭﺍﻑ ﺁﻥ ﺑﺭﺍی ﮔﺭﺩﺵ ﻫﻭﺍ 7 ﺍﻟﯽ 01 ﺳﺎﻧﺗﯽ ﻣﺗﺭ ﻧﺻﺏ ﻧﻣﺎﻳﻳﺩ. ﻣﻁﻣﺋﻥ ﺷﻭﻳﺩ .ﮐﻪ...
- Page 23 ﺑﺮﺭﺳ ﻗﻄﻌﺎﺕ Soundbar ﺩﺳﺗﮕﺎﻩ ﺍﺻﻠﯽ 3 ﺳﻳﻡ ﺑﺭﻕ AC/DC 2 ﺁﺩﺍﭘﺗﻭﺭ HDMI ﮐﺎﺑﻝ ﮐﻧﺗﺭﻝ ﺍﺯ ﺭﺍﻩ ﺩﻭﺭ / ﺑﺎﺗﺭی ﺳﺎﺏ ﻭﻭﻓﺭ 1 ﺳﻳﻡ ﺑﺭﻕ .*( ﺍﺳﺗﻔﺎﺩﻩ ﮐﻧﻳﺩSTP )ﻧﻭﻉCat 7 ﺑﺭﺍی ﺍﺗﺻﺎﻝ ﺍﺯ ﮐﺎﺑﻝ * ﺯﻭﺝ ﺑﻪ ﻫﻡ ﺗﺎﺑﻳﺩﻩ ﺭﻭﮐﺵ ﺩﺍﺭ ﻭﺻﻞ...
- Page 24 ﺍSOUNDBAR ﺍﺗﺼﺎﻝ ﺳﺎﺏ ﻭﻭﻓﺮ ﺑﻪ ﺩﺳﺘﮕﺎﻩ ﺍﺻﻠ .، ﻣﻳﺗﻭﺍﻧﻳﺩ ﺍﺯ ﺻﺩﺍﻫﺎی ﺑﻡ ﻏﻧﯽ ﻭ ﮐﻳﻔﻳﺕ ﺻﺩﺍی ﺑﻬﺗﺭ ﺍﺳﺗﻔﺎﺩﻩ ﮐﻧﻳﺩSoundbar ﺑﺎ ﻣﺗﺻﻝ ﮐﺭﺩﻥ ﺳﺎﺑﻭﻭﻓﺭ ﺑﻪ ﺩﺳﺗﮕﺎﻩ ﺍﺻﻠﯽ Soundbar ﺩﺳﺗﮕﺎﻩ ﺍﺻﻠﯽ ﺩﺳﺗﮕﺎ ﺳﺎﺏ ﻭﻭﻓﺭ ﻭ ﻫﻡ ﺳﺎﺑﻭﻭﻓﺭ ﺑﺎﻳﺩ ﺑﻪ ﺻﻭﺭﺕ ﺧﻭﺩﮐﺎﺭ )ﺑﯽ ﺳﻳﻡ( ﺑﻪSoundbar ﻭ ﺳﺎﺑﻭﻭﻓﺭ ﺭﺍ ﺭﻭﺷﻥ ﻣﻳﮑﻧﻳﺩ، ﻫﻡ ﺩﺳﺗﮕﺎﻩ ﺍﺻﻠﯽSoundbar ﻭﻗﺗﯽ ﺩﺳﺗﮕﺎﻩ ﺍﺻﻠﯽ .ﻳﮑﺩﻳﮕﺭ...
- Page 25 ﺍﺗﺼﺎﻝ ﺑﻪ ﺗﻠﻮ ﺰ ﻮﻥ . ﺑﻪ ﺗﻠﻭﻳﺯﻳﻭﻥ، ﺑﺎ ﮐﺎﺑﻝ ﻳﺎ ﺑﺩﻭﻥ ﮐﺎﺑﻝ، ﺍﺯ ﺗﻠﻭﻳﺯﻳﻭﻥ ﺍﺳﺗﻔﺎﺩﻩ ﮐﻧﻳﺩSoundbar ﺑﻪ ﺷﻣﺎ ﺍﻣﮑﺎﻥ ﻣﯽ ﺩﻫﺩ ﺑﻌﺩ ﺍﺯ ﺍﺗﺻﺎﻝ .ﻣﻬﻡ: ﻗﺑﻝ ﺍﺯ ﺷﺭﻭﻉ ﺑﻪ ﮐﺎﺭ، ﺑﺎﺗﺭی ﺭﺍ ﺩﺭ ﮐﻧﺗﺭﻝ ﺍﺯ ﺭﺍﻩ ﺩﻭﺭ ﺑﮕﺫﺍﺭﻳﺩ. ﺑﺭﺍی ﺍﻁﻼﻉ ﺍﺯ ﺩﺳﺗﻭﺭﺍﻟﻌﻣﻝ ﻫﺎ ﺑﻪ ﺻﻔﺣﻪ 71 ﻣﺭﺍﺟﻌﻪ ﮐﻧﻳﺩ ﺭﻭﺵ...
- Page 26 . ﻳﺎ ﮐﻧﺗﺭﻝ ﺍﺯ ﺭﺍﻩ ﺩﻭﺭ ﺗﻠﻭﻳﺯﻳﻭﻥ ﮐﻧﺗﺭﻝ ﮐﻧﻳﺩSoundbar . ﻋﺭﺿﻪ ﺷﺩﻩ ﺍﺯ 2102 ﺑﻪ ﺑﻌﺩ ﻣﻭﺟﻭﺩ ﻣﯽ ﺑﺎﺷﺩSamsung ﺗﻧﻬﺎ ﺩﺭ ﺑﺭﺧﯽ ﺗﻠﻭﻳﺯﻳﻭﻥ ﻫﺎیTV SoundConnect (SoundShare) ﻗﺎﺑﻠﻳﺕ ﮐﻧﺗﺭﻝ ﺍﺯ ﺭﺍﻩ ﺩﻭﺭ ﺭﺍ ﺑﺭﺍیp ﺍﮔﺭ ﻣﯽ ﺧﻭﺍﻫﻳﺩ ﺍﺗﺻﺎﻝ ﻓﻌﻠﯽ ﺑﻪ ﺗﻠﻭﻳﺯﻳﻭﻥ ﺭﺍ ﻗﻁﻊ ﮐﺭﺩﻩ ﻭ ﺍﺗﺻﺎﻝ ﺟﺩﻳﺩی ﺑﺎ ﻳﮏ ﺗﻠﻭﻳﺯﻳﻭﻥ ﺩﻳﮕﺭ ﺑﺭﻗﺭﺍﺭ ﮐﻧﻳﺩ، ﺩﮐﻣﻪ...
- Page 27 ﺻﻔﺣﻪ ﺷﺭﻭﻉ . ﺑﺎﻳﺩ ﺍﺳﻡ ﺭﻣﺯ ﺭﻭﺗﺭ ﺑﻳﺳﻳﻡ ﺧﻭﺩ ﺭﺍ ﻭﺍﺭﺩ ﮐﻧﻳﺩSamsung Multiroom ﺧﻭﺩ ﺑﻪ ﻳﮏ ﺷﺑﮑﻪ ﺑﻳﺳﻳﻡ ﺑﺎ ﺍﺳﺗﻔﺎﺩﻩ ﺍﺯ ﺑﺭﻧﺎﻣﻪSoundbar ﺑﺭﺍی ﻭﺻﻝ ﮐﺭﺩﻥ .ﺍﮔﺭ ﺭﻭﺗﺭ ﺑﻳﺳﻳﻡ ﺷﻣﺎ ﺍﺳﻡ ﺭﻣﺯ ﻣﺷﺧﺹ ﺷﺩﻩ ﺍی ﻧﺩﺍﺭﺩ، ﺗﻧﻅﻳﻣﺎﺕ ﺍﻭﻟﻳﻪ ﺑﺩﻭﻥ ﺍﻳﻧﮑﻪ ﺍﺯ ﺷﻣﺎ ﺩﺭﺧﻭﺍﺳﺕ ﻭﺍﺭﺩ ﮐﺭﺩﻥ ﺍﺳﻡ ﺭﻣﺯ ﺑﺷﻭﺩ ﺍﻧﺟﺎﻡ ﺧﻭﺍﻫﺩ ﺷﺩ...
- Page 28 . ﺭﺍ ﺍﻧﺗﺧﺎﺏ ﮐﻧﻳﺩNo ،ﺑﺭﺍی ﻭﺻﻝ ﺷﺩﻥ ﺑﻪ ﻳﮏ ﺷﺑﮑﻪ ﺩﻳﮕﺭ . ﺑﺎﻳﺩ ﺍﺳﻡ ﺭﻣﺯ ﺭﻭﺗﺭ ﺑﻳﺳﻳﻡ ﺧﻭﺩ ﺭﺍ ﻭﺍﺭﺩ ﮐﻧﻳﺩSamsung Multiroom ﺧﻭﺩ ﺑﻪ ﻳﮏ ﺷﺑﮑﻪ ﺑﻳﺳﻳﻡ ﺑﺎ ﺍﺳﺗﻔﺎﺩﻩ ﺍﺯ ﺑﺭﻧﺎﻣﻪSoundbar ﺑﺭﺍی ﻭﺻﻝ ﮐﺭﺩﻥ .ﺍﮔﺭ ﺭﻭﺗﺭ ﺑﻳﺳﻳﻡ ﺷﻣﺎ ﺍﺳﻡ ﺭﻣﺯ ﻣﺷﺧﺹ ﺷﺩﻩ ﺍی ﻧﺩﺍﺭﺩ، ﺗﻧﻅﻳﻣﺎﺕ ﺍﻭﻟﻳﻪ ﺑﺩﻭﻥ ﺍﻳﻧﮑﻪ ﺍﺯ ﺷﻣﺎ ﺩﺭﺧﻭﺍﺳﺕ ﻭﺍﺭﺩ ﮐﺭﺩﻥ ﺍﺳﻡ ﺭﻣﺯ ﺑﺷﻭﺩ ﺍﻧﺟﺎﻡ ﺧﻭﺍﻫﺩ ﺷﺩ...
- Page 29 ) ﺗﻧﻅﻳﻣﺎﺕ ﻣﻧﻭی ﺧﺎﻧﻪ .ﺻﺩﺍی ﺗﻠﻭﻳﺯﻳﻭﻥ ﺧﺭﻭﺟﯽ ﺍﺳﺕ 2015 ﺑﺭﺍی ﺗﻠﻭﻳﺯﻳﻭﻧﻬﺎی ﻋﺭﺿﻪ ﺷﺩﻩ ﺩﺭ ﺳﺎﻝ [ ﺭﺍ ﺍﻧﺗﺧﺎﺏ ﮐﻧﻳﺩSamsung] HW-Jxxxx (Wi-Fi) ﻟﻳﺳﺕ ﺑﻠﻧﺩﮔﻭ ﺻﺩﺍ ﻣﻧﻭی ﺧﺎﻧﻪ .ﺻﺩﺍی ﺗﻠﻭﻳﺯﻳﻭﻥ ﺧﺭﻭﺟﯽ ﺍﺳﺕ 2014 ﺑﺭﺍی ﺗﻠﻭﻳﺯﻳﻭﻧﻬﺎی ﻋﺭﺿﻪ ﺷﺩﻩ ﺩﺭ ﺳﺎﻝ ...
- Page 30 ﺑﻪ ﺻﺩﺍی ﻓﺭﺍﮔﻳﺭSamsung Multiroom ﺍﺗﺻﺎﻝ ﺳﻳﺳﺗﻡ ﺻﻭﺗﯽ .، ﻣﯽ ﺗﻭﺍﻧﻳﺩ ﺍﺯ ﺻﺩﺍی ﺳﻪ ﺑﻌﺩی ﺩﺭ ﺣﺎﻟﺕ ﻓﺭﺍﮔﻳﺭ ﺑﻬﺭﻩ ﻣﻧﺩ ﺷﻭﻳﺩSoundbar ﺑﻪMultiroom Audio ﭘﺱ ﺍﺯ ﻣﺗﺻﻝ ﮐﺭﺩﻥ ﺩﻭ ﺳﻳﺳﺗﻡ . ﻏﻳﺭﻓﻌﺎﻝ ﺍﺳﺕSoundbar ﻭMultiroom Audio ﺻﺩﺍی ﻓﺭﺍﮔﻳﺭ ﺑﻳﻥ .ﺭﺍ ﻟﻣﺱ ﮐﻧﻳﺩ...
- Page 31 .[ ﺑﺭﻗﺭﺍﺭ ﻧﺷﻭﺩ / ﺍﮔﺭ ﻧﻳﺎﺯ ﺑﻪ ﺟﺳﺗﺟﻭی ﻣﺟﺩﺩ ﺩﺳﺗﮕﺎﻩ ﺑﺎﺷﺩBluetooth ]ﺍﮔﺭ ﺍﺭﺗﺑﺎﻁ ﺑﺎ ﺩﺳﺗﮕﺎﻩ • . ﺟﺳﺗﺟﻭ ﮐﻧﻳﺩSoundbar ﻳﺎﻓﺕ ﺷﺩﻩ ﺍﺳﺕ ﺭﺍ ﺣﺫﻑ ﻭ ﻣﺟﺩﺩ ﺍ ً ﺁﻥ ﺭﺍ ﺑﺭﺍیBluetooth [" ﻗﺑﻠﯽ ﮐﻪ ﺗﻭﺳﻁ ﺩﺳﺗﮕﺎﻩSamsung] HW-Jxxxx" . ﺍﺯ ﺷﻣﺎ ﺧﻭﺍﺳﺗﻪ ﺷﺩ، >0000< ﺭﺍ ﻭﺍﺭﺩ ﮐﻧﻳﺩPIN ﮐﺩBluetooth ﺍﮔﺭ ﻫﻧﮕﺎﻡ ﻭﺻﻝ ﮐﺭﺩﻥ ﺩﺳﺗﮕﺎﻩ...
- Page 32 ﺍﺗﺼﺎﻝ ﺑﻪ ﺩﺳﺘﮕﺎﻩ ﺧﺎﺭﺟ ، ﻣﯽ ﺗﻭﺍﻧﻳﺩ ﺻﺩﺍی ﺁﻧﻬﺎSoundbar /ﮐﻧﺳﻭﻝ ﺑﺎﺯی/ﺩﺳﺗﮕﺎﻩ ﮔﻳﺭﻧﺩﻩ ﺳﻳﮕﻧﺎﻝ ﻭ ﺩﻳﮕﺭ ﻣﻭﺍﺭﺩ ﺑﻪBD ﺑﺎ ﺍﺗﺻﺎﻝ ﺩﺳﺗﮕﺎﻩ ﻫﺎی ﺧﺎﺭﺟﯽ ﺟﺩﺍﮔﺎﻧﻪ ﻣﺎﻧﻧﺩ ﭘﺧﺵ ﮐﻧﻧﺩﻩ .ﺭﺍ ﺑﺷﻧﻭﻳﺩ HDMI ﮐﺎﺑﻝ HDMI IN Soundbar HDMI ﮐﺎﺑﻝ HDMI OUT ﻭﺳﻳﻠﻪ ﺑﻳﺭﻭﻧﯽ Soundbar ﺯﻳﺭ ....
- Page 33 ﻧﺼﺐ ﻧﮕﻬﺪﺍﺭﻧﺪﻩ ﺩ ﻮﺍﺭﯼ ﺑﺮﻭﺯﺭﺳﺎﻧ ﻧﺮﻡ ﺍﻓﺰﺍﺭ ﻣﻣﮑﻥ ﺍﺳﺕ ﺩﺭ ﺁﻳﻧﺩﻩ ﺑﻪ ﺭﻭﺯﺭﺳﺎﻧﯽ ﻫﺎﻳﯽ ﺑﺭﺍی ﺛﺎﺑﺕ ﺍﻓﺯﺍﺭSamsung ﻧﮑﺎﺕ ﺍﺣﺗﻳﺎﻁﯽ ﻧﺻﺏ . ﺍﺭﺍﺋﻪ ﺩﻫﺩSoundbar ﺳﻳﺳﺗﻡ • .ﻓﻘﻁ ﺭﻭی ﻳﮏ ﺩﻳﻭﺍﺭ ﻋﻣﻭﺩی ﻧﺻﺏ ﮐﻧﻳﺩ ﺑﻪ ﺭﻭﺯ ﺭﺳﺎﻧﯽ ﺧﻭﺩﮐﺎﺭ • ﺭﺍ ﺩﺭ ﻣﺣﻠﻬﺎﻳﯽ ﮐﻪ ﺣﺭﺍﺭﺕ ﻳﺎ ﺭﻁﻭﺑﺕ ﺁﻧﻬﺎ ﺑﺎﻻSoundbar ﺳﻳﺳﺗﻡ...
- Page 34 Soundbar ﺑﺭﺍی ﺩﺳﺗﮕﺎﻩ ﺍﺻﻠﯽ ﭘﻳﭻ ﻧﮕﻬﺩﺍﺭﻧﺩﻩ 1 )4 ﻋﺩﺩ( ﻭ ﭘﻳﭻ ﻧﮕﻬﺩﺍﺭﻧﺩﻩ 2 )ﺑﺭﺍی ﺗﻌﻣﻳﺭ ﺩﺳﺗﮕﺎﻩ ( )4 ﻋﺩﺩ( ﺭﺍ ﻫﻣﺎﻧﻁﻭﺭ ﮐﻪ ﺩﺭ ﺗﺻﻭﻳﺭ ﻧﺷﺎﻥSoundbar ﺍﺻﻠﯽ ()ﻗﻁﻌﺎﺕ ﻣﺭﺑﻭﻁ ﺑﻪ ﻧﺻﺏ ﺭﻭی ﺩﻳﻭﺍﺭ . ﻣﺣﮑﻡ ﮐﻧﻳﺩSoundbar ﺩﺍﺩﻩ ﺷﺩﻩ ﺍﺳﺕ ﺩﺭ ﺳﻭﺭﺍﺥ ﻫﺎی 2 ﭘﻳﭻ...
- Page 35 (2 1) ﺭﺍ ﺑﻪ ﺗﺭﺗﻳﺏ ﻧﺷﺎﻥ ﺩﺍﺩﻩ ﺷﺩﻩ ﺩﺭ ﺗﺻﻭﻳﺭSoundbar .ﺭﻭی ﻗﻼﺏ ﺍﺗﺻﺎﻝ ﺑﻪ ﺩﻳﻭﺍﺭ ﻭﺻﻝ ﮐﻧﻳﺩ ﭘﺎﻳﻪ ﺛﺎﺑﺕ ﻧﺻﺏ ﻧﮕﻬﺩﺍﺭﻧﺩﻩ )ﺑﺭﺍی ﻧﺻﺏ ﺭﻭی ﺩﻳﻭﺍﺭ( ﺭﺍ ﺑﺎ . ﺑﻪ ﻗﻼﺏ ﺍﺗﺻﺎﻝ ﺑﻪ ﺩﻳﻭﺍﺭ ﻭﺻﻝ ﮐﻧﻳﺩSoundbar .ﭘﻳﭻ ﻫﺎی ﺍﺗﺻﺎﻝ ﺑﻪ ﺩﻳﻭﺍﺭ ﺍﺭﺍﺋﻪ ﻧﻣﯽ ﺷﻭﻧﺩ ﺑﻪ...
- Page 36 ﺩ ﻤﻬﻬﺎ ﻭ ﻭ ﮋﮔ ﻬﺎﯼ ﺭ ﻤﻮﺕ ﻨﺘﺮﻝ ﻗﺭﺍﺭ ﺩﺍﺩﻥ ﺑﺎﺗﺭی ﺩﺭ ﺭﻳﻣﻭﺕ ﮐﻧﺗﺭﻝ ﻗﺑﻝ ﺍﺯ ﺍﺳﺗﻔﺎﺩﻩ ﺍﺯ ﺁﻥ ﺑﺎ ﺍﺳﺗﻔﺎﺩﻩ ﺍﺯ ﻳﮏ ﺳﮑﻪ ﻣﻧﺎﺳﺏ، ﺑﻪ ﻧﺣﻭی ﮐﻪ ﺩﺭ ﺷﮑﻝ ﺯﻳﺭ ﻧﺷﺎﻥ ﺩﺍﺩﻩ ﺷﺩﻩ، ﺩﺭﺏ ﻣﺣﻔﻅﻪ ﺑﺎﺗﺭی ﺭﻳﻣﻭﺕ .ﮐﻧﺗﺭﻝ ﺭﺍ ﺧﻼﻑ ﺟﻬﺕ ﻋﻘﺭﺑﻪ ﻫﺎی ﺳﺎﻋﺕ ﺑﭼﺭﺧﺎﻧﻳﺩ ﺗﺎ ﺑﺎﺯ ﺷﻭﺩ ﻳﮏ...
-
Page 37: Sound Effect
ﺧﻭﺩ ﺭﺍ ﺑﺎ ﺍﺳﺗﻔﺎﺩﻩ ﺍﺯ ﮐﻧﺗﺭﻝ ﺍﺯSoundbar ﻭﺻﻝ ﺷﺩﻩ ﺑﺎﺷﺩ، ﻣﯽ ﺗﻭﺍﻧﻳﺩHDMI : ﺍﮔﺭ ﺑﺎ ﮐﺎﺑﻝAnynet+ Anynet+ . ﮐﻧﺗﺭﻝ ﻧﻣﺎﺋﻳﺩSamsung ﺭﺍﻩ ﺩﻭﺭ ﺗﻠﻭﻳﺯﻳﻭﻥ • ﺑﻁﻭﺭSoundbar ، : ﻫﺭﮔﺎﻩ ﺗﻠﻭﻳﺯﻳﻭﻥ ﻣﺗﺻﻝ ﺍﺯ ﻁﺭﻳﻕ ﻭﺭﻭﺩی ﺍﭘﺗﻳﮑﺎﻝ ﺭﻭﺷﻥ ﺷﻭﺩAuto Power Link .ﺧﻭﺩﮐﺎﺭ... - Page 38 ﺩﺭ ﺑﻌﺿﯽ ﺍﺯ ﺗﻠﻭﻳﺯﻳﻭﻥ ﻫﺎیTV SoundConnect DTS, Inc. © 0.2 ﻋﻼﻣﺕ ﺗﺟﺎﺭی ﺛﺑﺕ ﺷﺩﻩ ﻣﺗﻌﻠﻕ ﺑﻪChannel ، ﮐﻪ ﺍﺯ ﺳﺎﻝ 2102 ﺑﻪ ﺑﻌﺩ ﺑﻪ ﺑﺎﺯﺍﺭ ﻋﺭﺿﻪ ﺷﺩﻩ ﺍﻧﺩSamsung . ﻣﯽ ﺑﺎﺷﻧﺩ. ﮐﻠﻳﻪ ﺣﻘﻭﻕ ﻣﺣﻔﻭﻅ ﺍﺳﺕDTS, Inc ﭘﺷﺗﻳﺑﺎﻧﯽ ﻣﯽ ﺷﻭﺩ. ﺗﻠﻭﻳﺯﻳﻭﻥ ﺧﻭﺩ ﺭﺍ ﺑﺭﺭﺳﯽ ﮐﻧﻳﺩ ﻭ ﺑﺑﻳﻧﻳﺩ ﺁﻳﺎ ﺍﺯ...
- Page 39 • ﻣﺷﺧﺻﺎﺕ ﺍﺳﻣﯽ .ﻁﺭﺍﺣﯽ، ﻣﺷﺧﺻﺎﺕ ﻭ ﺻﻔﺣﻪ ﺑﺭﻧﺎﻣﻪ ﻣﻣﮑﻥ ﺍﺳﺕ ﺑﺩﻭﻥ ﺍﻋﻼﻡ ﻗﺑﻠﯽ ﺗﻐﻳﻳﺭ ﻳﺎﺑﻧﺩ – . ﺣﻕ ﺗﻐﻳﻳﺭ ﻣﺷﺧﺻﺎﺕ ﺑﺩﻭﻥ ﺍﻋﻼﻡ ﻗﺑﻠﯽ ﺭﺍ ﺑﺭﺍی ﺧﻭﺩ ﻣﺣﻔﻭﻅ ﻣﯽ ﺩﺍﺭﺩSamsung Electronics Co., Ltd – .ﻭﺯﻥ ﻭ ﺍﺑﻌﺎﺩ ﺩﺳﺗﮕﺎﻩ ﺗﻘﺭﻳﺑﯽ ﻫﺳﺗﻧﺩ –...
-
Page 40: Contact Samsung World Wide
© 2016 Samsung Electronics Co., Ltd. All rights reserved. Contact SAMSUNG WORLD WIDE If you have any questions or comments relating to Samsung products, please contact the SAMSUNG customer care centre. Contact Centre Contact Centre Country Web Site...
Need help?
Do you have a question about the HW-J7591R and is the answer not in the manual?
Questions and answers