Table of Contents

Related Manuals for Samsung HW-J7591R


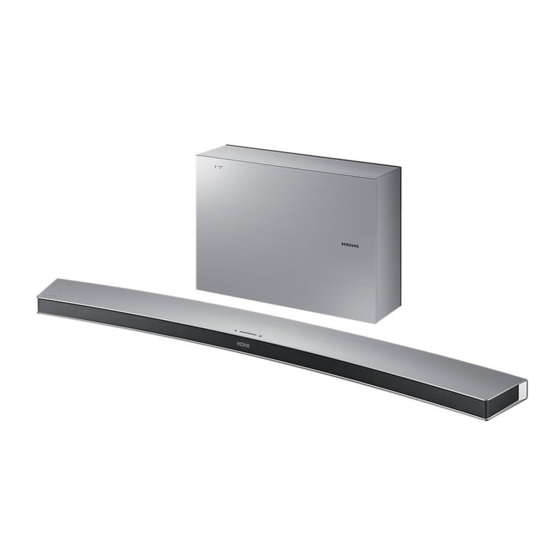
Summary of Contents for Samsung HW-J7591R
- Page 1 HW-J7591R User manual Imagine the possibilities Thank you for purchasing this Samsung product. To receive more complete service, please register your product at www.samsung.com/register...
-
Page 2: Getting Started
GETTING STARTED GETTING STARTED SAFETY INFORMATION SAFETY WARNINGS TO REDUCE THE RISK OF ELECTRIC SHOCK, DO NOT REMOVE THE COVER (OR BACK). NO USER-SERVICEABLE PARTS ARE INSIDE. REFER SERVICING TO QUALIFIED SERVICE PERSONNEL. This symbol indicates that high voltage is CAUTION present inside. - Page 3 GETTING STARTED PRECAUTIONS 68.6 mm 99.1mm 99.1mm 99.1mm Ensure that the AC power supply in your house complies with the power requirements listed on the identification sticker located on the back of your product. Install your product horizontally, on a suitable base (furniture), with enough space around it for ventilation (7~10 cm).
-
Page 4: Table Of Contents
GETTING STARTED CONTENTS GETTING STARTED 23 FUNCTIONS Safety Information Input Mode What’s Included Bluetooth Using the Multiroom App DESCRIPTIONS Using the Network Standby On Function Top / Front Panel Software Update Rear / Bottom Panel Remote Control 31 TROUBLESHOOTING 10 INSTALLATION Troubleshooting Installing the Soundbar 32 APPENDIX... -
Page 5: What's Included
GETTING STARTED WHAT’S INCLUDED BEFORE READING THE USER’S MANUAL Note the following terms before reading the user manual. + Icons used in this manual Icon Term Definition Caution Indicates a situation where a function does not operate or settings may be cancelled. Note Indicates tips or instructions on the page that help you operate a function. -
Page 6: Descriptions
DESCRIPTIONS DESCRIPTIONS TOP / FRONT PANEL VOL. - / + (Power) Button Controls the volume level. The numeric value of the volume level Turns the power on and off. appears in the front panel display. (Source) Button Display Selects the D.IN, AUX, HDMI, BT, or TV input. Displays the current mode. -
Page 7: Rear / Bottom Panel
Samsung HUB (purchased Port. adaptor to the power setup. (Requires a smart separately) or a network. supply jack, and then device and the Samsung (Requires a smart device connect the AC power Multiroom app. and the Samsung adaptor plug to a wall See page 26.) -
Page 8: Remote Control
(Default : Auto Power Link OFF, ON - ANYNET+ / OFF - POWER LINK or OFF - ANYNET+ / ON - POWER LINK). The Anynet+ function lets you control the Soundbar with the remote from an Anynet+ compatible Samsung TV. The Soundbar must be connected to the TV via an HDMI cable. - Page 9 DESCRIPTIONS Power Turns the Soundbar on and off. Volume Adjusts the volume level of the unit. Play / Pause Press the p button to pause a file temporarily. Press the p button again to play the selected file. Skip Back If there is more than one file on the device you are playing, and you press the [ button, the previous file is selected.
-
Page 10: Installation
INSTALLATION INSTALLATION INSTALLING THE SOUNDBAR INSTALLING THE WALL MOUNT + Installation Precautions ● Install on a vertical wall only. ● For the installation, avoid a location with high temperature or humidity, or a wall that cannot sustain the weight of the set. - Page 11 INSTALLATION 1. Place the Soundbar as shown in the illustration, ensuring that none of the buttons touch the surface it is lying on. 2. If the Holder-Foot (3 EA) and Holder-Support (2 EA) are attached, remove them. Holder-Foot Holder-Support 3. Fix Holder-Screw 1 (4 EA) and Holder-Screw 2 (for main unit fixing) (4 EA) into the holes of the Soundbar tightly as shown in the illustration.
- Page 12 INSTALLATION Wall 4. Insert the Wall-Mount Screws into the 3 holes one by one to fix the Wall-Mount Bracket on the wall. ● Recommended screw : M5 5. Mount the Soundbar on the Wall-Mount Bracket in order of the following illustration (1 2).
- Page 13 INSTALLATION 6. Fix the Holder-Fix Mount (for wall-mount fixing) to join the Wall-Mount Bracket with the Soundbar. ● Wall-Mount Screws are not provided. ● Since different types of wall-mount screws are required depending on your wall, you should check your wall before installation and purchase the appropriate wall-mount screws to use.
-
Page 14: Placing The Soundbar On A Tv Stand
INSTALLATION PLACING THE SOUNDBAR ON A TV STAND Place the Soundbar on a TV stand. Check for the supplied accessories shown below. Holder-Foot : 3EA Holder-Screw 2 : 3EA 1. Place the Soundbar as shown in the illustration, ensuring that none of the buttons touch the surface it is lying on. - Page 15 INSTALLATION 3. Remove Holder-Support (2 EA) from the Soundbar as shown in the illustration. 4. Align the Soundbar’s centre with the centre of the base of the TV, and then carefully push it onto the stand as far as it will go, as shown in the illustration. Be careful not to unbalance the TV. ●...
-
Page 16: Installing The Soundbar As A Free-Standing Unit
INSTALLATION INSTALLING THE SOUNDBAR AS A FREE-STANDING UNIT 1. Centre the Soundbar on the flat area in front of the TV. ASSEMBLING THE CLAMP-WIRE Clamp-Wire Attach the clamp-wire to the unit as shown, and then run the cables through the clamp-wire to keep them neat. -
Page 17: Connections
CONNECTIONS CONNECTIONS ● Do not connect the power cord of this product or your TV to a wall outlet until all connections between components are complete. ● Before moving or installing this product, be sure to turn off the power and disconnect the power cord. CONNECTING THE SUBWOOFER CONNECTING TO THE SUBWOOFER AUTOMATICALLY The Subwoofer's linking ID is preset at the factory and the main unit and subwoofer should link (connect wirelessly) - Page 18 CONNECTIONS ● Before moving or installing the product, be sure to turn off the power and disconnect the power cord. ● If the main unit is powered off,the wireless subwoofer will in standy mode and the STANDBY LED on the front will blink Red directly.
-
Page 19: Connecting To A Tv
CONNECTIONS CONNECTING TO A TV ● Important: Before you begin, put the battery into the remote. See page 9 for instructions. CONNECTING TO A TV USING AN HDMI (DIGITAL) CABLE HDMI Cable HDMI IN HDMI OUT (TV-ARC) 1. Connect an HDMI cable from the HDMI OUT (TV-ARC) jack on the back of the product to the HDMI IN jack on your TV. -
Page 20: Tv Soundconnect
3. Press the Anynet+ button on the remote control to toggle the Auto Power Link function on and off. ● Depending on the connected device, Auto Power Link may not function. TV SOUNDCONNECT You can enjoy TV sound through your Soundbar when it is connected to a Samsung TV that supports the TV SoundConnect function. Connect 1. -
Page 21: Connecting To External Devices
CONNECTIONS ● The TV SoundConnect (SoundShare) function is supported by some Samsung TVs released from 2012 on. Check whether your TV supports the TV SoundConnect (SoundShare) function before you begin. (For further information, refer to the TV’s user manual.). ● If your Samsung TV was released before 2014, check the SoundShare setting menu. -
Page 22: Optical Or Analogue Audio Cable
CONNECTIONS OPTICAL OR ANALOGUE AUDIO CABLE This unit comes equipped with one digital optical in jack and one analogue audio (AUX) in jack, giving you two ways to connect it to external devices. Audio Cable (not supplied) AUX OUT AUX IN Optical Cable (not supplied) BD / DVD player /... -
Page 23: Functions
FUNCTIONS FUNCTIONS INPUT MODE button on the main unit’s top panel or the SOURCE button on the remote control to select the mode Press the you want. Input mode Display Optical Digital input D.IN ARC (HDMI OUT) input AUX input HDMI HDMI input BLUETOOTH mode... -
Page 24: Bluetooth
• The device name can only be displayed in English. An underline " _ " will be displayed if the name is not in English. • If the Bluetooth device has failed to pair with the Soundbar, delete the previous "[Samsung] HW-Jxxxx" found by the Bluetooth device and have it search for the Soundbar again. - Page 25 ● You cannot connect the Soundbar to a Bluetooth device that supports only the HF (Hands Free) function. ● Once you have paired the Soundbar to a Bluetooth device, selecting "[Samsung] HW-Jxxxx" from the device's scanned devices list will automatically change the Soundbar to BT mode.
-
Page 26: Using The Multiroom App
To use the Soundbar with the Samsung Multiroom App, you must download and then install the Samsung Multiroom App on your smart device. You can download the app from Google Play or the App Store. With the Samsung Multiroom App installed, you can play music on your Soundbar that is stored on your smart device, located on other connected devices, provided by other content providers, or streamed from Internet radio stations. - Page 27 To launch the Samsung Multiroom app, tap the Multiroom app icon on your smart device. CONNECTING THE SOUNDBAR TO YOUR NETWORK On your smart device, select the Samsung Multiroom app. Follow the directions on your smart device’s screen. You can use the following music sources with the Samsung Multiroom app.
-
Page 28: Using The Network Standby On Function
Soundbar via Bluetooth or Wi-Fi. If you turn the Soundbar on via a Bluetooth connection, its input mode is set to BT automatically. To turn the Soundbar on via Wi-Fi, you must have the Samsung Multiroom App installed on your smart device. -
Page 29: Software Update
+ Updating Procedure 1. Follow the steps below to download the product software: Go to the Samsung website at (samsung.com/sec) search for the model name - select the customer support option (the option name is subject to change) 2. Save the downloaded software to a USB stick and select "Extract to the folder name" to unzip the folder. - Page 30 FUNCTIONS + If UPDATE was not displayed 1. Turn off the Soundbar, connect the USB storage device that contains update files to the Soundbar’s USB port. 2. Disconnect the power cord, reconnect it, and then turn on the Soundbar. ● Insert a USB device containing the firmware update into the USB port on the main unit. ●...
-
Page 31: Troubleshooting
The TV SoundConnect (TV pairing) failed. • Does your TV support TV SoundConnect? ¼ TV SoundConnect is supported by some Samsung TVs released from 2012 on. Check your TV to see if it supports TV SoundConnect. • Is your TV firmware the latest version? ¼... -
Page 32: Appendix
Design, specifications and App screen are subject to change without prior notice. Nominal specification Samsung Electronics Co., Ltd reserves the right to change the specifications without notice. Weight and dimensions are approximate. For more information about the power supply and power consumption, refer to the label attached to the product. - Page 33 HW-J7591R دفترچه راهنما فرصت ها را مجسم کنید . از شما ممنونیمSamsung بابت خرید این دستگاه برای دریافت خدمات کامل تر، لطف ا ً محصول خود را در این نشانی ثبت نمایید www.samsung.com/register...
- Page 34 آغاز به کار آغاز به کار اطالعات ایمنی هشدارهای ایمنی .جهت کاهش خطر برق گرفتگی، از برداشتن درپوش (یا پشت) دستگاه خودداری کنید .هیچ قطعه ای در داخل دستگاه وجود ندارد که مصرف کنندگان بتوانند آنها را تعمیر کنند. جهت تعمیرات به پرسنل خدماتی واجد شرایط مراجعه نمایید این...
- Page 35 آغاز به کار نکات احتیاطی 6,86 میلیمتر 68.6 mm 1,99 میلیمتر 99.1mm 1,99 میلیمتر 99.1mm 1,99 میلیمتر 99.1mm مطمئن شوید که منبع برق متناوب خانه شما با الزامات توان ذکر شده در برچسب مشخصات پشت دستگاه مطابقت داشته باشد. دستگاه خود را به صورت افقی و...
- Page 36 آغاز به کار فهرست مطالب 32 قابلیت ها آغاز به کار حالت ورودی اطالعات ایمنی Bluetooth آنچه همراه دستگاه است Multiroom استفاده از برنامه شرح Network Standby On استفاده از عملکرد بروزرسانی نرم افزار صفحه جلو / سمت راست پانل پشت / پایین 13 عیب...
- Page 37 آغاز به کار آنچه همراه دستگاه است قبل از خواندن دفترچه راهنما .قبل از خواندن دفترچه راهنما، حتم ا ً به اصطالحات زیر توجه کنید نمادهای استفاده شده در این راهنما تعریف اصطالح نماد .بیانگر مواردی است که قابلیتی کار نمی کند یا تنظیمات لغو می شوند احتیاط...
- Page 38 شرح شرح صفحه جلو / سمت راست VOL. -/+ .میزان صدا را کنترل می کند ()روشن/خاموش دکمه مقدار عددی میزان صدا روی نمایشگر پانل جلو دیده . را روشن و خاموش می کندSoundbar .می شود ()منبع دکمه صفحه نمایش را انتخاب میTV ، BT ، HDMI ، AUX ، D.IN ورودی های .حالت...
- Page 39 این دکمه را فشار دهید تا Soundbar دکمه را فشار دهید تا برای ارتقای نرم افزار محصول از با استفاده از تنظیمSoundbar (جداگانهSamsung HUB به .USB طریق پورت آداپتور برق مستقیم را به فیش منبع . به شبکه وصل شودWi-Fi فروخته...
- Page 40 .)ON - POWER LINK / OFF - ANYNET+ سازگار باAnynet+ را با استفاده از کنترل از راه دورSoundbar امکان کنترلAnynet+ عملکرد به تلویزیونHDMI باید به وسیله یک کابلSoundbar . برای شما فراهم می سازدSamsung تلویزیون .وصل شده باشد...
- Page 41 شرح روشن/خاموش . را روشن و خاموش می کندSoundbar میزان صدا .برای تنظیم میزان صدای دستگاه به کار برده می شود پخش/مکث . را فشار دهیدp برای مکث در پخش فایل به طور موقت، دکمه . را دوباره فشار دهیدp برای پخش مجدد فایل انتخابی، دکمه رد...
- Page 42 نصب SOUNDBAR نصب نصب نگهدارنده دیواری نکات احتیاطی نصب .فقط روی یک دیوار عمودی نصب کنید ● .نباید در محیط هایی با دما و رطوبت باال یا روی دیواری که قادر به تحمل وزن دستگاه نیست نصب شود ● قدرت تحمل دیوار را کنترل کنید. اگر دیوار برای تحمل وزن دستگاه به اندازه کافی قدرت ندارد، دیوار را تقویت کرده و یا دستگاه را روی دیواری دیگر ●...
- Page 43 نصب را همانطور که در تصویر نشان داده شده است قرار دهید و بررسی کنید که هیچکدام از دکمه ها با سطحی که روی آن قرار گرفته اند تماسSoundbar .نداشته باشند .اگر پایه نگهدارنده (3 عدد) و پشتیبان نگهدارنده (2 عدد) وصل هستند، آنها را جدا کنید پشتیبان...
- Page 44 نصب راوید .پیچ های اتصال به دیوار را تک به تک در 3 سوراخ موجود وارد کنید تا قالب اتصال به دیوار روی دیوار محکم شود M5 :پیچ توصیه شده ● . 2) روی قالب اتصال به دیوار وصل کنید 1( را به ترتیب نشان داده شده در تصویرSoundbar...
- Page 45 نصب . به قالب اتصال به دیوار وصل کنیدSoundbar پایه ثابت نصب نگهدارنده (برای نصب روی دیوار) را با .پیچ های اتصال به دیوار ارائه نمی شوند ● به دلیل اینکه بسته به دیوارتان به چند نوع مختلف از پیچ اتصال به دیوار نیاز دارید، باید قبل از نصب همه چیز را بررسی کنید و پیچ های ●...
- Page 46 نصب روی پایه تلویزیونSOUNDBAR قرار دادن . را روی پایه تلویزیون بگذاریدSoundbar .لوازم جانبی ارائه شده زیر را کنترل کنید پیچ نگهدارنده 2 : 3 عدد پایه نگهدارنده : 3 عدد را همانطور که در تصویر نشان داده شده است قرار دهید و بررسی کنید هیچ کدام از دکمه ها با سطحی که روی آن قرار گرفته اند تماسSoundbar ....
- Page 47 نصب . جدا کنیدSoundbar پشتیبان نگهدارنده (2 عدد) را همانطور که در تصویر نشان داده شده است از را با وسط پایه تلویزیون تراز کنید و سپس به دقت روی پایه فشار دهید تا جایی کهSoundbar همانطور که در تصویر نشان داده شده است، قسمت وسط .امکان...
- Page 48 نصب . به عنوان دستگاه بدون پایهSOUNDBAR نصب . را در سطحی صاف و تخت جلوی تلویزیون در مرکز قرار دهیدSoundbar اتصال سیم قالب دار سیم قالب دار .سیم قالب دار را همانطور که در تصویر نشان داده شده است وصل کنید و سپس کابل را از داخل سیم قالب دار رد کنید تا تمیز بماند...
- Page 49 اتصاالت اتصاالت .قبل از اینکه تمام اتصاالت بین اجزا را برقرار نکرده اید، سیم برق دستگاه یا تلویزیون را به پریز برق وصل نکنید ● .پیش از جابجاکردن یا نصب کردن دستگاه، حتم ا ً دستگاه را خاموش کرده و سیم برق را قطع کنید ●...
- Page 50 اتصاالت .پیش از جابجا کردن یا نصب دستگاه، حتم ا ً آنرا را خاموش کرده و سیم برق را قطع کنید ● در قسمت جلو مستقیم ا ً به رنگ قرمزSTANDBY LED اگر برق دستگاه اصلی قطع است، سابووفر بی سیم در حالت آماده به کار می ماند و ●...
- Page 51 اتصاالت وصل کردن به تلویزیون .مهم: قبل از شروع به کار، باتری را در کنترل از راه دور بگذارید. برای اطالع از دستورالعمل ها به صفحه 9 مراجعه کنید ● ( )دیجیتالHDMI اتصال ها به تلویزیون با استفاده از کابل HDMI کابل...
- Page 52 .بسته به وسیله وصل شده ممکن است لینک توان خودکار کار نکند ● TV SOUNDCONNECT پشتیبانی میTV SoundConnect که از عملکردSamsung TV بشنوید، البته در صورتی که به یکSoundbar می توانید صدای تلویزیون را از .کند اتصال...
- Page 53 اتصاالت که از سال 2102 به بعد به بازار عرضهSamsung ) در بعضی از تلویزیون هایSoundShare( TV SoundConnect عملکرد ● شده اند، پشتیبانی می شود. قبل از شرع بررسی کنید که آیا تلویزیون از عملکرد ).) پشتیبانی می کند. (برای اطالعات بیشتر به دفترچه راهنمای تلویزیون مراجعه شودSoundShare( TV SoundConnect ....
- Page 54 اتصاالت کابل صدای نوری یا آنالوگ ) است که با وجود آن به دو روش می توانید به دستگاه هایAUX( این دستگاه دارای یک فیش داخلی نوری دیجیتال و یک فیش داخلی صدای آنالوگ .خارجی متصل شوید کابل صدا ()همراه با دستگاه ارائه نشده است AUX OUT AUX IN کابل...
- Page 55 قابلیت ها قابلیت ها حالت ورودی . روی کنترل از راه دور را فشار دهیدSOURCE روی صفحه باالی دستگاه اصلی یا دکمه برای انتخاب حالت دلخواه، دکمه حالت ورودی صفحه نمایش ورودی دیجیتال نوری D.IN ARC (HDMI OUT) ورودی AUX ورودی HDMI ورودی...
- Page 56 .نام دستگاه فقط به انگلیسی نمایش داده می شود. اگر نام به انگلیسی نباشد، یک " _ " نمایش داده خواهد شد • راBluetooth [" قبلی یافت شده توسط وسیلهSamsung] HW-Jxxxx" ، انجام نشدSoundbar باBluetooth اگر جفت سازی وسیله •...
- Page 57 جفت کردید، انتخاب گزینهBluetooth را با یک وسیلهSoundbar بعد از اینکه ● . تغییر خواهد دادBT را به حالتSoundbar [" از فهرست وسیله های اسکن شده بطور خودکارSamsung] HW-Jxxxx" . باشد در دسترس استBluetooth در میان دستگاه های جفت شده با دستگاهSoundbar فقط در صورتی که...
- Page 58 MULTIROOM استفاده از برنامه بهSoundbar را به یک دستگاه هوشمند، شبکه و اینترنت وصل کنید. بعد از اتصالSoundbar به شما امکان می دهدSamsung Multiroom برنامه را به صورت بی سیمSamsung Multiroom و چند دستگاهSoundbar روی آن نصب شده است، می توانیدMultiroom دستگاه هوشمندی که برنامه...
- Page 59 . در دستگاه هوشمندتان ضربه بزنیدMultiroom ، روی نماد برنامهSamsung Multiroom برای راه اندازی برنامه به شبکهSOUNDBAR اتصال . را در دستگاه هوشمند انتخاب کنید. دستورالعمل های موجود بر روی صفحه دستگاه هوشمند را دنبال کنیدSamsung Multiroom برنامه . می توانید از قابلیت های زیر استفاده کنیدSamsung Multiroom با برنامه...
- Page 60 Wi-Fi از طریقSoundbar وصل می شود. برای روشن کردنBT فعال کنید، حالت ورودی آن به صورت خودکار رویBluetooth از طریق اتصال . را روی دستگاه هوشمندتان نصب کنیدSamsung Multiroom باید برنامه . وصل کنیدSoundbar دستگاه هوشمند را به...
- Page 61 بارگیری کرده و هر بار از یکی از آنها برای بهUSB توجه داشته باشید که در صورت وجود چند فایل به روزرسانی، باید آنها را جداگانه روی دستگاه .روزرسانی ثابت افزار استفاده کنید . تماس بگیریدSamsung مراجعه کرده یا با مرکز تماسsamsung.com جهت کسب اطالعات بیشتر درباره دانلود فایل های به روزرسانی، لطف ا ً به به روز رسانی مرحله...
- Page 62 قابلیت ها نمایش داده نمی شودUPDATE اگر . وصل کنیدUSB Soundbar حاوی فایل های به روز رسانی را به پورتUSB را خاموش کنید، دستگاه ذخیره سازیSoundbar . را روشن کنیدSoundbar سیم برق را جدا کنید، دوباره وصل کنید و سپس ....
- Page 63 آیا فاصله بین کنترل از راه دور و دستگاه اصلی خیلی زیاد است؟ » . )جفت سازی تلویزیون( انجام نشدTV SoundConnect کهSamsung در بعضی از تلویزیون هایTV SoundConnect پشتیبانی می کند؟TV SoundConnect آیا تلویزیون شما از »...
- Page 64 .طراحی، مشخصات و صفحه برنامه ممکن است بدون اعالم قبلی تغییر یابند مشخصات اسمی . حق تغییر مشخصات بدون اعالم قبلی را برای خود محفوظ می داردSamsung Electronics Co., Ltd .وزن و ابعاد دستگاه تقریبی هستند .برای آگاهی از مشخصات منبع تغذیه و توان مصرفی به برچسب دستگاه مراجعه کنید...
- Page 65 .. کلیه حقوق محفوظ استSamsung Electronics Co.,Ltd 2016© در سراسر دنیاSAMSUNG تماس با . تماس بگیریدSAMSUNG دارید، لطف ا ً با مرکز خدمات مشتریانSamsung اگر هرگونه پرسش یا نظری در رابطه با محصوالت Web Site Contact Centre ...
Need help?
Do you have a question about the HW-J7591R and is the answer not in the manual?
Questions and answers