Table of Contents
Advertisement
Quick Links
Advertisement
Table of Contents

Related Manuals for Bosch WLK20261BY


Summary of Contents for Bosch WLK20261BY
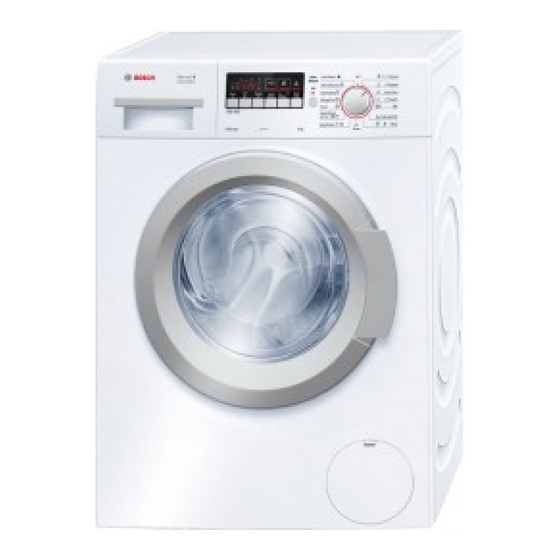
- Page 1 Washing machine WLK20261BY en Instruction Manual and Installation Instructions...
- Page 2 Your new washing machine Note/tip Information about the optimum use of You have chosen a Bosch washing the appliance/any other useful machine. information. Please take a few minutes to read and 1. 2. 3. / a) b) c) become familiar with the advantages of your washing machine.
-
Page 3: Table Of Contents
Contents e n I n s t r u c t i o n M a n u a l a n d I n s t a l l a t i o n I n s t r u c t i o n s Intended use. -
Page 4: Intended Use
Intended use After-sales service ..26 Intended use I n t e n d e d u s e Consumption rates ..27 For private domestic use only. -
Page 5: Safety Instructions
Safety instructions Reaching into the drum Safety instructions ■ when it is turning can cause injuries to hands. S a f e t o n s u c t i i n s t r Electrical safety Do not reach into the drum when it is turning. -
Page 6: Environmental Protection
Environmental protection Cut through the mains cable Do not let children touch the ■ and remove it, along with hot washing machine door. plug. Destroy the lock on the ■ washing machine door. Environmental Warning Risk of suffocation! protection Children may become wrapped o n m e n t a l E n v i r c t i... -
Page 7: Main Points In Brief
Main points in brief Main points in brief M a i n p o i n t b r i e Insert mains plug. Turn the tap on. Sort the laundry. Open the washing machine door. -------- Select the Maximum load is Load the laundry. -
Page 8: Getting To Know The Appliance
Getting to know the appliance Getting to know the appliance i n g G e t t k n o w t h e a n c e a p p l i Washing machine ( Detergent drawer ~ Page 17 8 Washing machine door with door handle 0 Operating/display panel ~ Page 9 9S Open the washing machine door... -
Page 9: Control Panel
Getting to know the appliance Control panel ( 0 8 Temp. °C (Temperature), 0 rpm XA Start/Reload for starting, interrupting (spin speed) and Ready in time for changing (adding laundry) and cancelling a programme. programme settings. ` Programme selector for selecting the Overview of all programme default settings programme and for switching the machine on and ~ Page 14... -
Page 10: Laundry
Laundry Soiling ■ Laundry Wash laundry with the same level of soiling together. L a u n d r y Some examples of levels of soiling: Prepare the laundry – light: Do not prewash; if necessary, select the additional Caution! programme setting Damage to the appliance/fabrics SpeedPerfect. -
Page 11: Saving Energy And Detergent
Detergent care products and cleaning agents for Saving Soiling/note domestic use. Reduced temper- Light Standard detergent with optical ature and deter- No visible dirt or stains. Cloth- ■ brighteners gent quantity as ing has taken on some body Suitable for boil-washable white per the recom- odour, e.g.: laundry made from linen or cotton... -
Page 12: Overview Of Programmes
Overview of programmes Overview of programmes O v e r v i p r o g r a m m e s Programmes on the programme selector Programme/type of laundry/information Settings max. load Name of the programme Brief explanation of the programme and for which fabrics it is suitable.S *reduced load for SpeedPerfect option selectable temperature in °C... - Page 13 Overview of programmes Programme/type of laundry/information Settings p W Wool max. 2 kg Hand- or machine-washable fabrics that are made of wool or contain wool. cold - 40 °C Particularly gentle wash programme to prevent shrinkage of laundry, with - - - ... 800 rpm longer programme breaks (fabrics rest in the detergent solution).
-
Page 14: Starching
Programme default settings Programme/type of laundry/information Settings 0 Spin/ Extra spin with speed that can be selected [ Drain - - - ... 1000 rpm Drain the rinsing water after - - - (Rinse Hold = without final spin cycle). O Rinse Extra rinse with spin - - - ... -
Page 15: Spin Speed
Additional programme settings The maximum temperature that can be After the start, the preselected time e.g. set depends on the programme which 8h is displayed and the time counts has been selected. down to the start of the wash programme. The programme duration is Overview of programmes ~ Page 12 then displayed, e.g. -
Page 16: Water Plus
Operating the appliance Water Plus Use the programme selector to select the required programme. Can be Increased water level and additional rotated in either direction. rinse cycle, extended washing time. For The washing machine is switched on. areas with very soft water or for an even better rinsing result. -
Page 17: Placing Laundry Into The Drum
Operating the appliance Placing laundry into the drum panel. Changes may be made to the default settings. Warning Measure and add detergent Danger of death! Items of laundry pretreated with and care products cleaning agents that contain solvents, e.g. stain remover/cleaning solvent, Caution! may cause an explosion after being Damage to the appliance... -
Page 18: Start The Programme
Operating the appliance being changed inadvertently. To do this, activate the childproof lock when the programme has started. To activate/deactivate the childproof lock, press and hold Start/Reload for approx. five seconds. The symbol E is indicated in the display. Dispenser I Detergent for prewash E lights up: The childproof lock is ■... -
Page 19: Changing The Programme
Operating the appliance Select 0 [ Spin/Drain (if only Notes a drained cycle is required: set rpm For safety reasons, the washing ■ (spin speed) to - - -). machine door remains locked when Select Start/Reload. the water level or temperature is high, or while the drum is rotating, and it is not possible to add laundry Programme end... -
Page 20: Setting The Signal
Setting the signal – Always wait until the programme Setting the signal ends, as the appliance could still be locked. Switch the appliance i n g S e t t t h e s i g n a l on and wait for the unlocking device. -
Page 21: Sensors
Sensors Sensors S e n s o r s Automatic load sensing The automatic load sensing function adapts the water consumption ideally to each programme depending on the The voltage control system is activated type of fabric and the load. when a program is started. -
Page 22: Machine Housing/Control Panel
Cleaning and maintenance Machine housing/control Push in the detergent drawer. panel Leave the detergent drawer open Note: so that any residual water can Wipe the housing and the control ■ evaporate. panel with a soft, damp cloth. Remove the detergent residue ■... -
Page 23: The Drain Hose At The Siphon Is Blocked
Cleaning and maintenance Carefully unscrew the pump cover. Filter in the water supply Clean the interior, pump cover blocked thread and pump housing. The impeller in the detergent solution First, reduce the water pressure in the pump must be able to rotate. supply hose: Turn off the tap. -
Page 24: Emergency Release
Faults and what to do about them. Caution! Faults and what to do Water damage about them. Any escaping water may cause water damage. F a u l t a n d w h a t a b o u t t h e m . -
Page 25: Faults And What To Do About Them
Faults and what to do about them. Display Cause/Remedy ~ flashes: Mains voltage too low ~ Page 21 ~ flashes: Undervoltage during the washing programme. The programme duration is extended. ~ Page 21 Other displays Switch off the appliance, wait for five seconds and switch it back on again. If the indicator appears again, call the after-sales service ~ Page 26 Faults and what to do about them. -
Page 26: After-Sales Service
After-sales service Faults Cause/Remedy Residual water in the care Not a fault – the effect of the care product is not affected. ■ product dispenser. Clean the insert if necessary. ■ Odours in the washing Run the i ü Cottons 90 °C programme without laundry. Use standard machine. -
Page 27: Consumption Rates
Consumption rates We will always find an appropriate Trust the expertise of the solution in order to avoid unnecessary manufacturer. visits by engineers. Contact us for assistance. By doing so, Please give the after-sales service the you will ensure that the repairs are product number (E no.) and the carried out by trained service personnel production number (FD) of the... -
Page 28: Efficiency Test Programmes For Cotton Fabrics
Technical data Programme Approximate information on the residual moisture** WLK24 ... WLK20 ... WLK16 ... max 1200 max 1000 max 800 Delicate/Silk Wool * The values may deviate from the indicated values depending on water pressure, water hardness, water inlet temperature, ambient temperature, type of laundry, amount and soiling of laundry, detergent used, fluctuations in the power supply and the selected additional functions. -
Page 29: Positioning And Connecting
Positioning and connecting 1 hose clip Ø 24–40 mm (DIY store) is Positioning and also required for connection to a siphon. Connecting the water connecting ~ Page 31 i o n i n g P o s i t a n d c o n n e c t i Useful tools: Included with the appliance... -
Page 30: Installation Surface
Positioning and connecting If the washing machine is raised by Notes ■ protruding components (e.g. Recess width of 60 cm required. ■ washing machine door), the Only install the washing machine ■ components may break off and the underneath a continuous worktop washing machine may be damaged. -
Page 31: Hose And Cable Lengths
Positioning and connecting Remove the mains cable from the holders. Remove sleeves. Right-hand connection Insert covers. If the hose holders are used, the Note: possible hose lengths are reduced! The following are available from Tip: specialist dealers/after-sales service: Extension for Aqua-Stop or cold ■... -
Page 32: Water Inlet
Positioning and connecting appliance (not necessary for Aqua-Stop Caution! models): Water damage The connection points for the water Aquastop ■ supply hose and water drain hose are under high water pressure. To prevent leaks and water damage, you must follow the instructions in this section. Notes In addition to the safety information ■... -
Page 33: Drainage Into A Wash Basin
Positioning and connecting Drainage into a wash basin Warning Risk of scalding! When you are washing at high temperatures, there is a risk of scalding if you come into contact with hot detergent solution (e.g. when draining hot detergent solution into a Drainage into a plastic pipe washbasin). -
Page 34: Electrical Connection
Positioning and connecting If an earth-leakage circuit breaker is Notes ■ used, only a type which displays this The lock nuts on all four appliance ■ symbol is used: z. feet must be screwed tightly against Only this symbol guarantees the housing. -
Page 35: Transportation
Positioning and connecting Close the detergent drawer. Select Start/Reload. At the end of the programme set the programme selector to Off. Your washing machine is now ready to use. Transportation Before switching on the appliance: Preparatory work Notes Turn off the tap. The transport locks must be ■... - Page 38 A call set-up fee of up 6 pence may apply.) 01450 2655 (0.03 € per minute at peak. Off peak 0.0088 € per minute.) You can find the contact information for all countries in the attached after-sales service directory. Robert Bosch, Hausgeräte GmbH Carl-Wery-Straße 34 81739 München DEUTSCHLAND...
Need help?
Do you have a question about the WLK20261BY and is the answer not in the manual?
Questions and answers