Tascam Frontier FW-1884 Manual
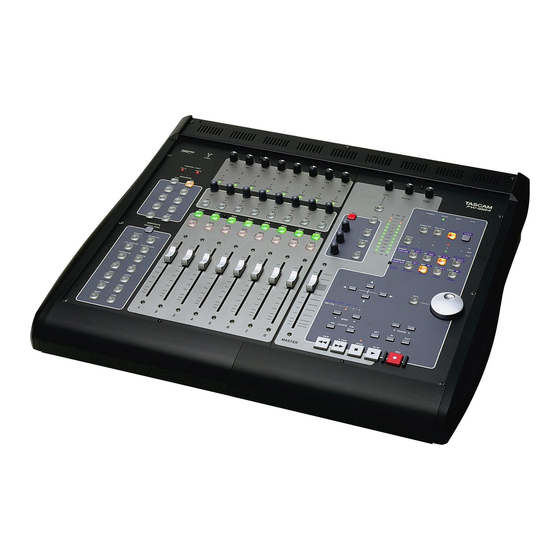
Professional control surface/firewire audiomidi interface
Hide thumbs
Also See for Frontier FW-1884:
- Owner's manual (42 pages) ,
- Service manual (28 pages) ,
- Setup manual (16 pages)

Related Manuals for Tascam Frontier FW-1884


Summary of Contents for Tascam Frontier FW-1884
- Page 1 TEAC Professional Division FW1884 / FE8 Professional Control Surface / FireWire AudioMIDI Interface READ ME 032105 Page 1 of 35 ...
-
Page 2: Table Of Contents
FW1884 C OSX ..............7 CCESSING THE ONTROL ANEL IN AC WINDOWS FEATURES (V1.10 & ABOVE) ..................8 (WDM) .......................... 8 UICK TART USING THE FW1884 WITH TASCAM GIGASTUDIO (GSIF)............9 96K ADAT I/O............................10 IN SYNC INDICATION (WINDOWS) ....................10 A NOTE ABOUT COMMON CONTROL PROTOCOLS ..............10 ..........................10 ACKIE ONTROL HUI ..............................10 Pro Tools ............................11 USING THE FW1884 WITH LOGIC AUDIO................... 11 USING THE FW1884 WITH PRO TOOLS..................12 ... - Page 3 (WDM) ....................17 ONVERTER OMPENSATION FE8 S ............................ 18 UPPORT FE8................. 19 DJUSTING ADER OUCH ENSITIVITY ON FE8 U ........................19 ONAR FE8 Use With Digital Performer ....................20 FE8 Use With Logic ........................21 FE8 With Mackie Control and HUI Emulation modes..............22 LCD............................22 ......................... 22 AINTENANCE TEMS ........................... 23 NOWN SSUES Playback of certain sound sources at high sample rates ..............23 Logic Plugin ..........................
-
Page 4: Updates
Updates Please visit the TASCAM web site at http://www.tascam.com to ensure that you have the latest software and documentation. Revisions to other documentation The points that follow are the most recent and correct information and may differ from information presented in the Owner’s Manual, Setup Guide or individual App Notes. Please use this information instead. The IEEE 1394 standard and the FW1884 Additional Notes · FireWire devices should never be connected in a “loop” configuration. There should only be one cable path from one FireWire device to another. If you cable a FireWire system in a loop by mistake, it will not work. · Note: Use only a 6pin FireWire connection on the computer. Making Connections The FW1884 and FE8 do not pass power provided by the host computer through their IEEE1394 ports. If you are daisychaining devices on the 1394 bus after the FW1884 or FE8, ensure that they have their own power supply and are not powered via the 1394 connection, and the FW1884 or FE8 is powered on. Alternatively, the FW1884 or FE8 can be placed last in the chain. If your computer has more than 1 IEEE1394 port, other devices should be connected to a port other than the one used by the FW1884 or FE8 Always make all connections between the FW1884, FE8 and a host computer with power OFF on all devices. Page 4 of 35 ... -
Page 5: System Requirements
System Requirements · Reminder: The FW1884 requires an OHCI compliant 1394 port. · Reminder: The FW1884 requires an update to the 1394 driver provided in Microsoft Windows. This update is automatically installed from the FW1884 driver installation application provided on the CDROM. The update requires that you have previously updated your Windows 2000 system to Service Pack 3 or 4, or that you’ve updated your Windows XP system to Service Pack 1. To see what Service Pack is installed in your system, go to Control Panel | System and look in the “General” tab under “System.” You can download Service Packs to your machine using the “Windows Update” feature. · Also note that future versions of Windows 2000 (starting with Service Pack 5) and Windows XP (starting with Service Pack 2) will include the 1394 update. · Due to OSX and application resource requirements, the following performance guidelines should be kept in mind: o A G4 processor and 512MB of RAM are strongly recommended to use the FW1884 as an 18Channel Sound Device in Core Audio. o A G3 based Mac running OSX may require very high buffer settings when the FW1884 is configured as anything greater than a 2Channel Sound Device in Core Audio. Page 5 of 35 ... -
Page 6: Installing The Fw1884 Drivers
Installing the FW1884 Drivers PC Reminder: When presented with the Windows Logo testing warning, click through it by clicking on the “Continue Anyway” button. o Note: Due to the required installation of a Microsoft Hotfix (also called a “QFE”), drivers must be installed using the provided installer. Separate Windows driver files are not provided on the CD. o Note: After installation of the driver software it may take the Windows Plug & Play process a few moments to recognize the FW1884. o Note: In the event that the Windows Plug & Play process does not detect the FW1884 after running the installer, the driver installation may be completed from the Windows Device Manager as described below: 1. Go to the Start menu, select Control Panel then double click System. 2. Click on the Hardware tab then click on the Device Manager button. 3. You should see a yellow icon representing the FW1884. Right click on it and choose Update Driver. 4. Follow the instructions in the Hardware Update Wizard. Mac o Note: OMS 2.3.8 for Mac OS9 is included on the FW1884 CD. o Note: Users of Digital Performer 3.x should remove the Digigram VX ASIO driver from their Performer ASIO folder as it has been shown to conflict with the FW1884 ASIO driver. o Note: Some USB MIDI interfaces have been shown to interfere with FireWire MIDI. If you experience MIDI communication problems with your FW1884 and you have a USB MIDI interface, try disconnecting the USB device. Early G4 Some testers have reported computer freezes when using the FW1884 with the 400MHz ... -
Page 7: Mac Osx Control Panel
Mac OSX Control Panel Accessing the FW1884 Control Panel in Mac OSX The FW1884 Manager application, located in the Applications folder, launches the FW 1884 Control Panel. While the Control Panel tabs for Settings, Routing and MIDI Programming are the same between Windows, Mac OS9 and Mac OSX, Mac OSX adds the Core Audio tab shown below. Here it is possible to configure how many I/O channels the FW1884 presents to the computer. On slower systems, it may be necessary to set this as a 2Channel or 8 Channel Sound Device for good performance. See the note above about Mac system requirements. Note: Changing this setting will restart the FW1884 in order to configure its systems. No data (audio/MIDI/control) will pass through the device while it is restarting. Page 7 of 35 ... -
Page 8: Windows Features (V1.10 & Above)
Windows Features (V1.10 & above) Quick Start (WDM) The tab shown below, Quick Start, has been added to the Windows Control Panel. This allows you to specify a set of channels which will always stream when using WDM/KS Driver Mode in Sonar. This, for example, speeds up the start of a playback or record operation in SONAR... especially when there are a lot of channels enabled. If there is a hesitation after pressing PLAY or RECORD before the operation begins, try enabling this feature. To use it, check the channels that you will be using in your WDM audio app. When the channels selected in the Quick Start tab match the channels actually used by your application, the FW1884 will not have to resync when the application begins to use those channels. This has shown to be much faster, and less prone to produce an “audio engine stop” message. Page 8 of 35 ... -
Page 9: Using The Fw1884 With Tascam Gigastudio (Gsif)
Using the FW1884 with TASCAM GigaStudio (GSIF) The Windows driver for the FW1884 implements the GSIF (Giga Streaming Interface) protocol, for highperformance operation with TASCAM GigaStudio software. The GSIF driver is installed automatically with the FW1884 driver; there is no need for a separate installation step. The FW1884’s GSIF interface always operates at full 24bit resolution, although GigaStudio has settings which can dither output to lower resolutions in special situations. To use the FW1884 as your GigaStudio output device, make sure the FW1884 is plugged in and turned on, and then start GigaStudio. When the main screen appears, select the Settings | Hardware/Routing page. Use the dropdown combo box labeled “Hardware” to select the FW1884. If you will also be using the FW1884’s MIDI Inputs to connect a keyboard or other controller, you should select the FW1884’s MIDI Input ports in the dropdown boxes labeled “Midi In Ports.” IMPORTANT: Be sure to click the “Apply” button to activate changes you have made in this screen! All eighteen output channels of the FW1884 may be utilized with GigaStudio. Since GigaStudio allows individual pairs of channels to be enabled via its Settings | Hardware/Routing page, it’s easy to control the number of active channels that GigaStudio is using. Channels that aren’t selected for use in GigaStudio are available to other applications via MME/WDM or ASIO since the FW1884 is a true MultiClient device. Here is a chart that shows the association of GigaStudio channel numbers with FW1884 outputs: Giga FW1884 1,2 Analog 1:2 3,4 Analog 3:4 5,6 Analog 5:6 7,8 Analog 7:8 9,10 ADAT 1:2 11,12 ADAT 3:4 13,15 ... -
Page 10: 96K Adat I/O
96k ADAT I/O Note: When operating in high sample rate modes (96k or 88.2k), the ADAT I/O reduces its channel I/O count to four. Because of this, when the sample rate is 96k or 88.2k, the FW1884 is a 14channel I/O device. In Sync Indication (Windows) Due to significant performance differences between computers at high sample rates, the computer and FW1884 may not be able to achieve sync with smaller buffer sizes. The FW1884’s Windows control panel reports “In Sync” below the Sample Rate selection box when the FW1884 and host are communicating properly. If this text does not appear, try increasing the buffer size (Audio Latency slider) or lowering the sample rate until the “In Sync” indication appears.” A Note About Common Control Protocols By emulating either the Mackie Control or the HUI, the FW1884 can provide control over the most used parameters of your DAW software until your particular DAW implements more complete Native Mode parameter mapping. Typically, one or both of these two protocols will provide control over faders, mutes, solo, recordenable, pan, and the main transport functions. Other functions may be available on certain keys as noted in the documents covering these protocols. While these protocols have been implemented by many DAWs, their implementation and function may vary from DAW to DAW. Below is a list of known issues with these protocols as of this writing: Mackie Control AUX1: This key invokes the Mackie Control Edit function. For it to work in Cubase or Nuendo, an audio part must be selected. SHIFT+UNDO invokes the REDO function. CTRL+RECORD is not implemented. SET: This key invokes the Mackie Control Zoom function. For it to work in Cubase or Nuendo, the Arrange window must be selected. SHTL: Not implemented in Cubase as of this writing. HUI NOTE: There is no dedicated master fader in the HUI protocol. A channel fader is typically assigned to function as a master fader. AUX7: This key brings forward the DAW’s Edit window per the HUI protocol. This is not implemented in Cubase as of this writing. AUX8: This key brings forward the DAW’s Mixer window per the HUI protocol. This is not implemented in Cubase as of this writing. Page 10 of 35 ... -
Page 11: Pro Tools
Pro Tools The following key functions are only available in Pro Tools when using the FW1884 in HUI emulation mode as of this writing: ALT/CMD CTRL SHIFT+RECORD (QuickPunch) LOCATE>> SET (Online) SHIFT+IN OUT <NUDGE (Also available in Nuendo) NUDGE> (Also available in Nuendo) <BANK BANK> SHIFT+ <BANK SHIFT+ >BANK Using the FW1884 with Logic Audio The control surface plugin included on the CDROM has been tested with Logic versions 6.1 and 6.2. Page 11 of 35 ... -
Page 12: Using The Fw1884 With Pro Tools
Using the FW1884 with Pro Tools Pro Tools Free This software is available as a free download from Digidesign. It records and plays back up to eight tracks of audio and 48 tracks of MIDI, and has many of the plugin and editing power of the more highend versions of Pro Tools. It uses Apple Sound Manager on Mac OS 9 and Windows MME drivers. As of the time of this writing, Digidesign hasn’t announced a Mac OS X version of the product. The FW1884 functions as a control surface in HUI emulation mode with Pro Tools Free. Just add a “HUI” in the Pro Tools “Peripherals” window and you’ll have full transport, editing and mixing control. Select Sound Manager (Mac OS 9) or MME (Windows) as your audio system to get 2channel input and output. You can also use the fourport MIDI interface via OMS (Mac). Pro Tools LE Pro Tools LE is a version of Pro Tools that requires one of Digidesign’s interfaces to function, you can’t use the FW1884 as the audio interface for this software. However, you could use the FW1884’s mic preamps, line inputs and ADAT inputs, submixed to a stereo signal, and record this digitally into Pro Tools using the FW1884’s S/PDIF output. HUI emulation works with this software – all of the transport, editing and mixing commands supported in other versions of Pro Tools work in LE. You can also use the fourport MIDI interface via OMS (Mac). Pro Tools TDM/ Pro Tools HD The professional version of Pro Tools is called Pro Tools TDM. Currently at version 6.1, this is the version that ships with their Mix and HDseries hardware. It offers 128 tracks of playback at 192kHz, TDM plugins and many other features. Like Pro Tools LE, this software requires the user to have Digidesign hardware to function. Therefore, the FW1884 can’t function as the audio interface for this Pro Tools system. You can still use the FW1884’s mic preamps, line inputs and ADAT inputs, submixed internally to a stereo signal, and record this digitally into Pro Tools using the FW1884’s S/PDIF output. You still get full HUI control surface functionality with the Fw1884, from editing and transport controls to mixing and automation control. You can also use the fourport MIDI interface via OMS (Mac). Page 12 of 35 ... -
Page 13: Chart: Pro Tools Software Compatibility
Chart: Pro Tools Software Compatibility Pro Tools Free Pro Tools LE Pro Tools TDM Audio 2channel I/O (n/a) (n/a) MIDI 4 MIDI I/O ports 4 MIDI I/O ports 4 MIDI I/O ports ü ü ü Transport Control ü ü ü Mixing Controls ü ü ü Editing Controls Miscellaneous · Section 5.1.3 MIDI Programming Tab (Owner’s Manual) o Please disregard the paragraph on this page entitled “Here’s a quick scenario”. Somehow software engineer notes found their way into the manual J Changes From Previous ReadMe Docs Please note that the ReadMe docs are stamped with their current date on the cover page. For example, 081903 is August 19, 2003. Since 082203 Using external clocking under Mac OSX Selection of external clock sources may not be possible from within your OSX DAW software. Please note that you can still change the clock source manually on the FW 1884 or from the FW1884 Manager app. While the system will be locked to the correct clock source, the DAW software will not display it. -
Page 14: Input Capability Matrix For Digital Performer
Input Capability Matrix for Digital Performer This has been fixed with Digital Performer 4.12 Due to the method that Digital Performer handles FireWire audio streams, only eight inputs and eight outputs can be simultaneously accessed on the FW1884 when using DP4 in Mac OS X. When the FW1884 is configured as an 18channel interface (in the FW1884 Manager application), the eight analog mic/line inputs and outputs will be used for I/O. If the FW1884 is set to act as an 8channel interface, you will be able to choose the eight mic/line ins and outs or the ADAT input and output or a combination of the two. When the FW1884 is configured for 2channel operation, you will be able to choose any pair of inputs and outputs for use with Digital Performer. FW1884 Mode Available I/O 18channel 8 mic/line inputs, 8 line outputs 8channel · 8 mic/line inputs, 8 line outputs · ADAT input, ADAT output · 8 mic/line inputs, ADAT output · ADAT input, 8 line outputs 2channel Any pair of inputs and outputs Maintenance Items · Some users have reported audio dropouts on dual processor G4 Macs running OSX. This is fixed with OSX driver version 1.03 and higher. Known Issues · On dual processor G4 Macs running DP4 and OSX, DAW faders may not respond accurately. Our testing has shown that the issue is more likely to present itself in bench testing rather than actual usage. This is currently under investigation. Page 14 of 35 ... -
Page 15: V1.10 Driver Release Notes
V1.10 Driver Release Notes Installing the V 1.10 Driver Windows Two versions of the V 1.10 driver installer for Windows are provided. They differ only in one aspect: the larger (~10MB) installer includes a required update to the Microsoft 1394 bus driver, whereas the smaller (500KB) installer does not. To determine which version you need, open the Windows Control Panel on your computer, and launch the Add/Remove Programs dialog. Scroll down and look for the presence of the Windows Hotfix Q819111. If this hotfix is installed you can use the smaller (~500KB) installer. Otherwise, use the full (10MB) installer. If you are installing this driver version onto a PC that does not have a previous (V 1.00) FW1884 driver installation, the full 10MB installer must be used. This installation is identical to that described in this doc, the Owner’s Manual and the Setup Guide. If you are installing this driver version onto a PC that has V 1.00 drivers already installed, please use the approximately 500k updater. NOTE: When connected FE8 expander units, each unit will require Windows to go through the plug & play driver installation process. This is due to the fact that each FE8 has its own unique identity to Windows. If more than one FE8 is connected during driver installation, their drivers will be installed sequentially by Windows. It is not necessary to reinstall the driver. FE8 drivers are included in the V 1.10 FW1884 driver so when an FE8 is connected, it will automatically be detected and installed. If you are installing V 1.10 drivers for the first time from the CD included with your FW 1884 then your devices already have the latest firmware that goes with V 1.10. If you are installing over V 1.00 drivers then you will also need to run the Firmware Updater. The Firmware updater must be installed after installing the V 1.10 drivers. The Firmware updater app is a separate download file from the V 1.10 driver file you downloaded from the TASCAM web site and includes instructions to guide you through this very simple process. This updates the FW1884 from ARM135 / FPGA 45 to ARM 145 / FPGA 49. These version numbers can be seen in the FW1884 control panel. Page 15 of 35 ... -
Page 16: Mac
Mac If you are installing V 1.10 drivers over a previous V 1.00 installation, the installer will automatically overwrite V 1.00 files with V 1.10 files. If you are installing over V 1.00 drivers then you will need to run the Firmware Updater. The Firmware updater app includes instructions to guide you through this very simple process. This updates the FW1884 from ARM135 / FPGA 45 to ARM 145 / FPGA 49. These version numbers can be seen in the FW1884 control panel. In Mac OS 9, the Firmware updater is placed in the FW1884 Drivers folder which will appear on your desktop. In OSX, the Firmware updater is contained within the .dmg (disk image) file. Double click the image file to see its contents and run the installer & updater within. New Features Analog to ADAT Routing This setting in the Routing tab for all platforms (Mac OS 9, Mac OSX & Windows) allows the signals present at the analog inputs to route directly to the ADAT outputs. This provides for use of the FW1884’s microphone preamps, control surface and MIDI ports with an audio card that has ADAT inputs but limited microphone inputs. An example would be the Digidesign 001. NOTE: Most applications permit several MIDI interfaces to be used simultaneously. For example, an app could simultaneously receive MIDI input from a keyboard while also receiving surface control via the FW1884 MIDI Control port. On the other hand, most audio apps do not permit multiple audio interfaces to be used simultaneously. This means that in the above example, the Digi 001 audio I/O would be used while the FW 1884 would only be used for microphone preamps, MIDI and control surface. By using the Analog to ADAT routing feature, the ADAT output of the FW1884 could be connected to the ADAT input of a Digi 001, providing it with 8 additional mic pre’s. Six Channel Surround Monitoring Previously it was only possible to set the Monitor Level Control on the FW1884 to affect analog outputs 1&2 or 18. It is now additionally possible to set the Monitor Level Control to affect analog outputs 16 only, allowing analog outputs 7&8 to be used for other purposes, like sends to external equipment, while mixing in 5.1. This setting is made in the Settings tab on all platforms. Page 16 of 35 ... -
Page 17: Converter Compensation (Wdm)
Converter Compensation (WDM) A new checkbox has been added in the Control Panel Settings tab on the Windows platform called “Compensate for converter delay”. When enabled, this compensates for the A/D and D/A converter chips' inherent delay in WDM client apps. In Sonar, enabling this switch also requires the number of Buffers in Playback Queue get set to a minimum of 3 in Sonar’s audio configuration window as shown below. When the switch is not enabled, you can set the number of buffers to a minimum of 2 and you'll get less absolute latency, but the A/D, D/A delays won't be compensated. For example: · Enabling this switch when synchronizing to external time code will ensure audio gets written into the project at exactly the correct location relative to the incoming time code. · Disabling this switch will allow the lowest possible performance latency for virtual instruments and audio monitoring through the DAW. Page 17 of 35 ... -
Page 18: Fe8 Support
FE8 Support Version 1.10 drivers support the FE8 channel strip expander unit. Below is a screen shot of the FE8 tab in the Windows control panel. The Mac version is the same. The order in which multiple FE8s are reported to a DAW can be changed in this tab by clicking an FE8 Name Assignment and using the Move Up or Move Down buttons at the bottom. When clicking the Identify button, the highlighted FE8 will flash its FireWire (1394) LED. It makes later FE8 assignment easier (if more than one FE8 is connected) if they are renamed at this point. Many users, for example, will want to rename the FE8s to reflect their physical position on the work surface (for example: “FE8 Left, FE8 Right”). After renaming, the FE8s must have their power cycled, then the new names will appear in the DAW for easy assignment. (In Windows, names entered in this dialog also become the names of the MIDI device names available to your audio applications.) Page 18 of 35 ... -
Page 19: Adjusting Fader Touch Sensitivity On Fe8
Adjusting Fader Touch Sensitivity on FE8 SEL1 + SEL3 + SEL5 + CH8 Encoder Adjust touch fader sensitivity FE8 Use With Sonar First, the FE8 Control Ports must be activated in Sonar’s MIDI Devices window in order for them to appear in the Control Surfaces window. The FE8 Control Ports will become available after Windows has detected the hardware and installed the driver for the FE8. In the Control Surfaces window (shown below) under the Options menu, Sonar provides multiple slots to insert individual control surfaces. If you have one or more FE8s connected, each one will appear individually in the Add New Control Surface pulldown menu when the yellow star icon is clicked. Add control surfaces in the order you want them to match up with mixer faders from top to bottom in the Control Surfaces window. Multiple FE8s will be numbered & named according to their order and names in the FE 8 tab of the control panel. NOTE: Sonar must be restarted for changes in this window to take effect, even though Sonar does not prompt for this. Page 19 of 35 ... -
Page 20: Fe8 Use With Digital Performer
FE8 Use With Digital Performer First, install the DP plugin V 1.10, included on the CD (or separately downloaded from the TASCAM web site). 1. Open the Control Surface window (shown below) under the Setup menu. Select FW1884 under the Driver pulldown. 2. Select FW1884 as the first Unit and choose a control port from the MIDI pull down. Any control port may be used. 3. Click on the + sign next to the FW1884 control port to enable another unit. Do not click on the master + sign outside of the outlined box – that is used for adding a second driver type. 4. Select FE8 as the second unit and choose a control port for it. 5. Repeat steps 3 & 4 for all FE8s connected. NOTE: V 1.10 DP plugins only exist for DP 3.1 and DP 4. DP 2.7 and 3.0 do not support multiple control surfaces. Page 20 of 35 ... -
Page 21: Fe8 Use With Logic
FE8 Use With Logic First, install the FW1884 Logic plugin included on the FW1884 CD and set up an FW 1884 according to those installation instructions. To add an FE8, repeat those same steps for each FE8 connected as shown below: Page 21 of 35 ... -
Page 22: Fe8 With Mackie Control And Hui Emulation Modes
FE8 With Mackie Control and HUI Emulation modes FE8 support using these emulation modes will vary from app to app with the particular app’s level of implementation. The outline below shows app support for these control protocols known at the time of this writing. · Cubase – Does not currently support multiple control surfaces. · Nuendo – Does not currently support multiple control surfaces. · Logic – It is recommended that the Logic plugin provided by Emagic and included with the FW1884 be used for surface control of Logic. · Pro Tools – Supports multiple HUI surfaces. Each HUI surface must be assigned to an FW1884 / FE8 Control Port. It may be necessary to trash the Pro Tools preferences file and/or rebuild your OMS setup in order for Pro Tools to properly communicate with multiple emulated HUIs. Pro Tools expects to see a HUI on MIDI channel #1 of a given Control Port. · Digital Performer – It is recommended that the DP plugin included with the FW 1884 be used for surface control of DP. o Mackie Control – DP expects to see a Mackie Control on MIDI channel #16 of a given Control Port. Any number of FE8s emulating Mackie Control expanders may be added below a master FW1884 emulating a Mackie Control. o HUI – DP expects to see a HUI on MIDI channel #1 of a given Control Port. At the time of this writing DP does not support multiple HUI controllers. · Sonar – It is recommended that the Sonar plugin included with the FW1884 be used for surface control of Sonar. o Mackie Control – Sonar does not support the Mackie Control expander and therefore will not support an FE8 emulating a Mackie Control ... -
Page 23: Known Issues
Known Issues Playback of certain sound sources at high sample rates If you are experiencing difficulties playing back audio via QuickTime at high sample rates, set the sampling rate to 44.1 or 48 kHz. and restart the Mac. Here are some examples of sounds that play at 88.2k: iTunes plays MP3 file Mail beeps Here are some examples of sounds that DON'T play at 88.2k, but do at 44.1/48k: Safari plays back an MP3 file Finder plays back an AIFF file Quicktime Player plays back a Quicktime MOV File Logic Plugin · The issues below are currently being worked on by Emagic. o Fader touch is not currently functional. HUI emulation can be used for this purpose. Fixed with FW1884 Logic driver V1.10. o Scrub/Shuttle behavior is erratic. Fixed with FW1884 Logic driver V1.10. o The Logic master fader is not tracked correctly by the FW1884 physical fader. Fixed with FW1884 Logic driver V1.10. o The bank LEDs are not currently functional. This will be fixed in a future release of the Logic main app. Page 23 of 35 ... -
Page 24: V1.20 Driver Release Notes
V1.20 Driver Release Notes Installing the V 1.20 Driver Please refer to the V1.10 installation instructions on pages 15 & 16 of this document. Installing V1.20 is the same. It is not necessary to install V1.10 before installing V1.20. It is possible to install V1.20 over previous V1.00 and V1.10 installs. What’s New SoftLCD · Added support for FE8’s to the SoftLCD application. Now SoftLCD can display data from both the FW1884 and FE8’s. (FE8/SoftLCD support is required in the control plugin to use this feature.) · Full support for Unicode added to the Sonar plugin to support alternate language based text. · Added support for full message data dumps to SoftLCD to accommodate the Logic Audio plugin. SONAR Plugin V 1.20 Minimum requirement is the latest Sonar 3 patches. This is compatible with Sonar 4. · Added support in the Sonar Plugin for SoftLCD and the FE8. · Added Support for the track Select buttons in Sonar 3. Now pressing a track Select button will highlight that track and place it into the Track Inspector window. · Added support for the new Sonitus channel EQ’s in Sonar 3. Now the EQ section will automatically control any currently selected track or buss. o SHIFT + CTRL+ any Band button toggle the selected track/bus EQ on or off o SHIFT + Band button toggle that band on or off o CTRL+ Band button select the type of filter for that band o ... -
Page 25: Digital Performer Plug In
· Added support for the new bussing scheme in Sonar 3. Now all hardware channel strips can be toggled between normal track mode and bus mode. This includes full support for level, pan, aux busses, EQ, automation, and banking. o SET + BANK> (right) put the FW1884 and any FE8’s into bus control mode. This will be indicated by a slow blinking of the Bank LED’s. o SET + <BANK (left) return the devices to normal track mode While in bus mode the Master fader will be mirrored by the Channel fader assigned to the same bus as the Master fader. This is to prevent confusion and keep the Master fader functionality consistent at all times. While in Bus mode the Select buttons do work, however the selected bus is not highlighted in the Track view, nor is it automatically displayed in the Track Inspector. This is due to a limitation within Sonar. All other available functions work just as they would for the tracks with the exception of the Archive function (CTRL+Mute) which is not applicable to busses. Note: There currently appears to be an issue in Sonar 3 which prevents the EQ graphic display window at the top of each buss in the Mixer view from updating its On or Off state until after a Track EQ is also turned On or Off. This does NOT effect the EQ’s operation and is only a graphic update issue. Digital Performer Plugin · Added support for FE8’s and SoftLCD with Digital Performer plugin. Mac OS X Driver · Added installable patch to provide a workaround to an issue in Logic Audio which causes the SOLO 3 button to pan selected tracks hard left. The Mac driver image contains an additional folder that contains the Logic Audio patch Installer and Remover. The patch Installer should be run after running the full Installer. Once installed the Solo 3 button on the FW1884 and FE8 will no longer send a MIDI message upon button release causing the unwanted panning to occur. No other controls are affected. · Added workaround for an issue in Digital Performer that would cause random MIDI notes to be lost during heavy MIDI traffic. Windows Driver · ... -
Page 26: Known Issues
Known Issues Shortcut Keys in Logic The illumination state of these keys is not being updated correctly. This will be fixed in a future release of the Logic main app. Control Panel Key in OSX Occasionally may require two presses to open the FW1884 control panel, especially immediately after switching sample rates. Mac G5 Kernel Issues Some testers have reported the following issues on Mac G5 computers: · MIDI dropouts (Fixed in Driver Version 1.30) · Audio dropouts (Fixed in Driver Version 1.30) · System hang (Fixed in Driver Version 1.30) Page 26 of 35 ... -
Page 27: 1.30 Driver Release Notes
V 1.30 Driver Release Notes Please note that V 1.30 drivers require firmware #173. For the Mac, this firmware updater was in the archive you downloaded from the TASCAM web site. For the PC, it is a separate updater from the driver updater and can be run before or after updating the driver. Virtual MIDI Ports With Version 1.30 it is now possible to assign physical controls in the MIDI Control layer to Virtual MIDI Ports accessible by the host computer via the FireWire connection. This allows an app running on the host computer to have its parameters controlled using standard MIDI controller messages. To use this new feature: 1. Enter MIDI Programming Mode by pressing SHIFT + MIDI CTRL on the FW 1884 2. Operate any surface control to make it editable in the MIDI Programming tab 3. Select VP1 (Virtual Port 1) or VP2 (Virtual Port 2) using the check boxes at the bottom of the tab. You may wish to uncheck any boxes representing the four physical MIDI ports. 4. If the software app you wish to control offers a Learn function, enable it then operate the control to complete the link. If Learn is not available in your app, it is possible to manually set the output messages to anything needed within the Action section of the MIDI Programming tab. 5. Press MIDI CTRL to exit MIDI Programming mode. It is possible to set all parameters in the MIDI Control layer back to factory default by pressing SHIFT + CTRL + F8. Note that this reset can only be performed when in normal operating mode, not MIDI Programming mode. GSIF2 Support Version 1.30 for Windows supports the TASCAM GSIF2 driver protocol for GigaStudio 3. Please note that V 1.30 will still work with older versions of GigaStudio. GSIF2 adds three features when used with GigaStudio 3: · Kernel Level MIDI for the lowest possible MIDI latency and jitter. To use Kernel Level MIDI, select the FW1884’s “GSIF – low latency” MIDI ports from within the Hardware tab in the System Settings window of GigaStudio. Compare normal ... -
Page 28: Mac Osx 10.4 (Tiger )
Mac OSX 10.4 (Tiger) At the time of this writing, V 1.30 has been tested with Beta versions of Tiger and found to be compatible. However further testing is needed with the Release version of Tiger to ensure compatibility – check the TASCAM web site before for news before upgrading to Tiger. Maintenance Items · The FW1884 Control Panel now opens automatically any time SHIFT + MIDI CTRL is pressed, entering MIDI Programming mode. · The FW1884 Control Panel now opens & closes more reliably with the shortcut key. · MIDI SysEx output overflow issues have been addressed. · Problems when using the FW1884 with Sonar on a HyperThreading enabled PC have been corrected. · Problems syncing the FW1884’s physical faders to DAW faders when opening a previously saved DAW project have been corrected. This was reported when using the FW1884 in Mackie Control emulation with Steinberg apps. Page 28 of 35 ... -
Page 29: 1.40 Driver Release Notes
V 1.40 Driver Release Notes Cubase LE and Cubase SE Support Control surface support for these versions of Steinberg’s Cubase has been added. Please see the document titled, “Cubase LE Setup” for details. New Features SONAR It is possible to control any of the three EQs in SONAR using the FW1884. Use the key commands below to assign the FW1884’s physical controls to the desired EQ: SET + HI = Sonitus track EQ SET + HIMID = Sonitus plugin EQ SET + LOMID = Cakewalk plugin FXEQ Maintenance Items OSX Previously custom MIDI programming of keys could get stuck in Controller mode in the MIDI Programming tab of the control panel. This has been fixed. Page 29 of 35 ... -
Page 30: 1.50 Driver Release Notes
V 1.50 Driver Release Notes The following describes how to setup Cubase SX 2.2, Cubase SX3, Nuendo 2.2 and Nuendo 3 for the FW1884 and how to use the FW1884 features to control the DAW app. Fixed Since v1.50 Public Beta The issue below was discovered during Public Beta and has been fixed in this Release: · Adjusting a Pan control after adjusting an EQ control will intermittently adjust the EQ control. Installation There are two Windows files available, a Full Installer and an Updater. Select the correct one to use from the following guide: · If you are running Windows XP Service Pack 1 and have not installed any FW 1884 drivers, use the 10MB Full Installer · If you are running Windows XP Service Pack 1 and have previously installed an FW1884 Full Installer, use the Updater. · If you are running Windows XP Service Pack 2, use the Updater. Setup 1. In the FW1884 Control Panel, select Cubase SX / Nuendo under Control Protocol 2. In the Steinberg app, select Devices > Device Setup. a. If using Cubase SX 2.2 or Nuendo 2.2, click on the Add/Remove tab. b. Add one Mackie Control device. c. Click on the Setup tab and assign the Mackie Control device’s MIDI In and Out to the FW1884’s control port. Press Apply. 3. If using Cubase SX 3 or Nuendo 3, click on the + sign in the upper left of the Device Setup window and add one Mackie Control device. 4. Click on the newly created Mackie Control device and assign its MIDI In and Out to the FW1884’s control port. Press Apply. 5. Note whether Enable Auto Select is checked. When checked, this automatically selects the channel in the DAW corresponding to the touch sensitive fader when ... -
Page 31: Operation
Operation Channel Strips The channel strips controls directly affect the associated onscreen channel. There is also a special control: REC + any SEL toggle track’s record enable Note: When you SOLO a channel, Cubase SX 2 also selects that channel. Channel Encoders Encoder coarse adjustment of selected parameter CTRL + Encoder fine adjustment of selected parameter NOTE: For proper operation, press the CTRL button and then turn the encoder. Pressing CTRL while you are turning the encoder you may result in unwanted changes to AUX or EQ parameters. In the “Encoders” section are buttons that determine the functions of the channel encoders. Pressing PAN sets them for panning. Pressing one of the AUX 18 buttons sets the encoders for Send (Aux) level adjustment. There are two AUX modes: · Single Aux Mode: In this mode a single AUX button is lit. Turning a channel encoder selects that channel strip (the channel’s SEL button will light) and adjusts the level of the aux send corresponding to the lit AUX button. · Single Channel Mode: In this mode all eight AUX buttons are lit. The channel encoders are used to adjust aux send levels 18 of the selected channel. To switch from Single Aux Mode to Single Channel Mode, press the lit AUX button. All eight AUX buttons should now light. To switch from Single Channel Mode to Single Aux Mode, press the AUX button that you want to be active. The other AUX button lights will go out. You can switch from either aux mode to pan mode. When you switch back the system remembers which aux mode you were last in. When the CTRL button is held down, the AUX buttons display the state of Aux Send on/off for that selected channel. Holding CTRL and pressing an AUX button toggles that Aux Send on and off. Please note that an Aux Send can only be turned on if it is first routed to an effect, group, or output channel … otherwise it will just briefly flash when you try to turn it on. Please note that the FLIP button is inactive in Cubase SX mode. Page 31 of 35 ... -
Page 32: Transport
Transport The five main transport buttons (REW, F FWD, STOP, PLAY, RECORD) control their equivalent onscreen buttons. In addition, the buttons in this part of the FW1884 have these functions: SHIFT + REW go to beginning of project SHIFT + F FWD go to end of project CTRL + RECORD toggle punch in on/off < BANK Shift left 8 channels BANK > Shift right 8 channels CTRL + < BANK Shift left 1 channel CTRL + BANK > Shift right 1 channel IN go to left locator OUT go to right locator SET + IN userprogrammable Shift + F7; see below SET + OUT userprogrammable Shift + F8; see below << LOCATE previous marker LOCATE >> next marker SHTL user programmable as “User B” The data wheel can be used to move the timeline forwards and back. The arrow keys operate just like the arrow keys on your computer keyboard. Page 32 of 35 ... -
Page 33: Shortcut Buttons
Shortcut Buttons The buttons to the left of the faders do the following functions: SAVE/F1 save REVERT/F2 (not implemented by Cubase SX 2’s Mackie Control device) ALL SAFE/F3 open/edit editor for the currently selected track CLR SOLO/F4 clear all solo’s SHIFT + CLR SOLO clear all mutes MARKER/F5 add a marker LOOP/F6 toggle cycle on/off CUT user programmable as F5; see below DEL user programmable as F6; see below COPY user programmable as F7; see below PASTE user programmable as F8; see below ALT/CMD (not used) UNDO undo CTRL + UNDO redo SHIFT used as a command modifier CTRL used as a command modifier Page 33 of 35 ... -
Page 34: Automation Buttons
Automation Buttons These are used with Cubase SX 2 for a combination of automation and nonautomation functions: READ toggle read automation for the selected channel SHIFT + READ toggle read automation for all channels WRITE toggle write automation for the selected channel SHIFT + WRITE toggle write automation for all channels TOUCH show Project window CTRL + TOUCH toggle between SMPTE time and beats/bars LATCH toggle Mixer window to front/back CTRL + LATCH toggle SoftLCD screen between parameter names and values NUDGE as Channel Views In the lower left of the mixer screen are five icons that represent different kinds of tracks: audio, groups, VST instruments, ReWire, and MIDI. You can make different sets of tracks visible and invisible, and save that set as a “channel view.” Click on “Store View Set” and “Remove View Set” icons and you can add and remove settings, which can also be recalled (in order) using variations of the NUDGE buttons as follows: < NUDGE Channel view 1 NUDGE > Channel view 2 SET + < NUDGE Channel view 3 SET + NUDGE > Channel view 4 CTRL + < NUDGE Channel view 5 CTRL + NUDGE > Channel view 6 REC + < NUDGE Channel view 7 REC + NUDGE > ... -
Page 35: User Programmable Functions
User Programmable Functions There are 18 userprogrammable functions that can be used with Cubase SX 2. To program these, go to “Device/Device Setup …”, select “Mackie Control” on the left and the “Setup” tab on the right. You can now program the USER A (the footswitch), USER B (the SHTL button), and 8 buttons, both unshifted and shifted. Buttons Mapped to Cubase SX 2’s Footswitch User A SHTL User B F7 F1 Shift + F7 Shift + F1 F8 F2 Shift + F8 Shift + F2 F9 F3 Shift + F9 Shift + F3 F10 F4 Shift + F10 Shift + F4 CUT F5 Shift + CUT Shift + F5 DEL F6 Shift + DEL Shift + F6 COPY F7 SET + IN Shift + F7 PASTE F8 ...
Need help?
Do you have a question about the Frontier FW-1884 and is the answer not in the manual?
Questions and answers