
Related Manuals for Kyocera DuraMax


Summary of Contents for Kyocera DuraMax
-
Page 1: User Guide
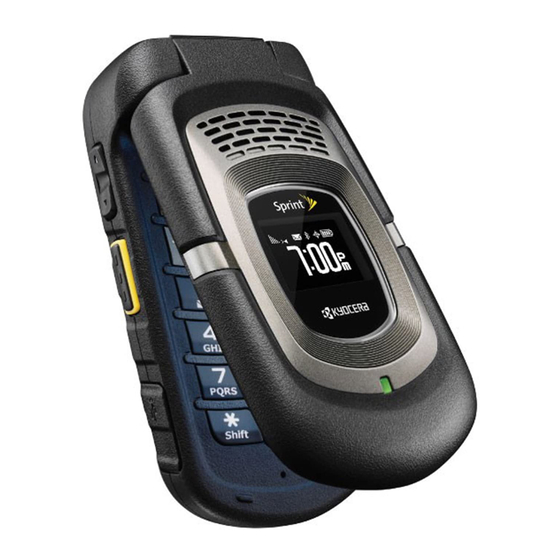
KYOCERA DuraMax User Guide ©2011 Sprint. SPRINT and the logo are trademarks of Sprint. KYOCERA is a registered trademark of Kyocera Corporation. Other marks are the property of their respective owners. -
Page 2: Table Of Contents
Get Started ...1 Your Phone at a Glance ...1 Set Up Your Phone...2 Activate Your Phone ...2 Set Up Voicemail ...3 Sprint Account Information and Help ...4 Sprint Account Passwords ...4 Manage Your Account...4 Sprint Support Services ...5 Phone Basics ...6 Your Phone‘s Layout ...7 Key Functions ...7 Turn Your Phone On and Off ...9... - Page 3 Call Using a Speed Dial Number ...22 Call Using Abbreviated Dialing Features ...22 Call a Phone Number With Pauses ...23 Call a Phone Number in a Message ...23 Call Emergency Numbers ...24 Receive Phone Calls ...25 Answer an Incoming Call With the Phone Open ...25 Answer an Incoming Call With the Phone Closed ...25 Answer an Incoming Call in Speakerphone Mode ...26 Answer a Roam Call With Roaming Guards Enabled ...26...
- Page 4 Hearing Aid Device Compatibility ...33 Sprint Direct Connect ...35 About Sprint Direct Connect ...35 Before Making Your First Direct Connect Call ...35 Your Direct Connect Number ...36 Dial Direct Connect Numbers ...36 Save a Direct Connect Number ...37 Display Your Direct Connect Number ...37 Make and Answer Direct Connect Calls ...38 Make a Direct Connect Call by Entering a Number ...38 Make a Direct Connect Call From Contacts ...39...
- Page 5 Reply to an Invite ...49 Settings ...51 Display Settings ...51 Change the Screen Saver ...51 Change the Brightness...52 Change the Backlight Settings ...52 Set the Notification Pop-up ...52 Select a Picture ID ...52 Power Save Mode ...53 Change the Clock/Calendar Display...53 Set a Custom Greeting...53 Change the Phone‘s Menu Style ...53 Change the Font Size ...53...
- Page 6 Roaming ...60 Roaming on Other Networks ...60 Roaming Settings...61 Roaming Guards ...61 Security Settings ...63 Lock Your Phone ...63 Limit Use ...64 Delete Phone Content ...65 Reset Your Phone and Phone Content ...66 Security Features for Data Services ...66 History ...68 View History ...68 The History List ...68 History Icons ...68...
- Page 7 Edit a Contacts Entry ...76 Edit a Contacts Entry ...76 Delete a Contacts Entry ...76 Add a Number to a Personal Entry ...77 Assign a Ringer to a Personal Entry...77 Assign a Picture to a Personal Entry ...77 Add Members to a Group Entry ...78 Remove Members From a Group Entry ...78 Find Contacts Entries ...78 Find an Entry From Contacts ...78...
- Page 8 Bluetooth Menu ...92 Pair Bluetooth Devices ...92 View the Trusted Devices List ...93 Send Items via Bluetooth ...94 microSD Card ...94 Remove or Insert the microSD Card ...94 microSD Card Settings...96 microSD Card Folders...97 File Manager ...97 Connect Your Phone to Your Computer ...98 Voice Services ...99 Automatic Speech Recognition (ASR) ...99 Manage Voice Memos ...
- Page 9 Send Pictures and Videos ... 114 Send Pictures and Videos Using the Messaging Feature ... 115 Send Pictures and Videos Using the Bluetooth Feature ... 115 Print Pictures ... 115 Print Pictures From Your Phone ... 116 Digital Print Order Format (DPOF) ... 117 Web and Data ...
-
Page 10: Get Started
Get Started This section gives you all the information you need to set up your phone and Sprint service the first time. Your Phone at a Glance Set Up Your Phone Activate Your Phone Set Up Voicemail Sprint Account Information and Help Your Phone at a Glance Get Started... -
Page 11: Set Up Your Phone
Set Up Your Phone You must first install and charge the battery to begin setting up your phone. 1. Install the battery. Insert the battery into the battery compartment, making sure the connectors align ). Gently press down to secure the battery ( ... -
Page 12: Set Up Voicemail
● If you received your phone in the mail and it is for a new Sprint account or a new line of service, it is designed to activate automatically. ● If you received your phone in the mail and you are activating a new phone for an existing number on your account (you‘re swapping phones), you can activate on your computer online or directly on your phone. -
Page 13: Sprint Account Information And Help
Note: Voicemail Password – Sprint strongly recommends that you create a password when setting up your voicemail to protect against unauthorized access. Without a password, anyone who has access to your phone is able to access your voicemail messages. Sprint Account Information and Help Find out about account passwords and information about managing your account and finding help. -
Page 14: Sprint Support Services
● View and pay your bill. ● Enroll in Sprint online billing and automatic payment. ● Purchase accessories. ● Shop for the latest Sprint phones. ● View available Sprint service plans and options. ● Learn more about data services and other products like games, ringers, screen savers, and more. -
Page 15: Phone Basics
Phone Basics Your phone is packed with features that simplify your life and expand your ability to stay connected to the people and information that are important to you. The topics in this section will introduce the basic functions and features of your phone. Phone Software Upgrades - Updates to your phone‘s software may become available Tip: from time to time. -
Page 16: Your Phone's Layout
Your Phone’s Layout Key Functions ● Earpiece lets you hear the caller and automated prompts. ● Main Screen displays all the information needed to operate your phone, such as the call status, the Contacts list, the date and time, and the signal and battery strength. ●... - Page 17 ● Camera Key lets you activate the camera or video mode and take pictures and videos with the phone open. ● TALK Key allows you to place or receive calls, answer Call Waiting, use Three-Way Calling, or activate Automatic Speech Recognition (ASR). ●...
-
Page 18: Turn Your Phone On And Off
Sprint-approved or Kyocera-approved batteries and accessories can be found at Sprint Stores or through Kyocera; or call 1-866-866-7509 to order. They‘re also available at sprint.com. Battery Capacity Your phone is equipped with a Lithium Ion (Li-Ion) battery. It allows you to recharge your battery before it is fully drained. -
Page 19: View The Display Screen
For a quick check of your battery level, glance at the battery charge indicator located in the upper right corner of your phone‘s display screen. When there are approximately five minutes of talk time left, the battery icon ( After an additional five minutes or so, the phone sounds a warning tone three times and then turns off. - Page 20 No Service - Your phone cannot find a usable signal. Roaming - Your phone is ―roaming‖ off the Nationwide Sprint Network. DC Unavailable - Direct Connect services are unavailable in your current location. Data Service Available - Sprint data service is available. When active, the icon is animated.
- Page 21 Urgent Messages - You have one or more new urgent messages waiting. Multiple Alerts - You have different kinds of alerts waiting. Urgent Multiple Alerts - You have different kinds of alerts (including urgent messages) waiting. Application Alerts - You have alert messages from Java applications activated in the background.
- Page 22 Mirror Image Mode - The picture/video mode is set to Mirror Image. Night/Dark Mode - The picture/video mode is set to Night/Dark. Self-Timer (5 Seconds) - The self-timer is set to 5 seconds. Self-Timer (10 Seconds) - The self-timer is set to 10 seconds. Multiple Shots - The multiple shots function is enabled.
-
Page 23: Navigate Through The Menus
Multitasking Virtual Machine - Java applications are running. The number next to the plus sign indicates the number of running applications. Navigate Through the Menus The navigation key on your phone lets you scroll through onscreen items. To navigate through a menu, press the navigation key up or down. -
Page 24: Enter Text
Enter Text You can type on your phone using various input modes. Select a Text Input Mode T9 Text Input ABC Mode Set Text Entry Options Select a Text Input Mode Your phone provides convenient ways to enter letters, numbers, and symbols whenever you are prompted to enter text. -
Page 25: T9 Text Input
T9 Text Input T9 Text Input lets you enter text by pressing keys just once per letter. To select the T9 Word mode when entering text, see T9 Text Input uses an intuitive word database to analyze the letters you enter and create a suitable word. -
Page 26: Simple Data Exchange
1. When entering text, press OPTIONS (right softkey) > Text Options. – or – Press > Settings > Text Entry. 2. Highlight an option and press Word Complete to suggest possible words based on letters you have entered. Next Word Complete to automatically display the word that may follow the current text input. - Page 27 Email Address Options ► Highlight an email address, press Send Message to select Message. The messaging application will open and the email address will appear as the message‘s recipient. Share to select Message. The messaging application will open and the email address will appear in the message body.
- Page 28 Web Address (URL) Options ► Highlight a Web address (URL), press Browse to open the browser to the Web page. Share to select Message. The messaging application will open and the Web address will appear in the message body. ...
-
Page 29: Phone Calls & Settings
Phone Calls & Settings With the Nationwide Sprint Network, you can enjoy clear calling across the country. This section explains the features related to phone calls. Make Phone Calls Receive Phone Calls End Phone Calls Missed Call Notification Voicemail Phone Call Options Phone Call Settings Note: The calling information in this section refers to traditional wireless phone calls. -
Page 30: Call With The Phone Closed
1. Enter a phone number from standby mode. (If you make a mistake while dialing, press to erase the numbers.) 2. Press , or the external speaker button. 3. Press when you are finished. Call With the Phone Closed You can make a phone call using Automatic Speech Recognition (ASR) with the phone closed. It also works with the phone open. -
Page 31: Call Using The Plus (+) Code
3. Press to dial the entry‘s default phone number. – or – To dial another number from the same entry, press number, and then press Call Using the Plus (+) Code When placing international calls, use Plus Code Dialing to automatically enter the international access code for your location (for example, 011 for international calls made from the U.S.). -
Page 32: Call A Phone Number With Pauses
2. Select Prepend > On. 3. Enter a five- or six-digit number and press To place a call using Abbreviated Dialing: 1. Enter the four or more digits of any part of a Contacts entry‘s phone number to use the Contacts Match feature. -
Page 33: Call Emergency Numbers
2. Select a message with the number you want to call. 3. Select the number and select Call. For more information on utilizing the information in a message, see Call Emergency Numbers You can place calls to 911 even if your phone is locked or your account is restricted. ►... -
Page 34: Receive Phone Calls
Receive Phone Calls Your phone notifies you of incoming calls in the following ways: ● The phone rings or vibrates. ● The LED indicator flashes. ● The backlight illuminates. ● The screen displays an incoming call message. If the incoming call is from a number stored in your Contacts, the entry‘s name is displayed. The caller‘s phone number may also be displayed, if available. -
Page 35: Answer An Incoming Call In Speakerphone Mode
Answer an Incoming Call in Speakerphone Mode ► Press or the external speaker button. Answer a Roam Call With Roaming Guards Enabled 1. Press 2. Read the message and press Roaming Guards for more information on Roaming Guards. Mute the Ringer and Stop the Vibration ►... -
Page 36: End Phone Calls
● Voice Memo to record the other party‘s voice. ● Phone Info to display information about your phone. ► Press MUTE/UNMUTE (left softkey) to mute/unmute the microphone. ► Press the volume button up or down to adjust the receiver volume. ►... -
Page 37: Voicemail Notification
2. Follow the system prompts to: Create your password. Record your name announcement. Record your greeting. Voicemail Password – Sprint strongly recommends that you create a Important: password when setting up your voicemail to protect against unauthorized access. -
Page 38: Retrieve Your Voicemail Messages
Retrieve Your Voicemail Messages You can review your messages directly from your wireless phone or from any other touch-tone phone. Use Your Phone to Access Your Messages Press and hold – or – In standby mode, press MESSAGING (left softkey) > Voicemail. Enter your voicemail password if prompted. -
Page 39: Call Waiting
2. Enter the number you want to call. 3. Press To permanently block your number, call Sprint Customer Service. Call Waiting When you‘re on a call, Call Waiting alerts you to incoming calls by sounding a beep. Your phone‘s screen informs you that another call is coming in and displays the caller‘s phone number (if available). -
Page 40: Phone Call Settings
To activate Call Forwarding: 1. Enter 2. Enter the area code and phone number to which you want your calls forwarded. 3. Press . (You will hear a tone to confirm the activation of Call Forwarding.) To deactivate Call Forwarding: 1. -
Page 41: Alert Notification
3. Highlight the time you would like your phone to wait before answering and press Alert Notification Set your phone to alert you with an audible tone when you change service areas, once a minute during a voice call, or when a call has been connected. 1. -
Page 42: Hearing Aid Device Compatibility
2. Press 3. Select one of the following options: TTY Off to disable TTY mode. TTY VCO to enable TTY mode in Voice Carry Over mode, which allows you to send voice and receive text during a call. ... - Page 43 Off to use your phone without a hearing aid device. Phone Calls & Settings...
-
Page 44: Sprint Direct Connect
Sprint Direct Connect ® ® on your Sprint phone offers instant, two-way ―walkie-talkie-style‖ Sprint Direct Connect communication between you and your family, friends, and co-workers, all at the click of a button. Perfect for get-in get-out conversations such as checking status, getting information, getting directions, or coordinating with others—fast. -
Page 45: Your Direct Connect Number
Important: When the Direct Connect feature is active, your phone‘s data services are enabled and the Net Guard feature is disabled (Settings > Others > Data Settings > Data and Net Guard). Your Direct Connect Number Your Sprint phone allows you two different options for your Direct Connect number: ●... -
Page 46: Save A Direct Connect Number
Highlight a contact and press Connect number. Save a Direct Connect Number 1. Use your keypad to enter a Direct Connect number. The Direct Connect number may be the ten-digit wireless phone number of the contact. – or – ... -
Page 47: Make And Answer Direct Connect Calls
Make and Answer Direct Connect Calls You can make a Direct Connect call by entering a Direct Connect number manually or by selecting an entry containing a Direct Connect number in your Contacts or History. For information on saving Direct Connect numbers to Contacts, see Note: Bluetooth devices cannot be used for Direct Connect calls. -
Page 48: Make A Direct Connect Call From Contacts
Wait for ―Push to Talk‖ to appear onscreen. Press and hold the DC button. Wait for a tone to sound and ―Me‖ to appear onscreen before you begin talking. 4. Release the DC button to listen. 5. Press to end the call. -
Page 49: Make A Direct Connect Call Using A Speed Dial Number
2. Highlight a Direct Connect entry and press and release the DC button. 3. Continue the Direct Connect call as described previously. Tip: To redial your most recent Direct Connect call, press and hold the DC button. Make a Direct Connect Call Using a Speed Dial Number ►... -
Page 50: End A Direct Connect Call
1. Press or the external speaker button to either enable or disable the Direct Connect speakerphone feature. If you enable the Direct Connect speakerphone ( ), you will hear the caller‘s voice through the speakerphone on the front of the phone. ... -
Page 51: Call Alerts
Set Direct Connect Permissions 1. Press > Settings > DC Settings > Permissions. 2. Select Accept all DC calls, except those from numbers I block or Reject all DC calls, except those from numbers I allow. 3. If you selected Accept all DC calls, except those from numbers I block, select Block Another # >... -
Page 52: Send A Call Alert
Send a Call Alert Send a notification to start a Direct Connect call. 1. Enter a Direct Connect number or select a number from History or Contacts. Note: When sending a Call Alert, make sure you select the Direct Connect number for the person you are trying to reach. -
Page 53: Group Connect
Group Connect A Group Connect call is a Direct Connect call made to up to 20 Direct Connect users with Sprint phones nationwide at one time. You can make a Group Connect call in several different ways: ● By setting up a group entry in Contact on your phone. ●... - Page 54 calls are not going through, please check to see whether your contact is using a Sprint phone. Make a Group Connect Call From History 1. Press > History. 2. Highlight a group entry and press the DC button. 3. Continue the Group Connect call as described previously. Make a Group Connect Call Without Saving 1.
-
Page 55: Group Connect Call Information
End the call for everyone: terminates the call session for all connected members. Allow the call to continue: keeps the call active even after you hang up. The call will remain active until the last members disconnect. Group Connect Call Information During a Group Connect call, the following information may appear on your screen: ●... -
Page 56: Update Teamdc Groups
3. Add TeamDC members directly (using Direct Connect numbers) or select individual members or groups from your Contacts list. 4. (Optional) Click Set Talker Priority to select a Talker Priority for each group member (default is Medium). You can assign a priority of Low, Medium, or High to each member. ... -
Page 57: Remove Yourself From A Teamdc Group
Join or Rejoin a TeamDC Call If you are not available at the beginning of a call, or if you drop off the call temporarily, you can rejoin the in-progress TeamDC call. 1. Press > History. 2. Highlight the TeamDC entry and press the DC button. 3. -
Page 58: Invites
Invites You can send an Invite to initiate a Group Connect call. When the group members receive an Invite, their phones sound a tone and display your name (if it is in Contacts). While on a call, you may also send an invitation message to a specific Contacts entry, or to the group members who have not joined the call yet. - Page 59 ► Press IGNORE (right softkey). Sprint Direct Connect...
-
Page 60: Settings
Settings This section provides an overview of items you can change using your phone‘s Settings menus. Display Settings Volume Settings Ringer Settings Messaging Settings Phone Setup Options Roaming Security Settings Display Settings Adjusting your phone‘s display settings not only helps you see what you want, it can also help increase battery life. -
Page 61: Change The Brightness
2. Select a screen saver option by pressing the navigation key up or down, and select a screen saver. Change the Brightness You can adjust the brightness on the main screen. 1. Press > Settings > Display > Brightness. 2. Highlight a brightness level and press Change the Backlight Settings Select how long the display screen remains backlit after any keypress is made. -
Page 62: Power Save Mode
2. Select Contact, Unsaved Numbers, or Private / Unknown. If you select Contact, select an entry. 3. Select a picture ID option and press 4. Select an image and press Power Save Mode This feature helps conserve your battery power by automatically adjusting the backlight setting of your phone. -
Page 63: Display Language
Press > Settings > Others > Accessibility > Font Size. Highlight a font size. You can see the current and new font sizes in the display window above the menu. If you are satisfied with the font size, press SAVE (left softkey). Display Language You can choose to display your phone‘s onscreen menus in English or in Spanish. -
Page 64: Ringer Settings
Ringer Settings You can assign a ringer or vibration pattern to incoming calls, messages, etc. and also enable audio guidance. Ringers Set Up Voice Guide Select a Vibration Pattern Ringers Ringers help you identify incoming calls and messages. You can assign ringers to individual Contacts entries, types of calls, and messages. -
Page 65: Set Up Voice Guide
Get New Ringers A wide variety of new ringers is available from the Sprint Digital Lounge, and you can access them right from your phone. (Additional charges may apply, but some are free.) 1. Press > Settings > Ringers. 2. Select a ringer type category (Incoming Calls, Voicemail, Messages, etc.) and any applicable subcategories. -
Page 66: Messaging Settings
Messaging Settings Your phone‘s advanced messaging capabilities let you send and receive different kinds of messages without placing a voice call. Messaging settings allow you to create a signature with each sent message and your own preset messages. Set Clear Alerts Icon Message Alerts Set a Callback Number Add a Customized Signature... -
Page 67: Manage Preset Messages
1. In standby mode, press MESSAGING (left softkey) > OPTIONS (right softkey) > Signature. 2. Select On. (If you do not wish to attach a signature to your outgoing messages, select Off.) 3. Enter a signature and press Manage Preset Messages Your phone is loaded with 20 preset messages to help make sending messages easier. -
Page 68: Navigation Key Shortcuts
Direct Connect Button Keyguard Headset Mode Navigation Key Shortcuts You can use the navigation keys as shortcuts to access specific menu items directly from standby mode. You can reassign the default shortcuts to the menu items you choose. 1. Press >... -
Page 69: Roaming
Press > Settings > DC Settings > Headset Mode > Headset button starts Voice calls. [TALK Key] or Headset button starts DC calls. [DC button]. To set the audio mode: ► Press > Settings > Others > Headset Mode > Earpiece > Stereo or Mono. To set the ringer mode: ►... -
Page 70: Roaming Settings
1. Dial your ten-digit wireless phone number. 2. When you hear your voicemail greeting, enter 3. Enter your password at the prompt and follow the voice prompts. When you return to the Nationwide Sprint Network, voicemail notification will resume as normal. Roaming Settings Your phone allows you to control your roaming capabilities. - Page 71 you are using the Nationwide Sprint Network.) Roaming Guards can be configured separately for domestic and international usage. To turn Roaming Guards on or off: 1. Press > Settings > Others > Roaming > Roaming Guards > Domestic or International. 2.
-
Page 72: Security Settings
Security Settings The Security settings menus let you set phone security, lock code, and more. Lock Your Phone Limit Use Delete Phone Content Reset Your Phone and Phone Content Security Features for Data Services Lock Your Phone When your phone is locked, you can only make calls to 911 and Sprint Customer Service. 1. -
Page 73: Limit Use
1. Press > Settings > Lock Phone and enter your lock code. 2. Select Lock Code Hint. 3. Edit the hint and press – or – Delete the hint by pressing Tip: If you can‘t recall your lock code, try using the last four digits of your wireless phone number or check your lock code hint. -
Page 74: Delete Phone Content
5. Select On/Off > On. Read the message and press OK (left softkey). Note: If you select On, you cannot add, edit, and delete any Contacts or Group entries. 6. Select Allowed Contacts > All Contacts or Choose Contacts. If you select Choose Contacts, select <Add Contact>, and then choose a member from the list. -
Page 75: Reset Your Phone And Phone Content
My Photos & Videos to delete all pictures and videos stored in My Photos & Videos. File Manager(In Phone) to delete all files saved in File Manager. All Stuff to delete all user-added data. 4. Read the message and press DELETE (left softkey). Reset Your Phone and Phone Content This option lets you clear different types of personal information stored on your phone, reset your phone to factory settings, or both. - Page 76 2. Read the disclaimer and press DISABLE (right softkey) to sign out. Net Guard When you first connect to the Web, the Net Guard will be displayed to confirm that you want to connect. The Net Guard helps you avoid accidental connections. You can disable the Net Guard in the future by selecting Auto-Connect when you see Net Guard displayed.
-
Page 77: History
History History keeps track of the calls placed, received, and missed on your phone. View History History Options Make a Call From History Save the Information in Your History Delete History View History History is a list of the last 60 incoming, outgoing, or missed phone calls and Direct Connect calls including Call Alerts. -
Page 78: History Thread
Phone Call Direct Connect Call, Call Alert Group Connect Call TeamDC Call, Opt-In TeamDC Call Group Connect Invite Opt-In TeamDC Invite History Thread The History thread screen shows all history for a selected entry. You can also keep track of all the messages you have sent and received for the selected entry. -
Page 79: Make A Call From History
● New Group to create a new Group entry. See ● Contact Details to display information about the entry if it has already been saved in your Contacts. ● Save Contact to save a phone number. See ● Group Details to display information about the group if it has already been saved in your Contacts. -
Page 80: Save A Number From History
Save a Number From History 1. Press > History. 2. Highlight an entry and press OPTIONS (right softkey) > Save Contact. 3. Select New Entry or Existing Entry. 4. If New Entry was selected, select a number type, and then enter the new entry name. –... - Page 81 2. Highlight an entry you wish to delete and press OPTIONS (right softkey) > Delete. 3. Select Delete All to delete all entries. 4. If you are certain you want to delete one or all entries from History, press DELETE (left softkey).
-
Page 82: Contacts
Contacts Your phone‘s Contacts help you stay in touch with family, friends, and colleagues by keeping track of all their contact information. This section explains how to use your phone‘s Contacts. About Contacts View Contacts Create a New Contacts Entry Edit a Contacts Entry Find Contacts Entries Use Contacts Information in Other Applications... -
Page 83: View Contacts
View Contacts Access your Contacts entries currently stored in your phone. The Contacts List Contacts Details View History From Contacts The Contacts List 1. In standby mode, press CONTACTS (right softkey). You will see the Contacts list. 2. Highlight a personal entry to show the entry‘s main phone number, or highlight a group entry to show how many members it has. -
Page 84: Create A Group Entry
3. Enter the phone number or Direct Connect number and press Connect Number for information on Direct Connect numbers. 4. Highlight a number type for the entry (Mobile, Mobile+DC, Home, Work, DC Only, Pager, Fax, or Other) and press 5. Press DONE (left softkey). After you have saved the number, the new Contacts entry is displayed. -
Page 85: Edit A Contacts Entry
3. Select New Entry or Existing Entry. 4. If you chose New Entry, select a number type, and then enter the new entry name. – or – If you chose Existing Entry, select an entry to which you want to save the number, and then highlight a number type and press 5. -
Page 86: Add A Number To A Personal Entry
Add a Number to a Personal Entry 1. In standby mode, press CONTACTS (right softkey). 2. Highlight the entry you want to add a number to and press OPTIONS (right softkey) > Edit Contact > <Add Number>. 3. Enter the new number and press 4. -
Page 87: Add Members To A Group Entry
Add Members to a Group Entry You can add a group member to an existing Group. 1. In standby mode, press CONTACTS (right softkey). 2. Highlight the group you want to add members to and press OPTIONS (right softkey) > Edit Group >... -
Page 88: Find An Entry Using The Phone Keypad
3. Highlight an entry and press left or right to display other listed numbers.) – or – Highlight an entry and press Find an Entry Using the Phone Keypad You can search Contacts entries for the numbers that contain a specific string of numbers. 1. -
Page 89: Assign Speed Dial Numbers
Navigate to get directions to the street address using Sprint Navigation. Map to display the address on a map. Note: For more information about your phone‘s navigation features, see Assign Speed Dial Numbers Your phone can store up to 98 phone numbers or Direct Connect numbers in speed dial locations. -
Page 90: Dial Sprint Services
3. Enter the four-digit lock code. Tip: If you can‘t recall your lock code, try using the last four digits of your wireless phone number. If this doesn‘t work, call Sprint Customer Service at 1-888-211-4727. Dial Sprint Services Your Contacts list is preprogrammed with contact numbers for various Sprint services. To dial a service from your Contacts: 1. - Page 91 ● Erase contact information from a lost phone. If your phone is lost or stolen, Sprint Mobile Sync can remotely remove all the contact information. You can then send the information to your replacement phone. ● Import and export contacts with online address books. Import or export contact information from or to Outlook, or other compatible databases.
-
Page 92: Messaging
Messaging Send your messages to your family and friends with text messaging (SMS) and multimedia messaging (MMS). You can also set up an email account on your phone. Text Messaging and Multimedia Messaging Email Text Messaging and Multimedia Messaging With messaging, you can send and receive messages between your phone and another messaging-ready phone. -
Page 93: Access Messages
MULTIPLE (left softkey) to select multiple recipients. Press CONTINUE (left softkey) when you have finished selecting and entering recipients. (You may include up to 40 recipients per message.) NEW ADDRESS (right softkey) to enter a recipient‘s phone number or email address directly. - Page 94 View Messages Highlight a thread and press contact, in reverse chronological order. Failed, pending, and draft messages are also listed. Highlight a message to see details for that message. ● Me - Message you sent. ● Me(Failed) - Message you did not send successfully. ●...
-
Page 95: Email
Unlock to unlock the selected message. Unlock All to unlock all messages. Note: Messages are automatically deleted starting with the oldest. To save messages, lock them. Delete to delete the selected message. Delete All to delete all messages. ... -
Page 96: Calendar & Tools
Calendar & Tools Learn how to use many of your phone‘s productivity-enhancing features. Calendar Alarm Bluetooth microSD Card Voice Services Calculator World Clock Countdown Timer Stopwatch Calendar Use Calendar to create and manage events, meeting, and appointments. Your Calendar helps organize your time and reminds you of important events. -
Page 97: Add A To Do List Item To The Calendar
4. Select a category for the event (Appointment, Meeting, etc.) by highlighting the category field and pressing 5. Select a priority for the event by highlighting the priority field and pressing 6. Select a start and end time for the event by highlighting the start and end time fields and pressing 7. -
Page 98: Calendar Alerts
6. Select a priority for the item by highlighting the priority field and pressing 7. Select a time and date for the item by highlighting the time and date field and pressing 8. Select a status for the item by highlighting the status field and pressing add an item, set it to Needs Action. -
Page 99: Alarm
Press OPTIONS (right softkey) > Schedule List or To Do List. 3. Highlight an event and press OPTIONS (right softkey) > Delete. 4. Highlight an option and press This to delete the highlighted event. Select to delete multiple events. ... -
Page 100: Bluetooth
12. Press SAVE (left softkey). Tip: Press ON or OFF (left softkey) to toggle the alarm on and off. Bluetooth ® Bluetooth is a short-range communications technology that allows you to connect wirelessly to a number of Bluetooth devices, such as headsets and hands-free car kits, and Bluetooth- enabled handhelds, computers, printers, and wireless phones. -
Page 101: Bluetooth Menu
Your phone is connected to a Bluetooth device. Your phone is connected to or communicating with a Bluetooth device via Hands- free Profile (HFP). Your phone is connected to or communicating with a Bluetooth device via Advanced Audio Distribution Profile (A2DP). The above icons will blink while your phone is communicating with a Bluetooth device. -
Page 102: View The Trusted Devices List
3. Enter the passkey and press 4. (Optional) Edit the device name and press SAVE (left softkey). Note: Due to different specifications and features of other Bluetooth compatible devices, display and operations may be different, and functions such as transfer or exchange may not be possible with all Bluetooth compatible devices. -
Page 103: Send Items Via Bluetooth
Send Items via Bluetooth Depending on your paired devices‘ settings and capabilities, you may be able to send pictures or videos, Contacts information, or other items using a Bluetooth connection. 1. Press > Tools > Bluetooth > Trusted Devices. 2. Select the device from the Trusted Devices list and press TRANSFER... (left softkey). 3. - Page 104 4. Gently pull out the card from the holder ( 5. Replace the card holder and lock it ( 6. Place the battery back into its compartment and replace the battery cover. Insert the microSD Card 1. Remove the battery cover and the battery. 2.
-
Page 105: Microsd Card Settings
6. Place the battery back into its compartment and replace the battery cover. Note: Make sure your battery is fully charged before using the microSD card. Your data may become damaged or unusable if the battery runs our while using the microSD card. microSD Card Settings Create Folders in the microSD Card The following steps allow your phone to create default folders for storing files in your microSD... -
Page 106: Microsd Card Folders
1. Press > Tools > Memory Storage > Save Contacts. (You will see a confirmation message.) 2. Press YES (left softkey) to proceed. (Please wait while the system creates your data.) microSD Card Folders Display Your microSD Card Folders All the files stored in your microSD are accessible through your microSD card folders. 1. -
Page 107: Connect Your Phone To Your Computer
● Move to Card/Move to Phone to move a file from one storage area to another. ● Copy to copy a file from the current folder to another folder in your phone or in the memory card. ● Copy to Card/Copy to Phone to copy a file from one storage area to another. ●... -
Page 108: Voice Services
2. Press OK (left softkey) to continue. 3. Connect your phone to your computer using a compatible USB cable. (Wait for the connection to be completed. When connected, the host computer will automatically detect your phone.) To remove the connection: ►... - Page 109 Activate ASR ► From standby mode, press and hold Tip: You can also activate ASR and use certain features with the phone closed. Press and hold the external speaker button while in standby mode to turn the keyguard off (if it is enabled), and then press and hold the external speaker button and follow the voice prompts.
- Page 110 Send a Message Using ASR 1. Press and hold 2. When you hear ―Say a command,‖ say ―Send Message.‖ 3. When you hear ―Say the name or number,‖ say a name or a phone number. 4. When you hear ―Which location?,‖ say a number type (for example, ―Mobile‖). The phone displays the text entry screen.
- Page 111 3. When you hear ―Which status item?,‖ say a command. ASR Settings To change ASR confirmation: 1. Press and hold 2. Press SETTINGS (right softkey) > Confirmation. Automatic to ask for confirmation only when the system is not sure what you said. ...
-
Page 112: Manage Voice Memos
3. Highlight an option and press North America to recognize only numbers valid in North America. Other to recognize any number regardless of location. To display the ASR software version: 1. Press and hold 2. Press SETTINGS (right softkey) > About. Manage Voice Memos Use your phone‘s Voice Memo to record brief memos to remind you of important events, phone numbers, or grocery list items and to record call memos of the other party‘s voice during a... - Page 113 To play multiple memos: 1. Press > Tools > Voice Services > Voice Memo > List. 2. Select In Phone or Memory Card. 3. Press OPTIONS (right softkey) > Play > Multiple and select memos you want to play. 4. Press PLAY (left softkey). Voice Memo Options Your phone offers several options for managing voice memos you have recorded.
-
Page 114: Calculator
Calculator Your phone comes with a built-in calculator. 1. Press > Tools > Calculator. 2. Enter numbers using your keypad. Press the appropriate key for an arithmetic option ( Press the left softkey to enter a decimal point. ... - Page 115 2. Press MODE (left softkey) to select split timing or lap timing. 3. Press START (right softkey) to start the stopwatch. 4. Press SPLIT or LAP (left softkey) to record the time. 5. Press STOP (right softkey) to stop timing. 6.
-
Page 116: Camera
Camera You can use the camera or camcorder to take and share pictures and videos. Your phone comes with a 3.2 megapixel camera that lets you capture sharp pictures and videos. Take Pictures Record Videos Store Pictures and Videos Send Pictures and Videos Print Pictures Take Pictures Taking pictures with your phone‘s built-in camera is as simple as choosing a subject, aiming the... -
Page 117: Assign Pictures
Delete to delete the picture you just took. Print to print the picture. You can choose whether to print using a PictBridge- or Bluetooth-enabled printer. Review Media to go to the In Phone folder or memory card folder to review your saved pictures. - Page 118 Multiple Shots to take multiple shots. See Fun Frames to select your favorite fun picture frame to decorate your picture (displayed only when the resolution setting is 0.3M or 0.1M). Color Tone to select a wide variety of color tones for the picture. ●...
-
Page 119: Camera Settings
4. Press , or CAPTURE (left softkey) to take the pictures. (The screen will display up to nine thumbnail pictures.) Zoom This feature allows you to zoom in on an object when you take a picture. You can adjust the zoom from 1x to 12x. -
Page 120: Camcorder Mode Options
Shortcut: Press to access the Photos & Videos menus. 2. Press Camcorder > Video Mail or Long Video to activate camcorder mode. Additional video options are available. See Note: Video Mail is limited to 50 seconds if Quality is set to Fine and 70 seconds if set to Normal. -
Page 121: Camcorder Settings
● Color Tone to select from a wide variety of color tones for your video. ● Image Controls to adjust settings for Brightness, White Balance, and Contrast. ● Video Settings to adjust your settings. See ● Review Media to go to the In Phone folder or memory card folder to review your saved videos. -
Page 122: Set Storage Options
In Phone Folder On Memory Card Folder In Phone and Memory Card Folder Options Review Pictures and Videos in the Assigned Media Folder Set Storage Options 1. Press > Photos & Videos > Other Settings > Auto Save to. 2. Select In Phone, On Memory Card or Switch w/Card. (Switch w/Card stores pictures and videos to the memory card when the card is installed.) In Phone Folder Your phone‘s internal storage area is called the In Phone folder. -
Page 123: Review Pictures And Videos In The Assigned Media Folder
● Print to print pictures. You can choose whether to print using a PictBridge- or Bluetooth- enabled printer. ● Copy/Move to Card to copy or move pictures and videos from your phone to your memory card. ● Copy/Move to Phone to copy or move pictures and videos from the memory card to your phone. -
Page 124: Send Pictures And Videos Using The Messaging Feature
Send Pictures and Videos Using the Bluetooth Feature Send Pictures and Videos Using the Messaging Feature 1. Press > Photos & Videos > My Photos & Videos > In Phone or On Memory Card. 2. Select your pictures or videos to send. ... -
Page 125: Print Pictures From Your Phone
Print Pictures From Your Phone Your phone is PictBridge compatible, allowing you to print directly from your phone without connecting to a computer. You can also print your pictures using Bluetooth. Note: Make sure your battery is fully charged before printing your pictures. To print pictures using a PictBridge-enabled printer: 1. -
Page 126: Digital Print Order Format (Dpof)
3. Select the check box for each picture you wish to print and press CONTINUE (left softkey). – or – 1. Press > Photos & Videos > My Photos & Videos > In Phone or On Memory Card. 2. Highlight a picture to print and press OPTIONS (right softkey) > Print > Bluetooth. ... - Page 127 2. Select Standard Print (to print individual pictures) or Index Print (to print an index sheet of thumbnail images). 3. Press OPTIONS (right softkey) and select an option: Select Picture to select a picture or pictures to print (up to 99). ...
-
Page 128: Web And Data
Web and Data Your phone‘s data capabilities let you wirelessly access the Internet. This section addresses your phone‘s data connections and the built-in Web browser. Data Services Browser Download Games, Ringers, and More Data Services With your Sprint service, you are ready to start enjoying the advantages of data services. This section will help you learn the basics of using your data services, including managing your user name, launching a data connection, and navigating the Web with your phone. -
Page 129: Launch A Web Connection
Launch a Web Connection Launching a Web connection is as simple as opening the browser on your phone. ► Press > Web. (Your data connection starts and you see the SprintWeb page.) Note: If Net Guard is enabled and displayed (see continue and launch the Web. - Page 130 Softkeys During a data session, the bottom line of your phone‘s display screen contains one or more softkeys. These keys are shortcut controls for navigating around the Web, and they correspond to the softkeys directly below the phone‘s display screen. Tip: Depending on which websites you visit, the labels on the softkeys may change to indicate their function.
-
Page 131: Browser Menu
Browser Menu Although the SprintWeb home page offers a broad and convenient array of sites and services for you to browse, not all sites are represented, and certain functions, such as going directly to specific websites, are not available. For these and other functions, you will need to use the browser menu. -
Page 132: Browser Settings
● to change the display font size on the Web page. ● Search the web to launch a Web search. ● Add this page to bookmarks to store the address of the currently viewed Web page. ● View all bookmarks to display a bookmark list. ●... -
Page 133: Download Games, Ringers, And More
Disable Virtual Mouse/Enable Virtual Mouse to activate or deactivate the virtual mouse. Virtual Mouse to set the speed of the virtual mouse. Reset browser to reset all browser settings. Download Games, Ringers, and More You have access to a dynamic variety of downloadable content, such as games, ringers, screen savers, and other applications. - Page 134 Download an Item Once you‘ve selected an item you wish to download, highlight it and press summary page for the item including its title, the vendor, the download details, and the cost. Links allow you to view the License Info page, which outlines the price, license type, and length of license for the download, and the Terms of Use page, which details the Premium Services Terms of Use and your responsibility for payment.
- Page 135 1. From the SprintWeb Manager. (You will see a list of your purchased items.) 2. Highlight a category and press To download purchased content from My Content Manager: 1. From the My Content Manager display, highlight the item you wish to download, and press .
-
Page 136: Gps Navigation
GPS Navigation Your phone‘s built-in GPS capability gives you access to a number of location-based services. GPS Services GPS Navigation Sprint Family Locator GPS Services Before using any of the location-based services, you must turn on your phone‘s location mode. Activate Location Mode To enable your phone‘s Location feature: 1. -
Page 137: Sprint Family Locator
Register Sprint Navigation Before you can use Sprint Navigation, your phone and service must be registered. 1. Press > Maps > Sprint Navigation. 2. Follow the onscreen instructions to enter and submit the required information. Use Sprint Navigation 1. Press >... - Page 138 3. Select a phone to locate from the available child phone list. 4. When you are finished, select Sign Out. Note: You may also use Sprint Family Locator with any computer with an Internet connection. Visit sprint.com/familylocator GPS Navigation for complete details.
-
Page 139: Copyrights
Independent JPEG Group. The Bluetooth word mark and logos are owned by the Bluetooth SIG, Inc. and any use of such marks by Kyocera Corporation is under license. Other trademarks and trade names are those of their respective owners. -
Page 140: Index
3-Way Calling, 30 Abbreviated Dialing, 22 Activation, 2 Airplane Mode, 32 Alarm, 90 Answer Calls, 25 Applications Download, 124 Auto-Answer, 31 Automatic Speech Recognition (ASR), 21, 99 Backlight, 52 Battery Capacity, 9 Charge, 2 Install, 2 Bluetooth, 91 Browser Menu, 122 Calculator, 105 Calendar, 87 Call... - Page 141 Dial From, 21 Edit an Entry, 76 Make a Direct Connect Call From, 39 Secret Entries, 80 Countdown Timer, 105 Data Services Enable/Disable, 66 Launch, 120 Password, 4 Security Features, 66 User Name, 119 Delete Phone Content, 65 Direct Connect Call Alerts, 42 Direct Connect Numbers, 36 Group Connect, 44...
- Page 142 Icon indication, 10, 68, 91 Invites Reply, 49 Send, 49 Key Functions, 7 Keyguard, 59 Language, 54 Limit Use, 64 Location, 127 Lock Code, 63 Make Calls, 20 From Contacts, 21 From History, 21, 70 Using ASR, 21, 100 Messaging, 83 Settings, 57 Thread, 84 microSD Card, 94...
- Page 143 Roaming Settings, 61 Save Direct Connect Number, 37 Number From History, 71 Number Using Keypad, 75 Security, 63 Self-timer, 109 Signature, 57 Speed Dial, 22, 40 Assign Numbers, 80 Sprint Family Locator, 128 Sprint Mobile Sync, 81 Sprint Service Account Passwords, 4 Dial, 81 Operator Services, 5, 81 Sprint 411, 5, 81...
Need help?
Do you have a question about the DuraMax and is the answer not in the manual?
Questions and answers