Kyocera DuraSport 5G User Manual
Hide thumbs
Also See for DuraSport 5G:
- User manual (120 pages) ,
- Quick start manual (7 pages) ,
- User manual (107 pages)
Table of Contents
Advertisement
Quick Links
Advertisement
Table of Contents

Related Manuals for Kyocera DuraSport 5G


Summary of Contents for Kyocera DuraSport 5G
- Page 1 User Guide...
-
Page 3: Table Of Contents
Table of Contents Introduction ..........................1 Descriptions in the User Guide ................... 1 Additional Information ......................1 Location information ....................1 Limitations ........................1 Get Started ..........................2 Your Phone at a Glance ...................... 2 Set Up Your Phone ......................4 Charge the battery ....................... - Page 4 Glide typing.........................24 Google voice typing ....................25 Copy and paste text ....................25 Phone Calls ..........................26 Make Phone Calls ......................26 Call using the phone dialpad ..................26 Call from RECENTS ....................27 Call from CONTACTS ....................27 Call using a speed dial number ...................27 Call emergency numbers ....................27 Call numbers with pauses ...................28 Call using the plus (+) code ..................28 Receive Phone Calls ......................29...
- Page 5 Additional settings.......................37 Video Calling ......................37 Wi-Fi Calling .......................37 Ringtone & vibrate ......................38 Step-up ring volume ....................38 Flashing light when ringing ..................38 Voicemail ........................38 Assisted dialing ......................38 Real Time Text ......................39 Hearing aids – telecoil mode ..................39 Call timer ........................39 Verizon Push To Talk Plus (PTT+) ..................40 Set up PTT+ .......................40 Contacts............................41 Contacts List ........................41...
- Page 6 Gmail ..........................48 Calendar ........................49 Google Play Store app ....................50 Google Maps ......................50 YouTube ........................51 YouTube Music ......................51 Files ..........................51 Supported formats ......................51 Message+ ..........................51 Connections ..........................53 Wi-Fi ..........................53 Turn Wi-Fi on and connect to a wireless network ............53 Wi-Fi settings menu ....................54 Bluetooth ...........................54 Turn Bluetooth on or off ....................54 Change the device name ....................55...
- Page 7 Camera settings ......................64 View Pictures and Videos Using Photos ................66 View pictures and videos ....................66 Work with Pictures ......................67 Edit a picture .......................67 Share Pictures and Videos....................68 Useful Tools ..........................69 Clock ..........................69 Alarm ..........................69 Clock ..........................69 Timer ..........................69 Stopwatch ........................70 Bedtime ........................70 Calculator ..........................71 Flashlight ...........................71...
- Page 8 Private DNS ........................78 Wireless emergency alerts ..................78 Connected Devices ......................78 USB ..........................78 Pair new device ......................78 Previously connected devices ..................79 Connection preferences ....................79 Codec preferences .....................79 Apps ..........................79 App launch optimization ....................80 Default apps .......................80 Screen time ........................80 Unused apps ......................80 Special app access .....................80 Notifications ........................80 App settings ........................80...
- Page 9 Storage ..........................82 Device storage ......................82 Portable storage ......................83 Sound ..........................83 Volume settings ......................83 Do Not Disturb ......................83 Phone ringtone ......................83 Media..........................84 Vibration pattern ......................84 Vibration & haptics ......................84 Shortcut to prevent ringing ..................84 Default notification sound ....................84 Default alarm sound ....................84 Emergency dialpad tone .....................85 Other sounds and vibrations ..................85 Display ..........................85...
- Page 10 TalkBack ........................87 Select to Speak ......................87 Text and display ......................88 Extra dim ........................89 Dark theme .........................89 Magnification ......................90 Switch Access ......................90 Accessibility menu ......................90 Timing controls ......................91 System controls ......................91 Vibration & haptics ......................92 Caption preferences ....................92 Real Time Text ......................93 Hearing aids –...
- Page 11 Notifications on lock screen ..................98 Show clipboard access ....................98 Autofill service from Google ..................98 Google location history ....................98 Activity controls ......................98 Ads ..........................98 Usage & diagnostics ....................98 Location ..........................99 Use location ........................99 Recent access ......................99 App location permissions ....................99 Location services ......................99 Safety &...
- Page 12 Backup ........................106 Reset options ......................106 About Phone ........................107 Compliance information .................... 107 Safety & warranty and User guide ................107 Contact Us ..........................108 Drying Procedures ........................109 Drying Your Phone ......................109 Copyright & Trademarks ......................110...
-
Page 13: Introduction
Limitations Kyocera does not authorize or approve the use or sale of its products in any country or region subject to trade embargo by the U.S. government. ©2022 Kyocera Corporation. KYOCERA is a registered trademark of Kyocera Corporation. All other trademarks are the property of their respective owners. -
Page 14: Get Started
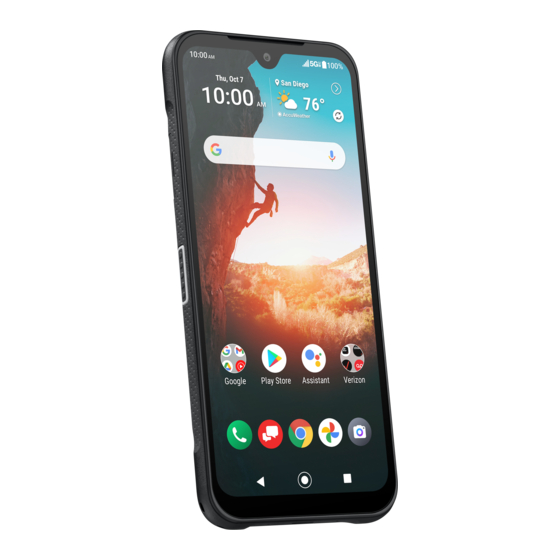
Get Started The following topics give you all the information you need to set up your phone and Verizon service the first time. Your Phone at a Glance The following illustration outlines your phone’s primary external features and keys. Get Started... - Page 15 ● LED indicator displays a phone notification, charging status, or alert. ● Proximity/Light sensor detects how close an object is to the surface of the screen. This is typically used to detect when your face is pressed up against the screen, such as during a phone call.
-
Page 16: Set Up Your Phone
Fully charge the battery before powering on the phone. NOTE: The battery cannot be removed from the phone. For replacing or disposing of the battery, contact a KYOCERA authorized service center. IMPORTANT: Unplug the AC adapter from the electrical outlet when not in use to reduce the environmental impact of charging. -
Page 17: Charge The Battery Wirelessly
WARNING: Use only approved chargers and cables with your phone. Improper handling of the charging port, as well as the use of an incompatible charger or cable, may cause damage to your device and void the warranty. When charging is complete, remove the cable from the port. Charge the battery wirelessly Your phone supports Qi and works with Qi-enabled chargers. -
Page 18: Install Microsd Card And Reinstall Sim Card
Install microSD card and reinstall SIM card Inserting a compatible microSD card into your phone will increase its storage capacity. Your phone comes with a preinstalled SIM card. If you need to reinstall your SIM card, follow the instructions below. NOTE: microSD cards are sold separately. - Page 19 Put the tray onto a flat surface and place a microSD card into the tray. Ensure the gold contacts are facing down as shown. NOTE: If you need to reinstall your SIM card, remove the original SIM card from the tray and place your new SIM card into the tray with the gold contacts facing down as shown.
-
Page 20: Turn Your Phone On And Off
WARNING: Do not use the phone under water if the SIM/microSD card tray cover is broken or open. NOTE: You can easily damage the microSD card by improper operation. Please be careful when inserting, removing, or handling the microSD card. NOTE: Make sure your battery is fully charged before using the microSD card. -
Page 21: Turn Your Screen On And Off
Turn your screen on and off Your phone allows you to quickly turn the screen off when not in use and to turn it back on when you need it. Turn the screen off when not in use ► To turn the screen off, quickly press the Power key. Pressing the Power key again or receiving an incoming call will turn on your phone screen. -
Page 22: Set Up Voicemail
Set up voicemail Your phone provides both paid and free voicemail options to choose from. A visual voicemail application Voicemail is a subscription-based service and allows you to manage your voicemail directly from your phone rather than calling in to your voicemail mailbox. As a subscription- based service, there is a charge for using Voicemail. -
Page 23: Phone Basics
Phone Basics Your phone is packed with features that simplify your life and expand your ability to stay connected to the people and information that are important to you. The following topics will introduce the basic functions and features of your phone. Touchscreen Navigation Your phone’s touchscreen lets you control actions through a variety of tap gestures. - Page 24 Drag: Touch and hold the item on the screen before you start to move it. Do not release your finger until you have reached the target position. Swipe or Slide: To swipe or slide means to quickly drag your finger vertically or horizontally across the screen.
-
Page 25: Function Buttons
Pinch and Spread: Pinch the screen using your thumb and forefinger to zoom out, or spread the screen to zoom in when viewing a picture or a Web page. (Move fingers inward to zoom out and outward to zoom in.) Function Buttons You will find a row of three buttons that let you perform specific functions as below. -
Page 26: Your Home Screen
Your Home Screen The Home screen is the starting point for your phone’s applications, functions, and menus. You can customize your Home screen by adding application icons, shortcuts, folders, widgets, wallpapers and more. Home screen overview The following illustration describes the basics of the Home screen. ●... -
Page 27: Manage The Home Screens
● Favorites Tray: Contains up to five icons and appears on every Home screen. ● Shortcut: Allows you to quickly launch applications. Manage the Home screens Learn how to customize the Home screens. Add widgets To get useful information more easily, you can add widgets to your Home screens. Touch and hold any empty area on the Home screen. - Page 28 Favorites tray The favorites tray displays up to five icons and appears on every Home screen. You can replace them with another icon you want to place there. To add a new icon to the favorites tray: Remove one of the icons from the favorites tray. Touch and hold the icon of the app you wish to add, and drag it to the favorites tray.
-
Page 29: Wallpaper & Style
Wallpaper & style You can personalize your phone by changing the color tone of onscreen elements and assigning your favorite background wallpaper. ► Touch and hold any empty area on the Home screen and then tap Wallpaper & style to open the Wallpaper &... -
Page 30: Apps Launcher
Apps launcher You can find and access numerous apps installed on your phone or available on the app store. Swipe up from the bottom of the Home screen to open the Apps launcher. to hide the keyboard if necessary, and then tap an app icon to open it. –... -
Page 31: Quick Shortcuts
Quick shortcuts By touching and holding an application icon, quick shortcuts will be displayed on the Home screen. Touch and hold an application icon to display the quick shortcuts available for that app. Tap a shortcut to the menu that you want to go directly to. TIP: To create a quick shortcut icon and place it on the Home screen, touch and hold instead, and put it where you want. -
Page 32: Notifications Panel
Icon Status Battery (full charge) Battery (charging) Battery (wireless charging) Battery (discharged) Battery Care Mode Notification icons Icon Status Missed call New mail New message Event Music application is running in the background Alarm Downloading Notifications panel You can open the Notifications panel to view the list of notifications you received, Wi-Fi connection status, and more. -
Page 33: Quick Settings
To open the Notifications panel: ► Slide the status bar down toward the bottom of the touchscreen. To clear a single notification, swipe it away to the left or right. To clear all deletable notifications, tap CLEAR ALL. ... -
Page 34: Enter Text
Enter Text You can type on your phone using one of the available touchscreen keyboards or using your voice. The keyboard appears automatically onscreen when you tap a text entry field and can be used in either portrait or landscape mode. Gboard Gboard offers a traditional QWERTY keyboard setup for entering text by tapping keys (like on a computer), along with enhancements and options that allow you to enter text faster and more... - Page 35 Description Tap to go to the next text entry field. Tap to toggle between the default Number & Symbol keyboard and additional Number & Symbol keyboard. Tap to see your search results. Tap to go to a Web address. Tap to insert a space. Touch and hold to select the keyboard type (if available). Tap to open the Gboard settings menus, such as Languages, Preferences, etc.
-
Page 36: Glide Typing
Add a word to the user dictionary You can use the user dictionary option to add new words to the dictionary. on the top of the Gboard, then tap Dictionary > Personal dictionary. Select the language to be applied for Personal dictionary. Type the word you want to add. -
Page 37: Google Voice Typing
Google voice typing Google™ voice typing uses Google voice recognition to convert speech to text. NOTE: If Gboard does not display the microphone icon , the voice input feature is not enabled. To enable or disable the voice input feature: on the top of the Gboard, then tap Voice typing. -
Page 38: Phone Calls
Phone Calls With the Verizon network and your phone’s calling features, you can enjoy clear phone calls across the country. Make Phone Calls There are several convenient ways to place calls from your phone. Call using the phone dialpad The most "traditional" way to place a call is by using the phone dialpad. From the Home screen, tap >... -
Page 39: Call From Recents
Call from RECENTS The recent calls list lets you quickly place calls to recent incoming, outgoing, or missed numbers. From the Home screen, tap > RECENTS to display the recent calls list. Tap the phone icon next to the number or contact to place a call. ... -
Page 40: Call Numbers With Pauses
Call the 911 emergency number when the screen is locked Tap EMERGENCY CALL on the screen. Enter 911 and tap Enhanced 911 (E911) Information This phone features an embedded Global Positioning System (GPS) chip necessary for utilizing E911 emergency location services where available. When you place an emergency 911 call, the GPS feature of your phone seeks information to calculate your approximate location. -
Page 41: Receive Phone Calls
Touch and hold 0 until you see a "+" on the display screen. Enter the country code and phone number, and then tap . The phone automatically prepends the access code for international dialing, followed by the country code and phone number. -
Page 42: Basic Voicemail
Review Voicemail Voicemail lets you easily access and select which message(s) you want to review. From the Apps launcher, tap Voicemail. From the Voicemail inbox, tap a message. Options such as Play, Stop, and more are available. to display the option menu. Configure Voicemail settings You can access the settings for notifications and greetings as well as the storage location of the messages. -
Page 43: Phone Call Options
To use another phone to access your messages: Dial your wireless phone number. If you hear a greeting, press or tap # to interrupt, and follow the prompts. Phone Call Options Your phone application provides many useful features and options to help you make the most of your calling experience. -
Page 44: 3-Way Calling
3-way calling With 3-way calling, you can talk to two people at the same time. When using this feature, the normal airtime rates will be charged for each of the two calls. Enter a number on the dialpad and tap (or place a call from RECENTS or CONTACTS). -
Page 45: Set Up Speed Dialing
Set up speed dialing You can save speed dial numbers in your phone’s speed dial memory. To assign a speed dial number to a contact: From the Home screen, tap > DIALPAD > > Speed dial setup > Enter a speed dial number (up to 6 digits) you want to add. Tap Unassigned to choose a contact. -
Page 46: Recent Calls
To edit the assigned speed dial: From the Home screen, tap > DIALPAD > > Speed dial setup. Tap the assigned contact with the speed dial to edit. Tap Edit. Edit the speed dial number (up to 6 digits) and tap >... -
Page 47: Delete Recent Calls
> Delete from recent call to delete the call. > Edit number before call to edit the number before calling. > Add to reject number to add the number to the reject call list. Delete recent calls Use the menu option to delete your recent calls. -
Page 48: Quick Responses
– or – From the Call rejection screen, tap the rejected number you want to delete. Tap DELETE > OK. To edit the rejected number: From the Call rejection screen, tap the rejected number you want to edit. Edit the rejected number and tap ADD. Quick responses You can add, delete, or modify the preset text messages to send when you select to reject an incoming call and send a text message. -
Page 49: Noise Reduction
Noise reduction Your phone can suppress background noise to improve audio quality for the other party during voice calls. ► From the Call settings screen, tap the Noise reduction on/off icon to turn on or off. Additional settings Caller ID From the Call settings screen, tap Additional settings. -
Page 50: Ringtone & Vibrate
Ringtone & vibrate Phone ringtone and vibration pattern Assign a ringtone or vibration pattern to your incoming calls. From the Call settings screen, tap Ringtone & Vibrate > Phone ringtone or Vibration pattern. Tap a ringtone or vibration pattern in the available list and tap OK to assign the ringtone or vibration. -
Page 51: Real Time Text
Tap Reference country, tap to the right of the country name you want to set as the Reference country, and then edit the settings if necessary. Real Time Text Real Time Text (RTT) lets you use text to communicate during a phone call. RTT works without any external TTY keyboards. -
Page 52: Verizon Push To Talk Plus (Ptt+)
Verizon Push To Talk Plus (PTT+) With Verizon PTT+, you can quickly and reliably connect to an individual or group instantly with a push of a key. For more information on PTT+, visit https://www.verizon.com/push-talk-plus. NOTE: This service requires a subscription. NOTE: When activating the PTT+ application, the PTT/Programmable key will be assigned for PTT use. -
Page 53: Contacts
Contacts The Contacts application lets you store and manage contacts from a variety of sources, including contacts you enter and save directly in your phone as well as contacts synchronized with your Google Account, your PC, and compatible email programs. Contacts List Scroll through the list to view all your contacts. -
Page 54: Add A Contact
Add a Contact Enter details such as name, phone numbers, email addresses, mailing addresses, and more. NOTE: We suggest that when you add phone numbers to your contact list, you add the area code + the 7-digit number. From the Contacts screen, tap CONTACTS to open the CONTACTS screen. You may be prompted to select an account to save your new contact to. -
Page 55: Save A Phone Number
Tap SAVE to save the contact. Save a phone number You can save a phone number to Contacts directly from the phone dialpad. From the Home screen, tap > DIALPAD. Enter a phone number and tap Add to contacts. To add the number to an existing contact, tap a contact, select a number type, and then tap SAVE. -
Page 56: Add A Group Contact
Refresh to refresh the contact information. Share to share the contact by using your preferred method. Delete to delete the entry. Join to merge the contact with another one. Add shortcut to Home screen to add a shortcut to the contact on the Home screen. -
Page 57: Edit A Group Contact
– or – From the GROUPS screen, tap a group to display it. > Delete > OK. Edit a group contact Manage the group contacts that you have created. From the GROUPS screen, tap a group contact and tap Edit it as necessary. Tap SAVE. -
Page 58: Synchronize Contacts
Choose and tap a contact you want to register as the emergency contact. TIP: You can edit your Emergency info if you tap the MY INFO tab and tap the item you want to edit. To remove an ICE contact: From the CONTACTS screen, tap ICE –... -
Page 59: Applications
Applications Your phone lets you enjoy a variety of apps installed on your phone or discover some exciting new apps by browsing online app stores such as the Google Play™ store. You can see all your preloaded and downloaded apps in the App Launcher. Google Apps You will need a Google Account to access several phone features such as Gmail™... -
Page 60: Chrome
Chrome Your phone’s Web browser Chrome™ gives you full access to both mobile and traditional websites on the go, using data services or Wi-Fi data connections. Launch Chrome ► From the Home screen, tap on the top right of the screen to display the option menu. Learn to navigate Chrome Navigating through menus and websites during a data session is easy once you have learned a few basics. -
Page 61: Calendar
Compose your message and then tap For more information, please visit https://support.google.com/mail. Calendar Use Calendar to create and manage events, meetings, appointments, and tasks. Access Calendar ► From the Home screen, tap Google > Calendar. on the top left of the screen to display the option menu. Add an event On any Calendar view, tap >... -
Page 62: Google Play Store App
Google Play Store app Google Play is a destination for discovering free and paid digital content, including Android™ apps, books, movies, music, and much more. To access the Google Play store app, you must first connect to the Internet using data services or a Wi-Fi data connection and sign in to your Google Account. -
Page 63: Youtube
YouTube YouTube™ is a video sharing website on which users can upload and share videos. Access YouTube ► From the Home screen, tap Google > YouTube. For more information, please visit https://support.google.com/youtube. YouTube Music Access the YouTube Music app to enjoy your favorite music. Access YouTube Music ►... - Page 64 Enter a phone number in the To field. Compose your message. When you finish composing the message, tap For more information on Message+, visit https://www.verizon.com/solutions-and- services/apps/verizon-messages/. Applications...
-
Page 65: Connections
Connections Your phone’s data capabilities let you wirelessly access the Internet or your corporate network through a variety of connections, including Wi-Fi, Verizon 5G Ultra Wideband, 4G LTE, and Virtual Private Networks (VPN). The following topics address your phone’s data connections and the built-in Web browser. Additional data-related features can be found in Applications Useful... -
Page 66: Wi-Fi Settings Menu
NOTE: The next time your phone connects to a previously accessed secured wireless network, you will not be prompted to enter the password again, unless you reset your phone to its factory default settings or you instruct the phone to forget the network. NOTE: Wi-Fi networks are self-discoverable, which means no additional steps are required for your phone to connect to a Wi-Fi network. -
Page 67: Change The Device Name
Change the device name The device name identifies your phone to other devices. From the Bluetooth settings screen, tap the on/off icon to turn Bluetooth on, if Bluetooth is not turned on. Tap Device name. Edit the name for your phone in the dialog box, and then tap RENAME. Pairing Pairing with other devices makes your phone ready for connecting to them. -
Page 68: Send And Receive Information
Unpair from other devices Unpairing from other devices makes your phone forget its pairing connection with them. To connect to the other devices again, you may need to enter or confirm a passcode. ► From the Connected devices screen, tap next to the paired device name >... -
Page 69: Near Field Communication (Nfc) Technology
Near Field Communication (NFC) Technology NFC (Near Field Communication) technology is a short-range, wireless technology that lets you quickly and wirelessly exchange information between your phone and other NFC-enabled devices. You can use this function to purchase goods or take a train in a contactless manner by installing your preferred payment/transit apps in your phone and bringing your phone close to the target NFC terminal. -
Page 70: Turn Mobile Hotspot On Or Off
Turn Mobile Hotspot on or off Use the settings menu to enable or disable your phone’s Mobile Hotspot capabilities. IMPORTANT: There may be charges for using Mobile Hotspot depending on your contract or plan. Contact your service provider for details. From the Mobile Hotspot &... -
Page 71: Camera
Camera You can use the camera to take and share pictures and videos. Your phone comes with a 48.0 megapixel back camera and 8.0 megapixel front camera that let you take sharp pictures and videos. A Super Wide-View Action Camera is also incorporated and it allows you to take wide angle shots while creating stable footage and offering excellent still image quality (16.0 megapixel). - Page 72 ● Camera Menu Bar: Select a mode such as Video bites, Video, Photo, Hi-Res, Portrait, Beauty, and More by sliding left or right. Pro video, Time lapse, Slow motion, Night, Panorama, Pro photo, Google Lens, Underwater, Action Overlay, Bike, and Multi camera are located under More by default. TIP: You can change the modes which appear here from the Edit modes menu.
-
Page 73: Take A Picture Or Record A Video
Video ● : Records a video. ● : Stops recording a video. ● Recording Time Counter: Displays the elapsed time while recording a video. Take a picture or record a video You can take high quality photos and videos with your phone's camera. From the Home screen, tap Select Photo or Video on the camera menu bar. -
Page 74: Action Overlay Mode
Tap any point to focus the area. Frame your subject on the screen. to take a picture. – or – to start recording. To stop recording, tap Tap thumbnail icon to view the image you’ve just taken or recorded. Action Overlay mode You can take a photo or record a video with additional information such as elapsed time, travel distance, speed, G-force, altitude, map, or weather. -
Page 75: Underwater Mode
Underwater mode You can take a picture or record video in the water. Your phone is immersible in water for up to 30 minutes at a depth not exceeding two meters (about 6.56 ft.). WARNING: Avoid using the phone in saltwater. It is highly corrosive and can damage internal components and degrade the audio performance over time. -
Page 76: Camera Settings
: Displays available menus for the image. Available menus may vary: • Back up now: Uploads the images to your Google Account. This menu displays only for images not backed up. • Loop video on: Select this option to see a video repeatedly. This menu displays only when reviewing a video. - Page 77 Photo ● Photo size: Select from the preferable size settings shown on the screen. ● Auto HDR: Select On to combine images automatically to prevent white spots or blackouts. ● Auto night detection: Switch On or Off. ● Continuous shooting: Switch On or Off. Video ●...
-
Page 78: View Pictures And Videos Using Photos
Image correction ● Wide camera distortion: Switch On or Off. ● Underwater distortion: Switch On or Off. Key settings ● Volume key: Select from the options shown on the screen. ● Programmable key (long press): Select from the options shown on the screen. Other ●... -
Page 79: Work With Pictures
For a picture, it displays the one you selected. When viewing, pinch & spread on the screen to zoom in or out on the picture. You can also zoom in and out by tapping quickly twice on the screen. Work with Pictures You can easily manage and retouch your pictures. -
Page 80: Share Pictures And Videos
When finished, tap Save or Save copy. Share Pictures and Videos The Photos application lets you send pictures and videos using email or multimedia messages. You can share pictures on your social networks. You can also send them to another phone or your computer using Bluetooth. -
Page 81: Useful Tools
Useful Tools Learn how to use many of your phone’s productivity-enhancing features. Clock The Clock application functions as a world clock that shows the date and time. You can also use it to turn your phone into an alarm clock, a countdown timer, or a stopwatch. Alarm You can use your phone as an alarm clock. -
Page 82: Stopwatch
Set the countdown time and tap to start the countdown. The following options are available: Label to add a description to the timer. + 1:00 to add an additional minute to the remaining time. Reset to return to the start of the countdown. ... -
Page 83: Calculator
Set a bedtime and the days to apply it. The following options are available: See recent bedtime activity to see your estimated time spent in bed. Listen to sleep sounds to choose a sound which can help you to fall asleep. ... -
Page 84: Sound Recorder
Sound Recorder The Sound Recorder app lets you record sound and save it as an audio file on your phone or inserted microSD card. Record sound From the Apps launcher, tap Sound Recorder to open the Sound Recorder screen. > File format to select the format type. >... -
Page 85: Voice Search
Voice Search Voice search allows you to find information on the Web as well as items and information on your phone by speaking your search terms. on the Google Search Widget. Speak clearly into the phone’s microphone when you see Listening... on the screen. If an error occurs, try again. -
Page 86: Weather
The following options are available: Your Activities: Tap on the top left of the screen, then tap your favorite activity, such as Surfing, Trekking, Snow, or Fishing. The Outdoor portal layout can be customized by focusing on more related information to your activity. To add other activities to the list, tap Activity settings. -
Page 87: Carkit Power On Or Off
To change an icon on the Outdoor Grid widget: Tap EDIT, then appears in the upper right corner of each icon. Tap the icon of the setting or feature to be replaced. The icon disappears. Tap Add, select the SETTINGS or APPS tab, and then tap the icon you want to place on the grid. -
Page 88: Settings
Settings The following topics provide an overview of items you can change using your phone’s Settings menus. Network & Internet You can set up a function or change the settings of the features related to Network and Internet such as Wi-Fi, mobile, and data usage. ►... -
Page 89: Airplane Mode
Automatically select network You can choose whether the network will be selected automatically or not. Choose network You can choose the network you want to use. Network extenders You can configure connections to a network extender nearby you. Access Point Names You can edit existing access points or add a new access point. - Page 90 When prompted, enter your login credentials, and then tap CONNECT. When you are connected, a VPN connected icon appears in the notification area. Private DNS Private DNS is a way to secure queries and responses between your phone and a website when your phone tries to get information from the website.
- Page 91 Previously connected devices View the list of devices to which the phone has previously connected via Bluetooth. Connection preferences You can see the status or configure the settings of listed devices or features. Bluetooth Your phone’s Bluetooth capabilities let you use wireless headsets, send and receive pictures and files, and more.
- Page 92 App launch optimization Automatically optimize the device performance to make your frequently used or favorite apps open quickly. You can select Learning (optimized based on your daily use) or Manual (you select the apps to optimize). Default apps If you have more than one app that does the same thing, you can pick which app to use by default.
- Page 93 Sensitive notifications Set whether or not sensitive contents will be shown when the phone is locked. Do Not Disturb Set to allow only selected contacts or apps to notify you based on an optional predefined schedule. See Do Not Disturb. Other notification settings You can set other notification functions such as Hide silent notifications in status bar, and Allow notification snoozing.
-
Page 94: Storage
talk/standby time. Battery Care Mode is recommended to extend the battery cycle life if you have no problem with the battery lasting throughout the day or you usually connect your phone to a charger. NOTE: When Battery Care Mode is On, a battery icon accompanied by a heart will display in the status bar. -
Page 95: Portable Storage
► From the Storage screen, select THIS DEVICE from the pull-down menu (if not selected) to see your internal storage information. Portable storage Manage your portable storage media, such as SD cards. You can see the card’s size and available space, unmount or mount, view the card information and format (erase) the SD card. From the Storage screen, select SD CARD from the pull-down menu to see your microSD card storage information. -
Page 96: Media
– or – Tap + Add ringtone to select a sound file. After being added to the available list, tap it. The ringtone briefly plays when selected. Tap OK to assign the phone ringtone. Media Sets to show media player in the Quick Settings panel. Vibration pattern Select a vibration pattern for your phone. -
Page 97: Emergency Dialpad Tone
Emergency dialpad tone You can set the tone for the emergency dialing keypad which appears on the lock screen when the lock screen is enabled. From the Sound screen, tap Emergency dialpad tone. Select from Silent, Tone, or Vibration. NOTE: When Ring & notification volume is set to vibrate , the Emergency dialpad tone will not sound even when Tone is set in this menu. -
Page 98: Font Size
Font size Choose the font size on the screen. Display size Adjust the display size by dragging the slider to left or right. Night Light Tints your screen amber and allows you to schedule the time when to turn on or off. Glove touch mode When Glove touch mode is set to on, the phone will detect if you are wearing gloves and automatically increase the sensitivity of the screen to improve touch detection through the glove... -
Page 99: Downloaded Apps
Downloaded apps This menu provides you with the list of accessibility-related applications. The applications displayed may vary depending on the applications installed on your phone. TalkBack TalkBack provides spoken feedback to help visually impaired users. NOTE: When TalkBack is turned on, you need to take different actions to operate the touchscreen. -
Page 100: Text And Display
and then tap the item you want to be read out. To hear multiple items, drag your finger across the screen. Tap if you want to hear everything on the screen. Tap Select to Speak shortcut to change the shortcut item. ... -
Page 101: Extra Dim
To turn it on, tap the Use color inversion on/off icon. Tap the Color inversion shortcut on/off icon, read the confirmation message, and tap GOT IT. Tap Color inversion shortcut to change the shortcut item. Remove animations Removes animations, for example, screens will no longer fade in and out when transitioning from one app to another. -
Page 102: Magnification
Tap Schedule to set to switch the Dark theme on or off automatically based on a schedule. The following options are available: None to turn it on or off manually. Turns on at custom time to set a Start time and an End time to suit your needs. ... -
Page 103: Timing Controls
To turn it on, tap the Accessibility Menu shortcut on/off icon, read the confirmation message and tap ALLOW > GOT IT. Tap Accessibility Menu shortcut to change the shortcut item. Tap Settings to configure its settings. Timing controls ►... -
Page 104: Vibration & Haptics
to set Digital assistant and Back Sensitivity for Gesture navigation. One-handed mode Shrinks the screen size and allows you to use your phone with just one thumb. NOTE: To use this feature, make sure that Gesture navigation is turned on in System navigation settings. -
Page 105: Real Time Text
To turn it on, tap the Show captions on/off icon. Configure the settings under Caption size and style and More options according to your needs. Real Time Text Real Time Text (RTT) lets you use text to communicate during a phone call. RTT works without any external TTY keyboards. -
Page 106: Accessibility Shortcuts
Audio balance Adjust the audio balance by using the onscreen slider and by hearing a sound clip which will play when you tap on the slider. Accessibility shortcuts ► From the Accessibility screen, tap Accessibility shortcuts to open the Accessibility shortcuts screen. -
Page 107: Security Status
Security status Shows you the status of your security apps. Screen lock Allows you to lock your phone's screen and enhance the security feature through various options. ► From the Security screen, tap Screen lock. IMPORTANT: Highest security level protection (password protection) and frequent change of password are recommended to protect your phone and data from unauthorized access. -
Page 108: Face And Fingerprint Unlock
You can use your face to unlock your phone. To set up face unlock, follow the onscreen instructions. IMPORTANT: Face authentication technology does not guarantee completely accurate personal authentication and identification. Kyocera assumes no responsibility for any damages resulting from a third party using your device or inability to use your device. -
Page 109: Smart Lock
• The fingerprint sensor is on the back of your phone. Before using the fingerprint sensor, make sure the fingerprint sensor and your finger are clean and dry. • The fingerprint recognition performance depends on your usage. The phone may have an issue in registering or recognizing fingerprints that have scars or worn down ridges, or if there are scratches on the sensor surface. -
Page 110: Privacy
Privacy You can access and adjust all your privacy preferences from this menu. ► From the Apps launcher, tap Settings > Privacy. Privacy dashboard Shows which apps have used permissions recently. Permission manager Shows a list of permission types and which apps have or do not have that permission. You can change an app’s permission setting through this menu. -
Page 111: Location
Location The Location services settings menu lets you decide whether to allow your phone to collect and use your phone's location information. Some apps may require location services be turned on for full functionality. IMPORTANT: Your wireless phone can determine its (and your) physical, geographical location ("Location Information") and can associate Location Information with other data. -
Page 112: Safety & Emergency
Safety & Emergency Use this feature to save and share your emergency information. Your phone can contact emergency services automatically. ► From the Apps launcher, tap Settings > Safety & emergency to open the Safety & emergency screen Emergency information To enter your emergency information: From the Safety &... -
Page 113: Emergency Location Service
To turn on Emergency SOS: From the Safety & emergency screen, tap Emergency SOS. Tap the Use Emergency SOS on/off icon. Tap Play countdown alarm on/off icon to turn it on or off. When enabled, your phone will play a loud sound when Emergency SOS is starting. ... -
Page 114: Passwords
Passwords You can manage and protect your passwords you saved in your Google Account by using Google Password Manager. ► From the Password & accounts screen, tap Google under Passwords and choose your Google account. For more information about Google Password Manager, visit https://support.google.com/android/password. -
Page 115: Your Digital Wellbeing Tools
Your Digital Wellbeing tools Get a daily view of your digital habits, such as how frequently you use different apps, how many notifications you receive, or how often you check your phone or unlock your device. Dashboard You can set daily timers to limit your use of each app. From the Digital Wellbeing &... -
Page 116: Google
Google You can see your Google Account and a variety of information, such as security, personalization, and other topics related to Google services. ► From the Apps launcher, tap Settings > Google. to display the option menu. to display the help menu. System Updates You can check for available software updates or the update status of your phone. -
Page 117: Gestures
On-screen keyboard You can select onscreen keyboards to be used and change their settings. Physical keyboard You can obtain some keyboard assistance. Spell checker This feature allows you to spell check text as you type it. Personal dictionary Add a word to the user dictionary. -
Page 118: Backup
If set to on, you cannot set the time zone values manually. Tap Use location to set time zone to turn it off if you do not want to use the location to set time zone. Tap Time zone. Tap Region, select a region from the onscreen list, and then select a time zone if necessary. -
Page 119: About Phone
Erase all data (factory reset) All the data in your phone's internal storage will be reset to default. TIP: Before performing a factory data reset on your phone, you may want to unmount the microSD card to avoid losing any data you may have stored on it. To unmount the SD card, from the Apps launcher tap Settings >... -
Page 120: Contact Us
Contact Us You can quickly access useful information for your mobile life by visiting the URLs below. To find out more about Kyocera: https://kyoceramobile.com/ To receive phone support and make registration: https://kyoceramobile.com/support/phone/ To learn about our white glove service for businesses: https://kyoceramobile.com/business/business-select/... -
Page 121: Drying Procedures
Drying Procedures Please see the proper procedures below. NOTE: For the Procedures to be followed in cleaning and disinfecting the phone, please visit https://kyoceramobile.com/support/phone/cleaning_guide/. Drying Your Phone CAUTION! If your phone has been submerged in water, for example to use the camera in Underwater mode, rinse all surfaces of the phone thoroughly with clean, fresh water before drying. -
Page 122: Copyright & Trademarks
The Bluetooth word mark and logos are registered trademarks owned by Bluetooth SIG, Inc. and any use of such marks by Kyocera Corporation is under license. Other trademarks and trade names are those of their respective owners. Bluetooth DID (Declaration ID): D060725 The ‘Qi’... - Page 123 Index 3-Way Calling, 32 Alarm, 69 Accessibility, 86 Applications, 47 accessibility menu, 90 Apps, 79 audio balance, 94 screen time, 80 autoclick, 91 Apps Launcher, 18 auto-rotate screen, 92 Backup, 106 Battery, 81 bold text, 88 button settings, 94 battery care mode, 81 caption, 92 battery manager, 81 color correction, 88...
- Page 124 Call Camera, 59 3-way calling, 32 action overlay mode, 62 answer, 29 back, 4 flash, 4 assisted dialing, 38 auto answer, 36 front, 3 call forwarding, 32 review, 63 call rejection, 35 settings, 64 underwater mode, 63 call timer, 39 call waiting, 31 wide view, 4 caller ID, 31, 37...
- Page 125 Display, 85 Google Play Store, 50 adaptive brightness, 85 install apps, 50 auto-rotate screen, 86 Google Voice Typing, 25 Hearing Aids, 39, 93 bold text, 88 brightness level, 85 Home Screen, 14 cast, 79 add shortcut, 15 dark theme, 17, 89 add widgets, 15 favorites tray, 16 display size, 86, 88...
- Page 126 Notifications, 80 Programmable Key, 4, 82 app settings, 80 answer and end call, 82 conversations, 80 wake up device, 82 Proximity Sensor, 3 history, 80 Outdoor Grid, 74 PTT Key, 4, 40 Outdoor Portal, 73 Push To Talk Plus (PTT+), 40 Parental Controls, 103 Quick Settings, 21 Quick Shortcuts, 19...
- Page 127 Speed Dialing call, 27 port, 3 set up, 33 USB Settings, 78 Useful Tools, 69 Spread, 13 Status Bar, 19 Vibration Stopwatch, 70 pattern, 38, 84 Storage, 82 settings, 84 phone, 82 Video SD card, 83 record video, 61 Style, 17 view, 66 Support viewfinder, 61...
Need help?
Do you have a question about the DuraSport 5G and is the answer not in the manual?
Questions and answers