
Related Manuals for FujiFilm FinePix F410Z


Summary of Contents for FujiFilm FinePix F410Z
- Page 1 Getting Ready Using the Camera Advanced Features Settings Software Installation Camera Connection BL00258-200 ( 1 )
-
Page 2: Warning
To comply with Part 15 of the FCC rules, this can radiate radio frequency energy and, if not product must be used with a Fujifilm-specified This device complies with part 15 of the FCC Rules. Operation is subject to the following two installed and used in accordance with the ferrite-core USB cable and DC supply cord. -
Page 3: Table Of Contents
Contents Red-Eye Reduction ........35 PRE - INSTALLATION CHECKLIST ......88 } Final 4 - frame Continuous Shooting ..... 60 Warning ..............2 z Forced Flash ..........35 Hardware and software requirements ....88 dEV ( EXPOSURE COMPENSATION ) ....61 Preface .............. -
Page 4: Preface
Preface Accessories included I Test Shots Prior to Photography note that this camera may cause interference to other h16MB, xD - Picture Card™ ( 1 ) hNP - 60 Rechargeable Battery ( 1 ) For particularly important photographs ( such as weddings and equipment in the hospital or aircraft. -
Page 5: Nomenclature/Attaching The Strap
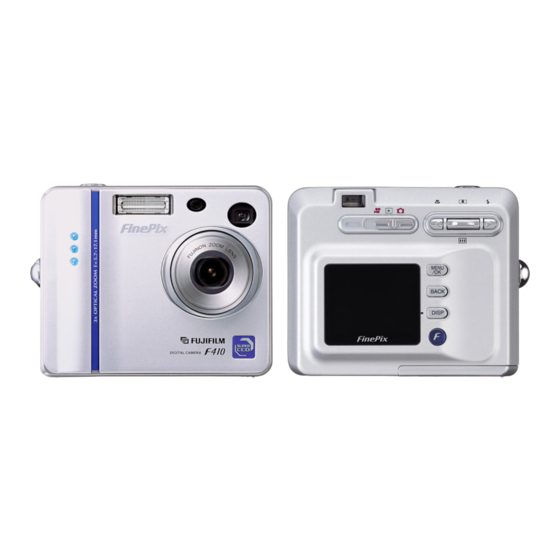
Nomenclature ✽ Refer to the pages in parentheses for information on using the camera features. Shutter button Flash control sensor Mode switch / Macro button ( P.33 ) Still photography mode (P.23) ( ) / Zoom button ( P.21 ) Flash ( P.34 ) Playback mode... -
Page 6: Getting Ready
Playback frame number Operation of this camera is only guaranteed when it Playback mode Battery level warning is used with FUJIFILM xD-Picture Card. DPOF Because xD - Picture Cards are small, they can be Protection The battery is not fully charged at shipment and accidentally swallowed by small children. - Page 7 LOADING THE BATTERY AND xD - Picture Card Indicator Indicator xD-Picture Card slot Battery release catch To remove the battery 1 Firmly insert the xD - Picture Card all the way Replacing an xD - Picture Card 1 Slide the battery cover out to open it. into the xD - Picture Card slot with the indicator 2 Hold the battery so that the arrow markings When you push the xD - Picture Card into the slot...
-
Page 8: Charging The Battery
DC IN 5V socket hCompatible AC power adapters AC - 5VW/AC - 5VS/AC - 5VHS/AC - 5VH Use only the FUJIFILM products listed above. See P.115 for notes on using the AC power adapter. Only connect or disconnect the AC power adapter when the camera is switched off. - Page 9 SETTING THE DATE AND TIME Once you have set the date and time, press the 1 Press “d” or “c” to select Year, Month, Day, 1 Press the “MENU/OK” button. 1 Press “a” or “b” to select “DATE/TIME”. “MENU/OK” button. Pressing the “MENU/OK” Hour or Minute.
-
Page 10: Changing The Date And Time
SETTING THE DATE AND TIME Checking the remaining battery charge Changing the date and time To change the date display format Switch the camera on and check that no battery level warning is displayed on the LCD º monitor. If the “ ”... -
Page 11: Selecting The Language
Basic Using the SELECTING THE LANGUAGE BASIC OPERATION GUIDE BASIC OPERATION GUIDE BASIC OPERATION GUIDE Photography Camera You’ve read the chapter on getting ready and the camera is now set up and ready to take pictures. The Basic Photography section explains the three basic steps of “taking pictures”, “viewing pictures” and “erasing pictures”. -
Page 12: Mode
SHOOTING STILL IMAGES ( AUTO MODE ) BASIC OPERATION GUIDE MODE MENU/OK button DISP button Displays the menu screen when you are shooting You can use this button to select the LCD monitor or playing back images. You also press this button display. - Page 13 SHOOTING STILL IMAGES ( AUTO MODE ) MODE 33 33 AF frame LCD monitor Take care to hold the camera so that your When you are using the viewfinder to take a fingers or the strap do not cover the lens, flash picture at a distance of 0.6 m to 1.5 m ( 2.0 ft.
-
Page 14: I Viewfinder Lamp Display
SHOOTING STILL IMAGES ( AUTO MODE ) MODE I Viewfinder Lamp Display Click Bebeep Display Status Lit green Ready to shoot. AF/AE operating or camera shake/AF warning ( ready to shoot ) . Blinking green Power save ( sleep mode ) . Blinking green Recording data to the xD - Picture Card ( ready to shoot ) . -
Page 15: Number Of Available Frames
USING AF / AE LOCK SHOOTING STILL IMAGES ( AUTO MODE ) MODE MODE Number of Available Frames 33 33 The number of available shots is displayed on the LCD monitor. See P.43 for information on changing the image quality. The default image quality “... -
Page 16: Framing Guideline Function
FRAMING GUIDELINE FUNCTION USING AF / AE LOCK MODE MODE Scene Click Bebeep Use this frame when you want to position your main subject in the center of the frame or when you want to align your shot with the horizon. This feature provides a clear guide to the subject size and the overall balance of the shot so that you get exactly the shot you want. -
Page 17: Using The Zoom
MACRO ( CLOSE - UP ) PHOTOGRAPHY USING THE ZOOM MODE MODE Selecting Macro mode allows you to take close - Zoom bar display up shots. Digital Effective Photography Range : zoom Approx. 10 cm to 80 cm (4 in to 31 in.). Also, set the flash functions according to the Optical given circumstances. -
Page 18: Flash
I FLASH MODE No icon Auto Flash Mode ( no icon ) n Red - Eye Reduction I Forced Flash Use this mode for ordinary photography. The Use this mode to ensure that the subject’s eyes Use this mode to photograph backlit scenes, flash fires automatically as required by the appear natural when photographing people in such as a subject against a window or in the... -
Page 19: Bsuppressed Flash
You can use this camera to view still images recorded on the FinePix F410 or still images ( excluding The image may be overexposed when you shoot See P.27, 119 for information on the camera shake some uncompressed images ) recorded on a FUJIFILM digital camera that supports xD-Picture Cards. warning. bright scenes. -
Page 20: Multi - Frame Playback
MULTI - FRAME PLAYBACK PLAYBACK ZOOM MODE MODE Text displayed No text displayed Multi-frame playback In Playback mode, the display shown on the LCD monitor switches each time you press the Zoom bar “DISP” button. Press the “DISP” button until the multi-frame playback screen ( 9 frames ) appears. -
Page 21: Saving Trimmed Images
ERASING SINGLE FRAME PLAYBACK ZOOM MODE MODE Saving Trimmed Images Check the size of the image being saved and then 1 Set the Mode switch to “ ”. Select “FRAME” in the “ ” ERASE menu and press the “MENU/OK” button. The cropped image press the “MENU/OK”... -
Page 22: Advanced Features
Basic Advanced PHOTO MODE STILL IMAGE/MOVIE ERASING SINGLE FRAME QUALITY SETTINGS IN STILL PHOTOGRAPHY ( q ) MODE MODE Photography Features You can choose from 4 settings. Use the table on the below as a guide for selecting the best setting for the shot you want to take. -
Page 23: Quality Settings In Movie Tmode
f SENSITIVITY QUALITY SETTINGS IN MOVIE MODE _ PHOTO MODE STILL IMAGE / MOVIE _ PHOTO MODE STILL IMAGE / MOVIE 1 Set the Mode switch to “ ”. 2 Press the Photo mode ( ) button. 3 Press “g” to select “ ”... -
Page 24: Finepix Color
FinePix COLOR f SENSITIVITY _ PHOTO MODE STILL IMAGE / MOVIE _ PHOTO MODE STILL IMAGE / MOVIE I Camera settings for high-sensitivity High-sensitivity photography ( 800 ) photography The sensitivity remains set to high ( 800 ) even if the Mode switch is set to Playback or the camera is switched off. -
Page 25: Photo Mode Playback
i HOW TO SPECIFY PRINT OPTIONS ( DPOF ) _ PHOTO MODE PLAYBACK DPOF stands for Digital Print Order Format and refers to a format that is used for recording printing specifications for images shot using a digital camera on media such as an xD - Picture Card. - Page 26 i HOW TO SPECIFY PRINT OPTIONS ( DPOF ) _ PHOTO MODE PLAYBACK When DPOF settings were specified on another camera When the data includes a frame with DPOF settings that were specified on by another π camera, “ ” is displayed. Pressing the “MENU/OK”...
-
Page 27: ª Dpof All Reset
ª DPOF ALL RESET _ PHOTO MODE PLAYBACK A confirmation screen appears. Slide the Power switch to the side turn the 1 Press “d” or “c” to select “ ª ” DPOF ALL To reset all the DPOF settings, press the camera on. -
Page 28: Mode
PHOTOGRAPHY MENU OPERATION / PHOTOGRAPHY MENU OPTIONS SELECTING AUTO OR MANUAL MODE Photography Menu Operation Set the Mode switch to “ ”. See P.63 for information on shooting movies. When you enable the setting, an icon appears in 1 Press the “MENU/OK” button to display the the top-left corner of the LCD monitor. -
Page 29: Photography Menu Options
= SELF - TIMER PHOTOGRAPHY PHOTOGRAPHY MENU OPERATION / PHOTOGRAPHY MENU OPTIONS PHOTOGRAPHY MENU ✽ Displaying the menus ( ➡P.56 ) ✽ Displaying the menus ( ➡P.42 Photography Menu Options 33 33 = Self-timer photography t Continuous shooting q Still photography mode g Option Available modes Available modes... -
Page 30: Self - Timer Photography
t CONTINUOUS SHOOTING = SELF - TIMER PHOTOGRAPHY PHOTOGRAPHY MENU ✽ Displaying the menus (➡P.42) PHOTOGRAPHY MENU ✽ Displaying the menus ( ➡P.56 ) 7 1/500 F2.8 1/500 F2.8 The self timer lamp lights for 5 seconds and then A counter on the LCD monitor counts down the This mode can be selected in the “... -
Page 31: Top 4 - Frame Continuous Shooting
✽ Selecting |/W ( ➡P.54 ) d EV ( EXPOSURE COMPENSATION ) t CONTINUOUS SHOOTING PHOTOGRAPHY MENU PHOTOGRAPHY MENU ✽ Displaying the menus ( ➡P.56 ) ✽ Displaying the menus ( ➡P.56 ) Subjects for Which Exposure t Top 4 - frame Continuous Shooting } Final 4 - frame Continuous Shooting Adjustment is Particularly Effective Guide to using + (positive) compensation... -
Page 32: ( Selecting The Light Source )
PHOTOGRAPHY MENU ✽ Selecting |/W ( ➡P.54 ) T SHOOTING MOVIES a WHITE BALANCE ( SELECTING THE LIGHT SOURCE ) MOVIE MODE ✽ Displaying the menus ( ➡P.56 ) AUTO : Automatic adjustment (Shooting to show the ambience of the light source) : Shooting outdoors in fine weather : Shooting in shade... - Page 33 T SHOOTING MOVIES MOVIE MODE Press the shutter button down fully to start During shooting, a timer in the top - right corner of shooting the movie. the LCD monitor counts down the remaining time. Zoom bar In Movie ( video ) mode, the lens is fixed at the To end shooting, press the shutter button again.
-
Page 34: Mode
PLAYING BACK MOVIES MODE I Playing back movies Control Description Plays the movie. Playback The movie automatically stops when playback ends. Pauses the movie during playback. Pause/Resume Press this button again to resume playback. Stops playback. ✽ Press “d” or “c” while movie playback is stopped to go back Stop to the previous file or advance to the next file respectively. -
Page 35: Playback Menu
ERASING SINGLE ALL FRAMES • PLAYBACK MENU ALL FRAMES Erases all unprotected files. You should copy important files that you do not want to be erased to your computer or other media. FRAME Erases only the selected file. 1 Set the Mode switch to “ ”. -
Page 36: Protecting Images Frame/Set All/Reset All
PROTECTING IMAGES FRAME / SET ALL / RESET ALL p ERASING SINGLE ALL FRAMES • PLAYBACK MENU PLAYBACK MENU FRAME ALL FRAMES 1 Set the Mode switch to “ ”. 2 Press the “MENU/OK” button to display the menu screen. Press “d”... - Page 37 PROTECTING IMAGES FRAME / SET ALL / RESET ALL PLAYBACK MENU RESET ALL FRAME Removes the protection from all the files. SET ALL Protects all the files. FRAME Protects or unprotects only the selected file. 1 Press “a” or “b” to select “RESET ALL”, “SET ALL”...
-
Page 38: Recording Voice Memos
r RECORDING VOICE MEMOS PROTECTING IMAGES FRAME / SET ALL / RESET ALL PLAYBACK MENU PLAYBACK MENU SET ALL RESET ALL 1 Set the Mode switch to “ ”. 2 Press “d” or “c” to select the image ( still image ) to which you want to add a voice memo. - Page 39 r RECORDING VOICE MEMOS PLAYBACK MENU When the image already has a voice memo If you select an image that already has a voice memo, a screen appears in which you can select whether or not to rerecord the caption. The “...
-
Page 40: Mode
The FinePix F410 can play voice memo files recorded on a FinePix F410 and voice memo files up to If the sound is difficult to hear, adjust the volume 30 seconds long that were recorded on a FUJIFILM digital camera and stored on xD - Picture Card. The “r” icon is displayed. -
Page 41: Settings
ADJUSTING THE MONITOR BRIGHTNESS Settings ADJUSTING THE VOLUME SET – UP Menu Options The options available in the g menu vary depending on whether “ ” or “ ” mode is selected. “ ” Still photography mode “ ” Movie mode 1 Set the Mode switch to “... -
Page 42: Gusing Set - Up
g USING SET – UP I SET - UP Menu Options Factory Settings Display Explanation Default Use this option to specify whether the Preview screen ( the photographed IMAGE DISP. ON/OFF/PREVIEW image ) is displayed after you take a shot. Use this option to specify whether the camera’s power consumption is POWER SAVE 2 MIN/5MIN/OFF... -
Page 43: Set - Up
POWER SAVE FORMAT SET – UP SET – UP Once you enable this function, the monitor is When the camera is in sleep mode, pressing the Formatting erases protected files also. temporarily switched off to reduce power Formatting erases all files, including protected files. shutter button down halfway brings the camera consumption ( Sleep mode ) if the camera is not Initialize the xD - Picture Card for use in the... -
Page 44: Set Frame No. Memory
Software SET FRAME NO. MEMORY THE SOFTWARE COMPONENTS SET – UP Installation CONT. RENEW 100−9999 100−9999 USB Mass Storage Directory number FinePixViewer Driver File number Allows you to display thumbnail lists of the Allows a digital camera to be used images stored on your PC or in the camera, Frame number Frame number... -
Page 45: Pre - Installation Checklist
PRE - INSTALLATION CHECKLIST NOTE Hardware and software requirements i Connect the camera directly to the computer using the special USB cable. The software may not operate correctly To run this software, you must have the hardware and software described below. Check your system if you use an extension cable or connect the camera via a USB hub. -
Page 46: Installation On A Windows Pc
INSTALLATION ON A Windows PC INSTALLATION ON A Mac OS 8.6 TO 9.2 1. You may see messages for installing Load the CD - ROM into your PC Pre-installation Checklist QuickTime, NetMeeting, ImageMixer VCD for FinePix and WINASPI. Install these To run this software, you must have the hardware and software described below. -
Page 47: Check The System Software Settings
INSTALLATION ON A Mac OS 8.6 TO 9.2 2. Double-click “Installer for MacOS8.6 - 9.x” 6. Select the installation destination for 7. Install QuickTime as directed by the on- Check the system software settings to launch the Installer. FinePixViewer and ImageMixer VCD for screen instructions and then restart your I Enable File Exchange FinePix. -
Page 48: Pre-Installation Checklist
INSTALLATION ON A Mac OS X INSTALLATION ON A Mac OS 8.6 TO 9.2 I To install Acrobat Reader later... 8. After you restart your Macintosh, the Pre-installation Checklist “FinePixViewer installation completed” 1. Double-click the “FinePix” CD-ROM to I Hardware and software requirements message appears. -
Page 49: From Finepixviewer Installation To Restart
INSTALLATION ON A Mac OS X I Functions not supported in FinePixViewer for Mac OS X From FinePixViewer installation to restart 4. Click the “ ” icon. Function Comment Only FinePixViewer is installed on Mac OS X. AVI movie playback Not supported in version 10.0.4 AVI movies cannot be played back on version 10.0.4. -
Page 50: Camera Connection Camera Connection
✽ Videoconferencing ( “PictureHello” ) is not If the power cuts out during data transmission, supported on Macintosh computers. ✽ Connection is only possible with a FUJIFILM camera the data will not be transmitted correctly. Always use the AC power adapter when connecting the equipped with a “PC Camera”... -
Page 51: Using The Ac Power Adapter
USING THE AC POWER ADAPTER USE AT DSC MODE Always use a FUJIFILM AC Power Adapter AC - 5VW/AC - 5VS/AC - 5VHS ( ➡P.7, 110 ) . (USB) socket Use the AC power adapter to avoid losing power at inconvenient times, such as when you are downloading photographed images to your computer. - Page 52 USE AT DSC MODE I Camera Operation I PC Operation I When FinePixViewer is not included Windows XP in the list of actions to perform Windows 98/98 SE/Me/2000 Professional 1. The “Found New Hardware” help message Select “Take no action” and then select the appears in the bottom-right corner of your ✽...
-
Page 53: Disconnecting The Camera
DISCONNECTING THE CAMERA Perform the steps shown below before you 2. Left-click the Eject icon in the taskbar and (USB) switch the camera off. This procedure eject “USB Disk”. socket differs depending on the operating system software ( or PC ) you are using. Windows 98/98 SE ✽... -
Page 54: Using Finepixviewer
USING FinePixViewer UNINSTALLING THE SOFTWARE 2. Search for relevant articles by clicking the Only perform this operation when you no longer Mastering FinePixViewer corresponding items Help require the installed software or when the software “Bookmarks” or “Contents”. Here, click was not installed correctly. For more information on FinePixViewer functions “Viewing Slide Shows”. -
Page 55: System Expansion Options
System Expansion Options UNINSTALLING THE SOFTWARE 2. After you have exited FinePixViewer and e By using the FinePix F410 together with other optional FUJIFILM products, your system can be Macintosh DP Editor and then drag the installed expanded to fill a wide range of uses. -
Page 56: Accessories Guide
This is designed to protect the camera against dirt, dust and damage while you are accessory used. carrying it. Visit the FUJIFILM web site for the latest information on camera accessories. http://home.fujifilm.com/products/digital/index.html h xD - Picture Card h DPC - R1 Image Memory Card Reader The DPC - R1 provides a quick and easy way to transfer images back and forth These are separately available xD - Picture Card cards. -
Page 57: Notes On Using Your Camera Correctly
You can also use the optional BC - 65 Battery Charger h In contact with chemicals such as pesticides or next to I Battery Features to a piece of FUJIFILM lens cleaning paper and wipe to charge the NP - 60. rubber or vinyl products for long periods of time gently. -
Page 58: Ac Power Adapter
Notes on the Power Supply I Battery Life plug is damaged, liquid has been spilled or objects Do not recharge the battery with chargers other those AC Power Adapter At normal temperatures, the NP - 60 can be used at specified. -
Page 59: Notes On The Xd - Picture Card
) , wipe it clean with a soft, dry cloth. I WARNINGS situations. Please note that FUJIFILM assumes no h Clean the memory card with a soft dry piece of cloth To reduce the risk of fire or electric shock, do not responsibility for data that is lost or destroyed. -
Page 60: Warning Displays
The camera quality cannot be guaranteed when (Lit red) The camera battery is low or completely out of Charge the battery or replace with a fully I Specifications cards other than those manufactured by FUJIFILM charge. charged battery. (Blinking red) Type Image memory card for digital cameras are used. - Page 61 The lens cover is faulty. i Switch the camera on again, taking care not to i Camera fault. i Contact your FUJIFILM dealer. touch the lens. i You attempted to play a movie that was not i Movies cannot be played back.
-
Page 62: Troubleshooting
Troubleshooting e If you think the camera is faulty, check the following once more Troubleshooting Possible causes Solutions Troubleshooting Possible causes Solutions The self-timer lamp does i There is no battery in the camera. i Load the battery. No photograph is taken i The xD - Picture Card is damaged. -
Page 63: Explanation Of Terms
Explanation of Terms Troubleshooting DPOF : Digital Print Order Format Troubleshooting Possible causes Solutions DPOF is a format used for recording information on a storage media ( image memory card, etc. ) that allows The shot was taken with a slow shutter speed ( long you to specify which of the frames shot using a digital camera are printed and how many prints are made of There is speckling on the This is a characteristic of CCDs and does not... -
Page 64: Specifications
Specifications Explanation of Terms PC Card : h Storage media : xD - Picture Card 16/32/64/128/256MB System A generic term for cards that meet the PC Card Standard. h Viewfinder : Real image optical Approx. 80% coverage h Model : Digital camera FinePix F410 h Lens : Fujinon optical 3×... - Page 65 Specifications I Available shots using the battery ( When fully charged ) I Self timer lamp display h Shutter : Variable-speed, 1/4 sec. to 1/2000 sec. ( depend on Exposure mode ) Battery Type Number of Shots Camera operation Display Status h Flash : Auto flash using flash control sensor LCD monitor ON...
-
Page 66: Safety Notes
FUJIFILM dealer. products. result if the information indicated by the icon is ignored h Contact your FUJIFILM dealer. Do not use chargers other than the and the product is used incorrectly as a result. Do not place the camera on an unstable specified model to charge the battery. - Page 67 Use your finger to stop the card The charger is designed for Fujifilm NP - 60 This can cause heat to build up and distort from flying out before removing the battery or HR - AA Ni - MH batteries.
-
Page 68: Ec Declaration Of Conformity
This End User License Agreement ( “Agreement” ) is an agreement between Fuji Photo STATUTORY, AS TO ANY OTHER MATTERS, INCLUDING, BUT NOT LIMITED Film Co., Ltd. ( “FUJIFILM” ) and you, which sets forth the terms and conditions of the TO NON - INFRINGEMENT OF ANY COPYRIGHT, PATENT, TRADE SECRET, license granted for you to use the software provided by FUJIFILM. - Page 69 Printed on recycled paper. 26 - 30, Nishiazabu 2 - chome, Minato - ku, Tokyo 106 - 8620, Japan http://home.fujifilm.com/products/digital/index.html FGS - 305102 - FG Printed in Japan...
Need help?
Do you have a question about the FinePix F410Z and is the answer not in the manual?
Questions and answers