Table of Contents
Advertisement
Advertisement
Table of Contents

Related Manuals for Phase Technology JFA-70X


Summary of Contents for Phase Technology JFA-70X
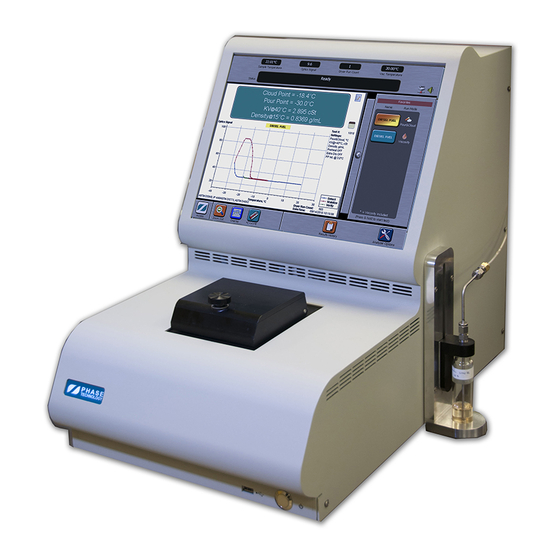
- Page 1 JFA-70X COLD FLOW PROPERTIES ANALYZER SYSTEM USER GUIDE...
- Page 2 The following document contains proprietary information of Phase Technology. These contents are confidential and any disclosure to persons other than the officers, employees, agents or sub-contractors of the owner or licensee of this manual, without the prior consent of Phase Technology, is strictly prohibited. Phase Technology...
-
Page 3: Table Of Contents
70Xi Cold Flow Properties Laboratory Analyzer User Guide T A B L E O F C O N T E N T S Section 1: How to Connect and Power On the Analyzer Section 2: How to Prepare Test Samples Section 3: How to Run Tests Using Pre-defined Favorites Section 4:... - Page 4 70Xi Cold Flow Properties Laboratory Analyzer User Guide Appendix A. How to Use DrySac Appendix B. Cleaning & Routine Maintenance Appendix C. FAQ: Calibration, Recertification and Maintenance Appendix D. Understanding & Using Phase Plots Appendix E. Customer Service & Support Appendix F.
- Page 5 A B O U T T H I S G U I D E This guide will help you become familiar with your Phase Technology 70Xi Cold Flow Properties Laboratory Analyzer and its features. In the unlikely event you experience a problem, contact Phase Technology for service and support.
-
Page 6: How To Connect And Power On The Analyzer
70Xi Cold Flow Properties Laboratory Analyzer User Guide H o w t o C o n n e c t a n d P o w e r O n t h e A n a l y z e r The analyzer should be set up on a flat, vibration-free surface in a well-ventilated location. - Page 7 70Xi Cold Flow Properties Laboratory Analyzer User Guide If Pour Point function is available, the message, “Remove sample then press Continue” will be displayed at the end of the self tests. If the sample cup is empty, press CONTINUE to proceed, otherwise remove the sample with a cotton swab, then press CONTINUE.
-
Page 8: How To Prepare Test Samples
H o w t o P r e p a r e T e s t S a m p l e s Phase Technology recommends filtering and drying test samples so that they are bright and clear in appearance and free of excessive moisture before testing. Refer to... -
Page 9: How To Run Tests Using Pre-Defined Favorites
70Xi Cold Flow Properties Laboratory Analyzer User Guide Lower the probe by sliding down the arm. The black handle should sit on top of the mouth of the vial. H o w t o R u n T e s t s U s i n g P r e - d e f i n e d F a v o r i t e s To start a run using a predefined test setting, press and hold (for one second) one of the favorite buttons (see section... -
Page 10: How To Change Test Settings
70Xi Cold Flow Properties Laboratory Analyzer User Guide The STOP TEST button will abort a test that is in progress. After the run has finished, the REPEAT TEST button will rerun the test using the same settings. H o w t o C h a n g e T e s t S e t t i n g s The analyzer’s current test settings, such as the Sample ID, Run Mode, and Temperature unit, etc. -
Page 11: How To Create And Modify Favorites
70Xi Cold Flow Properties Laboratory Analyzer User Guide The prefix “QC-“ is reserved for the names of QC samples. (see section 8. How to Use QC Chart and Limits, Sample Specifications and Trending of Test Results). Press SET AS QC button (next to the sample ID box) to assign the current sample to be a QC standard. -
Page 12: How To View Test Results
70Xi Cold Flow Properties Laboratory Analyzer User Guide H o w t o V i e w T e s t R e s u l t s The 70Xi analyzer has the ability to multitask, so previous results and phase plots may be viewed even while the analyzer is running a current test. -
Page 13: How To Use Qc Chart Limits, Sample Specifications, And Trending Of Test Results
70Xi Cold Flow Properties Laboratory Analyzer User Guide The OVERLAY button allows two or more phase plots to be overlaid on the screen for comparison purposes. To annotate the phase plot with a note, press the NOTE icon , at the upper right of the screen, and type in the desired text. - Page 14 70Xi Cold Flow Properties Laboratory Analyzer User Guide Select the QC sample in the list box that you wish to enter or modify the control limits. Select the Temperature Unit (°C or °F) at the top of the window. Enter the Upper Limit, Lower Limit and/or Centerline values for the corresponding run modes.
- Page 15 70Xi Cold Flow Properties Laboratory Analyzer User Guide Specification Limits for Non-QC Samples Upper and lower limits can also be assigned to sample not designated for QC purposes. Such limits may be internal production specification and hence useful for monitoring. Alerts are accordingly generated by the analyzer in case these limits are exceeded.
- Page 16 70Xi Cold Flow Properties Laboratory Analyzer User Guide Control Charts and Trend Graphs Trend graphs (i.e. time vs. test results graph) can be constructed for both QC and non- QC samples. Such a plot illustrates the test results of a particular sample (of a specific sample ID) over time, and can serve as a trending plot.
-
Page 17: How To Change User Level Access
70Xi Cold Flow Properties Laboratory Analyzer User Guide H o w t o C h a n g e U s e r L e v e l A c c e s s There are 3 different user levels that allow varying degree of configuration control: User: lowest level that may have restricted access to certain features. - Page 18 70Xi Cold Flow Properties Laboratory Analyzer User Guide Press USER ACCESS CONTROL. The following screen appears. Enter a password of your choice for the Administrator Password. This step should be performed by an authorized administrator. The screen also allows other permission settings.
-
Page 19: How To Shut Down And Restart The Analyzer
70Xi Cold Flow Properties Laboratory Analyzer User Guide H o w t o S h u t D o w n a n d R e s t a r t t h e A n a l y z e r NOTE: it is very important to follow the steps below to either shut down or restart the analyzer properly. - Page 20 There are 5 different types of data files that can be downloaded from the analyzer to the USB memory stick: DIAGNOSTIC FILES FOR CUSTOMER SERVICE This option downloads all necessary files for Phase Technology’s Customer Service department to review and perform further data analysis for troubleshooting SUMMARY OF ALL TEST RESULTS (.CSV)
- Page 21 70Xi Cold Flow Properties Laboratory Analyzer User Guide You can also import a supported document (.doc, .pdf, .ppt and .pps) into the analyzer by pressing IMPORT USER DOCUMENTS. The analyzer will automatically search for and list all supported documents in the root directory of the USB memory stick. Simply select the desired document to upload and enter a document title.
- Page 22 70Xi Cold Flow Properties Laboratory Analyzer User Guide NOTE: make sure the “Save Credentials” check box is selected (i.e. has check mark). After pressing OK, analyzer will ask whether to save the credentials. Selecting “Yes” will eliminate the need to enter the user name and password each time the network location is accessed.
- Page 23 CAUTION! The 70Xi’s USB ports are intended to only be used with Phase Technology recommended printers, barcode scanner, keyboard, mouse or flash drives. Do not use the USB ports to connect, power or charge other devices.
-
Page 24: How To Calibrate Viscosity
70Xi Cold Flow Properties Laboratory Analyzer User Guide H o w t o C a l i b r a t e V i s c o s i t y Viscosity can be calibrated by using jet fuel standards with known KV values. It is recommended to test at least two jet fuel standards with different viscosity. - Page 25 70Xi Cold Flow Properties Laboratory Analyzer User Guide CAUTION! Only use jet fuels as viscosity calibration standards. Do not use base oils or other materials to calibrate the viscosity. 3. When the test has completed, you may choose to do another run of the same sample (RE-RUN), test the next sample (NEXT), or finish the calibration (DONE CALIBRATION).
- Page 26 70Xi Cold Flow Properties Laboratory Analyzer User Guide 4. When all the calibration tests are completed, press DONE CALIBRATION. A table of the calibration tests will be displayed. Press SAVE CALIBRATION to update the calibration of the analyzer.
- Page 27 70Xi Cold Flow Properties Laboratory Analyzer User Guide 5. To see the current calibration results, press CURRENT VISCOSITY CALIBRATION from the Analyzer Options screen.
-
Page 28: Appendix A. How To Use Drysac
When your Phase Technology analyzer is not being used for an extended period of time, DrySac should be placed directly in the instrument’s test chamber. In some climates, moisture can collect in the purge system overnight. -
Page 29: Appendix B. Cleaning & Routine Maintenance
70Xi Cold Flow Properties Laboratory Analyzer User Guide A p p e n d i x B . C l e a n i n g & R o u t i n e M a i n t e n a n c e Cleaning the LED Touch Screen and External Surfaces of the Analyzer The screen protector shields the touch screen surface from dirt and spills while maintaining the screen’s responsiveness and functionality. - Page 30 “fill to this line” mark on the bottle to use as a guide when filling with desiccant. Lightly tap the bowl to settle the desiccant. NOTE: Phase Technology desiccant packs are pre-measured so that each one contains the exact required amount. There should be no excess. Desiccant is now better packaged with a stronger vacuum pack seal to ensure there is less exposure to air and moisture.
- Page 31 Keep the lid of your analyzer closed and latched when not in use to prevent humid air from entering the purge system through the chamber inlets. CAUTION! Use desiccant provided by Phase Technology only. Use of other desiccant or recharging desiccant will VOID WARRANTY. Ordering information:...
-
Page 32: Appendix C. Faq: Calibration, Recertification And Maintenance
The certificate specifies the allowable deviation from the average measurement over a range of standard results. Every new Phase Technology analyzer is shipped with a Certificate of Calibration which details the specific customer, serial number, test methods and precision (repeatability and reproducibility), date of calibration, and date for next recertification. - Page 33 70Xi Cold Flow Properties Laboratory Analyzer User Guide Is Phase Technology preventive or scheduled maintenance service the same as general, routine maintenance? No, routine maintenance consists of procedures that are a part of good laboratory practices. These include cleaning the test chamber, sample cup and optic lens. Replacing desiccant and performing certain diagnostic tests are also part of routine maintenance.
-
Page 34: Appendix D. Understanding & Using Phase Plots
ASTM D5773 test method. Phase Technology’s 70Xi analyzer performs a cloud point test in two stages. First, the sample is cooled at a fast rate as the optics system looks for crystal formation and signal rise. On a cloud point phase plot, this can be seen as the blue line moves from left to right. - Page 35 ASTM D5972 test method. During a freeze point test, Phase Technology’s 70Xi analyzer cools the sample relatively quickly until wax crystals begin to form. On a freeze point phase plot, this can be seen as the blue line moves from left to right.
- Page 36 70Xi Cold Flow Properties Laboratory Analyzer User Guide In a pour point test, the sample starts off in a wax-free liquid state, and is then cooled. As it cools, it becomes more viscous as wax crystals begin to form. Pour point is the minimum temperature at which the liquid still flows before gelling or becoming sufficiently viscous and immobile under the test conditions.
-
Page 37: Appendix E. Customer Service & Support
(if required), and conducts a final check before shipping back to customer. * Phase Technology Customer Service hours: Monday – Friday, 8:00 AM – 5:00 PM (Pacific Time Zone) TO CONTACT CUSTOMER SERVICE & SUPPORT: Send email to customer service: customer_service@phase-technology.com... -
Page 38: Appendix F. Warranty
If defective Products are returned to Phase Technology, the costs of such return will be borne by the customer, and those of delivering the repaired or replacement Products to the customer will be borne by Phase Technology.
Need help?
Do you have a question about the JFA-70X and is the answer not in the manual?
Questions and answers