Table of Contents
Advertisement
Quick Links
Download this manual
See also:
User Manual
Advertisement
Table of Contents

Related Manuals for Minolta PagePro 1100


Summary of Contents for Minolta PagePro 1100
- Page 1 PagePro™ 1100 User's Guide 1800627-001A...
-
Page 3: Table Of Contents
Roadmap of this manual ...1-3 Where to find what in this User’s Manual...1-3 Brief explanation of special type styles and method of presentation ...1-4 Working safely with your laser printer ...1-5 Notes on your safety and operating safety...1-5 Laser safety...1-7 Internal laser radiation...1-7 Safety label ...1-8... - Page 4 Switching Toner Save function on and off ... 4-16 Optimizing the print quality of text and graphics (Fine-ART) ... 4-16 Specifying the toner density ... 4-16 Optimizing data exchange with the printer (All raster)... 4-16 Specifying the resolution ... 4-17 Activating the use of printer-resident TrueType fonts... 4-17 Device option index card ...
- Page 5 6 Working with the DOS printer tools Calling up the Status Monitor in Windows 3.1x ...5-3 Altering the size of the Status Monitor window ...5-4 Calling up the Control Panel ...5-5 Paper index card ...5-6 Defining the response in the case of a lack of suitable paper ...5-7 Specifying a paper format for paper feed tray 1 ...5-7...
- Page 6 Loading paper into the manual feed unit ... 7-9 Loading paper into paper feed tray 2 ... 7-10 Determining the direction of the print-out ... 7-12 Monitoring print jobs with the Status Monitor... 7-14 Cancelling a print job ... 7-15 TOC-4 7 Working with the printer...
- Page 7 Status messages...10-16 User messages ...10-17 Service messages...10-18 11 Appendix 11.1 Features ...11-1 Hardware...11-1 Software ...11-1 Operating System ...11-1 11.2 Technical specification...11-2 PagePro 1100 Printer...11-2 Second Paper Cassette tray (option)...11-3 Network Interface Card (Option) ...11-3 Expansion Memory (SDRAM-DIMM) (option) ...11-3 TOC-5...
- Page 8 Interface connector and Cable ... 11-4 11.3 Minolta's concern for environmental protection ... 11-5 What does the energy star mean? ... 11-5 11.4 CE symbol (Declaration of Conformity) ... 11-6 11.5 Index ...11-8 TOC-6 11 Appendix...
-
Page 9: Welcome To Minolta
Introduction Welcome to Minolta Thank you for your decision to purchase a Minolta laser printer. To achieve the best possible results and to use your laser printer effectively, this User's Manual provides you with information on the following topics: installing the printer driver,... - Page 10 These documents may not be reproduced, transmitted, transcribed, stored in an archive system or translated without the express prior written consent of Minolta Co. Ltd. We reserve the right to make changes to the content of this manual. Trademarks PCL is a registered trademark of the Hewlett-Packard Company. Centronics is a registered trademark of Centronics,Inc.
-
Page 11: Roadmap Of This Manual
Introductory remarks and information on how to use this manual as well as notes on the safe use of the printer. Information on how to set up the printer as well as an introduction to the various features. A step-by-step explanation of the routine for installing the printer driver. -
Page 12: Brief Explanation Of Special Type Styles And Method Of Presentation
This is a helpful tip Text passages that are identified in this manner provide you with tricks and handy tips to make it even easier to work with the printer. Introduction Here you can see what has to be done. -
Page 13: Working Safely With Your Laser Printer
Notes on your safety and operating safety Working improperly with the printer can result in health hazards, electric shocks and even fires. Before you unpack the laser printer, you should make yourself familiar with this information on your safety and operating safety. - Page 14 the machine improperly can result in a fire or an electric shock. Do not place any heavy objects on the machine. Do not open any covers on the machine while printing is in progress. Do not switch off the unit while printing is in progress. Do not place any magnetic objects near the machine.
-
Page 15: Laser Safety
Introduction Laser safety This printer is equipped with a laser. If the printer is used in accordance with the instructions in this User's Manual, the laser presents no danger. The radiation emitted is completely absorbed and attenuated by the case. -
Page 16: Safety Label
Safety label Laser caution label Ozone emission Small quantities of ozone escape during the printing process. These quantities do not represent a health hazard. In spite of this, you should take care that the area in which the machine is located has adequate ventilation, especially if you are printing large quantities of materials or if the machine is being used continuously over a long period of time. -
Page 17: Unpacking, Installing And Setting Up The Printer
Unpacking, installing and setting up the printer Unpacking, installing and setting up the printer Unpacking your laser printer CAUTION Plastic packaging materials are dangerous for children! After unpacking, keep the packaging materials out of reach of children. Remove the printer and accessories from the box. - Page 18 Why keep packaging materials? If you need to transport the printer, you can reuse the packaging. This will ensure that your printer is safely and correctly packed. Unpacking, installing and setting up the printer...
-
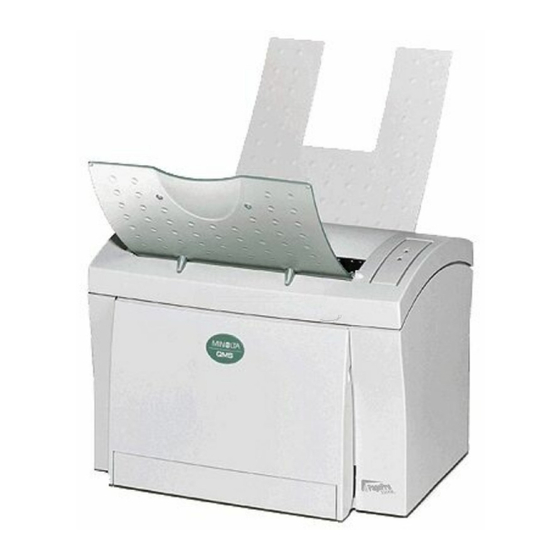
Page 19: Overview Of The Printer
Unpacking, installing and setting up the printer Overview of the printer External features Description Release button for top cover Control panel Paper output tray (printed side down) Top Cover Paper guides Extending paper support Description Paper feed tray 1 (multipurpose tray) -
Page 20: Inside The Printer
Inside the printer Description Fusing unit Image transfer roller Unpacking, installing and setting up the printer Description Toner cartridge... -
Page 21: Optional Accessories
Unpacking, installing and setting up the printer Optional accessories Description Paper output tray (printed side up) Description Paper feed tray (500-sheet capacity) -
Page 22: Printer Control Panel
The control panel has three indicator lamps and one control button. Description Fault lamp (amber) Paper lamp (amber) For further information on the control panel, see chapter 10. Unpacking, installing and setting up the printer Description Stand-by lamp (green) Control button... -
Page 23: Installing Your Laser Printer
The printer must be positioned such that it cannot be adversely affected by the following: splashing liquids, organic gases, e.g. -
Page 24: Ambient Conditions
Ambient conditions The optimum ambient conditions for your printer are as follows: Temperature range 10°C to 35°C (fluctuations max. 10°C per hour); Humidity range 15% to 85% (fluctuations max. 20% per hour). Unpacking, installing and setting up the printer... -
Page 25: Space Required
Unpacking, installing and setting up the printer Space required Make certain that there is enough space available around the printer (see illustration). This will facilitate operation, reloading paper and toner, and maintenance of the printer. - Page 26 Unpacking, installing and setting up the printer 2-10...
-
Page 27: Setting Up Your Laser Printer
Unpacking, installing and setting up the printer Setting up your laser printer Setting up paper feed tray 1 Set the feed tray for the required paper format. Lift up the paper output tray. Fold down the paper feed tray. Press the right-hand paper guide together in order to release the guide. -
Page 28: Connecting The Power Cable
Connecting the power cable Only use the power cable supplied with the printer! The laser printer requires a non-fluctuating power supply. If necessary, ask an electrician for advice. Main voltage: 22 0-240V ± 10 • Main frequency: 50- 60Hz ± 0.3% •... -
Page 29: Switching The Printer On And Off
CAUTION Improper handling may result in damge to the printer! Never switch off the printer while a print job is in progress, the printer is receiving data from the computer (flashing “Stand-by“ lamp on control panel) or the printer is being reset. -
Page 30: Printing Out The Configuration Page
Be prepared for technical inquiries! Always have a current configuration page available in the event of a technical inquiry. Make a note of the printer‘s serial No. on the configuration page, see chapter 1 (Safety label). 2-14 Unpacking, installing and setting up the printer... -
Page 31: Connecting The Printer To A Computer
Using the wrong type of cable may result in damage to the equipment! Using the wrong type of cable can damage the socket on the printer. Only use an IEEE 1284 type B shielded interface cable for connecting the printer to your computer. - Page 32 Unpacking, installing and setting up the printer 2-16...
-
Page 33: Installing The Printer Driver
Which optional accessories are fitted to your printer? Is your printer a local printer or a network printer? Local printer: when the printer is connected directly to your computer via a parallel interface cable. Network printer: when the printer is integrated in a computer network. -
Page 34: General Information On The Printer Driver
Information on installing a network printer You can install the printer as a local printer or as a network printer. You should note of the following points when installing as a network printer: If you would like to access the printer from a server based on Windows 95, first install the printer driver from the server using the installation program. -
Page 35: Installation For Windows 95/98 And Nt 4.0
Switch on the printer. Switch on the computer and start W indows95 , Windows98 or Windows NT 4.0. Place the PagePro 1100 printer driver CD in the CD-ROM drive of your computer. The installation program starts automatically. The installation program does not start automatically? Start Windows Explorer and open the directory of the CD. -
Page 36: Plug-&-Play Installation (Windows 95/98 Only)
Plug-&-Play installation (Windows 95/98 only) Make sure that the printer is connected to your computer via a parallel interface cable. Switch on the printer. Switch on the computer and start Wi ndows95 or Windows98. Make sure that the printer name is shown in the update device driver box or the “Hardware Wizard“... -
Page 37: Installation For Windows 3.1X
Switch on the printer. Switch on the computer and start W indows3.1x. Place the PagePro 1100 printer driver CD in the CD-ROM drive of your computer. Call up File Manager and open the CD-ROM directory. Double-click on “Minolta.exe“ to activate the installation program. -
Page 38: Uninstalling The Windows Printer Driver
Example: Windows 95/98, Windows NT 4.0 Example: Windows 3.1x Click on “Uninstaller“. The deinstallation program starts automatically. Follow the subsequent instructions. To complete the deinstallation of the printer driver, the Windows operating system must be restarted Installing the printer driver... -
Page 39: Installation For Ms-Do
Make sure that the printer is connected to your computer locally or via a network. Switch on the printer. Switch on the computer and start MS-DOS. Place the PagePro 1100 printer driver CD in the CD-ROM drive of your computer. Change to the CD-ROM drive. Enter, for example: d:\ ( d = corresponding letter of your CD-ROM drive) Change to the directory which contains the installations program. - Page 40 Installing the printer driver...
-
Page 41: Working With The Windows Printer Drivers
Working with the Windows printer drivers Displaying printer driver settings Displaying settings in Windows 95/98 In the START menu, select “Settings – Printer“. The “Printers“ dialogue box appears. Click on the “Minolta PageWorks/Pro1100“ icon. Under “File“, select the item “Properties“. -
Page 42: Displaying Settings In Windows Nt 4.0
Displaying settings in Windows NT 4.0 In the START menu, select “Settings – Printer“. The “Printer“ dialogue box appears. Click on the “Minolta PageWorks/Pro1100“ icon. Under “File“, select the item “Standard document settings“. The printer driver dialogue box appears. Working with the Windows printer drivers... -
Page 43: Displaying The Settings In Windows 3.1X
Working with the Windows printer drivers Displaying the settings in Windows 3.1x The options on the individual index cards correspond to those of Windows 95/98. In the Windows main group, double-click on the “Control panel“ icon. The “Control panel“ program group appears. -
Page 44: Paper Index Card
(enlarge/reduce) documents upon print-out, specify the number of copies, switch on/off the printer’s sorting function. Working with the Windows printer drivers... -
Page 45: Selecting A Paper Format
Selecting a paper format Use “Paper size“ to specify the format of the printed page. The various paper sizes supported by your printer are shown in the dropdown list. The following formats have a fixed definition in the dropdown list:... -
Page 46: Creating A Custom Paper Format
Would you like to delete a custom format? In the “Custom paper“ dialogue box, mark the paper size you would like to delete. Then click on “Delete“. Confirm with [OK]. Working with the Windows printer drivers 76 ×12 7mm (3 × 5 in.) 21 6×3 56mm... -
Page 47: Adjusting The Print-Out To Fit The Paper
Working with the Windows printer drivers Adjusting the print-out to fit the paper Use the “Fit to paper“ function to fit your document to a certain paper size when it is printed. Your document will be automatically enlarged or reduced so that it will fit on the paper size you have selected. -
Page 48: Specifying The Paper Source
Specifying the paper source Under “Paper source“ you can specify which tray will feed the printer. Paper source Auto Tray 1 Tray 2* Manual feed * optional paper source unit Not all paper formats available? If you have selected the optional paper feed tray 2 under “Paper feed“, then not all the paper formats given in the table are available. -
Page 49: Specifying The Number Of Copies
You may enter any value between 1 and 999. Switching on/off the printer’s sorting function Switch on the “Collate at printer“ function in order to sort your print-outs automatically. This function is only available when your printer is fitted with a memory capacity of at least 64 MB. -
Page 50: Page Layout Index Card
Page layout index card This index card allows you to: print several pages of a document on the same print page, provide print-outs with a watermark, design custom watermarks, adjust the printable area. 4-10 Working with the Windows printer drivers... -
Page 51: Printing Multiple Document Pages Per Print Page (N-Up)
Working with the Windows printer drivers Printing multiple document pages per print page (N-up) Use the “N-Up“ function to print multiple reduced document pages on a single print page. The “N-up“ function cannot be used at the same time as the features “Scaling“, “Fi tto paper“... -
Page 52: Printing Watermarks
Activate the checkbox “First page only“ so that the watermark will only be printed on the first page of a multi-page document. Watermarks as copy protection! Provide your print-outs with a watermark in order to prevent the printed pages from being copied. 4-12 Working with the Windows printer drivers... -
Page 53: Custom Watermarks
Working with the Windows printer drivers Custom watermarks Design your own personal watermark. Click on the [EDIT WATERMARK...] button and the “Watermark“ dialogue box will appear. Click on the [ADD] button to create a new watermark, click on a predefined Water mark to modify it. -
Page 54: Adjusting The Printable Area (Xy Image Shift)
10 points (approx. 4 mm) horizontally and vertically. Enter a value in the “X“ box in order to move the printable area horizontally. Enter a value in the “Y“ box in order to move the printable area vertically. 4-14 Working with the Windows printer drivers... -
Page 55: Quality Index Card
Toner Save mode, optimize the print quality of text and graphics (Fine-ART), specify the toner density, optimize the exchange of text and graphics data with the printer (All raster), specify the resolution for the print-out, activate the use of TrueType Fonts. -
Page 56: Switching Toner Save Function On And Off
Increasing the toner density produces a darker print-out but increases the consumption of toner. Optimizing data exchange with the printer (All raster) Use the “All raster“ function to determine the format in which graphics and font data will be loaded into the printer. -
Page 57: Specifying The Resolution
The “All raster“ function cannot be used at the same time as the “N-up“, “Scaling“, “Fit to paper“ and “Font“ functions. Select “ON“ to send both graphics and font data to the printer as raster graphics. This makes it possible for the printed document to agree as closely as possible with the appearance on the screen. -
Page 58: Device Option Index Card
Device option index card This index card allows you to: activate the optional paper feed tray 2, define the total memory capacity of the printer. Windows NT 4.0 only! The “Device option“ index card for Windows NT 4.0 is integrated in a different system sector and must be called up separately. -
Page 59: Activating The Optional Paper Feed Tray 2
Specifying the total memory capacity Use the “Memory option“ function to specify how many megabytes of memory capacity have been installed in your printer. Enter the value corresponding to the total memory capacity (installed 4 MB memory module + optional memory module). - Page 60 Working with the Windows printer drivers 4-20...
-
Page 61: Working With The Windows Printer Tools
Status Monitor and the Control Panel. Automatic start of Status Monitor! If upon installing the printer driver you activated the option to automatically start the printer driver, then the Status Monitor is automatically called up upon starting the computer. -
Page 62: Calling Up The Status Monitor
Calling up the Status Monitor Calling up the Status Monitor in Windows 95/98, Windows NT 4.0 Call up the program group “MLT PageWorksPro 1100“. Click on “MLT PageWorksPro 1100 Printer Tools“. The Status Monitor appears. Working with the Windows printer tools... -
Page 63: Calling Up The Status Monitor In Windows 3.1X
Calling up the Status Monitor in Windows 3.1x The options on the individual index card correspond to those of Windows 95/98. Call up the program group “MLT PageWorksPro 1100“. Click on “MLT PageWorksPro 1100 Printer Tools“. The Status Monitor appears. -
Page 64: Altering The Size Of The Status Monitor Window
“Reduce“ in order to decrease the size of the window. In the Status Monitor menu bar, select the "View" menu and then the option “Expand“ in order to increase the size of the window. Working with the Windows printer tools... -
Page 65: Calling Up The Control Panel
Use the Control Panel in order to check and/or alter the basic settings of the printer. Call up the program group “MLT PageWorksPro 1100“. Click on “MLT PageWorksPro 1100 Printer Tools“. The Status Monitor appears. Click on [PRINTER SETTING...], select “Setup – Printer setting“ via the menu bar. The Control Panel appears. -
Page 66: Paper Index Card
Paper index card This index card allows you to: define the response in the case of a lack of suitable paper (paper format error), define the paper format for paper feed tray 1. Working with the Windows printer tools... -
Page 67: Defining The Response In The Case Of A Lack Of Suitable Paper
Working with the Windows printer tools Defining the response in the case of a lack of suitable paper You can determine how the printer responds in the case of a paper format error. Select “Proceed“ to continue printing on the paper format already fed into the machine. -
Page 68: Printer Setting Index Card
Working with the Windows printer tools... -
Page 69: Switching On/Off The Power Save Mode
Select “Off“ to deactivate the Power Save mode function. Switching on/off the automatic continuation function A print job is interrupted if the printer signals a format error or memory overflow. The “Auto continue“ function enables you to determine whether the print job should continue automatically after a certain time has elapsed despite the presence of an error message. -
Page 70: Specifying The Input/Output Timeout
Only then does the printing process begin. Select “Auto“ to enable the printer to check each page of a print job in advance and activate page protection if necessary. -
Page 71: Test Print Index Card
Click on the button corresponding to the test print you wish to print out. The required test print is output. Description Prints out a demonstration page with an overview of all printer functions. Prints out a configuration page with the current printer settings. -
Page 72: Counter Index Card
Counter index card This index card allows you to: check the status of a counter, reset a counter. 5-12 Working with the Windows printer tools... -
Page 73: Checking The Status Of A Counter
The associated counter is reset to zero. Description This indicates the total number of pages printed by the printer. This counter can only be reset by a customer service engineer. This indicates how many pages have been fed frompaper feed tray 1. -
Page 74: Configuration Index Card
Configuration index card This index card summarizes the most important printer settings for quick reference. No settings can be altered via this index card. 5-14 Working with the Windows printer tools... -
Page 75: Working With The Dos Printer Tools
Working with the DOS printer tools Using the Status Monitor Calling up the Status Monitor Call up the Status Monitor in order to check the printer and the progress of print jobs. Change to the directory into which the printer driver files were copied upon installation. -
Page 76: Switching On/Off Popup Messages (Setup Menu)
Status Monitor. Defining popup messages (Setup menu) You can specify which printer faults cause a popup message to appear on the screen. Mark one of the error messages and press [ENTER] in order to change the status of the error message. -
Page 77: Using The Dos Control Panel
Calling up the Control Panel Call up the Control Panel in order to specify the basic settings of the printer. Change to the directory into which the printer driver files were copied upon installation. Enter, for example: cd c:\mltdos Enter the following command in order to call up the Cont rolPanel: spcpdos The Control Panel appears. -
Page 78: Creating And Saving Printer Profiles
Printer profiles are created in order to save printer configurations and then call them up later as required. Adjust the settings in the Control Panel in order to create a printer profile. Select “File – Save profile“ from the menu bar. -
Page 79: Loading Printer Profiles
Working with the DOS printer tools Loading printer profiles Printer profiles are loaded in order to replace the current printer settings by those of a printer profile. Select “File – Open Profile“ from the menu bar. The “Open profile“ dialogue box appears. -
Page 80: Printing A Test Or Demo Page
Print out a test page in order to obtain an overview of the current configuration of the printer. Print out a demo page in order to obtain an overview of all printer functions. Select “Option“ from the menu bar and then the fun ction “Testpage“... -
Page 81: Setup Panel
Working with the DOS printer tools Setup panel This panel allows you to: specify the paper format, specify paper feed from different trays, specify fast or normal printing, specify the number of lines printed per page, specify the number of copies,... -
Page 82: Selecting A Paper Format
Selecting a paper format Use “Paper size“ to specify the format of the printed page. The various paper sizes supported by your printer are shown in the dropdown list. The following formats have a fixed definition in the dropdown list:... -
Page 83: Specifying The Paper Source
Working with the DOS printer tools Specifying the paper source Under “Paper source“ you can specify which tray will feed the printer. Paper source Auto Tray 1 Tray 2* Manual feed * optional paper source unit Not all paper formats available? If you have selected the optional paper feed tray 2 under “Paper feed“,... -
Page 84: Specifying The Orientation Of The Printing Paper
(vertical) or landscape (horizontal) format. Defining the response to format errors The “Paper Time Out“ function allows you to define how the printer responds to paper format errors. Select “Proceed“ to continue printing on the paper format already fed into the machine. -
Page 85: Specifying A Paper Format For Paper Feed Tray 1
Working with the DOS printer tools Specifying a paper format for paper feed tray 1 You can specify whether paper feed tray 1 is to be used as a universal tray or as a tray set to a certain format. -
Page 86: Font Panel
(Type Face) which is to be used for the print-out, determine the character set (Symbol Set) which is to be used for the print-out, determine the font size (Pitch) which is to be used for the print-out. 6-12 Working with the DOS printer tools... -
Page 87: Output Quality Panel
Working with the DOS printer tools Output Quality panel This panel allows you to: switch on/off the Toner Save mode, define the resolution for the print-out, define the print quality optimization for text and graphics (Fine-Art), specify the toner density. -
Page 88: Switching Toner Save Function On And Off
In the print-out this produces a softer transition at the edges. Select “DARK“ to smooth the edges of text and graphics by means of a large number of dots. In the print-out this produces a harder transition at the edges. 6-14 Working with the DOS printer tools... -
Page 89: Specifying The Toner Density
Working with the DOS printer tools Specifying the toner density The amount of toner used is specified by means of the “Toner density“ function. High toner density = high toner consumption! Increasing the toner density produces a darker print-out but increases the consumption of toner. -
Page 90: Counter Panel
Counter panel This panel allows you to: check the status of a counter, reset a counter. 6-16 Working with the DOS printer tools... -
Page 91: Checking The Status Of A Counter
The associated counter is reset to zero. Description This indicates the total number of pages printed by the printer. This counter can only be reset by a customer service engineer. This indicates how many pages have been printed with the current image transfer roller. -
Page 92: Configuration Panel
Configuration panel This panel summarizes the most important printer settings for quick reference: Printer Name The designation of the printer. Total Memory Indicates the total memory available. Additional Accessories Indicates presence and status of optional accessories. No settings can be altered via this panel. -
Page 93: Other Panel
Working with the DOS printer tools Other panel This panel allows you to: switch on/off the Power Save mode, switch on/off the detection of paper format errors, activate the page protection function, switch on/off the automatic continuation in the case of an error message, define the input/output timeout. -
Page 94: Switching On/Off The Power Save Mode
Only then does the printing process begin. Select “AUTO“ to enable the printer to check each page of a print job in advance and activate page protection if necessary. -
Page 95: Switching On/Off The Automatic Continuation Function
Working with the DOS printer tools Switching on/off the automatic continuation function A print job is interrupted if the printer signals a format error or memory overflow. The “Auto continue“ function enables you to determine whether the print job should continue automatically after a certain time has elapsed despite the presence of an error message. - Page 96 Working with the DOS printer tools 6-22...
-
Page 97: Working With The Printer
Working with the printer Please note the following points: What should I watch out for when loading paper? To avoid paper misfeeds in the laser printer, please observe the following points: Do not use any paper with the following features: Paper that has already been used in a thermal or ink-jet printer. -
Page 98: Which Sizes Of Paper Can I Use
Which sizes of paper can I use? This printer is only designed for use with the sizes of paper listed below. Paper size Standard sizes 21 0 ×2 97mm 14 8 ×2 10mm JIS B5 18 2 ×2 57mm Letter 215 . -
Page 99: What Types Of Paper Can I Use
Working with the printer What types of paper can I use? This printer is only designed for use with the types of paper listed below. Paper size Plain paper 60 to 90g/m Recycled paper 60 to 90 g/m Transparent film... -
Page 100: Using The Control Button
Working with the printer Description Stand-by lamp (green) Control button... -
Page 101: Resetting The Counter For The Toner Cartridge
After you have replaced the toner cartridge, reset the toner cartridge counter. Switch off the printer. Hold down the control button and switch on the printer again. The green “Stand-by“ lamp begins to flash. Hold down the control button for another 5 seconds and then release it. -
Page 102: Resetting The Counter For The Image Transfer Roller
After you have replaced the image transfer roller, reset the counter for the image transfer roller. Switch off the printer. Hold down the control button and switch on the printer again. The green “Stand-by“ lamp begins to flash. Hold down the control button for another 5 seconds and then release it. -
Page 103: Printing Out The Configuration Page
Make sure that one of the above errors has occurred. -
Page 104: Loading Paper
Place the paper between the paper guides. Slide the guides up to the stack of paper. How many sheets may I place on the tray? The stack of paper should not rise above the "m ax."mark. Working with the printer... -
Page 105: Loading Paper Into The Manual Feed Unit
Working with the printer Loading paper into the manual feed unit When using the manual feed unit, sheets and envelopes must be fed in one at a time. Slide the guides outwards as far as they will go. Place the paper between the guides with the side to be printed facing upwards. -
Page 106: Loading Paper Into Paper Feed Tray 2
2 until you detect a certain resistance. Then lift the front of the cassette a little before pulling it out completely. Remove the cassette cover. Press down the paper lifting plate until it locks. 7-10 Working with the printer... - Page 107 Working with the printer Place the paper in the cassette. How many sheets may I place in the cassette? The stack of paper should not rise above the "m ax."mark. Refit the cassette cover. Slide the cassette back into paper feed tray 2.
-
Page 108: Determining The Direction Of The Print-Out
Printed sheets can be output in two directions: face up, or face down. The printer is fitted with a tray for face-down output as standard. A tray for face-up output is available as an option. The face-up output option is especially suitable for thick papers and envelopes because then the path through the printer is straighter. - Page 109 “Face-down output“ when the printed Face-down output sheets are to be output face down; make sure that the switch is set for “Face-up output“ when your printer is fitted with the optional output tray and the printed sheets are to be output Face-up output face up.
-
Page 110: Monitoring Print Jobs With The Status Monitor
Monitoring print jobs with the Status Monitor The Status Monitor allows you to monitor the printer and the progress of current print jobs. When the background to the printer graphic is green, the printer is in Stand-by mode or a print job is running normally. -
Page 111: Cancelling A Print Job
Working with the printer Cancelling a print job This cancels the current print job. Hold down the control button for longer than 5 seconds. Release the control button when all three lamps have gone out. The current print job has now been cancelled. - Page 112 Working with the printer 7-16...
-
Page 113: Installing Paper Feed Tray 2
Take the parts out of the box and remove the plastic packagings. Remove all packaging materials and adhesive tape. Remove the plastic pad from the feed tray. Switch the printer OFF and also disconnect the power cable and the interface cable from the printer. Mount the printer on the paper feed... - Page 114 Fill the cassette with paper, see chapter 7. How many sheets may I place in the cassette? The stack of paper should not rise above the "m ax."mark. Refit the cassette cover. Slide the cassette back into the feed tray. Installing optional accessories...
-
Page 115: Installing The Face-Up Output Tray
Installing optional accessories Installing the face-up output tray The printer is fitted with a tray for face-down output as standard. A tray for face-up output is available as an option. The face-up output option is especially suitable for thick papers and envelopes because then the path through the printer is straighter. -
Page 116: Installing The Dimm Memory Module
Installing the DIMM memory module This printer is equipped with 4 MB of memory capacity as standard. The memory capacity can be expanded to max. 132MB with commercially available SDRAM-DIMM memory modules (PC/100-compatible). Memory modules of the following sizes may be used: 16, 32, 64, 128 MB. - Page 117 Installing optional accessories Switch the printer OFF and also disconnect the power cable and the interface cable from the printer. Fold down the output tray. Press the top cover release button and open the cover. Remove the two screws from the...
- Page 118 Insert the memory module into the slot. Press it carefully onto the socket until it clips into place. Refit the side cover and secure it with the two screws. Close the top cover. Installing optional accessories...
- Page 119 Installing optional accessories Lift up the output tray. Enter the new total memory capacity in the printer software (see chapter 4), print out the configuration page (see chapter 2. The new total memory capacity should be shown correctly. What if the total amount of memory is not displayed correctly? Check whether the modules were installed correctly.
-
Page 120: Installing A Network Card
The network card is very sensitive. Handling it improperly could result in damage to the network card that will render it unusable. Before you unpack the network card, touch a metal part of the printer to cause static electricity to discharge from you. -
Page 121: Caring For And Maintaining Your Printer
You could damage the unit by using incorrect accessories and parts! If you use accessories and parts of manufacturers other than Minolta, we cannot guarantee that the laser printer will operate properly. Use only Minolta accessories and parts unless specified otherwise. -
Page 122: Cleaning The Printer
Cleaning the case Switch the printer OFF and unplug the power cable. Wipe the printer case off with a soft cloth. You may moisten the cloth with a little neutral household cleaner if you wish. Cleaning the paper feed roller Clean the paper feed roller if paper feed problems occur frequently. - Page 123 Caring for and maintaining your printer Press the top cover release button and open the cover. Remove the toner cartridge and the image transfer roller. Wrap the the image transfer roller in a cloth to protect it against exposure to light.
- Page 124 Refit the toner cartridge and the image transfer roller. Close the top cover. Lift up the output tray. Caring for and maintaining your printer...
-
Page 125: Replacing The Toner Cartridge
The toner cartridge has a capacity of about 6000 A4 pages or letters with about 5% toner coverage. The toner cartridge supplied with the printer has a capacity of, on average, 3000 A4 pages or letters with about 5% toner coverage. - Page 126 Place the new toner cartridge in the printer. In doing so, match up the coloured strips and numbers on the cartridge with those on the printer. Caring for and maintaining your printer...
- Page 127 Caring for and maintaining your printer Make sure that the toner cartridge is correctly seated in the guides and is clipped in place. Close the top cover. Lift up the output tray.
-
Page 128: Replacing The Image Transfer Roller
The fusing unit can become very hot! The fusing unit, which is located beneath the top cover, can become very hot when the printer is in operation. To prevent injuries, avoid contact with this area. Switch the printer OFF and unplug the power cable. - Page 129 Remove the new image transfer roller from the box and place it in the printer. In doing so, match up the coloured strips and numbers on the roller with those on the printer. Place the toner cartridge back in the printer.
- Page 130 Make sure that the toner cartridge is correctly seated in the guides and is clipped in place. Close the top cover. Lift up the output tray. 9-10 Caring for and maintaining your printer...
-
Page 131: Troubleshooting
Troubleshooting Troubleshooting CAUTION The fusing unit can become very hot! The fusing unit, which is located beneath the top cover, can become very hot when the printer is in operation. To prevent injuries, avoid contact with this area. 10-1... -
Page 132: Clearing Paper Misfeeds
10.1 Clearing paper misfeeds Clearing a paper misfeed at the image transfer roller Switch the printer OFF. Fold down the output tray. Press the top cover release button and open the cover. Lift out the toner cartridge and the image transfer roller. - Page 133 Troubleshooting Carefully pull the misfed sheet(s) out of the printer. Refit the image transfer roller and the toner cartridge. Close the top cover. Lift up the output tray. 10-3...
-
Page 134: Clearing A Paper Misfeed At The Fusing Unit
CAUTION The fusing unit can become very hot! The fusing unit, which is located beneath the top cover, can become very hot when the printer is in operation. To prevent injuries, avoid contact with this area. Switch the printer OFF. - Page 135 Troubleshooting Hold the bottom edge of the misfed sheet and carefully pull it out of the printer. The bottom edge of the paper is not visible? Move the bottom edge of the paper so that you can grab it with your fingers.
-
Page 136: Clearing A Paper Misfeed At The Output Tray
Clearing a paper misfeed at the output tray Carefully pull the misfed sheet(s) out of the tray concerned. Top: Face-down tray Bottom: Face-up tray (optional) Open the top cover and close it again in order to reset the printer. 10-6 Troubleshooting... -
Page 137: Clearing A Paper Misfeed At Paper Feed Tray 1
Troubleshooting Clearing a paper misfeed at paper feed tray 1 Carefully pull the misfed sheet(s) out of the tray. Open the top cover and close it again in order to reset the printer. 10-7... -
Page 138: Clearing A Paper Misfeed At The Manual Feed Unit
Clearing a paper misfeed at the manual feed unit Carefully pull the misfed sheet out of the unit. Open the top cover and close it again in order to reset the printer. 10-8 Troubleshooting... -
Page 139: Clearing A Paper Misfeed At Paper Feed Tray 2 (Optional)
Remove the stack of paper from the cassette and carefully pull the misfed sheet(s) out of the tray. Open the top cover and close it again in order to reset the printer. 10-9... -
Page 140: Problems With Print Quality
Remove the image transfer roller and check it for damage. If necessary, replace it with a new roller, see chapter 9. Clean the inside of the printer, see chapter 9. Deactivate the Toner Save feature in the print menu and try another sample print-out, see chapter 4. - Page 141 The toner density is not set correctly in the print menu. The toner cartridge is damaged. Action Check the setting in the printer driver and in the printer menu. Change the setting and try it again. Set the toner density to the desired level, see chapter 4.
- Page 142 Problem Uneven toner density on the print- Blank spots on the print-out, text missing White or black lines on the print-out 10-12 Possible cause The toner cartridge is damaged. The image transfer roller is damaged. Insufficent toner in the cartridge. The paper is moist because of high humidity in the air or from being splashed with water.
- Page 143 Troubleshooting Problem Toner smudges on the print-out Possible cause The toner cartridge is damaged. Insufficent toner in the cartridge. The paper feed roller is dirty. Action Remove the toner cartridge and check it for damage. If necessary, fit a new toner cartridge, see chapter 9.
-
Page 144: General Print Problems
Further information and assistance... can be found in the Internet at www.minolta-qms.com. 10-14 Possible cause The printer is not connected to the power supply, or the cable is not connected to the printer. The printer is not switched on You are using the wrong type of interface cable. -
Page 145: Printer Messages
Troubleshooting 10.4 Printer messages Indicator lamp functions The lamps on the control panel provide information on the status of the printer. The control panel has three indicator lamps and one control button. Description Fault lamp (yellow) Paper lamp (yellow) The table below shows the possible states of the lamps. -
Page 146: Status Messages
Status messages Status messages indicate the current condition of the printer. Lamps Meaning Printer is switched off Printer is switched on and running a self-test (slow flashing) Printer is in Power Save mode 10-16 Troubleshooting Lamps Meaning Printer is ready for... -
Page 147: User Messages
Troubleshooting User messages These messages indicate faults which need to be rectified by the user before a print job can be continued or the printer switched back to “Stand-by“. Lamps Meaning Top cover is open. Print job is too large, insufficient memory capacity. -
Page 148: Service Messages
These messages indicate more serious faults that can only be rectified by a customer service engineer. If one of these messages is signalled, switch the printer off and then on again. If the problem persists, contact your technical customer service centre. -
Page 149: Appendix
Windows Status Monitor – simultaneous display of printer status information and progress of current print job. Operating Syste The PagePro 1100 can be used with the following operating systems: Windows 95, Windows 98, Windows 3.1, Windows NT 4.0,... -
Page 150: Technical Specification
15 to 8 5% (with fluctuation of 20% per hour) 6000 A4/Letter-size prints with a black-to-white ratio of 5% or less. (The toner cartridge supplied with the printer is capable of producing approx. 3000 A4/Letter-size prints.) 20 000 A4/Letter-size prints with a black-to-white ratio of 5% or... -
Page 151: Second Paper Cassette Tray (Option)
Appendix Technical specification Standard memory Options Second Paper Cassette tray (option) Technical specification Paper feed tray Paper/Media Capacity External dimensions Weight Network Interface Card (Option) Technical specification Type Version Expansion Memory (SDRAM-DIMM) (option) Technical specification Capacity Function type Access speed Number of pins Module type Operating voltage... -
Page 152: Interface Connector And Cable
CAUTION Scorched cable and danger of fire from cable! Minolta undertakes no guarantee for any specific cable. The user is responsible for the quality and performance of the cable. 11-4 Printer: Parallel 36-pin connector Computer: EIA 25-pin connector Shielded Each signal and earth pair should be twisted... -
Page 153: Minolta's Concern For Environmental Protection
This function can reduce your electricity costs by up to 60%. This laser printer fulfills the energy efficiency criteria for the Energy Star of the EPA (US Environmental Protection Agency). -
Page 154: Ce Symbol (Declaration Of Conformity)
11.4 CE symbol (Declaration of Conformity) We hereby declare that we are responsible for ensuring that the printer and the options to which this declaration relates comply with the specifications given below. This declaration shall only apply to the area of the European Union (EU). - Page 155 Appendix This unit must be operated with a shielded (parallel) interface cable and a shielded network cable (10/100Base-T). The use of non-shielded cable can result in radio interference and is forbidden according to EC Regulation 89/336/EEC. 11-7...
-
Page 156: Index
All raster ...4-16 Auto Continue function on/off ... 5-9 Cable specifications ... 11-4 Cancelling a print job ... 7-15 Caring for your printer ...9-1 CD-ROM installation, Windows 95/98 & NT 4.0 ... 3-3 Cleaning the printer ...9-2 Case ...9-2 Paper feed roller ...9-2 Clearing ... - Page 157 Appendix Setup ...6-7 Data exchange optimization ...4-16 Defining a type of media ...4-8 Defining a type of paper ...4-8 Device options, printer driver settings Activating tray 2 ...4-19 Defining total memory capacity ...4-19 DIMM module ...8-4 Face-down output ...7-12 Face-up output ...7-12 Fast printing mode ...5-9...
- Page 158 Paper feed tray 1 ...7-8 Paper feed tray 2 ... 7-10 Maintaining your printer ...9-1 Media types, list of ...7-3 Memory capacity of printer ... 4-19 Memory module, installation of ... 8-4 Messages, service ... 10-18 Messages, status ...10-16 Messages, user ...10-17 Monitoring of print job ...
- Page 159 Appendix Page layout, printer driver settings Adjust printable area ...4-14 Design watermark ...4-13 Print watermark ...4-12 Printing several document pages on one sheet ...4-11 Page protection, activation ...5-10 Paper feed tray 1 setup ...2-11 Paper feed tray 2, activation ...4-19 Paper format error detection on/off ...5-10...
- Page 160 Paper ...4-4 Quality ... 4-15 Windows 3.1x ...4-3 Windows 95/98 ...4-1 Windows NT 4.0 ...4-2 Printer driver settings, display of ... 4-1 Printer messages ...10-15 Indicator lamp functions ... 10-15 Service messages ... 10-18 Status messages ... 10-16 User messages ... 10-17 Printer profile, creation of (DOS) ...
- Page 161 Defining the resolution ...4-17 Defining toner density ...4-16 Optimizing print quality ...4-16 Switching on/off Toner Save mode ...4-16 Quality, printer driver settingsOptimizing data exchange (All raster) .4-16 Replacing the image transfer roller ...9-8 Replacing the toner cartridge ...9-5 Resetting a counter ...5-13 Resolution ...4-17...
- Page 162 Status Monitor, reduce/expand ... 5-4 Storage of accessories ...2-7 Storage of consumables ... 2-7 Switching on/off ...2-13 Switching the printer on/off ... 2-13 System requirements ... 3-1 Technical specification ... 11-2 500-sheet paper feed tray ... 11-3 DIMM memory module ... 11-3 Interface connections and cables ...
Need help?
Do you have a question about the PagePro 1100 and is the answer not in the manual?
Questions and answers