Table of Contents
Advertisement
Quick Links
Advertisement
Table of Contents

Related Manuals for Kenwood KW-V660BT


Summary of Contents for Kenwood KW-V660BT
- Page 1 KW-V660BT KW-V66BT MONITOR WITH DVD RECEIVER Quick Start Guide...
- Page 2 Important Notice on Software EULA Ñ Ñ Software License on This Product Software License Agreement The software embedded in this product comprises a JVCKENWOOD Corporation (hereinafter called “Licensor”) holds either the copyright to the number of independent software components, each embedded software or the right to sublicense it.
- Page 3 Article 3 (Terms of License) Article 8 (Cancellation of the Agreement) 1. In assigning this product, User may not retain Licensor reserves the right to cancel this agreement the original copy of the embedded Licensed forthwith and claim compensation from User for the Software (including associated literature, updates damages caused by such cancellation when User: and upgrades) and any duplicates and associated...
-
Page 4: Table Of Contents
Before Use Contents Before Use About the Quick start guide Before Use ..............4 About the Quick start guide ............4 How to read this manual ..............4 This Quick Start Guide describes basic functions Precautions ....................5 of this unit. Basic Operations ............7 Functions of the Buttons on the Front Panel .......7 The Instruction manual is subject to change for Turning on the Unit ................7... -
Page 5: Precautions
Before Use Ñ Precautions How To Reset Your Unit • If the unit or the connected unit fails to operate properly, reset the unit. Press the <Reset> button. # WARNINGS The unit returns to factory settings. Ñ To prevent injury or fire, take the following precautions: •... - Page 6 Before Use Ñ Precautions on handling discs • Do not touch the recording surface of the disc. • Do not stick tape etc. on the disc, or use a disc with tape stuck on it. • Do not use disc type accessories. •...
-
Page 7: Basic Operations
Basic Operations Basic Operations Functions of the Buttons on Turning on the Unit the Front Panel Press the [ ] button. h The unit is turned on. ● To turn off the unit: Press the [ ] button for 1 second. NOTE NOTE •... -
Page 8: Getting Started
Basic Operations Basic Operations Getting Started ■ [Camera] Set the parameters for the camera. 1 Touch [Camera]. Initial setup 2 Set each item and touch [ Perform this setup when you use this unit first For detailed operation, see Instruction time. -
Page 9: Adjusting The Volume
Basic Operations Adjusting the volume Touch [User Interface]. To adjust the volume (0 to 40), Press [ ] to increase, and press [ ] to decrease. Holding [ ] increases the volume continuously to level 15. h User Interface screen appears. Touch screen operations Touch [Clock Adjust]. -
Page 10: Home Screen Descriptions
Basic Operations Display the HOME screen Gesture Touch Control: You can also control playback by moving your finger on the touch panel as follows (for some Press the [ ] button. sources, the gesture control is not available). • Sliding the finger towards up/down: - Functions same as pressing [ ] / [ ] (Media) - Page 11 Basic Operations Select the playback source To turn off the AV source Touch [ ] on the HOME screen. Touch [ ] on the HOME screen. From the screen, you can select the Touch [AV Off]. following sources and functions. •...
-
Page 12: Source Control Screen Descriptions
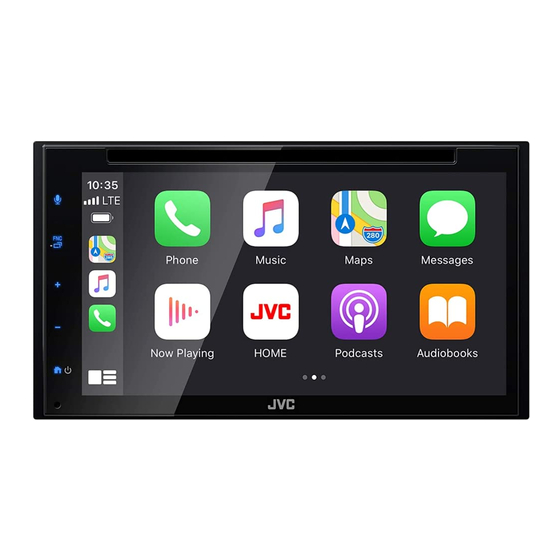
Basic Operations Source control screen [Û] descriptions Touch to display the Hands Free screen. (P.21) There are some functions which can be When connecting as Apple CarPlay or Android operated from most screens. Auto, it works as a phone provided in Apple CarPlay or Android Auto. -
Page 13: Function Screen
Basic Operations FUNCTION screen ● To turn on the screen Touch the display. Press the [FNC] button. List screen There are some common function keys in the h FUNCTION screen appears. list screens of most sources. Touch to display the FUNCTION screen. The contents of the menu are as follows. -
Page 14: Disc
Disc Disc Playing a disc DVD/VCD Basic Operation Ñ Insert a disc NOTE • The screen shot below is for DVD. It may be Insert the disc into the slot. different from the one for VCD. When the operation buttons are not displayed on the screen, touch area. -
Page 15: Dvd Disc Menu Operation
Disc DVD Disc Menu Operation Operation keys • [E] [F] : Searches for the previous/next You can set up some functions using the DVD- content. VIDEO disc menu. Touch and hold to fast-forward or fast-backward the disc. Touch area during playback. •... -
Page 16: Usb
Connecting a USB device USB Basic Operation Most functions can be controlled from the Connect the USB device with the USB source control screen and playback screen. cable. (P.29) Control screen Press the [ ] button. Touch [ Touch [USB]. (P.11) Ñ... -
Page 17: Tuner
Tuner Tuner Tuner Basic Operation Operation keys • [E] [F] : Tunes in a station. The method of Most functions can be controlled from the frequency switching can be changed (see 2 in source control screen. table). To enter Tuner source, touch [Tuner] icon in the •... -
Page 18: Siriusxm
Tuner SiriusXM® SiriusXM® Memory Operation Ñ Auto memory SiriusXM® Basic Operation You can store stations with good reception in memory automatically. Only SiriusXM® brings you more of what you love to listen to, all in one place. Get over 140 Touch desired band key. - Page 19 SiriusXM® Control screen Artwork / Function panel • Displays the album artwork for most SiriusXM music channels. • Touch [ ] of the screen to display the function panel. Touch [ ] to close the panel. – [Direct Channel]: Touch and enter the desired number.
-
Page 20: Bluetooth Control
Bluetooth Control Bluetooth Control Ñ About the cell-phone and Operate your smartphone/cell-phone Bluetooth audio player according to the displayed messages. Confirm the request on the This unit conforms to the following Bluetooth ■ smartphone/cell-phone. specifications: Version Bluetooth Ver. 4.1 Profile Cell-phone: HFP (Hands Free Profile) SPP (Serial Port Profile) -
Page 21: Using Hands-Free Unit
Bluetooth Control Using Hands-Free Unit Touch [Select Device] in the Bluetooth SETUP screen. You can use telephone function by connecting the Bluetooth telephone to this unit. NOTE • While Apple CarPlay or Android Auto is being connected, Bluetooth Hands-Free function cannot be used. - Page 22 Bluetooth Control Call using call records Call using the preset number Touch [ Touch [ Select the phone number from the list. Touch the Name or phone number. Call by entering a phone number Call using the phonebook Touch [ Touch [ Enter a phone number with number keys.
- Page 23 Bluetooth Control Ñ Ñ Receive a call Operations during a call Touch [ ] to answer a phone call or [ to reject an incoming call. ● Adjust the receiver volume Press the [ ] or [ ] button. NOTE •...
-
Page 24: Controlling Audio
Controlling Audio Controlling Audio Ñ Controlling General Audio You can adjust the various settings such as audio balance or subwoofer level. Press the [FNC] button. Press the [FNC] button. h FUNCTION screen appears. h FUNCTION screen appears. Touch [ Touch [ h Audio screen appears. - Page 25 Controlling Audio Ñ Equalizer Control [SW Level] ■ Adjusts the subwoofer volume. You can adjust equalizer by selecting the optimized setting for each category. Press the [FNC] button. h FUNCTION screen appears. Touch [ h Audio screen appears. Touch [Equalizer]. Touch the screen and set the Graphic Equalizer as desired.
-
Page 26: Connection/Installation
Connection/Installation Connection/Installation Before Installation touching to cause a short circuit, then replace the old fuse with one with the same rating. • Insulate unconnected wires with vinyl tape or Before installation of this unit, please note the other similar material. To prevent a short circuit, following precautions. -
Page 27: Installing The Unit
Connection/Installation Ñ Supplied accessories for Installing the unit installation Ñ Non-Japanese cars (3 m) (2 m) Bend the tabs of the mounting sleeve with a screwdriver or similar utensil and attach it in place. (M5 × 6 mm) (M5 × 8 mm) NOTE •... - Page 28 Connection/Installation Ñ Ñ Microphone unit Removing the unit 1) Check the installation position of the 1) Remove the trim plate by referring to step 1 in “Removing the trim plate”. microphone (accessory 1). 2) Clean the installation surface. 2) Insert the extraction key (accessory 9) deeply into the slot as shown.
- Page 29 Connection/Installation Ñ Connecting wires to terminals USB device 5V = 1.5A USB terminal (1.0 m) SiriusXM Connect Vehicle Tuner connector Sirius XM For more information on how to install the SiriusXM Connect Vehicle tuner, consult the installation guide included with the tuner. Light Green (Parking sensor wire) Accessory 3: Parking Extention cable For best safety, be sure to connect the...
- Page 30 Connection/Installation Ñ Connecting an iPhone/Android Android smartphone USB cable 1 3 5 7 2 4 6 8 1 3 5 7 2 4 6 8 iPhone Accessory 7 Lightning connector Accessory 8 KS-U62 (0.8m) Speaker impedance: 4-8 Ω White To front left speaker USB terminal (1.0 m)
-
Page 31: Appendix
Appendix Appendix Specifications ■ Bluetooth section Frequency : 2.402 – 2.480 GHz RF Output Power (E.I.R.P.) : +8 dBm (Avg.), Power Class 1 ■ General Operating Voltage : 12V DC Car Battery Speaker Impedance : 4 – 8 Ω Specifications subject to change without notice.
Need help?
Do you have a question about the KW-V660BT and is the answer not in the manual?
Questions and answers