Table of Contents
Advertisement
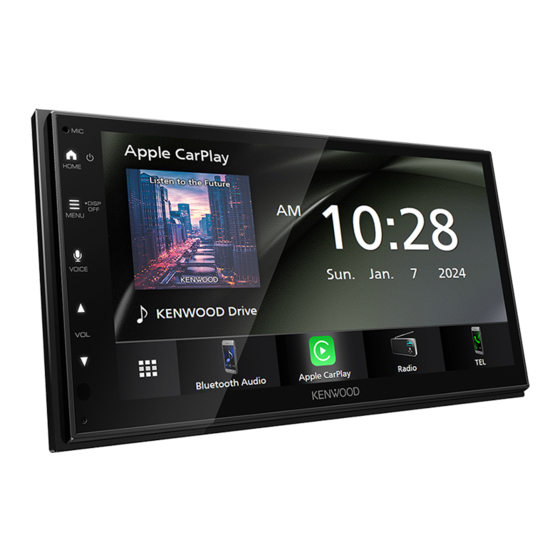
Quick Links
Advertisement
Table of Contents

Related Manuals for Kenwood DMX6523S


Summary of Contents for Kenwood DMX6523S
- Page 1 DMX6523S MONITOR WITH RECEIVER INSTRUCTION MANUAL • Updated information (the latest Instruction Manual, system updates, new functions, etc.) is available from <https://www.kenwood.com/cs/ce/>. © 2024 JVCKENWOOD Corporation B5K-1159_ref_M_En_01...
-
Page 2: Table Of Contents
Contents Before Use Radio Precautions ..............4 Radio Basic Operation ..........23 How to read this manual ......... 5 Memory Operation ..........24 Selecting Operation ..........24 Basic Operations Traffic Information ...........25 Radio Setup ..............25 Functions of the Buttons on the Front Panel ... 6 Turning on the Unit ........... - Page 3 Controlling Audio Speaker/ X’over setup ..........42 Controlling General Audio ........43 Equalizer Control ............44 Volume Offset ............45 Sound Effect ...............45 Listening Position/ DTA ..........46 Remote control Functions of the Remote control Buttons ..47 Connection/Installation Before Installation ............49 Installing the unit .............50 Troubleshooting Problems and Solutions .........55 Error Messages ............55...
-
Page 4: Before Use
• Disconnect the USB device before pressing the • When you purchase optional accessories, <Reset> button. Pressing the <Reset> button check with your KENWOOD dealer to make with the USB device connected can damage sure that they work with your model and in your area. -
Page 5: How To Read This Manual
• For best results while pairing with your KENWOOD receiver, please be sure to close any unused applications. How to read this manual • The screens and panels shown in this manual are examples used to provide clear explanations of the operations. -
Page 6: Basic Operations
Basic Operations Basic Operations Functions of the Buttons on Name the Front Panel • Motion [S], [R] ([VOL]) • Adjusts volume. The volume will go up until 15 when you keep pressing [R]. Remote Sensor • Receives the remote control signal. Reset •... -
Page 7: Getting Started
Basic Operations Getting Started Touch [Finish]. Initial setup Perform this setup when you use this unit first time. Set each item as follows. NOTE • These settings can be set from the SETUP menu. See Setting Up (P.36). Calendar/clock settings Press the [MENU] button. -
Page 8: Adjusting The Volume
Basic Operations Adjusting the volume Set each item as follows. Scroll the page to show hidden items. To adjust the volume (0 to 40), Press [R] to increase, and press [S] to decrease. Holding [R] increases the volume continuously to level 15. Touch screen operations [Time Format] ■... -
Page 9: Home Screen Descriptions
Basic Operations HOME screen descriptions Source selection screen descriptions Most functions can be performed from the HOME screen. You can display all playback sources and options on the source selection screen. • Displays the control screen of current source. • Changes the playback source. •... - Page 10 Basic Operations Select the playback source To select the playback source on the HOME screen Touch [ ] on the HOME screen. From the screen, you can select the following sources and functions. • Switches to the Radio broadcast. (P.23) •...
-
Page 11: Source Control Screen Descriptions
Basic Operations Customize Short-cut buttons on The color of the lower circle indicates the HOME screen reckoning status. The lower circle blinks red during measurement and turns green when You can arrange the position of the source icons measurement is completed. as you like. -
Page 12: Popup Menu
Basic Operations List screen NOTE • Depending on the recording language of the There are some common function keys in the file name and song information, the order of list screens of most sources. characters and scrolling may not be displayed correctly. -
Page 13: Apps
APPS APPS Ñ Apple CarPlay Operation Preparation Wired connection Apple CarPlay is a smarter, safer way to use your iPhone in the car. Apple CarPlay takes the things Connect your iPhone with the USB cable you want to do with iPhone while driving and that matches the connector. -
Page 14: Application Buttons
APPS Ñ Ñ Operation buttons and Use Siri available Apps on the home You can activate Siri. screen of Apple CarPlay Press the [VOICE] button. You can use the Apps of the connected iPhone. The items displayed and the language used on the screen differ among the connected devices. -
Page 15: Android Auto™ Operation
APPS Android Auto™ Operation NOTE • Turn on the Bluetooth function and Wi-Fi Android Auto enables you to use functions function of Android smartphone. of your Android smartphone convenient • If two or more Android smartphones have been for driving. You can easily access route registered, select the Android smartphone to be guidance, make calls, listen to music, and used as the Android Auto source. -
Page 16: Wireless Mirroring Operation For Iphone
APPS Ñ Switch to the Android Auto Wireless Mirroring Operation screen while listening to for iPhone another source You can display and control the App on the unit Press the [HOME] button. while your iPhone is connected via Bluetooth. h HOME screen appears. To use Wireless Mirroring, follow the instructions on your iPhone. -
Page 17: Connecting An Iphone
APPS Ñ Ñ Connecting an iPhone Operation buttons Press the [MENU] button. Touch [ ] on the bottom left of the h Popup menu appears. screen. 10:00 100% Touch [ h The Device List screen appears. Touch [ Launch Mirroring App on your iPhone. Your iPhone will connect to the unit's Wi-Fi. -
Page 18: Wireless Mirroring Operation For Android Smartphone
APPS Ñ Wireless Mirroring Operation Connecting an Android smartphone for Android Smartphone Press the [MENU] button. You can display and control the App on the unit h Popup menu appears. while your Android smartphone is connected via Bluetooth. Touch [ To use Wireless Mirroring, follow the instructions h The Device List screen appears. - Page 19 APPS Ñ Operation buttons Touch [ ] on the bottom left of the screen. 10:00 h Operation menu appears. 10:00 10:00 Wireless Mirroring Works the same as the Back button on the Android smartphone. Works the same as the Home button on the Android smartphone.
-
Page 20: Usb
Connecting a USB device USB Basic Operation Most functions can be controlled from the Connect the USB device with the USB source control screen and playback screen. cable. (P.52) Control screen Press the [HOME] button. Touch [ Touch [USB]. (P.10) Ñ... -
Page 21: Track Information
Video screen • [ ] : Randomly plays all tracks in current folder. Each time you touch the key, random mode switches in the following sequence; File random ([ ]), Random off ([ Track information Displays the information of the current file. Only a file name and a folder name are displayed if there is no tag information. -
Page 22: Search Operation
Ñ Search Operation Link search (Audio file only) You can search a file of same artist/album/genre You can search music or video files by the as the current track. following operations. Touch [Link Search]. Touch [1]. Touch the desired tag type. You can select Touch [S]. -
Page 23: Radio
Radio Radio Radio Basic Operation Operation keys • [E] [F] : Tunes in a station. The method of Most functions can be controlled from the frequency switching can be changed (see 2 source control screen. in table). To enter Radio source, touch [Radio] icon in the •... -
Page 24: Memory Operation
Radio Selecting Operation • [RDS]: Indicates the state of the Radio Data System station when the AF function is on. Ñ White: Radio Data System is being received. Preset select Orange: Radio Data System is not being You can list and select memorized station. received. -
Page 25: Traffic Information
Radio Traffic Information (FM only) Radio Setup (FM only) You can listen and watch the traffic information You can set tuner related parameters. automatically when a traffic bulletin starts. Touch [ However, this feature requires a Radio Data System that includes the TI information. Touch [ ] on the left side of the screen. -
Page 26: Bluetooth Control
Bluetooth Control Bluetooth Control Ñ About the cell-phone and Using the Bluetooth function, various functions Bluetooth audio player can be used: listening to the audio file, making/ receiving a call. This unit conforms to the following Bluetooth specifications: Information for using Bluetooth®... -
Page 27: Register The Bluetooth Device
Bluetooth Control Register the Bluetooth device Connection Setup It is necessary to register the Bluetooth audio Press the [MENU] button. player or cell-phone to this unit before using the h Popup menu appears. Bluetooth function. You can register up to 7 Bluetooth devices. Touch [ NOTE •... - Page 28 Bluetooth Control Ñ Switch the connected device To delete the registered Bluetooth device If two or more Bluetooth devices have been registered, select the device to be used. Touch [ ] on the Device List screen. Touch [Device List] on the Connection Setup screen.
-
Page 29: Playing Bluetooth Audio Device
Bluetooth Control Playing Bluetooth Audio Play mode indicator/ Playing time Device • Touch [ ] / [ ] allows you to hide/display the artwork area. Most function can be controlled from the • [D], [H]: Current play mode indicator source control screen. The meanings of each icon are as follows;... -
Page 30: Using Hands-Free Unit
Bluetooth Control Using Hands-Free Unit ● Device List 1) Touch [ Device List screen appears. You can use telephone function by connecting the Bluetooth telephone to this unit. NOTE NOTE • The status icons such as battery and antenna are displayed for each connected cell-phone. -
Page 31: Voice Recognition
Bluetooth Control Ñ Voice Recognition Call using the preset number You can access the voice recognition function of Touch [ the cell-phone connected to this unit. You can search the cell-phone phonebook by voice. (The Touch the Name or phone number. functionality depends on the cell-phone.) Press the [VOICE] button. -
Page 32: Operations During A Call
Bluetooth Control Ñ Operations during a call ● When you receive a call from another connected device during a call Touch [ ] to end the current call and answer a new call. Touch [ ] to end the new call and continue the current call. -
Page 33: Phonebook Transfer
Bluetooth Control Hands-Free Setup [Add number direct] ■ Enter the telephone number directly and touch [SET]. See Call by entering a phone You can make various settings for the Hands- number (P.30). Free function. ■ [Delete] Press the [MENU] button. To delete a preset number, touch [Delete] h Popup menu appears. -
Page 34: Other External Components
Other External Components Other External Components Ñ Camera Setup View Camera Press the [MENU] button. # CAUTION h Popup menu appears. The position of parking guidelines displayed on the monitor may differ from actual condition. Touch [ Please take the actual parking guidelines as h SETUP Menu screen appears. -
Page 35: Maestro Features Operation
Other External Components Maestro Features Operation To adjust the parking guidelines NOTE By connecting this unit to the bus system of the • Install the rear view camera in the appropriate vehicle using an iDatalink Maestro (commercially position according to the instructions supplied available), this unit can access OEM audio with the rear view camera. -
Page 36: Setting Up
Setting Up Setting Up Monitor Screen Setup System Setup You can adjust image quality in video screen. Press the [MENU] button. Press the [MENU] button. h Popup menu appears. h Popup menu appears. Touch [ Touch [ h Screen Control screen appears. Adjust each item as follows. -
Page 37: User Interface Setup
Setting Up User Interface Setup [Time Zone] ■ [Clock Adjust] ■ You can setup user interface parameters. You can set the date and time. Ñ Press the [MENU] button. Learning function of steering h Popup menu appears. remote This function is available only when your vehicle Touch [ is equipped with the electrical steering remote h SETUP screen appears. -
Page 38: Special Setup
Setting Up Special Setup Display Setup You can setup Special parameters. Press the [MENU] button. Press the [MENU] button. h Popup menu appears. h Popup menu appears. Touch [ Touch [ h SETUP screen appears. h SETUP screen appears. Touch [Display]. Touch [Special]. -
Page 39: Av Setup
Setting Up AV Setup To register original image You can load an image from the connected USB device and set it for the wallpaper image. You can set AV parameters. Before operating this procedure, it is necessary Press the [MENU] button. to connect the device which has the image to h Popup menu appears. -
Page 40: Connection Setup
See Change the device name for Bluetooth [Vehicle Feature Settings] (P.41). ■ This function requires a commercial adaptor. [PIN Code] ■ Consult your KENWOOD dealer for details. Display the PIN code. [Bluetooth MAC Address] ■ Display the MAC address. [Auto Response]* ■... - Page 41 Setting Up Ñ Change the device name for Bluetooth Touch [Device Name] on the Connection screen. h Change Device Name screen appears. Touch [ Input the device name. Touch [Enter]. English...
-
Page 42: Controlling Audio
Controlling Audio Controlling Audio Speaker/ X’over setup You can adjust the various settings such as audio balance or subwoofer level. Press the [MENU] button. Press the [MENU] button. h Popup menu appears. h Popup menu appears. Touch [ Touch [ h Audio screen appears. -
Page 43: Crossover Network Setup
Controlling Audio [Tweeter] (Only for Front) [TW] (Tweeter) [Gain]* ■ ■ You can set the tweeter when you are Adjusts the tweeter level. (When front is selecting front speakers. selected on Speaker Select screen) [None], [Small], [Medium], [Large] [Phase Inversion]* ■... -
Page 44: Equalizer Control
Controlling Audio Equalizer Control [SW Level] ■ Adjusts the subwoofer volume. You can adjust equalizer by selecting the Ñ Recall the EQ curve optimized setting for each category. Press the [MENU] button. Touch [Preset Select]. h Popup menu appears. Select EQ curve. Touch [ h Audio screen appears. -
Page 45: Volume Offset
Controlling Audio Volume Offset Sound Effect Finely adjust the volume of the current source You can set sound effects. to minimize the difference in volume between Press the [MENU] button. different sources. h Popup menu appears. Press the [MENU] button. h Popup menu appears. -
Page 46: Listening Position/ Dta
Controlling Audio Listening Position/ DTA Position DTA control You can fine-adjust your listening position. Adjust the sound delay time as nearer speakers Touch [Adjust]. to the selected seat have more delay time, so that the sound from each speaker arrive a Touch [Delay]. -
Page 47: Remote Control
Remote control Remote control Ñ Switch the operation mode This unit can be operated using the remote control KCA-RCDV340 (optional accessory). Turn its operation mode switch to “AUD.” # CAUTION • Put the remote control in a place where it will not move during braking or other operations. - Page 48 Remote control Function Name Numeric Allows you to enter the number to Keypad search in the direct search mode. For details on the direct search mode, see Direct search mode (P.48). Switches to the direct search [DIRECT] mode. For details on the direct search mode, see Direct search mode (P.48).
-
Page 49: Connection/Installation
Connection/Installation Connection/Installation This section is for the professional installer. • Do not use your own screws. Use only the For safety’s sake, leave wiring and mounting screws provided. If you use the wrong screws, to professionals. Consult the car audio dealer. you could damage the unit. -
Page 50: Supplied Accessories For Installation
Connection/Installation • Reception may drop if there are metal objects 6) Install the unit in your car. near the Bluetooth antenna. 7) Reconnect the ¤ terminal of the battery. 8) Press the reset button. Installing the unit Ñ Japanese cars 5 or 6 Car Bracket Bluetooth antenna unit... -
Page 51: Gps Antenna
Connection/Installation Ñ Ñ GPS antenna Removing the trim plate 1) Insert the extraction key (accessory 4) GPS antenna is installed inside of the car. It between the trim plate and the main unit should be installed as horizontally as possible to from between the claws. -
Page 52: Connecting Wires To Terminals
Connection/Installation Ñ Connecting wires to terminals Subwoofer Preout (Blue) Visual Output (Yellow) SUB-W V-OUT CAM IN Rear view camera input (Yellow) Rear Audio Preout (Left; White, Right; Red) Front Audio Preout (Left; White, Right; Red) iDatalink Maestro connector SUB-W V-OUT CAM IN Fuse (15A) USB terminal... - Page 53 To use the steering wheel remote control feature, you need an exclusive remote adapter (not Battery supplied) matched to your car. Connect to vehicle’s steering remote harness. Contact your KENWOOD dealer for details. ST REMOTE Green/Red INPUT 1 Orange/White ST REMOTE...
- Page 54 Connection/Installation Ñ Connecting an iPhone/Android Android smartphone USB cable for Android smartphone iPhone USB cable for iPhone USB terminal (1.0 m) 2.1A SUB-W V-OUT CAM IN USB maximum power supply current : DC 5 V = 2.1 A Sold separately...
-
Page 55: Troubleshooting
Troubleshooting Troubleshooting Problems and Solutions Error Messages If any trouble occurs, first check the following When you fail to operate the unit correctly, the table for possible problems. cause of the failure appears as the message on the screen. NOTE [No Device] (USB device) •... -
Page 56: Appendix
Appendix Appendix Playable Media and Files You can play various kinds of media and files on this unit. Ñ About files The following audio and video files are supported. ■ Playable Audio files Format Bit rate Sampling frequency Bit count AAC-LC (.m4a) MPEG2/4 AAC LC 8 –... -
Page 57: Specifications
Appendix Specifications ■ Wi-Fi section Wireless LAN Standards ■ Monitor section : IEEE 802.11 a/n/ac Picture Size Frequency Range : 6.8 inches (diagonal) wide : 5GHz (5.745 – 5.825GHz) Display System Channels : Transparent TN LCD panel : 5GHz: 149ch Drive System Transfer rates (MAX) : TFT active matrix system... - Page 58 Appendix Low pass filter ■ Audio section Frequency: 30/ 40/ 50/ 60/ 70/ 80/ 90/ 100/ 120/ Maximum Power Output (Front & Rear) 150/ 180/ 220/ 250 Hz, Through : 50 W × 4 Slope: -6/ -12/ -18/ -24 dB/ Oct. Full Bandwidth Power (at less than 1% THD) Gain: -8/ -7/ -6/ -5/ -4/ -3/ -2/ -1/ 0 dB : 22 W ×...
-
Page 59: About This Unit
Appendix About this Unit PERSONAL AND NON-COMMERCIAL ACTIVITY AND/ OR WAS OBTAINED FROM A VIDEO PROVIDER LICENSED TO PROVIDE VC-1 VIDEO. NO LICENSE IS GRANTED OR ■ Copyrights SHALL BE IMPLIED FOR ANY OTHER USE. ADDITIONAL INFORMATION MAY BE OBTAINED FROM MPEG LA, L.L.C. •... - Page 60 Appendix DIRECT, INDIRECT, INCIDENTAL, SPECIAL, EXEMPLARY, OR CONSEQUENTIAL DAMAGES (INCLUDING, BUT NOT LIMITED TO, PROCUREMENT OF SUBSTITUTE GOODS OR SERVICES; LOSS OF USE, DATA, OR PROFITS; OR BUSINESS INTERRUPTION) HOWEVER CAUSED AND ON ANY THEORY OF LIABILITY, WHETHER IN CONTRACT, STRICT LIABILITY, OR TORT (INCLUDING NEGLIGENCE OR OTHERWISE) ARISING IN ANY WAY OUT OF THE USE OF THIS SOFTWARE, EVEN IF ADVISED OF THE POSSIBILITY...
- Page 61 JVCKENWOOD Europe B.V. Rendementsweg 20 B-9, 3641 SL Mijdrecht, THE NETHERLANDS English Hereby, JVCKENWOOD declares that the radio equipment DMX6523S is in compliance with Directive 2014/53/EU. The full text of the EU declaration of conformity is available at the following internet address: URL : https://www.kenwood.com/euukdoc/...
-
Page 62: Software License Agreement
Important Notice on Software EULA Ñ Ñ Software License on This Product Software License Agreement The software embedded in this product comprises a JVCKENWOOD Corporation (hereinafter called number of independent software components, each “Licensor”) holds either the copyright to the of which is copyrighted by JVCKENWOOD Corporation embedded software or the right to sublicense it. - Page 63 Article 3 (Terms of License) Article 8 (Cancellation of the Agreement) 1. In assigning this product, User may not retain Licensor reserves the right to cancel this agreement the original copy of the embedded Licensed forthwith and claim compensation from User for the Software (including associated literature, updates damages caused by such cancellation when User: and upgrades) and any duplicates and associated...
Need help?
Do you have a question about the DMX6523S and is the answer not in the manual?
Questions and answers