Table of Contents
Advertisement
Available languages
Available languages
Quick Links
Advertisement
Table of Contents

Related Manuals for S&P ARTIC-255N GR


Summary of Contents for S&P ARTIC-255N GR
- Page 1 ARTIC-255N GR ARTIC-305N GR ARTIC-405N GR...
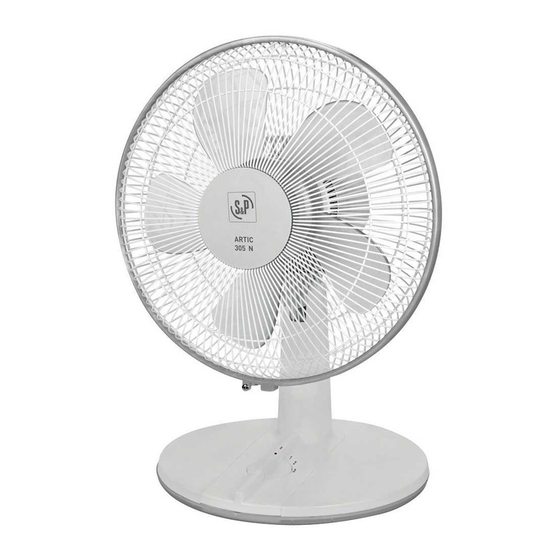
- Page 3 Fig. 1 ARTIC-305 N / ARTIC 405 N ARTIC-255 N Fig. 2...
- Page 4 Fig. 3...
-
Page 5: Recomendaciones De Seguridad
ESPAÑOL GENERAL Le agradecemos la confi anza que nos ha depositado mediante la compra de este aparato. Usted ha adquirido un producto de calidad que ha sido totalmente fabricado según reglas técnicas de seguridad reconocidas y conformes a las normas CE. Sírvase leer atentamente estas instrucciones antes de la puesta en funcionamiento y guárdelas para futuras referencias. -
Page 6: Instrucciones De Montaje
INSTRUCCIONES DE MONTAJE 1. Pase el cable de alimentación a través de la base del ventilador (Fig. 1) 2. Una el pie soporte del motor con la base del ventilador, encajando las ranuras frontales y presio- nando los clips de anclaje posteriores. (Fig. 1) 3. -
Page 7: Mantenimiento
MANTENIMIENTO Antes de empezar cualquier operación de limpieza o mantenimiento sobre el aparato, desenc- húfelo de la red eléctrica. Los ventiladores ARTIC N no necesitan de un especial mantenimiento. Para sacar la hélice siga las instrucciones de montaje en sentido inverso. La hélice puede lavarse en agua templada con un poco de detergente suave. -
Page 8: Security Advices
ENGLISH GENERAL Thank you for placing your trust in S&P by purchasing this product, which has been manufactured in accordance with technical safety regulations and compliance with current EC standards. Before using this product please read the instructions carefully, as they contain important infor- mation for your safety during use and maintenance. -
Page 9: Fitting Instructions
FITTING INSTRUCTIONS 1. Pass the power cable through the fan base (Fig. 1) 2. Slot the foot of the motor support into the circular fan base and fi x with the rear clips. (Fig. 1) 3. Place the power cable in the groove located in the back part of the base, to ensure that the fan is stable. -
Page 10: Maintenance
MAINTENANCE Before beginning any cleaning or maintenance operation on the appliance unplug it from the mains supply. The ARTIC N fans do not need any special maintenance. To take out the propeller, you must follow the fi tting instructions in reverse order. The propeller can be cleaned using warm water with a small quantity of a mild detergent. -
Page 11: Informations Générales
FRANÇAIS INFORMATIONS GÉNÉRALES Vous venez d’acquérir un appareil S&P. Nous vous remercions de votre confi ance. Ce produit a été fabriqué selon les règles techniques de sécurité, confor mément aux directives de la CE. Avant d’installer et de mettre en marche cet appareil, lisez attentivement les instructions d’utilisation car elles contiennent des indications importantes concernant votre sécurité... -
Page 12: Instructions De Montage
INSTRUCTIONS DE MONTAGE 1. Passer le câble d’alimentation à travers la base du ventilateur. (Fig.1) 2. Monter le pied support du moteur sur la base du ventilateur, en le plaçant dans les rainures situées à l’avant et en exerçant une pression sur les clips de fi xation à l’arrière. (Fig.1) 3. -
Page 13: Entretien
ENTRETIEN Avant de commencer toute opération de nettoyage ou maintenance de l’appareil, il faut le dé- brancher du secteur. Les ventilateurs ARTIC N ne nécessitent aucun entretien particulier. Nettoyer extérieurement le moteur avec un chiffon humide. Ne pas immerger, ni passer sous l’eau. Pour nettoyer l’hélice, démonter le ventilateur en suivant l’ordre inverse des instructions de montage. - Page 14 PORTUGUÊS GENERAL Agradecemos a confi ança depositada na S&P ao comprar este produto, o qual foi fabricado segun- do as regras técnicas de segurança conformes as normas da CE. Antes de colocar este produto em funcionamento, leia atentamente as instruções de utili zação, pois contêm informações importantes para a sua segurança durante a utilização e manutenção do aparelho.
- Page 15 INSTRUCCIONES DE MONTAJE 1. Passe o cabo de alimentação através da base do ventilador. (Fig 1) 2. Una o pé do suporte de motor com a base do ventilador, encaixando as ranhuras frontais e pres- sionando os clips de encaixe posteriores. (Fig 1) 3.
-
Page 16: Assistência Técnica
MANUTENÇÃO Antes de começar qualquer operação de limpeza ou manutenção no aparelho, desligue-o da co- rrente eléctrica. Os ventiladores ARTIC N não precisam de manutenção especial. Para tirar a hélice, siga as ins- truções de montagem, mas ao contrário. A hélice pode lavar-se em água tépida, com um pouco de detergente suave. A parte exterior do motor, pode limpar-se com um pano húmido. - Page 17 NEDERLANDS ALGEMENHEDEN Dank u voor het vertrouwen in S&P door dit product te kopen, wat geproduceerd is in overeenstem- ming met veiligheidseisen en het naleven van de huidige EC standaard. Voordat u het product in gebruik neemt, lees de instructies goed door omdat ze belangrijke veilig- heidsinformatie bevatten voor gebruik en onderhoud.
-
Page 18: Installatie Instructies
INSTALLATIE INSTRUCTIES 1. Duw de voedingskabel door de voet (fi g.1) 2. Klik de voet van de motorophanging in de basisvoet en fi xeer hem met de clips (fi g.1) 3. Plaats de voedingskabel in de sleuf aan de achterkant van de voet zodanig dat hij goed klem zit. (fi... - Page 19 vochtige doek. Dompel de ventilator niet onder en spoel deze niet af onder stromend water! Voordat u de spanning weer op het apparaat zet dient u te controleren of alle onderdelen droog zijn. Belangrijk: Schakel eerst de stroom van het toestel uit, voordat de bescherming eraf wordt ge- haald.
- Page 20 РУССКИЙ ОБЩИЕ Компания S&P благодарит Вас за оказанное доверие и покупку нашего оборудования. Вся наша продукция изготавливается в соответствии с международными снатдартами качества. Пожалуйста, перед эксплуатацией вентилятора, внимательно изучите данную инфтрукцию, она содержит важную информацию по подготовке к работе, обслуживанию и по технике безопас- ности.
- Page 21 ПОДГОТОВКА ВЕНТИЛЯТОРА К РАБОТЕ 1. Пропустите кабель питания через основание вентилятора (Рис.1/Fig.1) 2. Вставьте ножку вентилятора в основание вентилятора и зафиксируйте при помощи защелки с задней стороны основания (Рис.1/Fig.1) 3. Уложите кабель питания в специальный паз на нижней части основания вентилятора таким образом, чтобы...
-
Page 22: Дополнительная Информация
ВЕРТИКАЛЬНАЯ НАСТРОЙКА ВЕНТИЛЯТОРА Верхняя часть вентилятора может быть отрегулирована на необходимый угол наклона. Для этого достаточно, вручную, установить верхнюю часть вентилятора в необходимом положении (Рис.3). ВАЖНО. Перед выполнением каких-либо манипуляций с оборудованием, убедитесь, что выключатель вентилятора установлен в положение «Выкл.» и вентилятор выключен из розетки. - Page 23 ITALIANO GENERALITÀ Grazie per la fi ducia riposta in S&P con l’acquisto di questo prodotto, costruito secondo le regole tecniche di sicurezza conformi alle norme della CE. Prima di installare e di mettere in funzione questo apparecchio, leggere attentamente ques- to libretto di istruzioni in quanto contiene indicazioni importanti per la sicurezza degli utenti per l’installazione, l’uso e la manutenzione dello stesso.
-
Page 24: Instruzioni Di Montaggio
INSTRUZIONI DI MONTAGGIO 1. Passare il cavo di alimentazione attraverso la base gli ventilatore (fi g.1). 2. Fissare il soporte del motore con la base del ventilatore, montando le fessure frontale e premen- do le clip di ancoraggio posteriori (fi g.1). 3. -
Page 25: Manutenzione
MANUTENZIONE Prima di iniziare qualsiasi operazione di pulizia o di manutenzione, scollegare l’apparecchio da- lla corrente elettrica. Queste ventilatori ARTIC N non necessitano di una manutenzione speciale. Per rimuovere la girante seguire le istruzioni di montaggio in senso inverso. La girante può essere lavata in acqua calda uti- lizzando un detergente delicato, mentre si può... - Page 28 S&P SISTEMAS DE VENTILACIÓN, S.L.U. C. Llevant, 4 Polígono Industrial Llevant 08150 Parets del Vallès Barcelona - España Tel. +34 93 571 93 00 Fax +34 93 571 93 01 www.solerpalau.com Ref. 1431227-4...
Need help?
Do you have a question about the ARTIC-255N GR and is the answer not in the manual?
Questions and answers