Table of Contents
Advertisement
Quick Links
Advertisement
Table of Contents

Related Manuals for Renz Slide D01


Summary of Contents for Renz Slide D01
- Page 1 Slide...
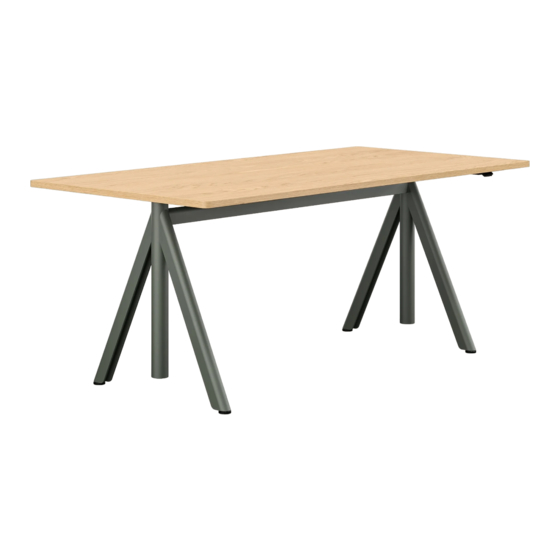
- Page 2 Further, please keep this instruction together with the product. Wilhelm Renz GmbH + Co. KG Assembly and operating Instruction for electrically height-adjustable desks, model: (Frame type 1300 / TP Format 01 (1600 x 800mm, Rectangle)
-
Page 3: Table Of Contents
Slide Content Content Intended use Previous knowledge Symbols in safety instructions Safety instructions Before installing, uninstalling or trouble shooting Before operating During operation Important information for resellers Repairs / service / CE conformity Maintenance / cleaning Assembly 1) Schematic overview table (basic version) 2) Schematic overview table (extension version) 3) Assembly of table frame 4) Convert cable guide „RIGHT“... -
Page 4: Intended Use
The sitting/standing desk may not be used improperly. Modifications to the table frame or electrification are not allowed, otherwise the warranty and the declaration of CE conformity by RENZ will be voided. Previous knowledge The following knowledge is required for commissioning and assembly of the height-adjustable office desks:... -
Page 5: Before Installing, Uninstalling Or Trouble Shooting
Slide Safety instructions Moving the furniture can damage cables leading into the floor (shearing, squeezing)! Cleaning personnel and operators must be informed of these dangers. Be sure to use the supplied power supply cable! Make sure that the power supply cable is not damaged. Operating the sit-stand table with a damaged power supply cable is prohibited. -
Page 6: During Operation
The sit-stand table must not be handled or used improperly and no modefications may be made to the table frame or electrification, otherwise Renz‘s warranty and declaration of CE conformity will lapse. Maintenance / cleaning At regular intervals, remove dust and dirt from the table frame, especially from the guide tubes, and make sure that there are no damages or cracks. -
Page 7: Assembly
Slide Assembly Assembly Use only screws for mounting the table frame in accordance with the assembly drawing! Wrong screws may cause damage to the desk! During assembly of the table frame, the power cable of the motor control must be disconnected from the mains supply ! Before installing and commissioning the sit-stand table, make sure that the product is acclimated to the values for temperature and humidity for operation! -
Page 8: Schematic Overview Table (Extension Version)
Slide Assembly 2) Schematic overview table (expansion version) → without cable net, with power box, with modesty panel height 75mm # 4B 2 x Ø 4,0 x 35 mm 2 x Cable clip 5 x M6 x 20 + 5 x Washer 8 mm 10 x M6 x 20 10 x M6 x 20 black... -
Page 9: Assembly Of Table Frame
Slide Assembly 3) Assembly of table frame Check on which side of the table the cable entry should be. Position the lifting column with the pre-mounted cable guide there. Do not disassemble the cable guide ( clamps, cable covers, guide)! Prepare both leg sides with the „nose“... -
Page 10: Convert Cable Guide „Right" (= As Supplied) To „Left
Slide Assembly 4) Convert cable routing „RIGHT“ (= as supplied) to „LEFT A. The cable guide is pre-mounted „RIGHT“ (for the manual switch) at the factory. For cable management „LEFT“, you have first assembled the leg with the cable management on the left side. IMPORTANT: change the metal bracket with strain relief from „R“... -
Page 11: Assembly Cable Covers Correctly
Slide Assembly 5) Assembly cable covers correctly For cable cover on the left: Change mounting position, see illustration. - Unscrew mounting bracket with ball-head hex from scope of delivery - Change side - Screw on untwisted (2 pieces M5 x10 with spring washer) as loose loop =as supplied. - Additional cables can be inserted in the hose (zipper, do not overfill) - Check function and stroke, do not twist / squeeze cable) Metal bracket with strain relief for mains supply cable:... -
Page 12: Assembly Of Table Top / Frame
Slide Assembly 7) Assembly of table top / frame Do not clamp or squeeze the cable of the device when placing the table top. Place the table top on the table frame from above. The „noses“ of the screw-on plates engage between the lengthwise frames (blue arrow). -
Page 13: Cabling At The Table Without Additional Modules
Slide Assembly Connect the left / right motor cable from the columns to the relevant connection cable to the control. The plug connection must engage firmly. Always lead all cables through the Velcro cable holders on the left or right of the table into the cable network or to the control unit: Fix the cables in the cable holder by passing the strap through the free duct in the base. -
Page 14: Cabling At The Table With Power Box
11) Cabling at the table with distributor / multiple modules In tables with central distributor (RENZ article #0Z91 1005), connect the network connection cable (1) to the distributor box; this to the connection cable (2) to the control. All plug connections must engage. -
Page 15: Information On Power Cable
Slide Assembly 12) Information on power cable Use only the supplied 3-pin power supply cable or mains connection cable! The mains connection cable is secured by a pre-mounted strain relief on the upper mounting bracket. The strain relief must not be changed or removed. If the power supply cable of this device is damaged, it must be replaced by the manufacturer or its customer service or a similarly qualified person to avoid hazards. -
Page 16: Manual Switch = Toggle Switch
Slide Assembly / Installation 14) Manual switch = toggle switch The control is operated via a toggle switch. Become familiar with the operation of the table (item 12) before putting it into operation. Make sure that you do not press any of the function keys (see picture below) by mistake. Push and hold the toggle switch up to move the table up. -
Page 17: Setting Desk Height Limits Upper / Lower
Slide Commissioning Setting desk height limits upper / lower If the table cannot be operated in its entire travel range because, for example, there is a collision with a shelf above or a container below, you can: - set an upper limit („shelf stop“) - set a lower limit („container stop“) Set an upper limit Set the table to the maximum allowed height:... -
Page 18: Connecting Bluetooth® / Linak - Desk Control
The mentioned Desk Control ™ APP / software is a complementary offer of LINAK, the manufacturer of our lifting system. Wilhelm RENZ GmbH + Co. KG is not the supplier / developer and in case of damage neither responsible nor liable for possible malfunctions of software and device. -
Page 19: Factory Reset Of Manual Switch
Automatic operation not allowed The height-adjustable desk RENZ „SLIDE“ may only be adjusted manually with the attached hand switch (in „ tip - mode“). Any remote control, height adjustment or time control with the help of an app / software on... -
Page 20: Environmentally Friendly Disposal
Slide Environmentally friendly disposal / Ergonomics Environmentally friendly disposal Your product is designed for durability and sustainability. When disposing of this product and its packaging, please always observe your country-specific regulations and dispose of the product in an environmentally friendly manner or recycle it. -
Page 21: Ec Declaration Of Conformity
We hereby declare that the following products in the versions marketed by us comply with the following directives. This declaration shall lose its validity in the event of modification or improper use. Manufacturer: Wilhelm Renz GmbH + Co. KG Hanns-Klemm-Straße 35 71034 Böblingen... - Page 22 Wilhelm Renz GmbH + Co. KG Hanns-Klemm-Straße 35 71034 Böblingen Germany T +49 (0)7031.21880 F +49 (0)7031.218850 info@renz.de www.renz.de 2021...
Need help?
Do you have a question about the Slide D01 and is the answer not in the manual?
Questions and answers