Table of Contents
Advertisement
Quick Links
Advertisement
Table of Contents

Subscribe to Our Youtube Channel
Related Manuals for Renz Upsite U05


Summary of Contents for Renz Upsite U05
- Page 1 Upsite...
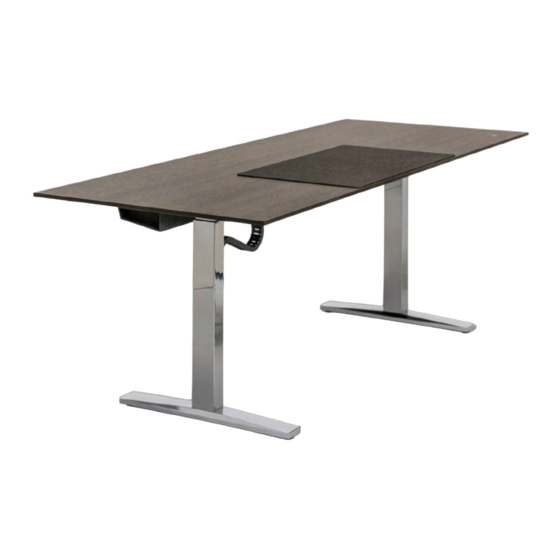
- Page 2 Please read the assembly and operating instruction before initial operation of the height-adjustable workplace. Further, please keep this instruction together with the product. Wilhelm Renz GmbH + Co. KG Assembly and operating Instruction for height-adjustable desks, model: (Frame type 1300 / TP Format 05 (1800 x 1000mm)
-
Page 3: Table Of Contents
Upsite Content Content Intended use Previous knowledge Symbols and safety instructions Safety instructions Before installing, uninstalling or trouble shooting Before operating Important information for resellers Repairs / service Maintenance / cleaning Assembly 1) Overview freestanding desk (A) 2) Overview desk on toolboard (B) 3) Assembly of top frame (A,B) 4) Assembly of control unit (A,B) 5) Assembly of desk top (A;B) -
Page 4: Intended Use
740 and 1140 mm. Modifications to the table are not permitted and will void the responsibility of the Wilh. Renz GmbH + Co. KG. This sitting/standing table must be assembled, put into operation and maintained and functionally tested by qualified personnel. - Page 5 Upsite Safety instructions Moving the furniture can damage cables leading into the floor (shearing, squeezing)! Cleaning personnel and operators must be informed of these dangers. Be sure to use the supplied power supply cable! Make sure that the power supply cable is not damaged. Operating the sit-stand table with a damaged power supply cable is prohibited.
-
Page 6: Before Installing, Uninstalling Or Trouble Shooting
The sit-stand table must not be handled or used improperly and no alterations may be made to the table frame or electrification, otherwise Renz‘s warranty and declaration of CE conformity will lapse. Maintenance / cleaning At regular intervals, remove dust and dirt from the table frame, especially from the guide tubes, and make sure that there are no damages or cracks. -
Page 7: Assembly
Upsite Assembly Assembly Use only screws for mounting the table frame in accordance with the assembly drawing! Wrong screws may cause damage to the desk! During assembly of the table frame, the power cable of the motor control must be disconnected from the mains supply ! Before installing and commissioning the sit-stand table, make sure that the product is acclimated to the values for temperature and humidity for operation! 1) Overview freestanding desk (A) -
Page 8: Overview Desk On Toolboard (B)
Upsite Assembly 2) ) Overview desk on toolboard (B) 2 x M4 x 30 with spacer sleeve Left + right: 4 x Pressure bush, black 4 x M6 x 50 4 x M6 x 16 black Desk on toolboard (B): Lifting column with foot stabilizers Frame Pressure plates... -
Page 9: Assembly Of Top Frame (A,B)
Upsite Assembly 3) Assembly of top frame (A,B) Mount the frame to the two lifting columns one after the other. Only use the supplied M6x50 half-round head screws and the pressure bushes according to the assembly drawing! The maximum tightening torque for these screws is 7.5Nm. The maximum screw-in depth into the motor housing is 5mm. -
Page 10: Assembly Of Control Unit (A,B)
Upsite Assembly 4) Assembly of control unit (A,B) Insert the motor control into the recesses in the frame from above. The control points downwards. Select the appropriate page for your table configuration. Pay attention to additional equipment such as electrical strips. Plug 2x motor cable and 1x mains connection cable into the control unit. -
Page 11: Assembly Of Desk Top (A;B)
Upsite Assembly 5) Assembly of desk top (A,B) Insert the handset cable from above into the frame and to the control unit and fasten it according to the above instructions. Screw your table top to the table frame from below as shown in the drawing. There are 16 screws for this. M6 x 16 round head with. -
Page 12: Assembly Of Cabling: Desk On Toolboard, Cable Pipe (B)
Upsite Assembly 7) Assembly of cabling: desk on toolboard, cable pipe (B) 1. Combination table and container: - Table and container must be aligned at the same height. - To do this, first place the table frame with the mounted lifting column (free side with boom) on the container lifting column. - Page 13 Upsite Assembly If any additional data cables are required, run them through the cable conduit parallel to the factory installed power supply cables. Carefully fasten all cables in the specified position, observing the cable length. - Mount the holder with 2x M4 x 30 and spacer sleeves on the plate frame. All strain reliefs (7.1 + 7.2 + 7.3) must be mounted correctly.
- Page 14 Upsite Assembly - Align the components so that the guide tube is positioned upright in the cable duct. - The cable conduit must be aligned parallel inside the cable duct, especially in the retracted position . (Blue arrows).
-
Page 15: Information On Power Cable (A,B)
Upsite Assembly Cable protection 7.3 Strain relief 7.1 Cable protection 7.2 The table must not be operated without the cable protection 7.2. + 7.3 and the strain relief 7.1. Cables should be sorted, straight and never twisted as a closed wire harness. -
Page 16: Assembly Of Cable Channel (A;B)
Upsite Assembly 9) Assembly of cable channel (A;B) Screw the cable channel (6 direct fixing screws 6.3 x 19mm flat head) to the prepared position on the table top and check the alignment. The front locks must lock almost automatically. To open the channel, slide the side wall (horizontal, red arrow) inwards. -
Page 17: Assembly Single Unit Container
Upsite Assembly 10) Assembly single unit container To assemble the single containers, place the furniture in the desired place and level out any unevenness in the floor using the leveling feet. The joints of the front elements must be parallel and the corners exactly aligned with each other. -
Page 18: Assembly And Configuration Of Drawers
Upsite Assembly 11) Assembly and configuration of drawers Drawer assembly / removal Pull out the cabinet member. Set drawer on the cabinet member and..push until drawer locks in place. Pull out drawer completely and lift. Drawer setting Höhenverstellung / Seitenverstellung der Front Hight adjustment / Side adjustment of the front On the underside of the drawer, you will find the following adjustment Hight adjustment: Lightly loosen screw Side adjustment: Press the... -
Page 19: Initial Operation
Upsite Initial operation Initial operation Putting into operation includes all activities required to adjust the height of an electrically height-adjustable sitting/standing desk using the smart neo motor control system. The prerequisites for operating are: - Table frame = fully assembled (section Assembly 1 - 11) - Motor control smart neo and handset = assembled (section Assembly 1-5) The motor control unit may only put into operation by qualified personnel! Qualified specialists have the necessary electrical engineering training and are familiar with these operating instructions. -
Page 20: Initialization / Reset
Upsite Initialization / Reset, Operation Initialization / Reset After assembly, or if the desk has been disconnected from the power supply for a long time, if a disturbance has been caused at the desk or if the connection between the drives and the controller has been disconnected - the controller of the desk must be initialized. -
Page 21: Trouleshooting
Upsite Troubleshooting Trouleshooting Contact the customer service department if technical problems occur. Always state the product name and the revision level (to be found on the type plate) with every customer service request. In case the system is out of order, the SMART neo-pro must be replaced. -
Page 22: Click Codes
Upsite Troubleshooting / Product dimensions / Technical data 2.) Click-Codes As soon as the control unit is supplied with power, the control unit uses the built-in relays to inform the user about the system status and the reason for the last shutdown. The following chart explains the click codes. Product dimensions Technical data Nominal current consumption... -
Page 23: Environmentally Friendly Disposal
+40°C to +60°C at max. 32% relative humidity (non-condensing), temperatures above 40°C only for a duration of max. 10 hours. Before installation, the product must be acclimatized to the permissible operating conditions. Contact Renz for exact specifications. Protection class based on IEC 60529: IP20 Contact discharge 4 kV... -
Page 24: Tests And Certificates
Upsite Tests and certificates Tests and certificates... - Page 25 Upsite Tests and certificates...
- Page 26 Upsite Tests and certificates...
-
Page 27: Ec Declaration Of Conformity
We hereby declare that the following products in the versions marketed by us comply with the following directives. This declaration shall lose its validity in the event of modification or improper use. Manufacturer: Wilhelm Renz GmbH + Co. KG Hanns-Klemm-Straße 35 71034 Böblingen... - Page 28 Wilhelm Renz GmbH + Co. KG Hanns-Klemm-Straße 35 71034 Böblingen Germany T +49 (0)7031.21880 F +49 (0)7031.218850 info@renz.de www.renz.de 2021...
Need help?
Do you have a question about the Upsite U05 and is the answer not in the manual?
Questions and answers