Advertisement
Quick Links
Download this manual
See also:
User Manual
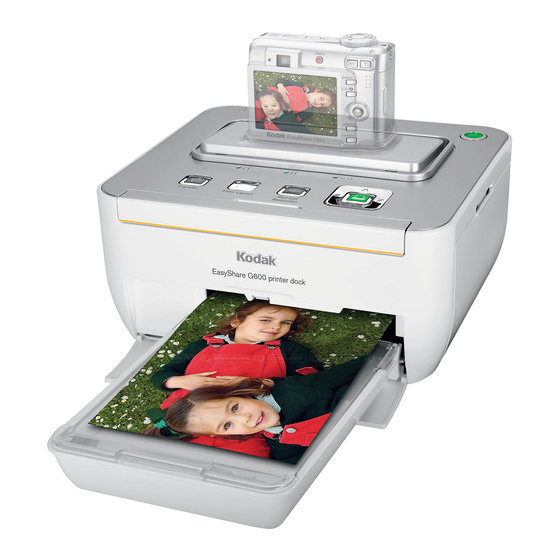
Overview
1 Power button/light
2 Camera connector (for Kodak EasyShare camera
or ImageLink print system compatible camera)
3 Cartridge status indicator light
4
(4-way button)
5 Print button/light
6 Red-eye reduction button/light
7 Camera battery status light
www.kodak.com/go/g600support
8 Print layout button
9
Transfer button/light
10
Pull-out handle
11 Paper status indicator light
12 USB device connector
13 USB connector (to computer)
14 Power connector (DC-in)
15 Connector cover for optional battery
1
Advertisement

Summary of Contents for Kodak EasyShare G600
- Page 1 Overview 1 Power button/light 2 Camera connector (for Kodak EasyShare camera or ImageLink print system compatible camera) 3 Cartridge status indicator light (4-way button) 5 Print button/light 6 Red-eye reduction button/light 7 Camera battery status light www.kodak.com/go/g600support 8 Print layout button...
-
Page 2: Install The Software
Install the software IMPORTANT: Before connecting any cables, install the software that was included with your printer. Follow the on-screen instructions. After installing the software, return to this Getting Started Guide. www.kodak.com/go/easysharecenter... - Page 3 Load cartridge and paper Use only Kodak color cartridge & paper kits with symbol: Remove ribbon slack. Insert cartridge. Fan paper www.kodak.com/go/g600support Glossy side up. Do not fill above fill line (maximum 30 sheets).
- Page 4 Connect power and camera insert Your AC power adapter may not require assembly Custom camera insert included with your camera www.kodak.com/go/easysharecenter...
- Page 5 Dock camera and print Note: To avoid cropping, use your camera’s 3:2 Picture Size setting. (See your camera user’s guide.) Press Print. (Each picture makes 4 passes through the printer.) www.kodak.com/go/g600support Select pictures to print: Press to locate a picture.
- Page 6 • set up your printer • printed pictures Keep learning! Finish reading this book, so you can print and share your best pictures! Visit www.kodak.com/go/g600support and www.kodak.com/go/easysharecenter for: • the extended user’s guide • interactive troubleshooting and repairs • interactive tutorials •...
- Page 7 Press the Share button. Press to locate a picture. Highlight Print, then press OK. * For Kodak EasyShare cameras only. For other brands of ImageLink system compatible cameras, see your camera user’s guide. www.kodak.com/go/g600support Press to select copies, then press OK.
- Page 8 Take the printer dock with you Slide tray into grooves. click click Optional battery installation www.kodak.com/go/accessories Battery charges when printer dock is plugged in. Blinking green = Battery charging Steady green = Charging complete www.kodak.com/go/easysharecenter...
- Page 9 OK. Follow the screen prompts. Note: The original picture is saved. * For Kodak EasyShare cameras only. For other brands of ImageLink system compatible cameras, see your camera user’s guide. www.kodak.com/go/g600support to locate a picture.
- Page 10 Transfer pictures, print from a computer Remember to load software. Transfer pictures to your computer. Print using EasyShare software or other application. www.kodak.com/go/easysharecenter...
- Page 11 PictBridge compatible device: To print, see your device user’s guide. Transfer pictures to a USB flash drive Copy one or all the pictures from your camera to a USB flash drive. Press the Transfer button. Follow the screen prompts. www.kodak.com/go/g600support...
- Page 12 Note: Not all cameras are compatible for charging on the G600 printer dock. See your camera user’s guide for dock compatibility. Your printer dock charges only Kodak Ni-MH and Li-Ion rechargeable batteries, and only when powered by the AC adapter. (The printer dock will not charge camera batteries when it is powered by its optional battery.)
- Page 13 4-up (wallet size) 9-up (mini photo) Press the Print button to begin printing. IMPORTANT: The printer dock automatically ejects the finished print after the fourth pass. Do not pull out a print. www.kodak.com/go/g600support Number and size of prints per sheet One 4 x 6 in.
- Page 14 Step 3. Place the camera on the printer dock. If your camera is docked, a message appears on the camera screen indicating that tagged pictures are found.
- Page 15 • The Red-eye reduction button is disabled when printing from a computer. If printing from a computer (see page 10), make sure Kodak EasyShare software is installed on the computer. • Your printer dock may apply red-eye reduction to an area such as a sunburn, which darkens the area in your print.
- Page 16 If the LCD breaks, do not touch the glass or liquid. Contact Kodak customer support. When removing the battery, allow it to cool; it may be hot.
- Page 17 Kodak makes no other express or implied warranty for this product. In the event that the exclusion of any implied warranty is ineffective under the law, the duration of the implied warranty will be one year from the purchase date.
- Page 18 In countries other than the United States and Canada, the terms and conditions of this warranty may be different. Unless specific Kodak warranty is communicated to the purchaser in writing by a Kodak company, no warranty or liability exists beyond any minimum requirements imposed by law, even though defect, damage, or loss may be by negligence or other act.
-
Page 19: Waste Electrical And Electronic Equipment Labeling
English translation: As this equipment has obtained EMC registration for household use, it can be used in any area including residential areas. Eastman Kodak Company Rochester, New York 14650 © Eastman Kodak Company, 2006 Kodak, EasyShare, ImageLink, and XtraLife are trademarks of Eastman Kodak Company. 4J4886_en www.kodak.com/go/g600support for recycling program information.


Need help?
Do you have a question about the EasyShare G600 and is the answer not in the manual?
Questions and answers